BC Reads: Adult Literacy Fundamental English - Reader 6
BC Reads: Adult Literacy Fundamental English - Reader 6
Shantel Ivits
Unless otherwise noted within this book, this book is released under a Creative Commons Attribution 4.0 International License also known as a CC-BY license. This means you are free to copy, redistribute, modify or adapt this book. Under this license, anyone who redistributes or modifies this textbook, in whole or in part, can do so for free providing they properly attribute the book.
Additionally, if you redistribute this textbook, in whole or in part, in either a print or digital format, then you must retain on every physical and/or electronic page the following attribution:
Cover image: Narrative (https://pixabay.com/en/narrative-history-dream-tell-794978/) by Jonny Lindner (https://pixabay.com/en/users/Comfreak-51581/) is in the public domain (https://creativecommons.org/publicdomain/zero/1.0/).
BC Reads: Adult Literacy Fundamental English – Reader 6 was created by Shantel Ivits. This creation is a part of the B.C. Open Textbook project.
The B.C. Open Textbook project began in 2012 with the goal of making post-secondary education in British Columbia more accessible by reducing student cost through the use of openly licensed textbooks. The B.C. Open Textbook project is administered by BCcampus and funded by the British Columbia Ministry of Advanced Education.
Open textbooks are open educational resources (OER); they are instructional resources created and shared in ways so that more people have access to them. This is a different model than traditionally copyrighted materials. OER are defined as teaching, learning, and research resources that reside in the public domain or have been released under an intellectual property license that permits their free use and re-purposing by others (Hewlett Foundation).
Our open textbooks are openly licensed using a Creative Commons license, and are offered in various e-book formats free of charge, or as printed books that are available at cost.
If you are an instructor who is using this book for a course, please let us know.
2
Acknowledgments
These books were developed on the unceded territories of the Musqueam, Squamish, and Tsleil-Waututh Nations. Huy tseep q’u! Chen kw’enmántumiyap! Kw’as hoy!
I feel very fortunate to have had the opportunity to work on this project alongside a dedicated team of basic education instructors from across British Columbia. This series was shepherded by Leanne Caillier-Smith (College of the Rockies) and benefited enormously from the insight and encouragement of Julia Dodge (University of the Fraser Valley), Chandra McCann (Okanagan College), Jan Weiten (Vancouver Community College), and Melinda Worfolk (College of New Caledonia). The above five mentioned are representatives of the BC Adult Literacy Articulation Committee and were the advisory committee members for this project. It has been a pleasure to scaffold my own learning among such brilliant and passionate educators.
Huge thanks to Lauri Aesoph of BCcampus for introducing me to the exciting open textbook movement and managing all aspects of the publication of these books — from layout and image selection to copyediting and print –so adeptly.
I am incredibly lucky to work with and have the support of the Basic Education Department at Vancouver Community College: Rita Acton, Cynthia Bluman, Andrew Candela, Lynn Horvat, Alayna Kruger, Jo Lemay, Edie Mackenzie, Rene Merkel, Tara Mollel, Leah Rasmussen, Linda Rider, Mary Thompson-Boyd, Jan Weiten, our Program Assistant, Nadia Kawas, and our Dean, David Wells. I am also deeply grateful to the basic education students at Vancouver Community College for all that you teach me about dreams, resilience, and perseverance.
A special thank you to my partner, Marria, for always lending my words an eager ear, and for keeping the world around me turning even though my head was perpetually stuck in these books.
3
Notes to the Instructor
In the days before YouTube, I created my first digital story without knowing that the genre had a name and was part of a growing movement of do-it-yourself media. Digital storytelling has since become a popular tool in literacy teaching and learning. I experienced this firsthand as part of the Literacy Lives teaching team at Simon Fraser University. At the end of the program, learners were assigned the task of creating a digital story to share their learning in the program. The results were tear-jerkingly powerful.
More recently, I had the opportunity to be a storytelling mentor in a project called Cancer’s Margins. For this project, people made digital stories sharing what it was like to live in the intersection of queerness and cancer. As a result of the deeply moving and transformative experiences I’ve had with these projects, I am excited to share a digital storytelling curriculum specifically tailored to basic education students. It is based on the excellent work of the Center for Digital Storytelling in Berkeley, California.
This reader contains 11 original readings written specifically for adults, and is designed to accompany the BC Reads: Adult Literacy Fundamental English – Course Pack 6. This level-6 reader, one of a series of six, is roughly equivalent to grades 7.5 to 9 in the K-12 system.
To help students develop their computer literacy skills, the texts in this reader contain videos that allow learners to watch a skill being performed. These videos are followed by step-by-step written instructions to further support learners as they try out each new skill. In addition, you will find helpful instructions in the appendices that supplement the skills taught throughout the reader, such as how to create a Gmail account in Appendix 1.
An Internet connection is needed to watch the digital stories that are highlighted throughout the curriculum, as well as to access the web-based tool that allows learners to build their own digital stories.
New vocabulary is highlighted throughout each reading, and then summarized in a Glossary at the end of this book. Font size and line spacing can be adjusted in the online view, and have been enhanced for the print and PDF versions for easier reading. (In addition, both epub and mobi files are offered for students with e-readers and Kindles.)
This reader has been reviewed by subject experts from colleges and universities.
I hope these pages help learners find new meaning in their everyday relationships and experiences, as well as equip them with new tools to share their voices and perspectives with the world.
-Shantel Ivits
1
Storytelling Goes Digital
Storybook
“The truth about stories is that’s all we are,” writes Thomas King. We are the stories we tell about ourselves and the stories others tell about us. In this way, we need to share stories as much as we need to breathe air. Through stories, we learn. We celebrate. We remember. We pass down knowledge. We heal. We honour. We grow as individuals. We connect with others and we grow as communities. In short, we are alive through our stories.
Before there were books, radio, television, or movies, ordinary people entertained one another by telling stories. Their stories were recited, acted out, sung, and written down. Inventions like the printing press and television airwaves have now made it possible to share stories with a large number of people in faraway places. At the same time, storytelling has become the role of professionals, including authors, journalists, and filmmakers. Large companies have the power to decide whose stories will be shared widely. Some voices tend to be left out. Stories from the point of view of women, working class people, people of colour, queer and trans people, and people with disabilities are not always given equal space.
Digital stories
With the invention of the personal computer, a new kind of storytelling has appeared. It’s called digital storytelling. A digital story is a short film made by an ordinary person, rather than a professional storyteller. It combines images, sound, and text to tell a story about a part of that person’s life. This form of do-it-yourself media invites us all to take back our role as storytellers. Everyone’s voice matters. We all have something to say. Anyone with an online computer can make a digital story and share it with the world. This change has made it possible for people who have been silenced to speak out and be heard.
This book will introduce you to many moving digital stories created by ordinary people. It will also guide you through the process of making your own digital story. It is based on the work of the Center for Digital Storytelling in Berkeley, California. This organization is one of the pioneers of digital storytelling. For over 20 years, the Center has been running workshops that teach people around the world to express themselves using this art form. You can learn more about the Center for Digital Storytelling at www.storycenter.org.
Digital Story Spotlight
All the Truly Important Things is a digital story by Eric Zheng. It was created as part of the Banyan Tree Project, a campaign to end HIV stigma in Asian and Pacific Islander communities. HIV is a virus that makes it hard for your body to fight other infections. There is a lot of stigma, or negative and unfair beliefs, around HIV. This stigma makes it harder to live with and fight against this illness. Many people are afraid to talk about HIV, get tested for it, or get treated for the disease. As a result, HIV continues to spread. The Banyan Tree Project organized a digital storytelling project to help Asian and Pacific Islanders living with HIV share how they have been affected by this disease. These digital stories break the silence around HIV and, in doing so, they are helping to fight shame and judgment.
As you watch All the Truly Important Things, think about these questions:
How do you think the process of making a digital story may have helped Eric?
How might Eric’s digital story help others living with HIV?
How might Eric’s digital story help people who do not have HIV?
Even though we tell stories every day at school, over the dinner table, and on the phone, being asked to write a story down on paper can feel overwhelming. We may suddenly feel that what we have to say is not interesting or important enough to share. But a story doesn’t have to be as dramatic as a Hollywood movie to be worth telling. Everyday life is full of valuable stories. Joe Lambert of the Center for Digital Storytelling identifies some common story types, as well as some questions that may help us find the story we want to tell.
Someone important
Stories about someone important in your life
These stories may be about finding meaning in a relationship with a family member, friend, neighbour, or co-worker. The story may be a way to remember and honour someone who has passed away. It may be a story about romantic love.
What is your relationship to this person?
How would you describe this person?
Was there an event that really shows what kind of person they are?
What about the person do you enjoy most?
What about the person drives you crazy?
What lesson did you learn from the person that you feel is most important?
If you had something to say to the person, but they never had a chance to hear it, what would that be?
Adventure
Adventure stories
These are stories about our travels and what we realized along the way.
What was challenging about the trip?
What was the best part of the trip?
How did the trip help you see your regular life in a new way?
Accomplishment
Accomplishment stories
These are stories about achieving a goal, like getting a job or winning a sports game.
What was the event?
Where and when did the event happen?
Who did you experience the event with?
What moment stands out the most for you?
How did you feel during the event?
What did the event teach you?
How did this event change your life?
Place
Stories about a place in your life
These are stories about special places like a home, a town, a gathering place, a mountain, or a forest. These places can shape our values and sense of community.
How would you describe the place?
Who shared this place with you?
What experiences happened here?
Does one of these experiences stand out?
What lessons about yourself can you draw from this place?
If you have returned to this place, how has it changed?
What you do
Stories about what you do
These are stories about your job, hobby, or volunteer role.
What is your job or hobby?
What experiences prepared you for this activity?
Was there an event that led you toward this interest?
Who influenced you or helped you develop this interest?
How has this job or hobby affected your life as a whole?
What has been the best part of doing this job, hobby, or volunteer role?
Discovery
Discovery stories
These are stories about learning. They might be about a first, an embarrassing moment, or a mistake.
What was the event?
Where and when did the event happen?
Who did you experience the event with?
What moment stands out the most for you?
How did you feel during the event?
What did the event teach you?
How did the event change your life?
With all these possibilities, finding the right story to tell can be difficult. Lambert recommends the following activities to help you get started:
Choose a story type from the list above. Write whatever comes to mind on that topic for 10 minutes without stopping.
Choose a story type from the list above. Record yourself as you answer the list of questions for that story type. Listen to your recording and write down what you said.
Choose a story type from the list above. Have someone ask you the questions for that topic. Record the conversation. Listen to it and write down what you said.
Draw a map of the neighbourhood you grew up in. Include the layout of the streets, as well as where friends lived, friendly or strange neighbours, stores, school, and so on. What events did this process remind you of?
Look around your house for images that are meaningful to you. Do any images relate to each other? What memories link those images together?
There is a seed of a story somewhere in the thoughts generated by these exercises. The key is to start with a small idea. Play with that small idea as though it’s a block of clay. Keep sculpting the details of your idea, looking at it from different angles until it starts to take on the rough shape of the story you want to tell.
Sculpting
Revisiting memories can remind us of difficult periods in our lives. Since school is a learning space rather than a therapeutic space, it is important to avoid travelling into emotions you can’t return from. Choose topics that you feel comfortable and natural discussing. Listen to your gut. It will tell you if you are heading toward feelings that are best explored with a trusted friend or counsellor.
Digital Story Spotlight
In 2012, 20 youth in the Native Youth Enrichment Program at the University of Washington participated in a digital storytelling workshop. Taté BlackBear, a Lakota teenager, was one of the participants. The American and Canadian governments tried to erase Aboriginal languages and cultures for over 100 years, so the Lakota have had to work very hard to keep their language alive. There are about 6,000 people who can speak the Lakota language. Taté knew six words in his traditional language.
As you watch, think about what category his story falls into. Think of the reasons behind your decision.
The stories that stay with us tend to be more than an event with a beginning, middle, and end. The stories that stay with us hold a bit of insight into what it means to be human. This insight is the main idea or message of the story. For example, the Ojibwe nation has told stories for thousands of years about a character named Nanabush. Nanabush stories are used to teach children lessons such as the importance of sharing and the value of our elders.
While listening to stories can leave the audience with an important lesson, telling stories can also help the storyteller find a lesson. This is one of the goals of the digital storytelling process. Examining our stories helps us reflect on who we have been, who we are, and who we will become.
For example, when putting together All the Truly Important Things, the storyteller learned that his lived experience of being diagnosed with HIV allows him to bring comfort to his newly diagnosed HIV-positive patients. When he tells these patients that all the truly important things in life are not lost, they can see that he is a living and breathing example of this truth. This hope may be the best medicine he can share with his patients, and it’s a medicine that would not be as healing if he did not share the same illness.
In 7th Word, Taté BlackBear’s message is that the classroom is everywhere. After the government spent over 100 years trying to erase the Lakota language, learning Lakota might seem impossible. But Taté’s successes keep him hungry to learn more. Some of his most meaningful learning happens in the bus on the way to the skate park, or sitting around the kitchen table eating berry pudding. Taté’s digital story shows that by embracing these moments, Taté has been — and will continue to be — an active learner of Lakota language and culture.
Digital Story Spotlight
In 2008, a project called Nurstory was launched. The project used digital storytelling to help nurses reflect on the way they practiced nursing. By sharing their digital stories with their colleagues, the nurses improved their ability to cope with a difficult job, work well with others, be leaders, and make ethical decisions.
Cathy Jaynes is one of the nurses who participated in the Nurstory project. She worked as an emergency nurse. Her job involved flying in helicopters to the scene of an accident. On the surface, her digital story Go Around is about a helicopter ride that almost ended in disaster. But it’s really about the recognition of Cathy’s voice and value as a person. As you watch this digital story, consider these two questions:
Part of the magic of storytelling is that it can reduce the distance between people. It can create connection and community. In a world where loneliness is far too common, this is a valuable gift.
Stories reduce the distance between people when they honestly tap into the emotion of the events. If the emotions are exaggerated, the story seems dishonest. If there are no emotions, the story will also seem dishonest.
It can be difficult to honestly tap into the emotion of our stories. Many of us are not used to identifying our feelings. Our feelings vocabulary might need room to grow. Below is a list of words that might help you build your vocabulary.
friendly
loving
curious
fascinated
hopeful
confident
proud
empowered
safe
excited
amazed
surprised
thankful
inspired
joyful
amused
thrilled
calm
pleased
relaxed
relieved
Happiness
A story can contain many different emotions. The overall emotional feeling of a story is called the tone. For example, the tone of All the Important Things might be described as hopeful. The storyteller has found a career that allows him to help others with HIV, and he is hopeful that he will have a bright future despite his illness. The tone of 7th Word might be described as curious. The storyteller is surprised he knew the Lakota word for berry pudding and curious about what else he will learn from the world around him. The tone of Go Around might be described as empowered. The storyteller is empowered because she is able to use her voice to keep herself and others safe, and nowadays people listen to what she has to say.
Digital Story Spotlight
Monte Hallis took part in the first workshop the Center for Digital Storytelling ever held, back in 1993. Monte created Tanya, a digital story about friendship. Monte built a friendship with a mother who was dying of AIDS. This was before there was a treatment for this illness. As she tells her story, Monte sounds like she is talking to a trusted friend. The emotional honesty of the story draws viewers in.
What feelings can you identify in this digital story?
One of the most common pieces of advice given to storytellers is, “Show, don’t tell.” This means that a storyteller should allow the audience to experience the story through scenes, rather than through a summary of events. A scene is alive with action, words, thoughts, feelings, and senses. A summary simply tells the facts of what happened. We will return to the difference shortly.
Before creating a scene, the storyteller needs to identify which scenes will best tell the story and its insight. There may be one scene or many. The most important scene to include is usually the moment of change. In Tanya, Monte Hallis starts by explaining she didn’t really know what a friend was. The digital story ends with a scene where Tanya asks Monte to lie down next to her so she can tell her a secret. In this moment, Tanya refers to her as “Monte Faye.” Monte was stunned that Tanya knew her middle name. Monte does not say, “This is when I knew I had made a real friend,” but the audience can powerfully feel it through the scene. This was Monte’s moment of change.
In Go Around, Cathy Jaynes starts by explaining she had been in an abusive relationship. During that time, her feelings and her voice didn’t matter. She once told a helicopter pilot that he was about to crash and he ignored her warning. Once again, what she had to say was ignored. The digital story ends with a scene where Cathy tells a helicopter pilot to stop, or they will land on a bunch of wires. The pilot listens. Cathy did not say, “This was when I knew that my voice matters and there are people who will listen to me,” but the audience can feel it through the scene. This was Cathy’s moment of change.
What was the moment of change in your story?
The structure of the story can be built around this moment of change. Keep in mind that the script should be quite short — between 250 and 375 words long. This will result in a digital story of about three to five minutes. You can rely on the audience’s common sense to fill in some of the more obvious details. You will also be able to rely on images to tell part of the story. A storyteller gives the audience just enough information to understand the importance of this moment. If the audience is overloaded with information, they may grow bored.
Digital Story Spotlight
In Memory, Salomeja Karaseviciute demonstrates what it means to “show, not tell.” She begins her tale by talking about cheques that arrive every month. At first, she does not tell us that she receives these cheques as compensation from the government for deporting one of her parents. However, we know this because the image shows the words “deportee daughter.” When someone is deported from a country, they are forced to leave. When Salomeja does reveal that her parent was deported, she once again shows us rather than tells us. She creates a scene about the day she learned about the deportation. Now the audience has just enough information to understand why Salomeja is receiving these cheques. We can imagine feeling that there is no right way to spend the money that she receives to make up for her parent’s suffering. Salomeja’s moment of change comes when she finally spends the money. She does not say, “This moment changed me,” but we know that it does.
What scenes are important to include to help someone understand how you changed?
What details show that you changed?
Cue card
Spend some time writing down your ideas. Then, ask your instructor for a single cue card. Take 10 minutes to write a first draft of your story. Write whatever comes to mind. Don’t worry about grammar or spelling. Write as if you are talking to a dear friend. Don’t stop until your time runs out or you have filled up your cue card.
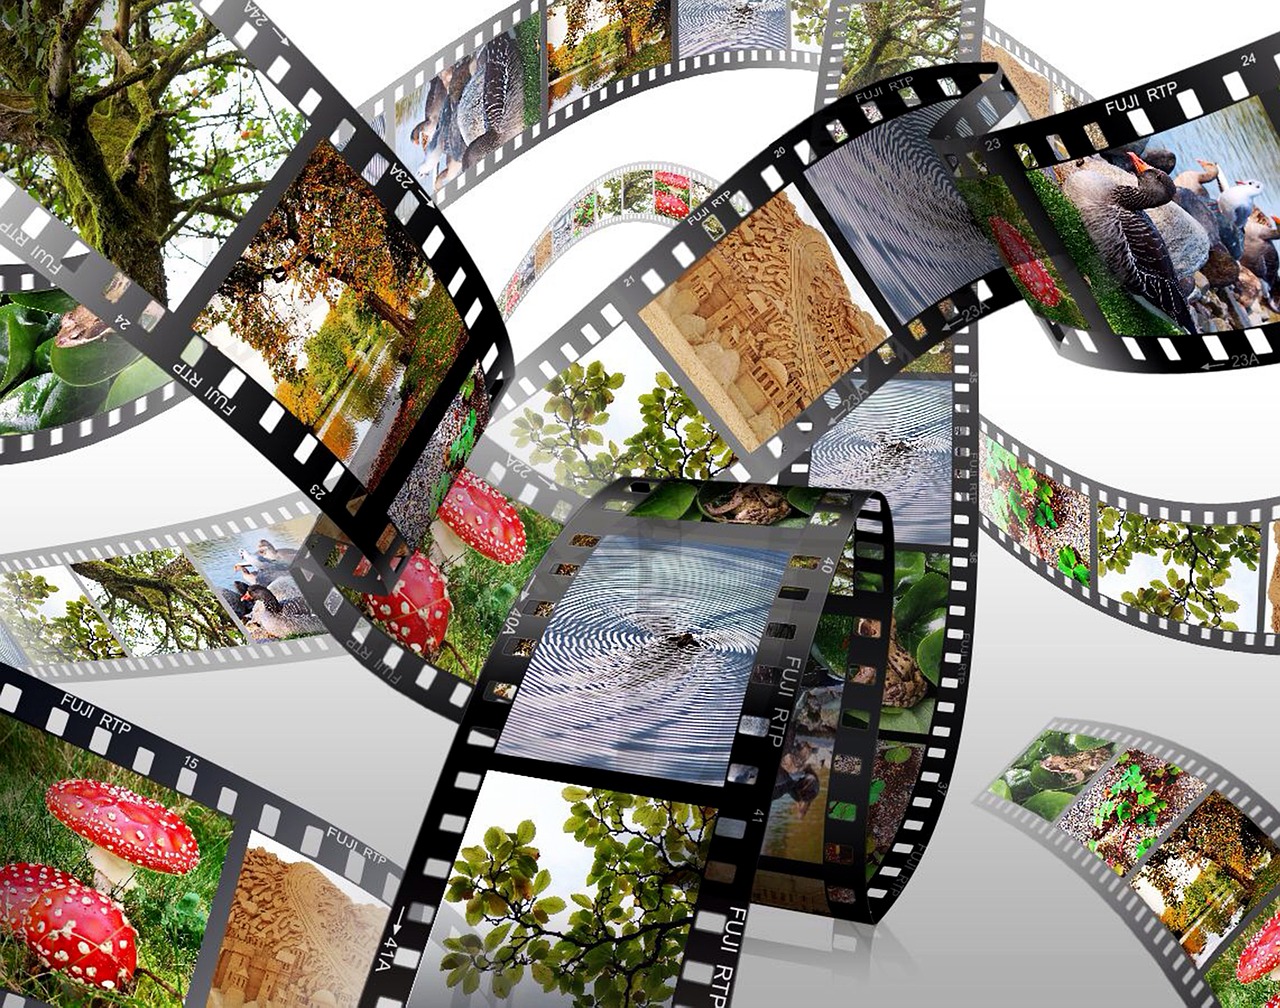
A digital story has many parts, including visualelements and audioelements. Visualelements are things you can see. People use all kinds of visualelements in a digital story: photos, drawings, maps, videos, letters, pages from a book, and clothing. Photos are the most common.
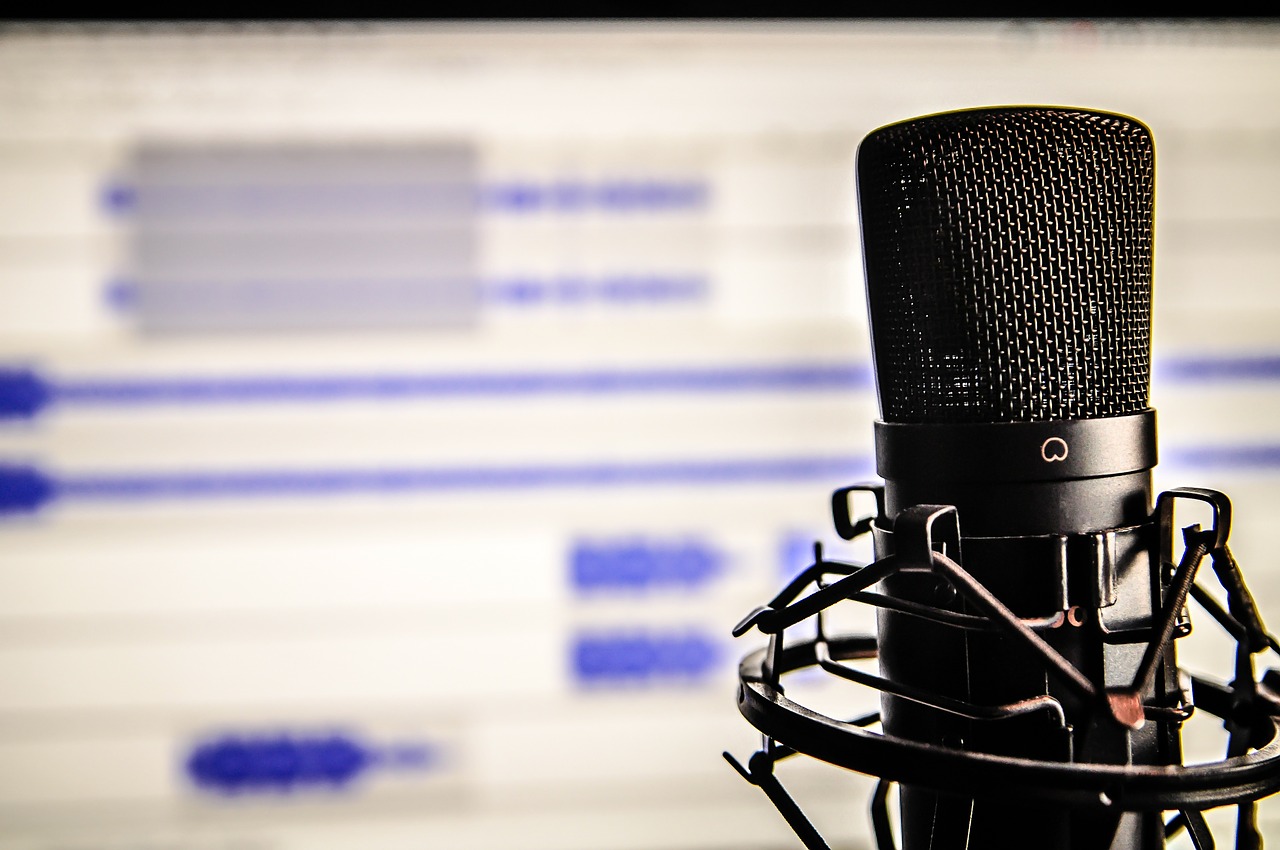
Headphones
Audioelements are the things you can hear. A digital story has the sound of someone telling their story, called a “voiceover.” It can also have background music, called a “soundtrack.” The soundtrack might be music recorded by the storyteller or their friend, a song from a CD, or a song downloaded from the Internet.
Before you start to gather the images and sounds for your digital story, it can help to set up a folder on the computer to keep everything organized. Creating folders is a very useful computer literacy skill.
A computer works like a filing cabinet. It uses folders to organize and store files. Most computers come with a folder that holds your music, a folder that holds your pictures, a folder that holds your downloads, and a folder that holds your documents. You can also make your own folders.
Look at the story you have written. Think about what images would help the audience understand your story and your message. Make a list of up to 20 images you would like to use. Some of these images may be photos, letters, maps, or drawings you have at home. Other images may need to be created or found on the Internet. (If this is the case, don’t worry about finding images on the web quite yet. Just write down what you want to look for). Keep your list in a safe place. You’ll need it again later.
As you choose visual and audioelements, it is important to think about copyright. A copyright is a law that gives the owner of a creative work (like a story, song, or picture) the right to decide what other people can do with it. A person can only include items in their digital story that they have permission to use. Fortunately, many people make their creative works available for anyone to use for free. You will learn how to access these later in this book.
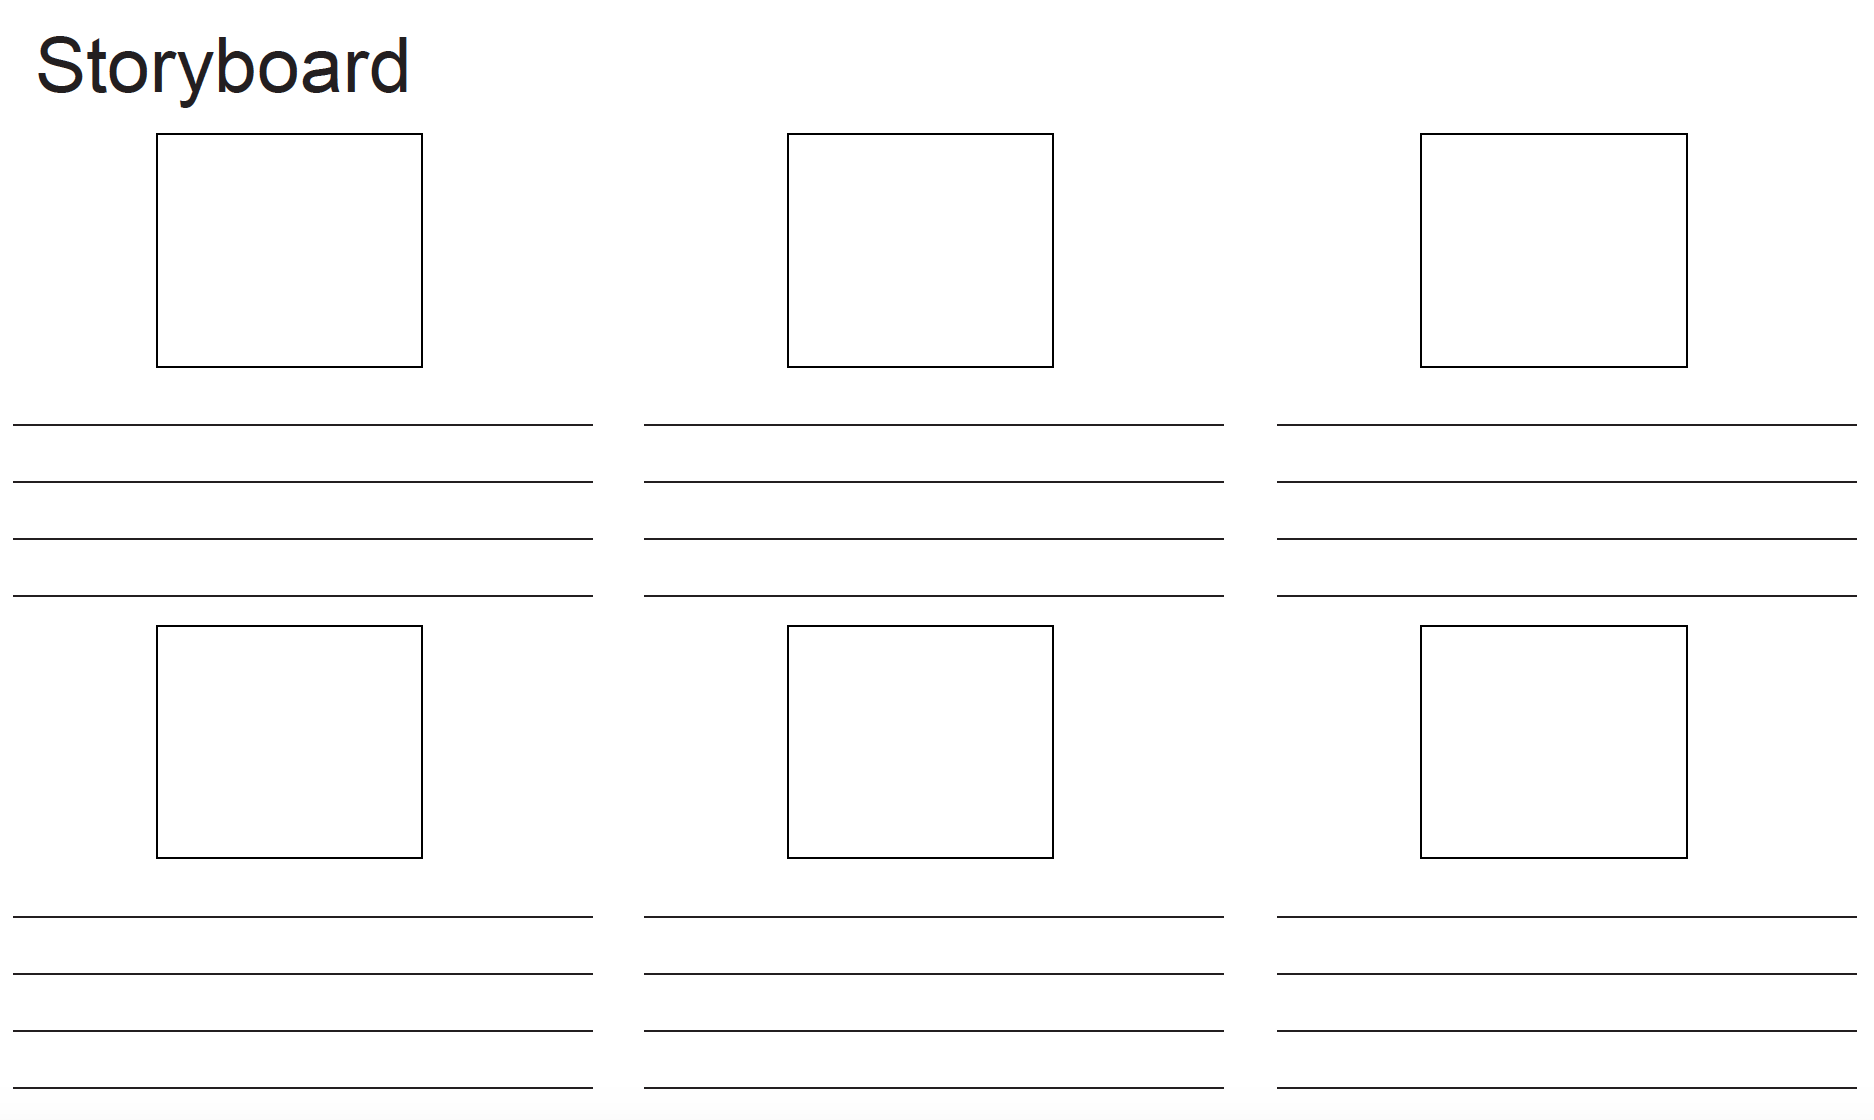
Once you have decided the visual elements you’ll use, you are ready to plan out how they will come together in your digital story. Filmmakers use a tool called a “storyboard” for this purpose. A storyboard is a place to plan a visual story. It is also a place to plan what the audience will see and hear during each part of your story.
Digital Story Spotlight
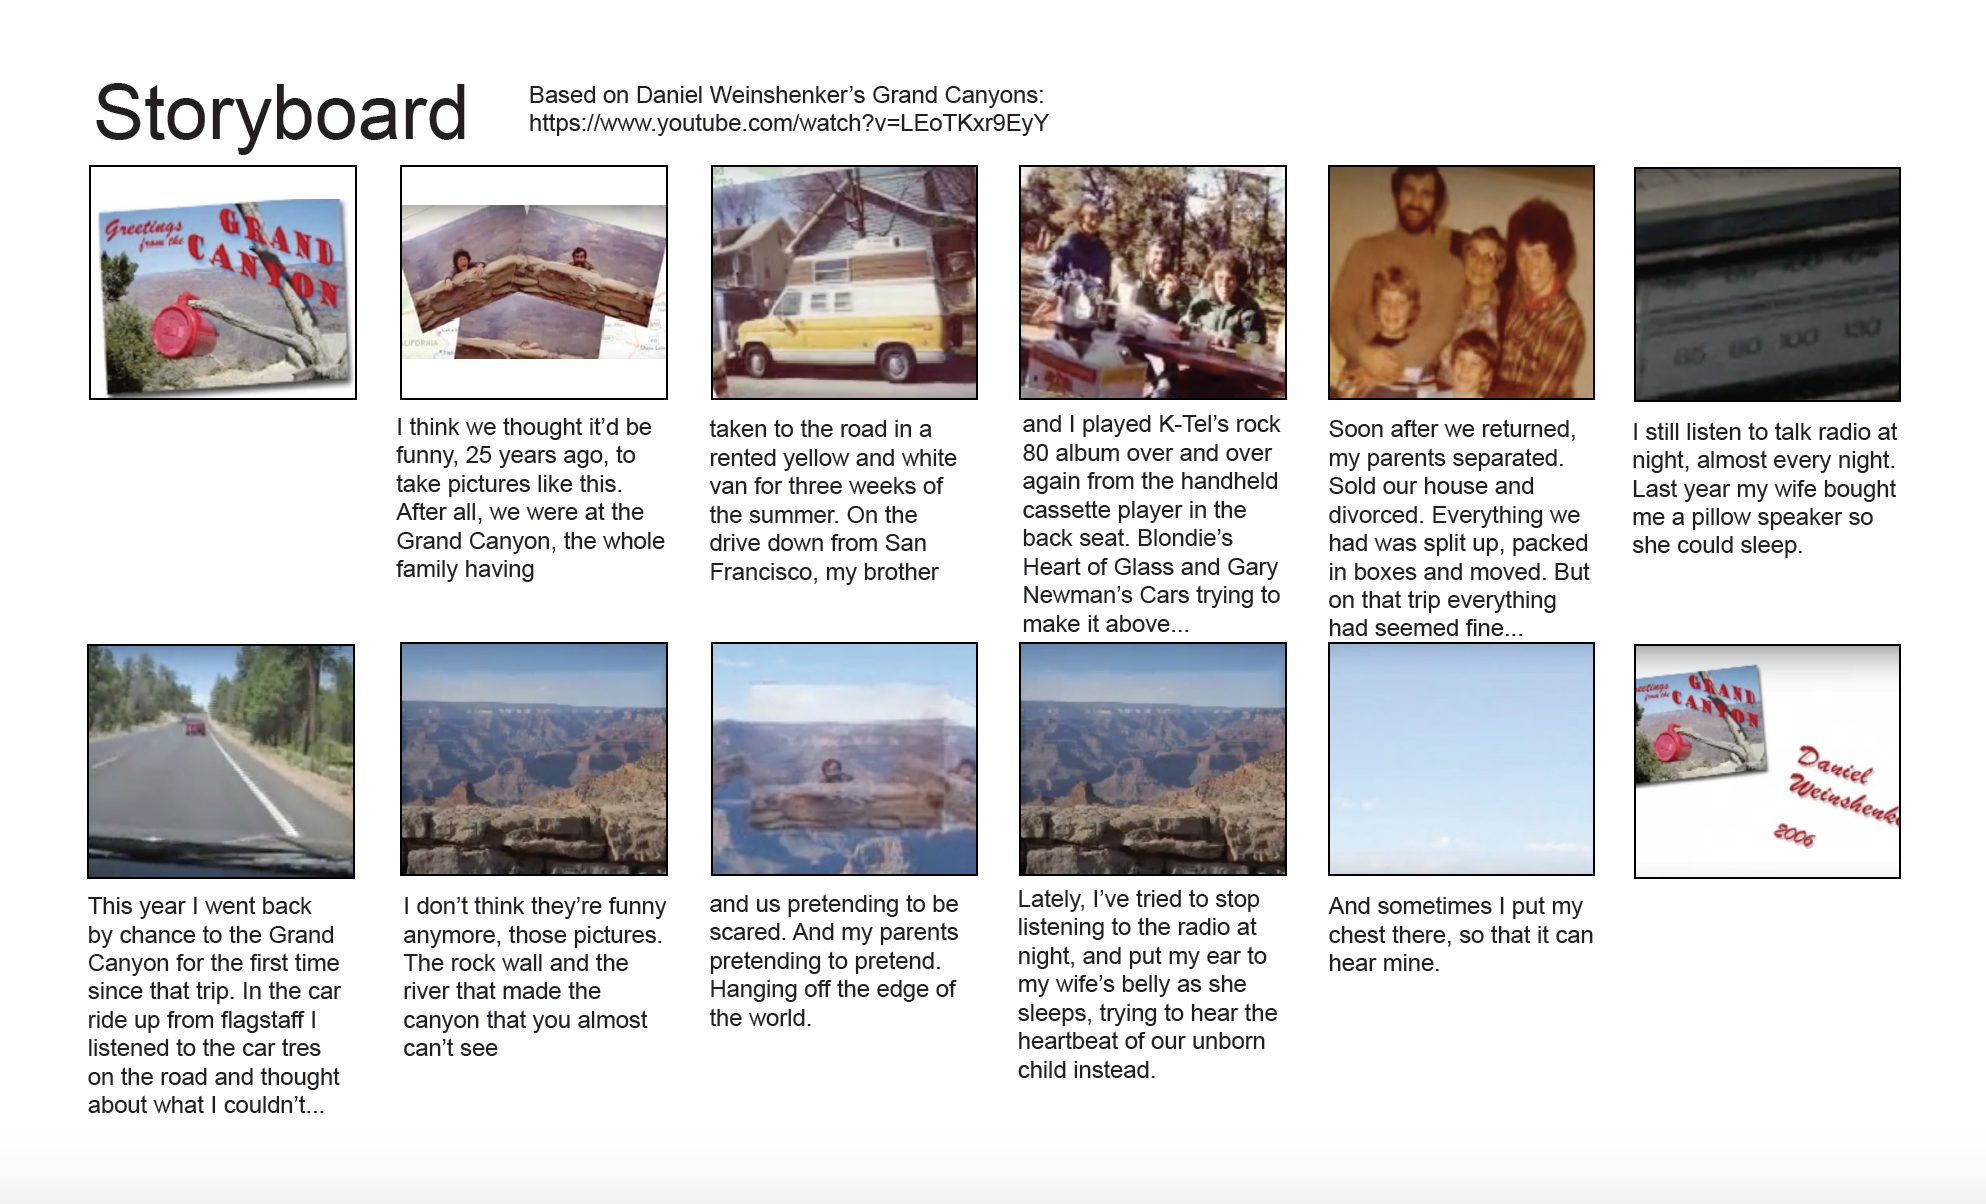
Daniel Weinshanker is a facilitator with the Center for Digital Storytelling. He created a moving digital story about the last trip his family went on before his parents got a divorce. The picture below is an example of a storyboard for this digital story.
Examine the storyboard, then watch the digital story Grand Canyons to see how they connect.
Use the Storyboardtemplate to plan your digital story. The storyboard has boxes with lines below them. Copy your story onto the lines. In the box above the lines, draw the image your audience will see at that point in the story. Don’t worry if drawing is not one of your strengths. As long as you know what your drawings represent, whatever scribbles you make will work just fine! You will probably need more than one copy of the template to fit your whole story. When you are done, keep your storyboard somewhere safe. You will need it later.
First, read through these instructions. Then, answer the Check Your Understanding questions in the course pack. Finally, try out the steps yourself.
Remember that folder you made on the computer? Now it’s time to use it. A folder is just a place that holds files. Each picture, document, or recording on your computer is a file. The next step is to create the computer files that will go into your digital story.
Collect, make, and find the images from the list you made earlier. You might bring the images from home, take them with a digital camera, or find them on the Internet.
If your image is on a piece of paper (like a photo, map, book, or drawing), scan it and save it on the computer. Follow the steps in Appendix 4: Scanning an Image.
First, read through these instructions. Then, answer the Check Your Understanding questions in the course pack. Finally, try out the steps yourself.
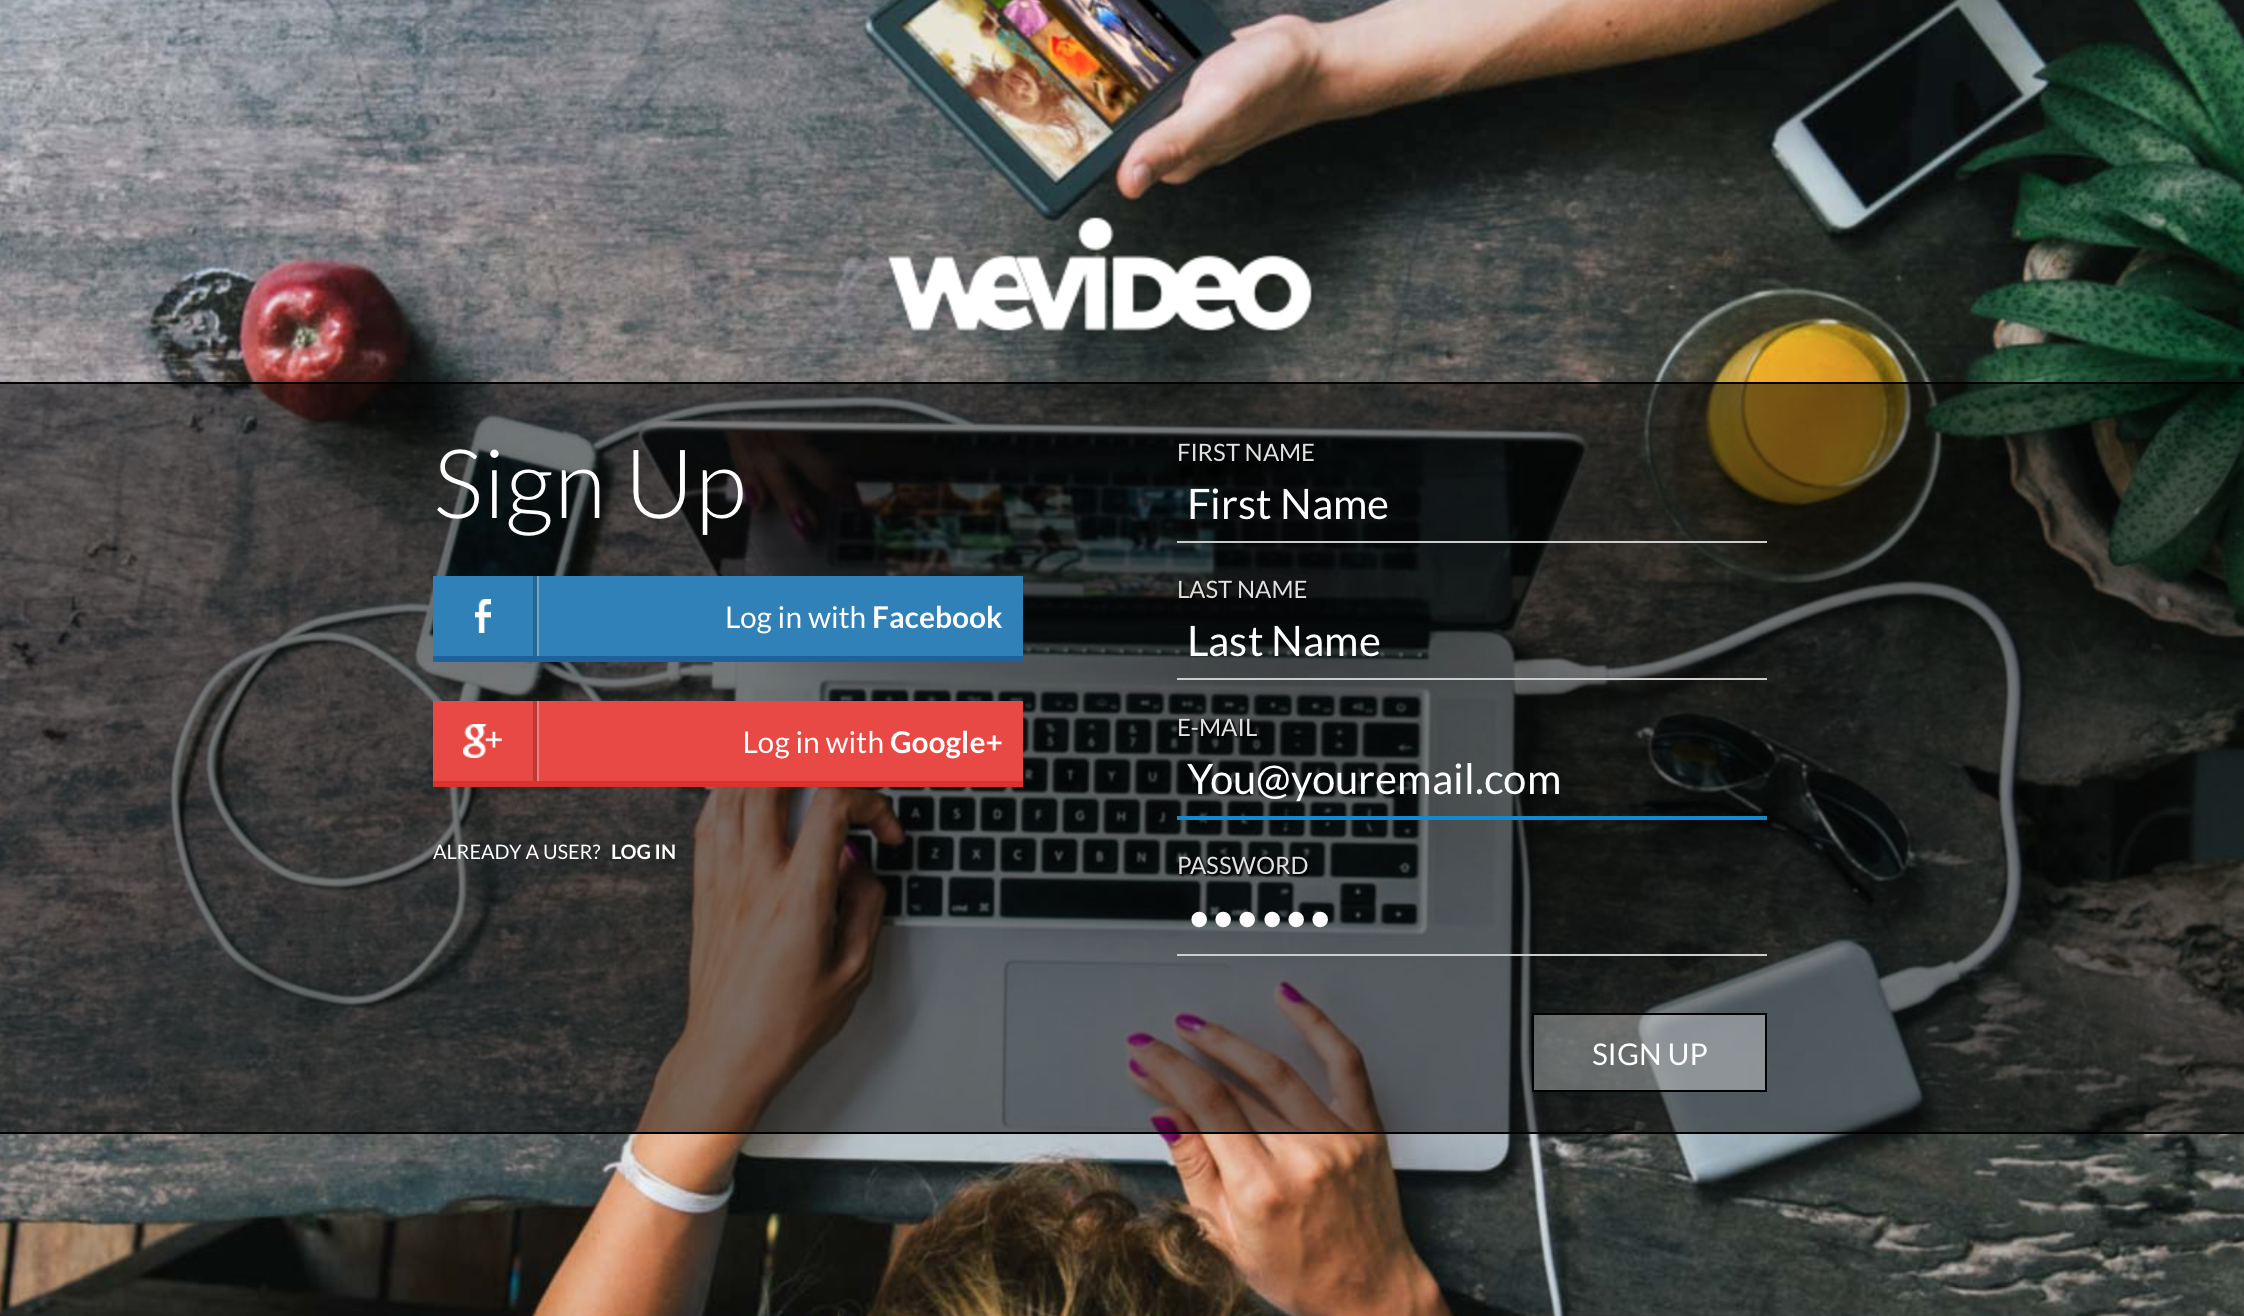
Many different programs can be used to make a digital story. WeVideo is the program explained in this book because it is free and easy to learn. To use WeVideo, you’ll need to create an account. This requires you to have an email address, because your email address will be your log in name. (If you don’t have an email address, follow the steps in Appendix 5: Creating a Gmail Account.) Follow these steps to create a WeVideo account:
1. Open an Internet browser, like Explorer, Chrome, or Firefox.
2. Type www.wevideo.com in the address bar at the top. Press ENTER.
3. Click SIGN UP in the top right corner.
4. You’ll see three different options. Choose GET STARTED, under the word FREE.
5. Click FIRST NAME and type your first name.
6. Repeat step 5 for your last name, email, and password. Your password needs to have at least six letters. Write down your password and keep it somewhere safe.
7. Click SIGN UP.
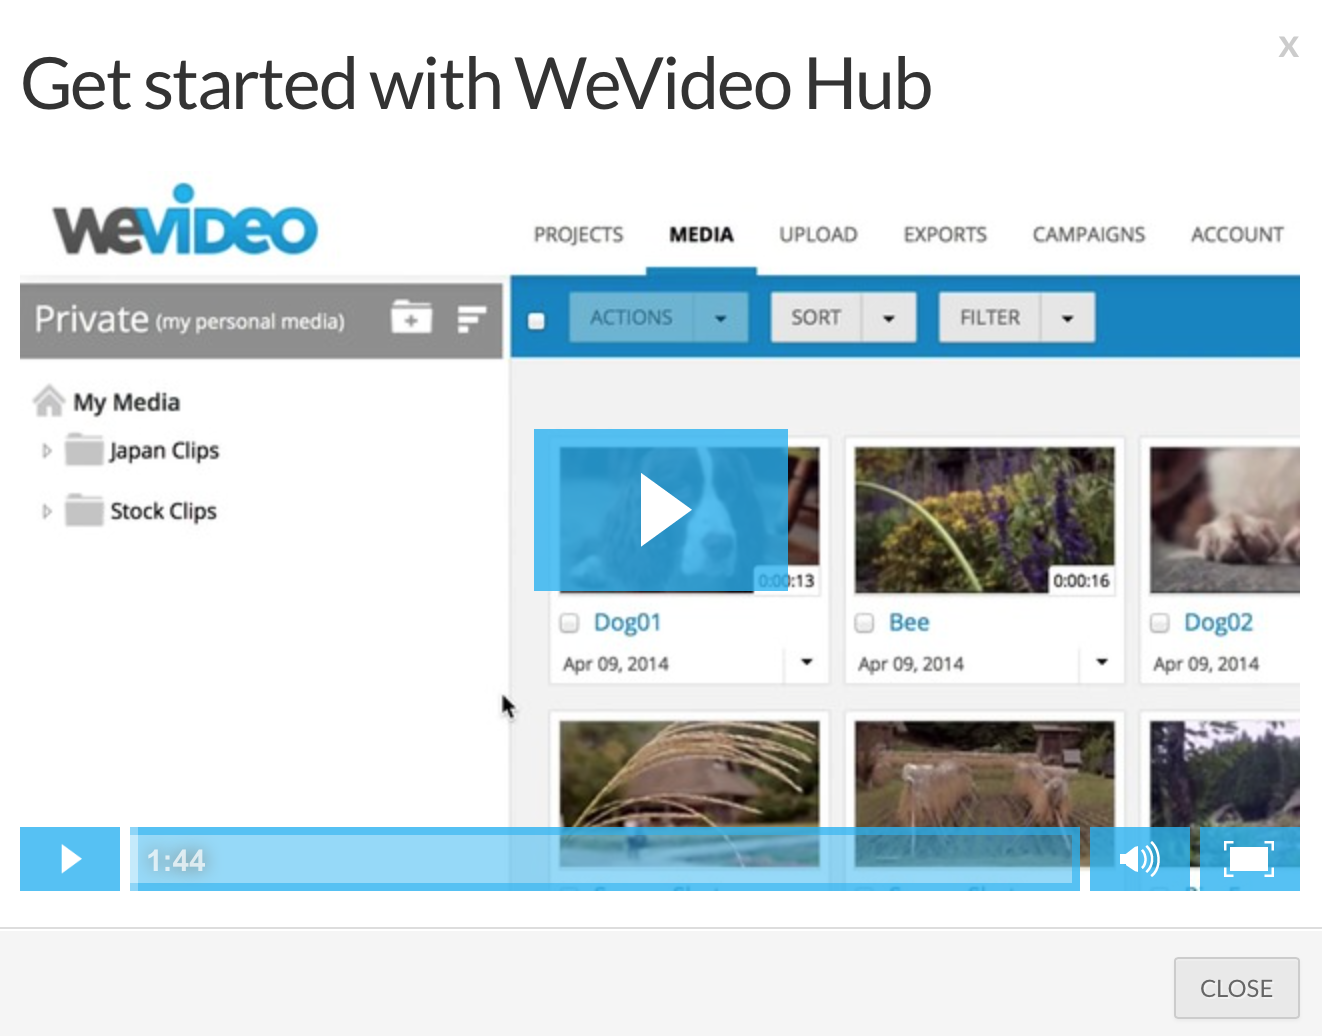
8. A video will pop up. Don’t watch it. Click CLOSE.
Now you have your own WeVideo account! You can access it from any computer that has Internet. Just remember, with your free account, you can only create five minutes of video each month. Don’t hit the PUBLISH button until you are sure you are finished.
1. Press the GET STARTED button.
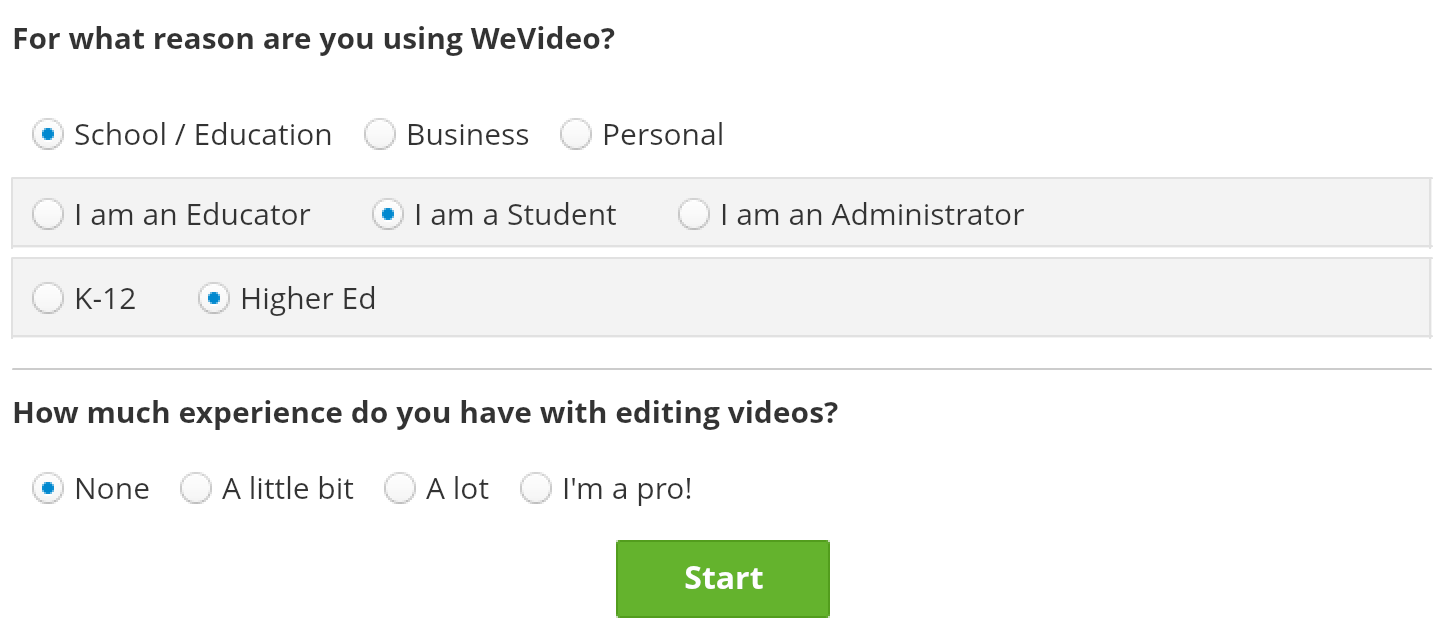
2. There is one more short form to fill out. Click the buttons beside the options that are true for you. Choose NONE for “editing experience,” even if you have done video editing before.
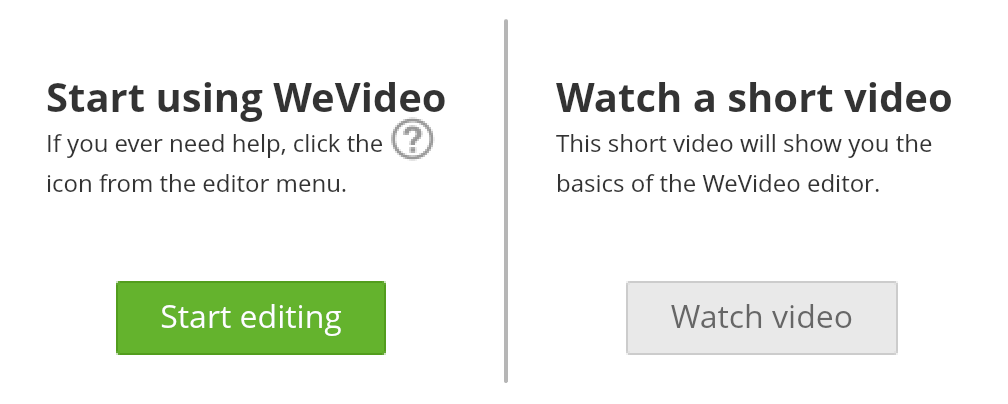
3. Click START EDITING. You will be taken to a screen called the Editor. This is where you combine all of your media into a film.
Let’s upload your visual media to the WeVideo Editor. Right now your files are on your computer, but they need to be saved to the MyMedia folder in WeVideo so that you can use them. Moving files from your computer to the Internet is called uploading. Here’s how to do it:
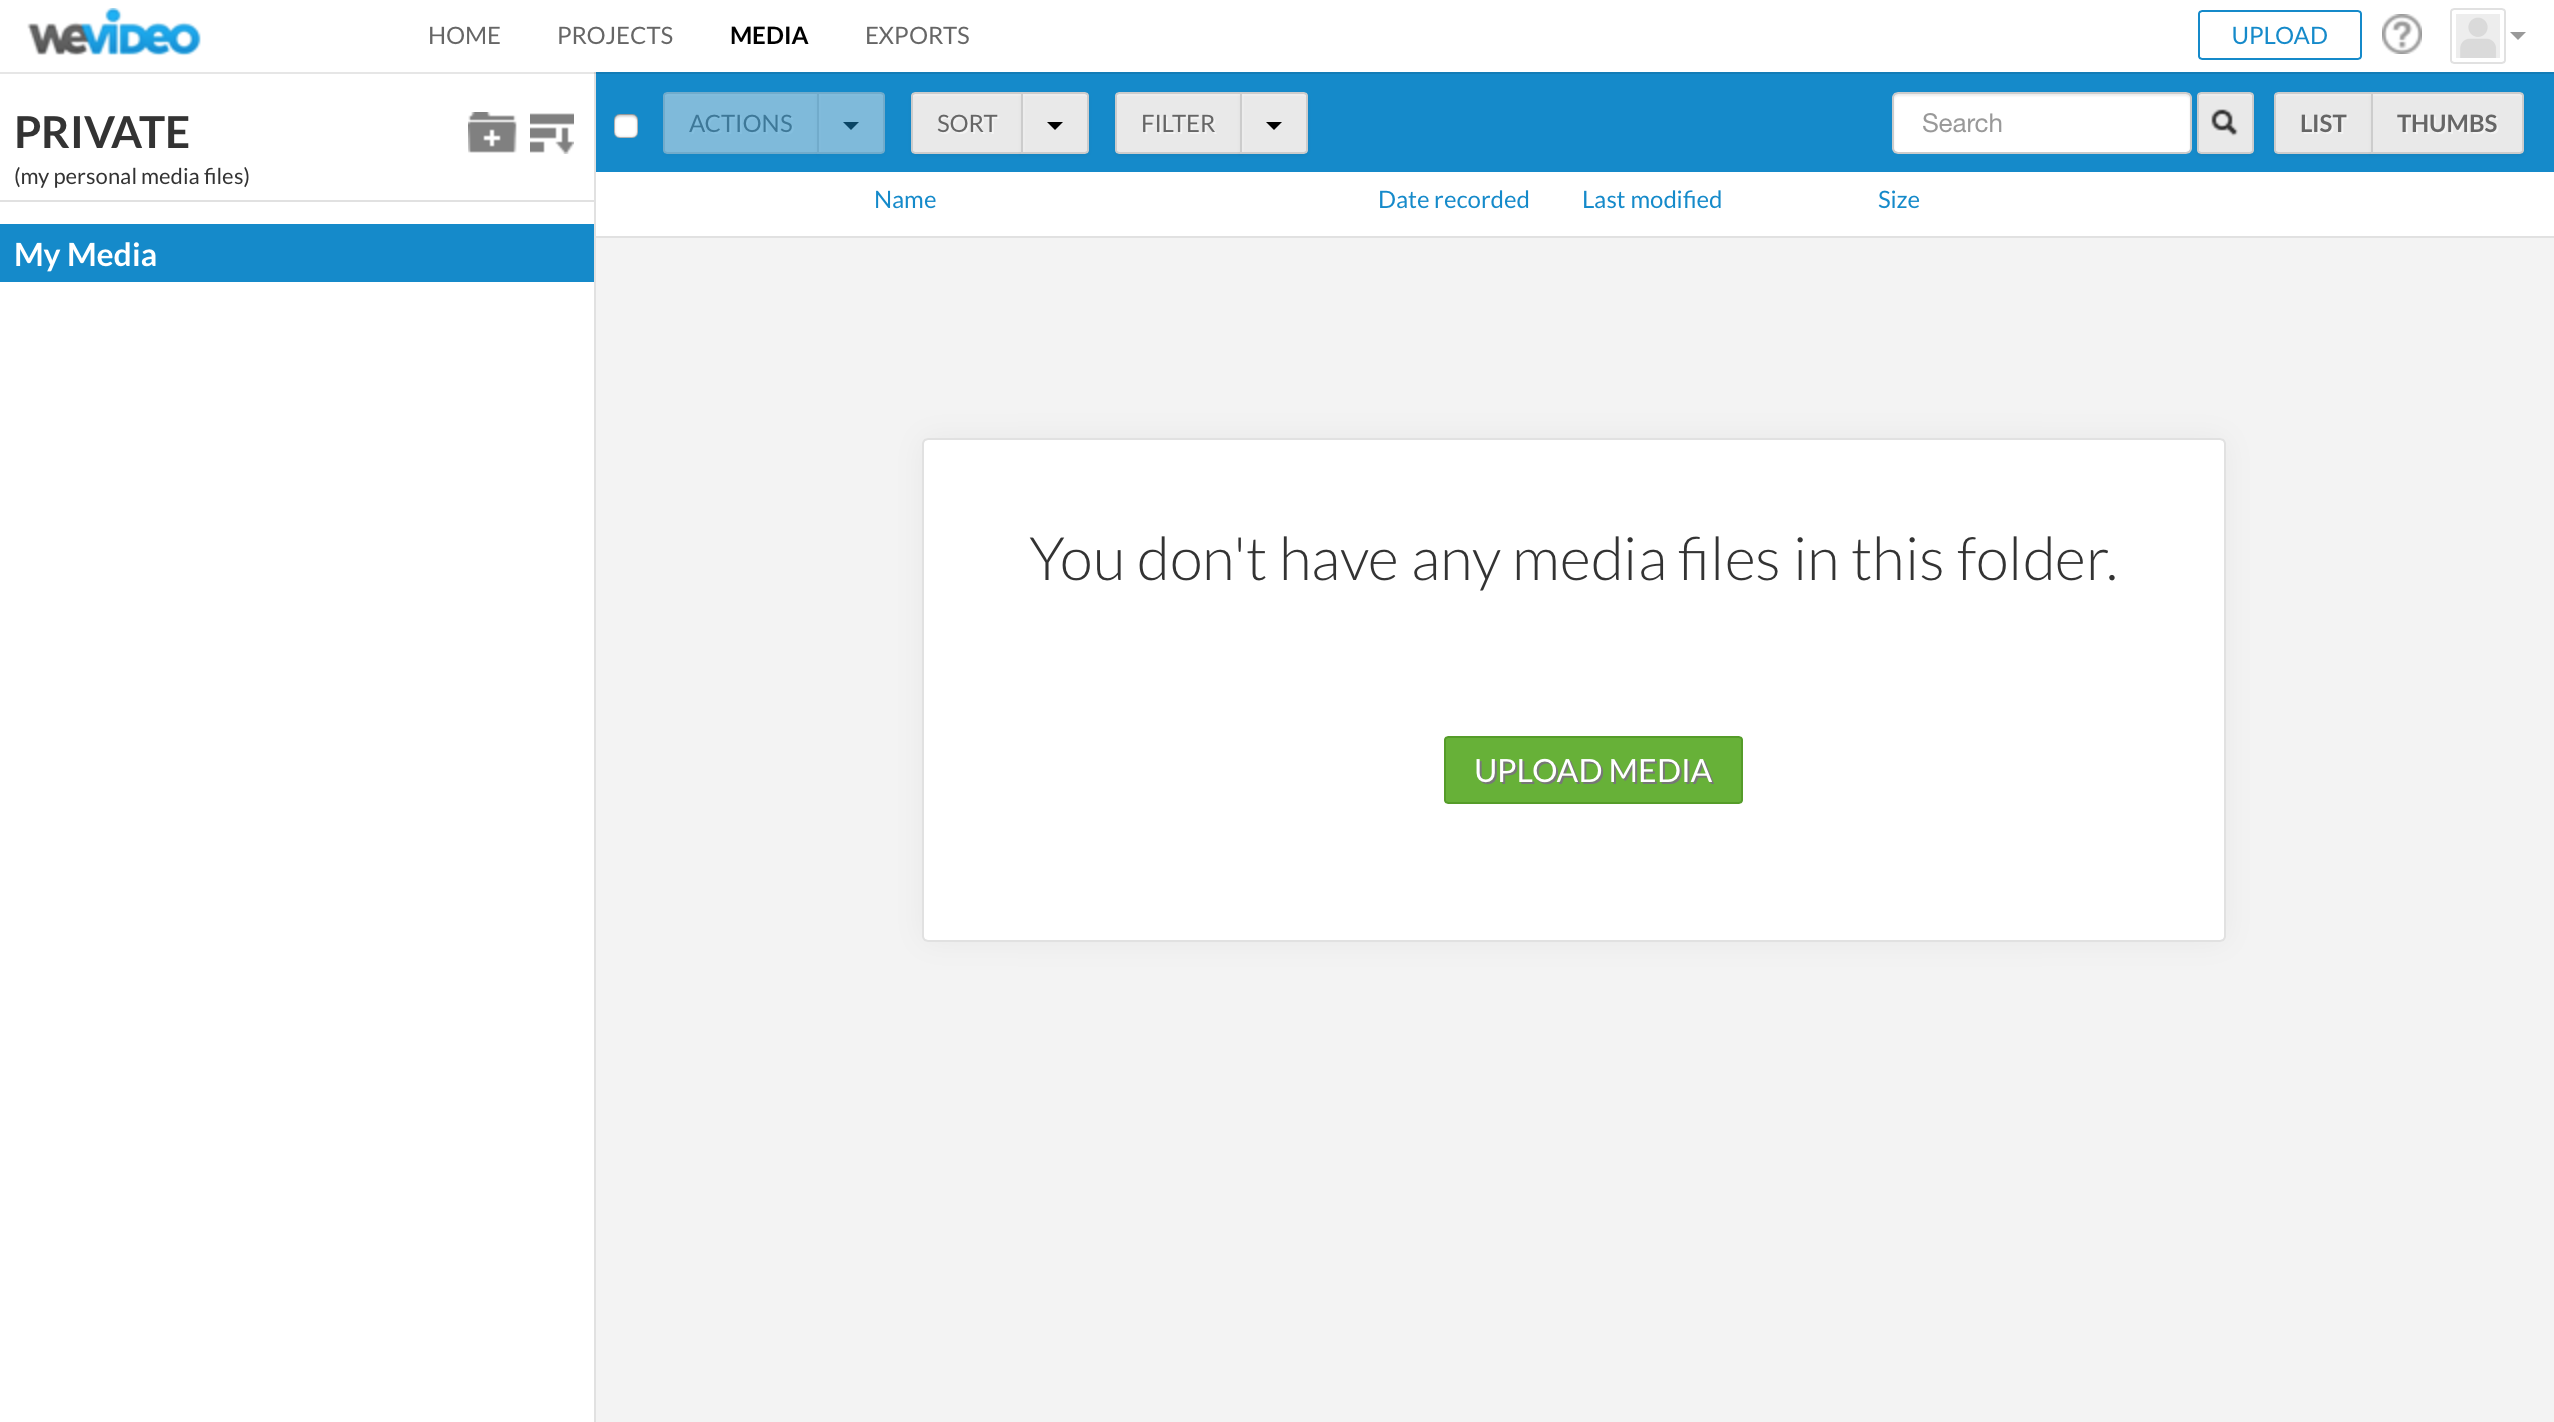
1. At the top of the Editor, there is a menu that says: Home, Projects, Media, and Exports. Click MEDIA.
2. Click the big green UPLOAD MEDIA button.
3. Click BROWSE TO SELECT
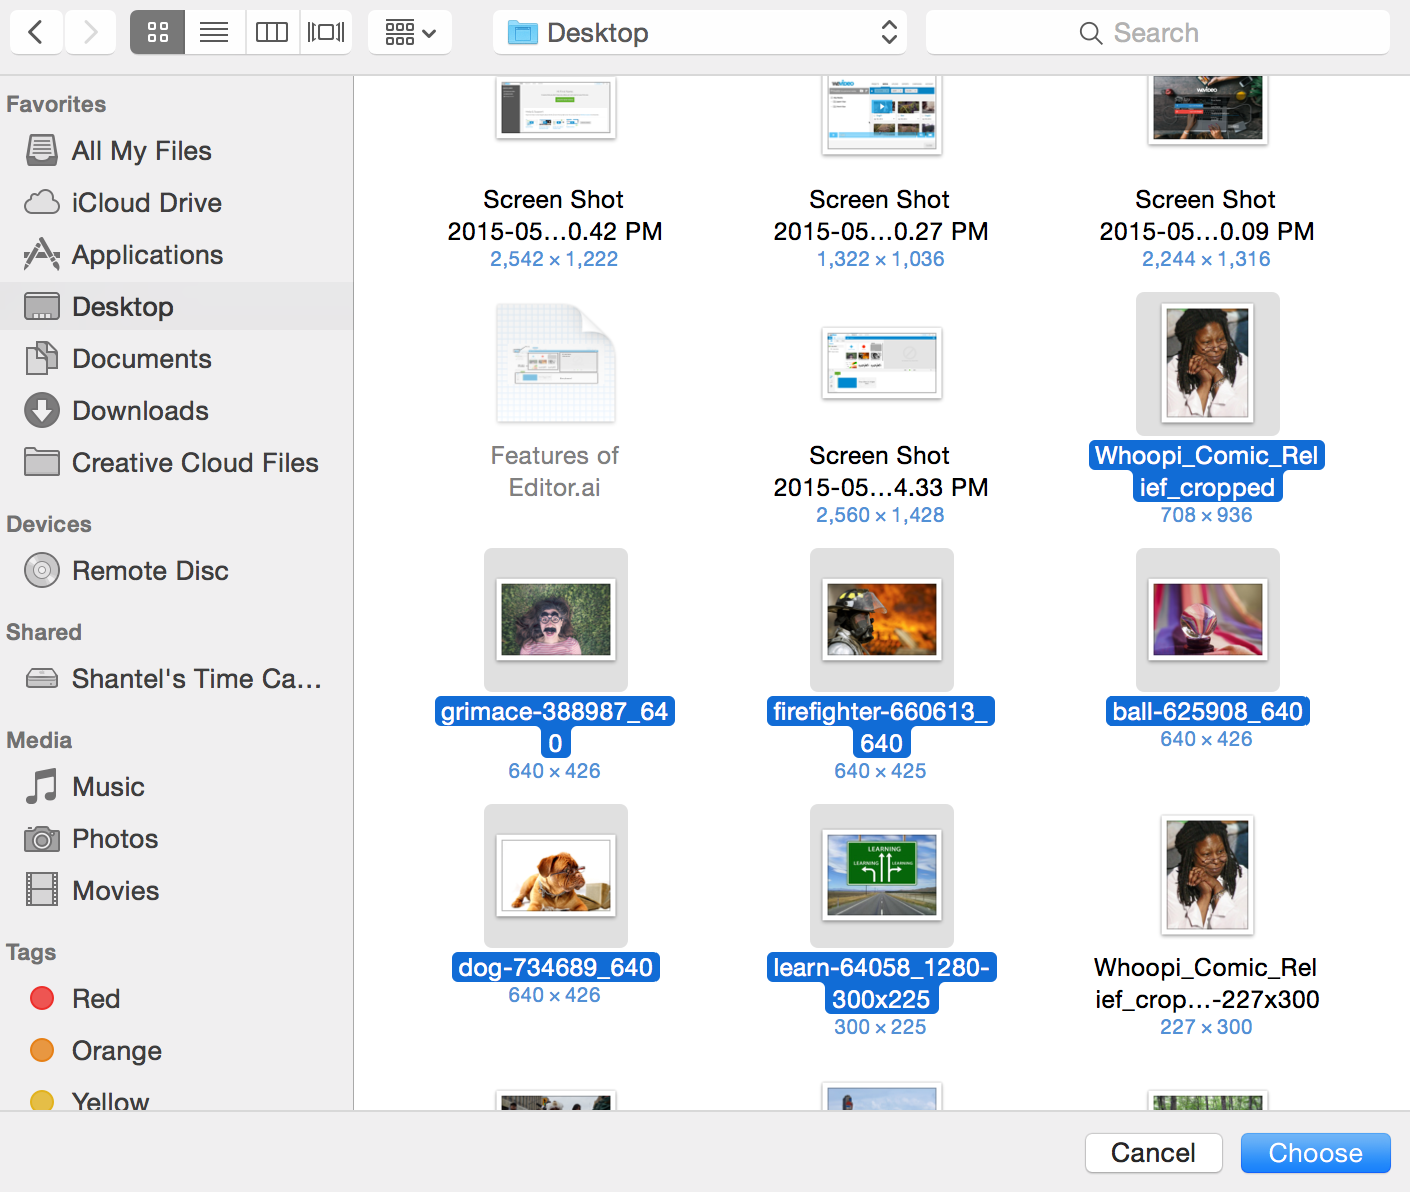
4. A window will pop up. Click DESKTOP from the list on the left.
5. Click your folder (the one named after you). Click CHOOSE.
6. Click EDIT from the menu at the top of the screen.
7. Click SELECT ALL. Now all of your images will be highlighted.
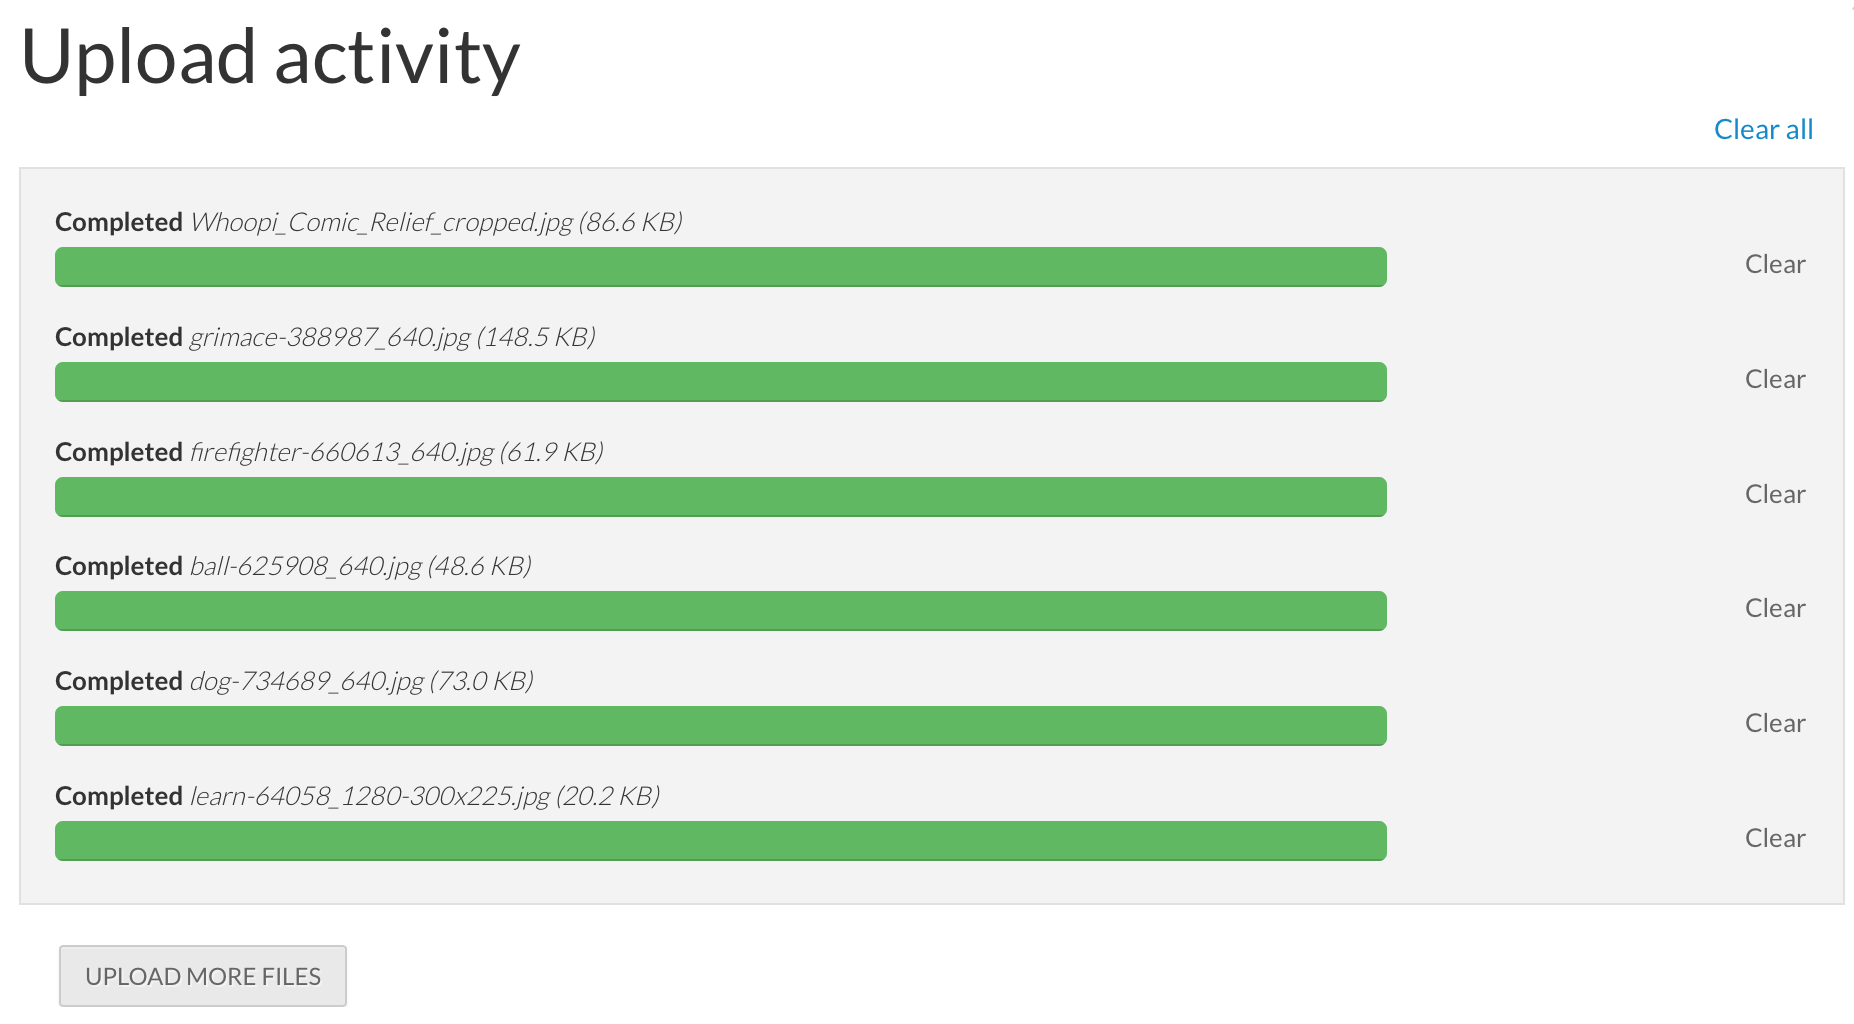
8. Click CHOOSE again. Now all of your images will be uploaded to the MyMedia folder in WeVideo. This may take some time. When all the bars are green, the images are done uploading. Click the X in the top right corner. This will close the Upload window.
9. To log out, click on the small picture of a grey person’s head and shoulders in the top right corner. Then click LOG OUT.
Digital Story Spotlight
Between 2006 and 2013, over 280 homeless people died on the streets of British Columbia. Homeless people tend to die much earlier than people who have housing. These deaths are often the result of having no protection from very hot or cold weather, illness, violence, and drug or alcohol poisoning. Very often, these deaths could be prevented. Many people are working to end homelessness and save lives.
Wayne Richard is a man from Chicago who grew up in foster care and then ended up living on the streets. In 2008, he made a digital story as part of a project with the Chicago Coalition for the Homeless. His story is called Sofas. As you watch it, think about how Wayne uses his voice:
Notice where he pauses and what effect this has on you as a viewer.
What else do you notice about how Wayne uses his voice to tell his story?
How do you want to use your voice when you tell your story?
First, read through these instructions. Then, answer the Check Your Understanding questions in the course pack. Finally, try the steps out yourself.
After your images are uploaded, it’s time to create your voiceover. You will record yourself reading your story. This makes some people nervous, because it can feel strange to hear your own voice on a recording. But just think: your voice is an instrument that only you will ever get to play. Speak from your heart and you can’t go wrong. You may wish to practice reading your story out loud a few times. When you’re ready, ask your instructor if there is a quiet place you can record your voiceover. Then follow these steps:
1. Return to WeVideo at www.wevideo.com. You may need to log in again with your email and password. Once you’re in your account, click CREATE A NEW VIDEO. This will load the Editor.
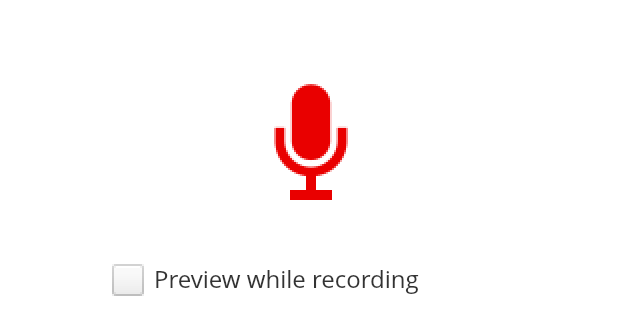
2. On the bottom left of the screen, you will see a picture of a microphone. Click the microphone.
3. When you are ready to record your voice, click the microphone again. (If any boxes pop up, click ALLOW.) You will see a countdown. Then the computer will start recording.
4. If you make a mistake and want to start over, press stop. Then press the microphone button on the screen when you are ready to try again. You will be asked if you want to replace your previous recording. Click YES if you are okay with recording over top of it. Click NO if you want to keep it.
5. Once you are happy with your voiceover recording, click the green checkmark on the left. Your voiceover will be saved. This may take a minute.
6. Click on the MENU and click SAVE.
What if your computer does not have a built in microphone? Here are some options:
• Ask your instructor if there is a microphone you can plug into the microphone jack (hole) in the computer. The hole will have a tiny image of a microphone next to it.
• Ask your instructor if you have access to another computer that has a built-in microphone. For example, many laptops have built-in microphones. Use this computer to record your voiceover.
• If you have a cellphone or tablet, check to see if you can record your voice on it. For example, all iPhones and iPads have a Voice Memos app in the Extras folders. Record your voiceover on your cellphone or tablet. Then ask your instructor to help you transfer it to your computer by emailing it to yourself or by using a cable.
To log out, click on the small picture of a grey person’s head and shoulders in the top right corner. Then click LOG OUT.
Pull out the storyboard you made in an earlier lesson. You’ve already decided what order your images will go in, and which images will match up with which part of the story. Now you will follow this plan to build your digital story on the computer. First, read through these instructions. Then, answer the Check Your Understanding questions in the course pack. Finally, try out the steps yourself.
1. Return to WeVideo at www.wevideo.com. You may need to log in again with your email and password. Once you’re in your account, you should see the video you last edited. It is probably called Untitled Video. Click CONTINUE EDITING.
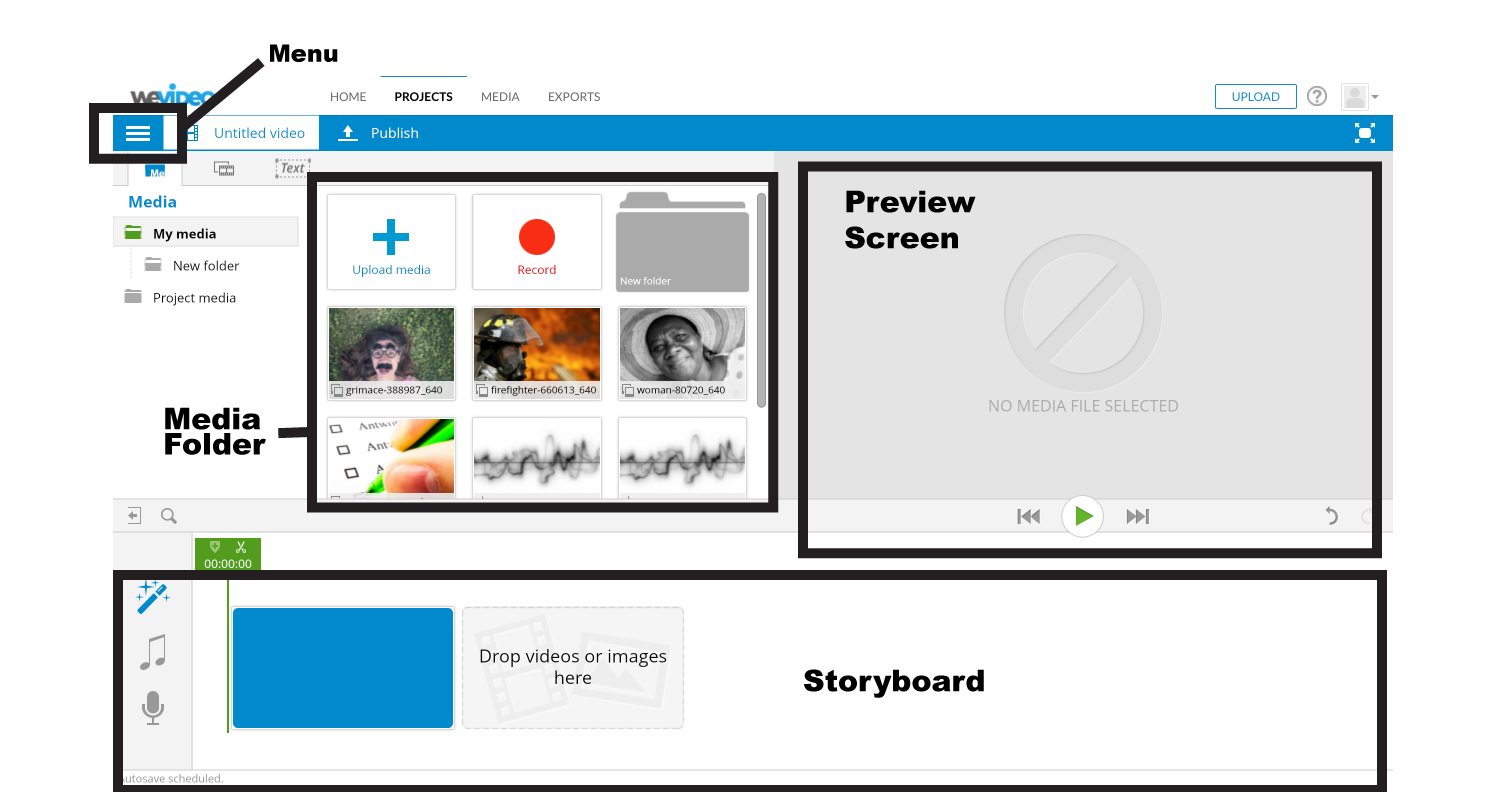
2. Now you are looking at the Editor. Let’s get to know each feature of the Editor.
a. On the top left of the Editor is the Menu. Click on it to see a number of options, such as SAVE. Click anywhere else on the screen and the Menu will disappear.
b. Below the Menu is a folder called MyMedia. It displays all of the visual media you have uploaded. There is a grey scroll bar on the right side of the area that holds all your visual media. If you click down on it and don’t release your finger, you can move that bar up and down to see all of your media. Try this.
c. Beside the media panel is a Preview Screen. It has a button to rewind, play, and fast-forward. This space allows you to see what your digital story looks like while you build it. Press play and watch what happens.
d. Along the bottom of the Editor is a Storyboard, similar to the one you made on paper. This is where you arrange your visual media in the right order, decide how long each image will appear, and add a soundtrack.
If you are using a print version of this book, refer to the online version for videos that guide you through the steps below.
Giving Your Digital Story a Title
1. Find the first box in the storyboard. Hold your mouse pointer over it.
2. Click the EDIT button that appears.
3. Click in the grey box. Type in a title for your digital story.
4. Click the green DONE EDITING box.
5. Click on the Menu and click SAVE.
Adding Images to the Storyboard
1. Note what image is supposed to appear first.
2. Find the image in your MyMedia folder. Hold your mouse pointer over it.
3. Click the ADD button that appears. The image will appear in the storyboard at the bottom of the screen.
Changing the Order of Images in the Storyboard
1. Hold your mouse pointer over the image you want to move. Move your mouse pointer to the sides of the image until the pointer turns to four arrows.
2. Left-click and keep holding the mouse button down. The four arrows will turn to a grabbing hand. Move the mouse to position the image in the right spot. Let go of the button when the image is in the right position.
Deleting Images from the Storyboard
1. Hold your mouse pointer over the image in the storyboard you want to delete.
2. Click the trashcan button.
Changing the Timing of an Image
Your goal is to get the images to match the voiceover in the way you planned on your paper storyboard.
1. Click the rewind button under the preview screen. It looks like two arrows pointing backwards.
2. Click the play button. Watch the video to see how the image matches up with the voiceover. Decide whether the image appears for too much time or too little time. Press the play button again to stop the preview.
3. Hold your mouse pointer over the right side of the first box in the storyboard. The pointer will change to two arrows. Click down on the mouse button and don’t let go. Drag the mouse to the left to make the image appear for a shorter time. Drag the mouse to the right to make the images appear for a longer time.
4. Click the rewind button.
5. Click the play button. Watch the video to see whether the image appears for the right amount of time. Press the play button again to stop the preview.
6. Repeat steps 1 to 5 until the image shows for the right amount of time. When that image is done, work on the next image right beside it.
Continue these steps until the images match the voiceover in a way you are happy with.
Adding a Soundtrack
1. Click the MUSIC NOTE button on the left side of the storyboard.
2. Click the FREE MUSIC folder.
3. Choose a folder with a name that matches the tone of your story, such as “Serious, sad, worried” or “Exploring, tension.”
4. Click on a song and listen to how it sounds. Repeat until you find one you like.
5. Turn the volume down so viewers will be able to hear your voiceover above the soundtrack. To do this, click on the volume slider and don’t let go of the button. Drag the slider to the left to make the soundtrack quieter.
6. Click the USE THIS TRACK button.
7. Rewind your digital story.
8. Press the play button to see how everything looks and sounds together.
You can repeat these steps to choose a different song.
Digital Story Spotlight
Nazbah Tom is a Two-Spirit person from the Diné Nation. A Two-Spirit person is an Aboriginal person who has both a masculine and feminine spirit. Mountain of Stories is a digital story about when Nazbah came out to her mother as Two-Spirit. “Coming out” is the process of telling someone you are queer*, trans, or Two-Spirit. When people come out, they may experience the loss of friends and family, unfair treatment, and violence. As a result, coming out can be a difficult process.
As you watch Nazbah’s story, think about these questions:
How do the images help you understand the story?
How does the music help you understand the story?
How does Nazbah’s voice help you understand the story?
What tone do the images, music, and Nazbah’s voice work together to create?
*Queer can be used to refer to people whose sexual orientations and gender identities fall outside of what society traditionally expects. This term has been — and still is — used in hateful ways, so some people feel uncomfortable with it. It is important to use this word with care.
Stories are usually created to be shared with an audience. Some stories are meant for an audience of one person. Other stories are meant to be shown to a group at a special event. Many stories are put online for a worldwide audience.
Digital Story Spotlight
Ed Popovitz created a digital story for his dog, Opie. This digital story is available for anyone to see.
If Ed’s story was meant for his dog, why do you think he shared it with the online world?
Who is the audience for your story? How would you like to share it?
Once you have finished editing your story in WeVideo, the final step is to publish it. Publishing your digital story converts your creation into a version you can share with others.
Read below about how to publish your digital story. Then, answer the Check Your Understanding questions in the course pack. Finally, try the steps out yourself.
1. Return to WeVideo at www.wevideo.com. You may need to log in again with your email and password.
2. Once you’re in your account, you will see the video you last edited. It is probably called Untitled Video. Click CONTINUE EDITING.
3. Push the PUBLISH button near the top of the Editor.
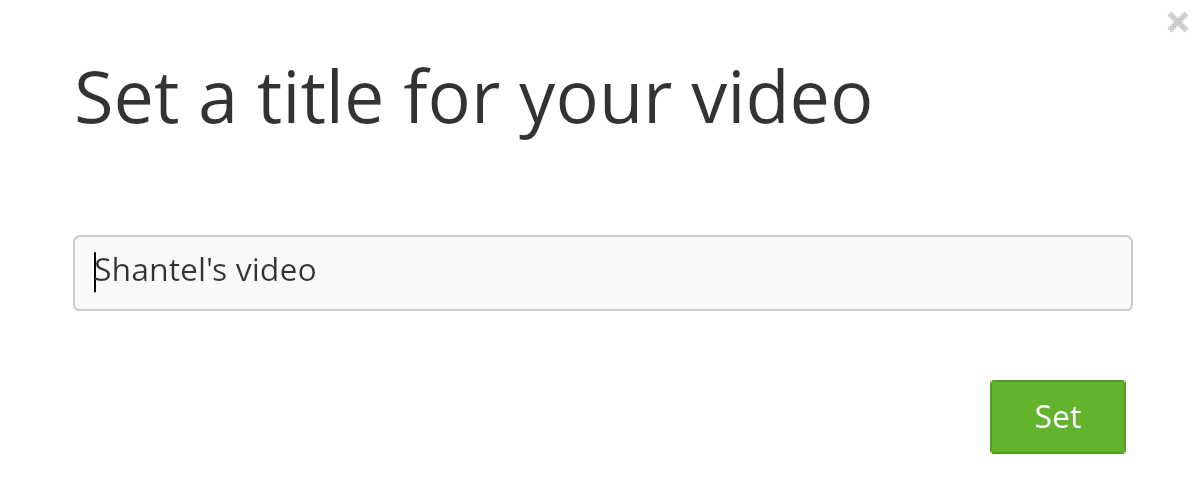
4. A window will pop up asking you to set a title for your video. Type your title and press the green SET button.
5. You will see a new screen. Decide whether you want your video to be public or private. If the video is public, anyone you give the link to will be able to watch it. If the video is private, only you will be able to watch it. Choose one of these buttons.
6. Click the green PUBLISH VIDEO button.
7. A new window may pop up asking you if you want to try Timeline Mode. Click the X in the top right corner to close this window.
8. Your video will take some time to process. When the green bar says 100%, it is done. Click WATCH THIS VIDEO to see your final digital story.
9. From this screen, you can DOWNLOAD the video to your computer, so you can watch it even if you are not on the Internet.
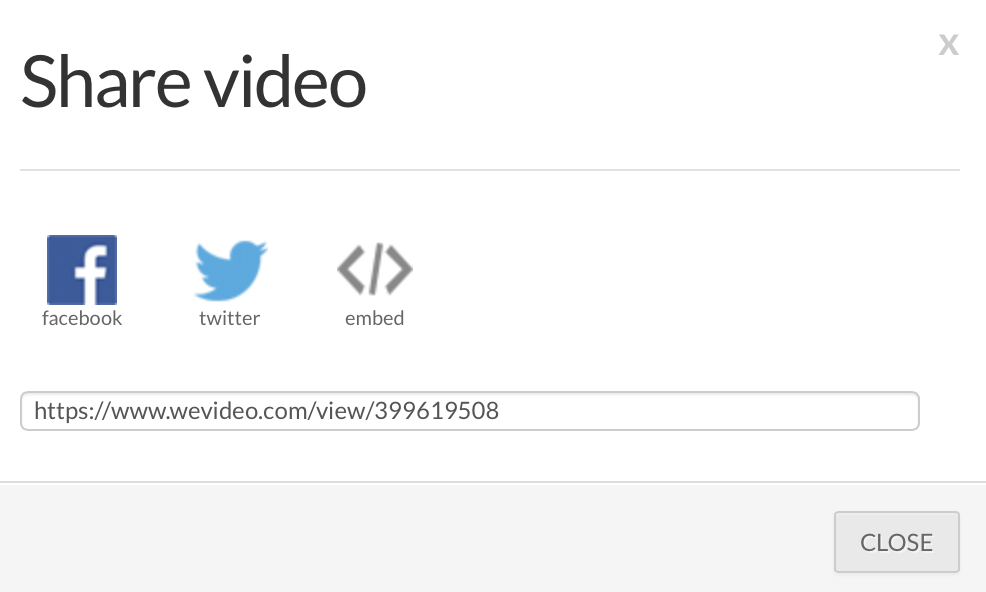
10. Click the SHARE button (which looks like a link) to get a web address you can give to people who you want to watch your video. A window will pop up with a web address. Carefully write this web address down and keep it in a safe place. Later on, you can email it to any friends you want to share it with.
Creating a digital story is more about the process than the product. This means that, whether you are thrilled or disappointed with your digital story, what matters most is what you have learned. The final task in this book is to reflect on the process and your learning.
Think about these questions:
What was the process like, developing a story from a small idea into a digital story?
Was this story useful for you to reflect on at this time in your life?
You are coming to the end of a difficult, but hopefully very rewarding journey. Whatever experiences await you in the future, know that your inner storyteller is always there to help you make sense of this weird and wonderful world we live in.
There are many different companies that offer free email service. Gmail is a popular email service. To get a Gmail account, follow these steps:
1. Open an Internet browser, like Explorer, Firefox, or Chrome. 2. Type www.gmail.com in the address bar at the top. 3. Click CREATE AN ACCOUNT. A form will appear. The form has many areas to type in, called fields. 4. Click inside the first field. Type in your first name. Repeat this step to enter your last name. 5. Enter a username, such as firstname.lastname83 (use numbers that are easy for you to remember, like your year of birth). You may be told “Someone already has that username.” Try again with a different username. 6. Enter a password. It should have at least eight letters or numbers. 7. Enter your password again in the next line. 8. Enter your birthday month, day, and year. 9. Enter your gender. 10. You can leave the Mobile Phone field and Current Email Address field empty. 11. Type the text you see in the picture. This proves you are not a robot. 12. Click the box beside “I agree to Google’s Terms of Service.” 13. Click NEXT STEP.
You now have your own email address! This book does not teach you how to send and receive email. If you want to learn this skill, ask your instructor if your school offers computer classes or check with your local library.
Appendix 2: Making a Folder for Your Digital Story
Turn on the computer you will be using to store your images. When the computer is ready to use, follow these steps:
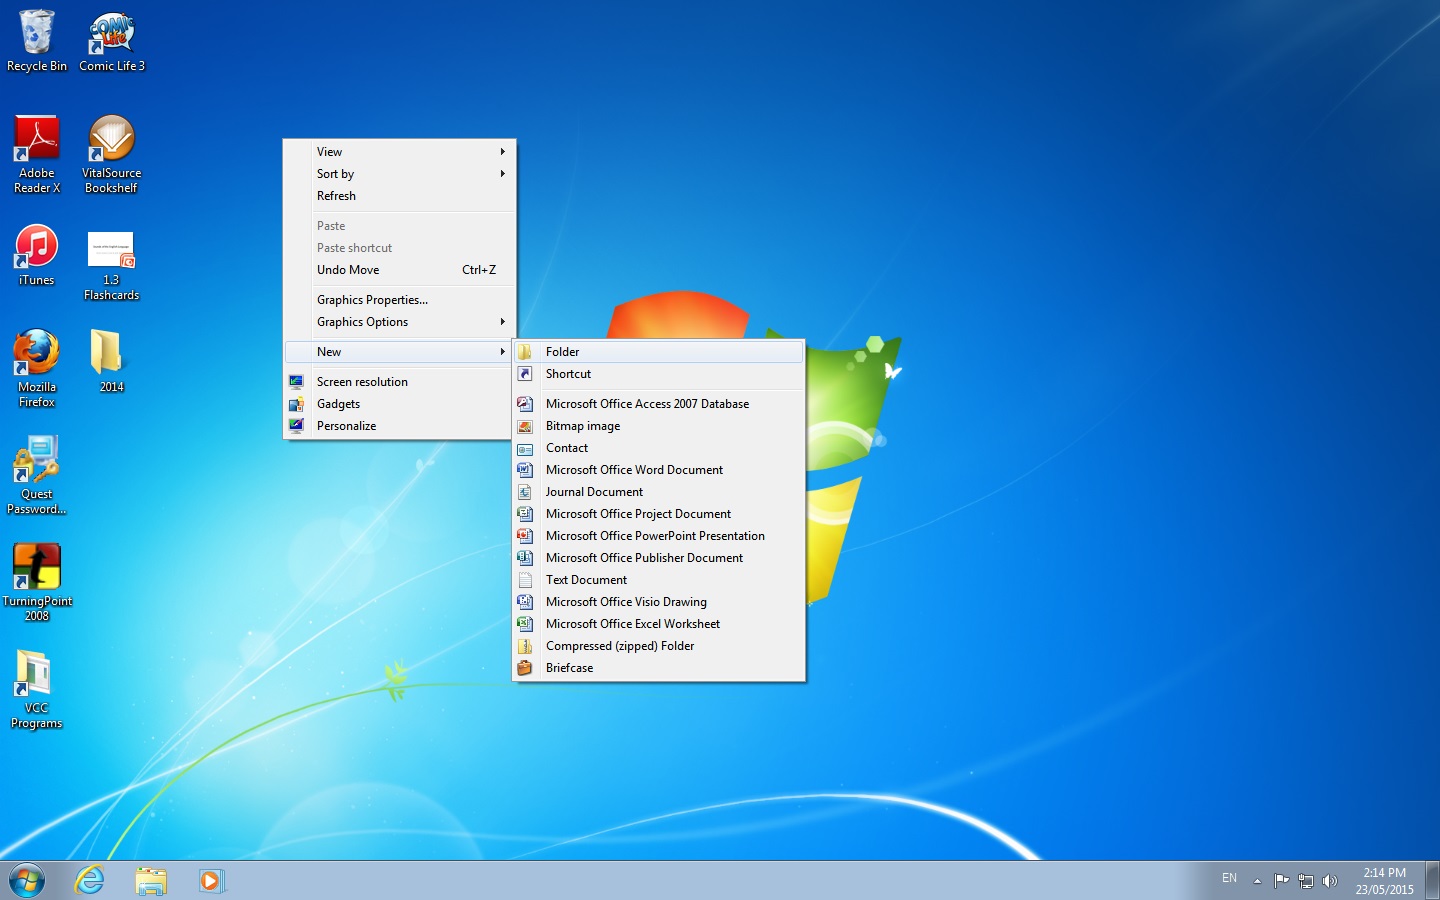
1. Right-click on any empty space on the desktop.
2. A menu will pop up. Left-click on NEW. Another menu will pop up. Left-click on FOLDER.
3. A small picture, or icon, of a folder will appear.
4. Type in a name for the folder, such as your name. Press ENTER.
You have now made a folder for your personal use. This is the place where you will save files that you scan, import from a digital camera, or download from the Internet.
3
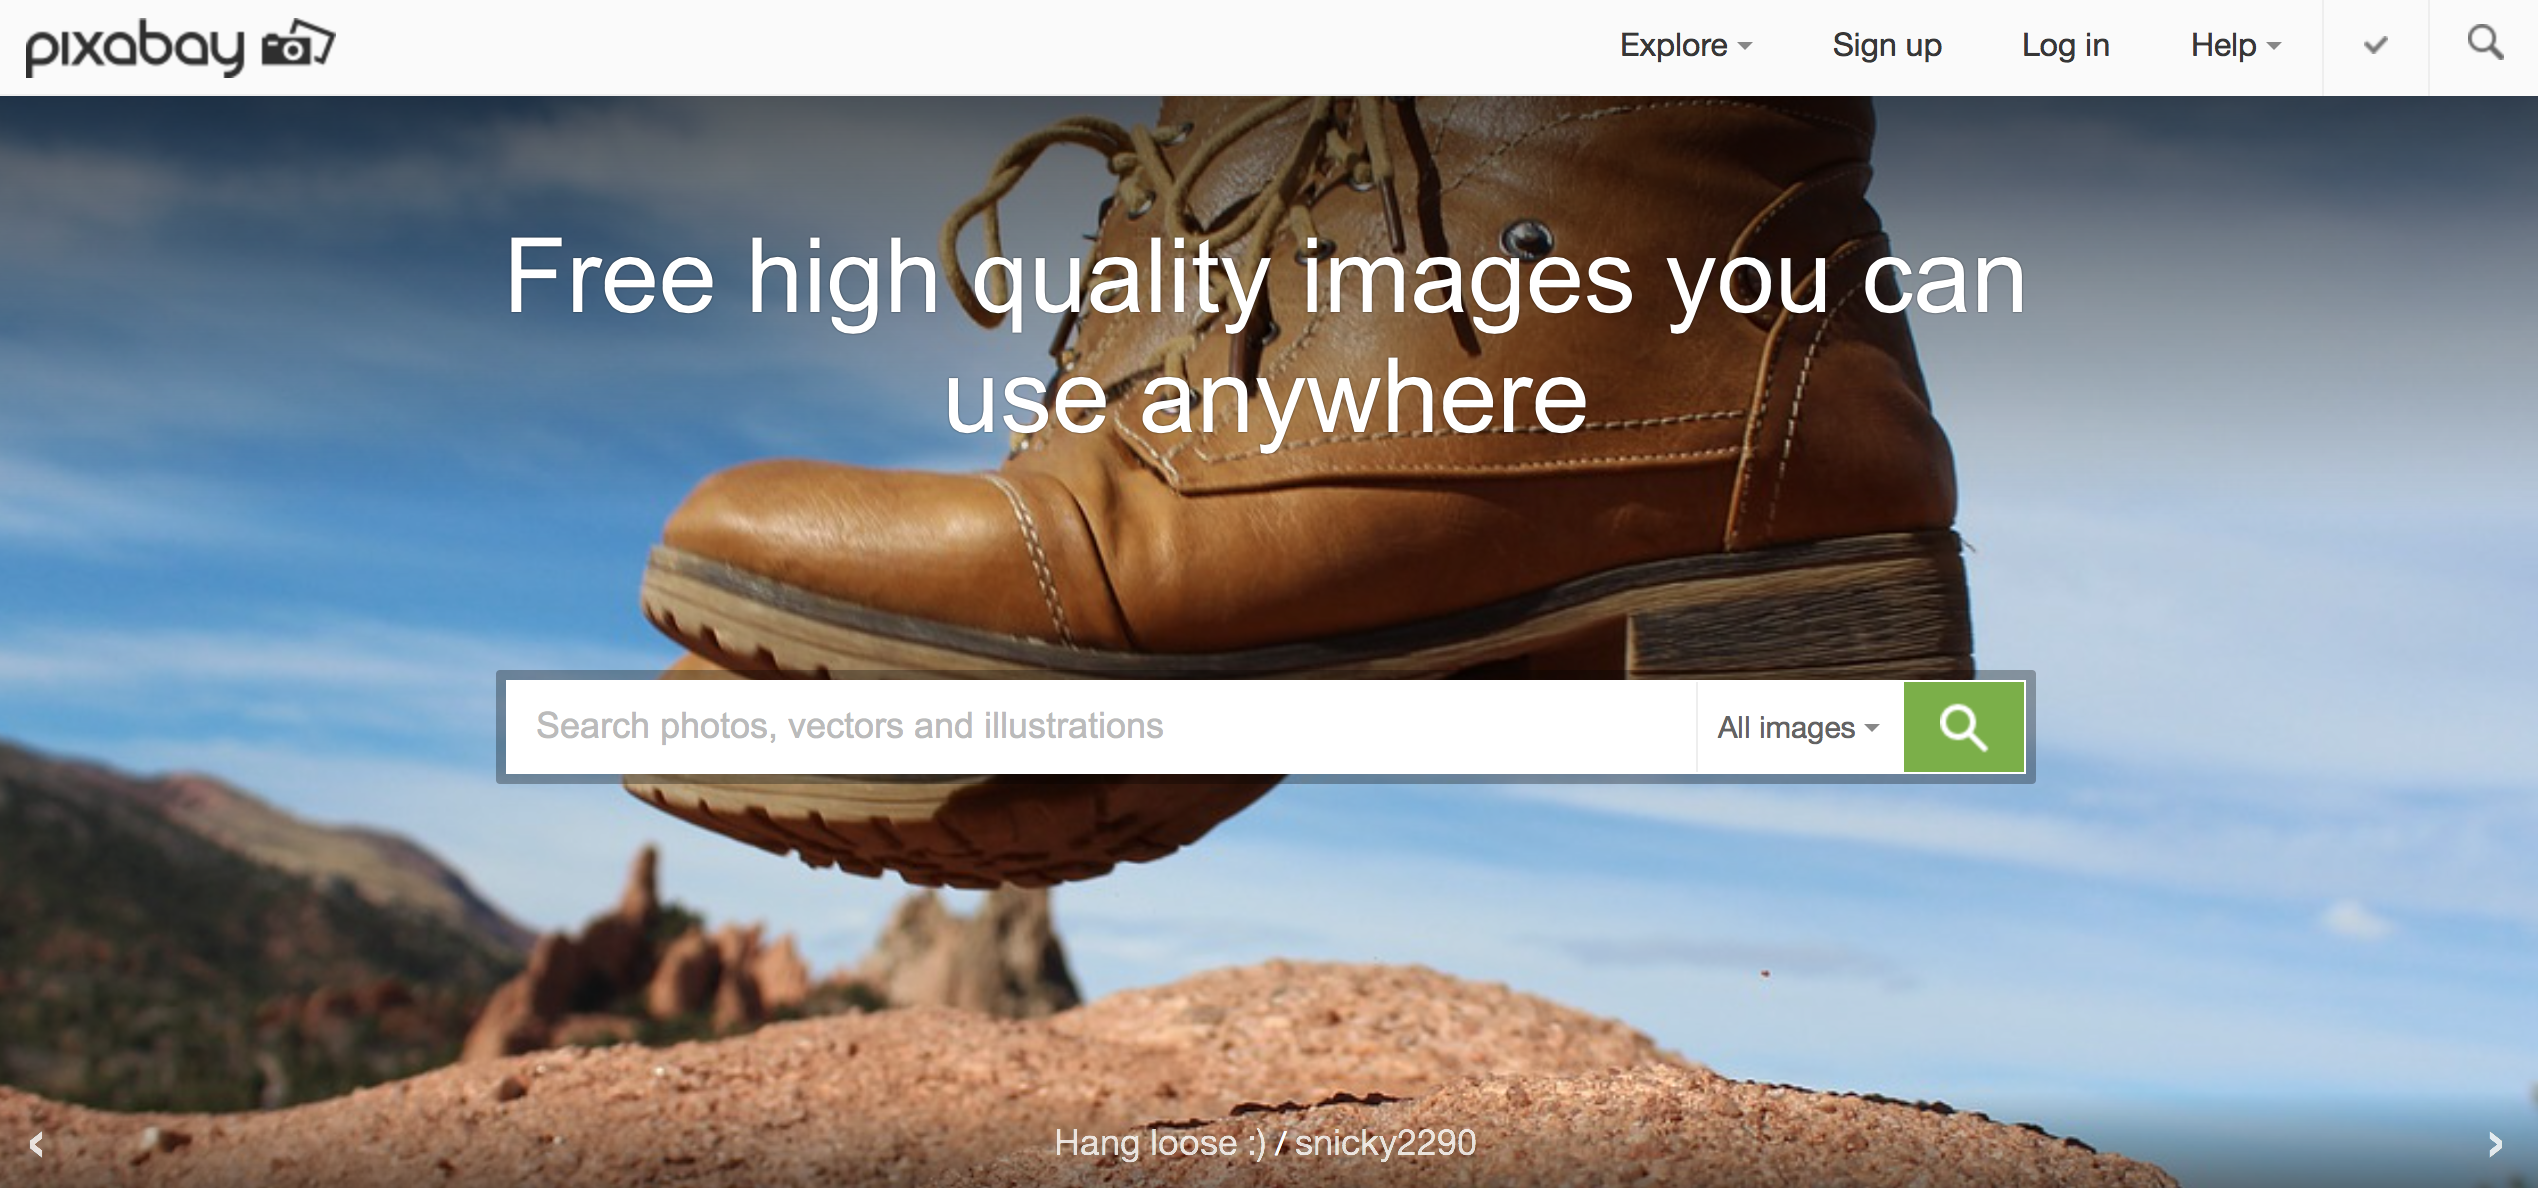
Appendix 3: Downloading a Picture from Pixabay
There are many websites that allow you to download pictures. Pixabay is recommended because the public has permission to use any of the images on this site. Images from other websites may have a copyright, which makes it against the law to use them without permission.
To download images from Pixabay, follow these steps:
1. Go onto the Internet. To do this, look for the icon of an Internet browser, like Explorer, Firefox, or Chrome. Left click the icon quickly two times.
2. In the address bar at the top of the screen, type in www.pixabay.com and press ENTER.
3. Type in one or more words that describe what you want a picture of and press ENTER. You will be shown a bunch of pictures.
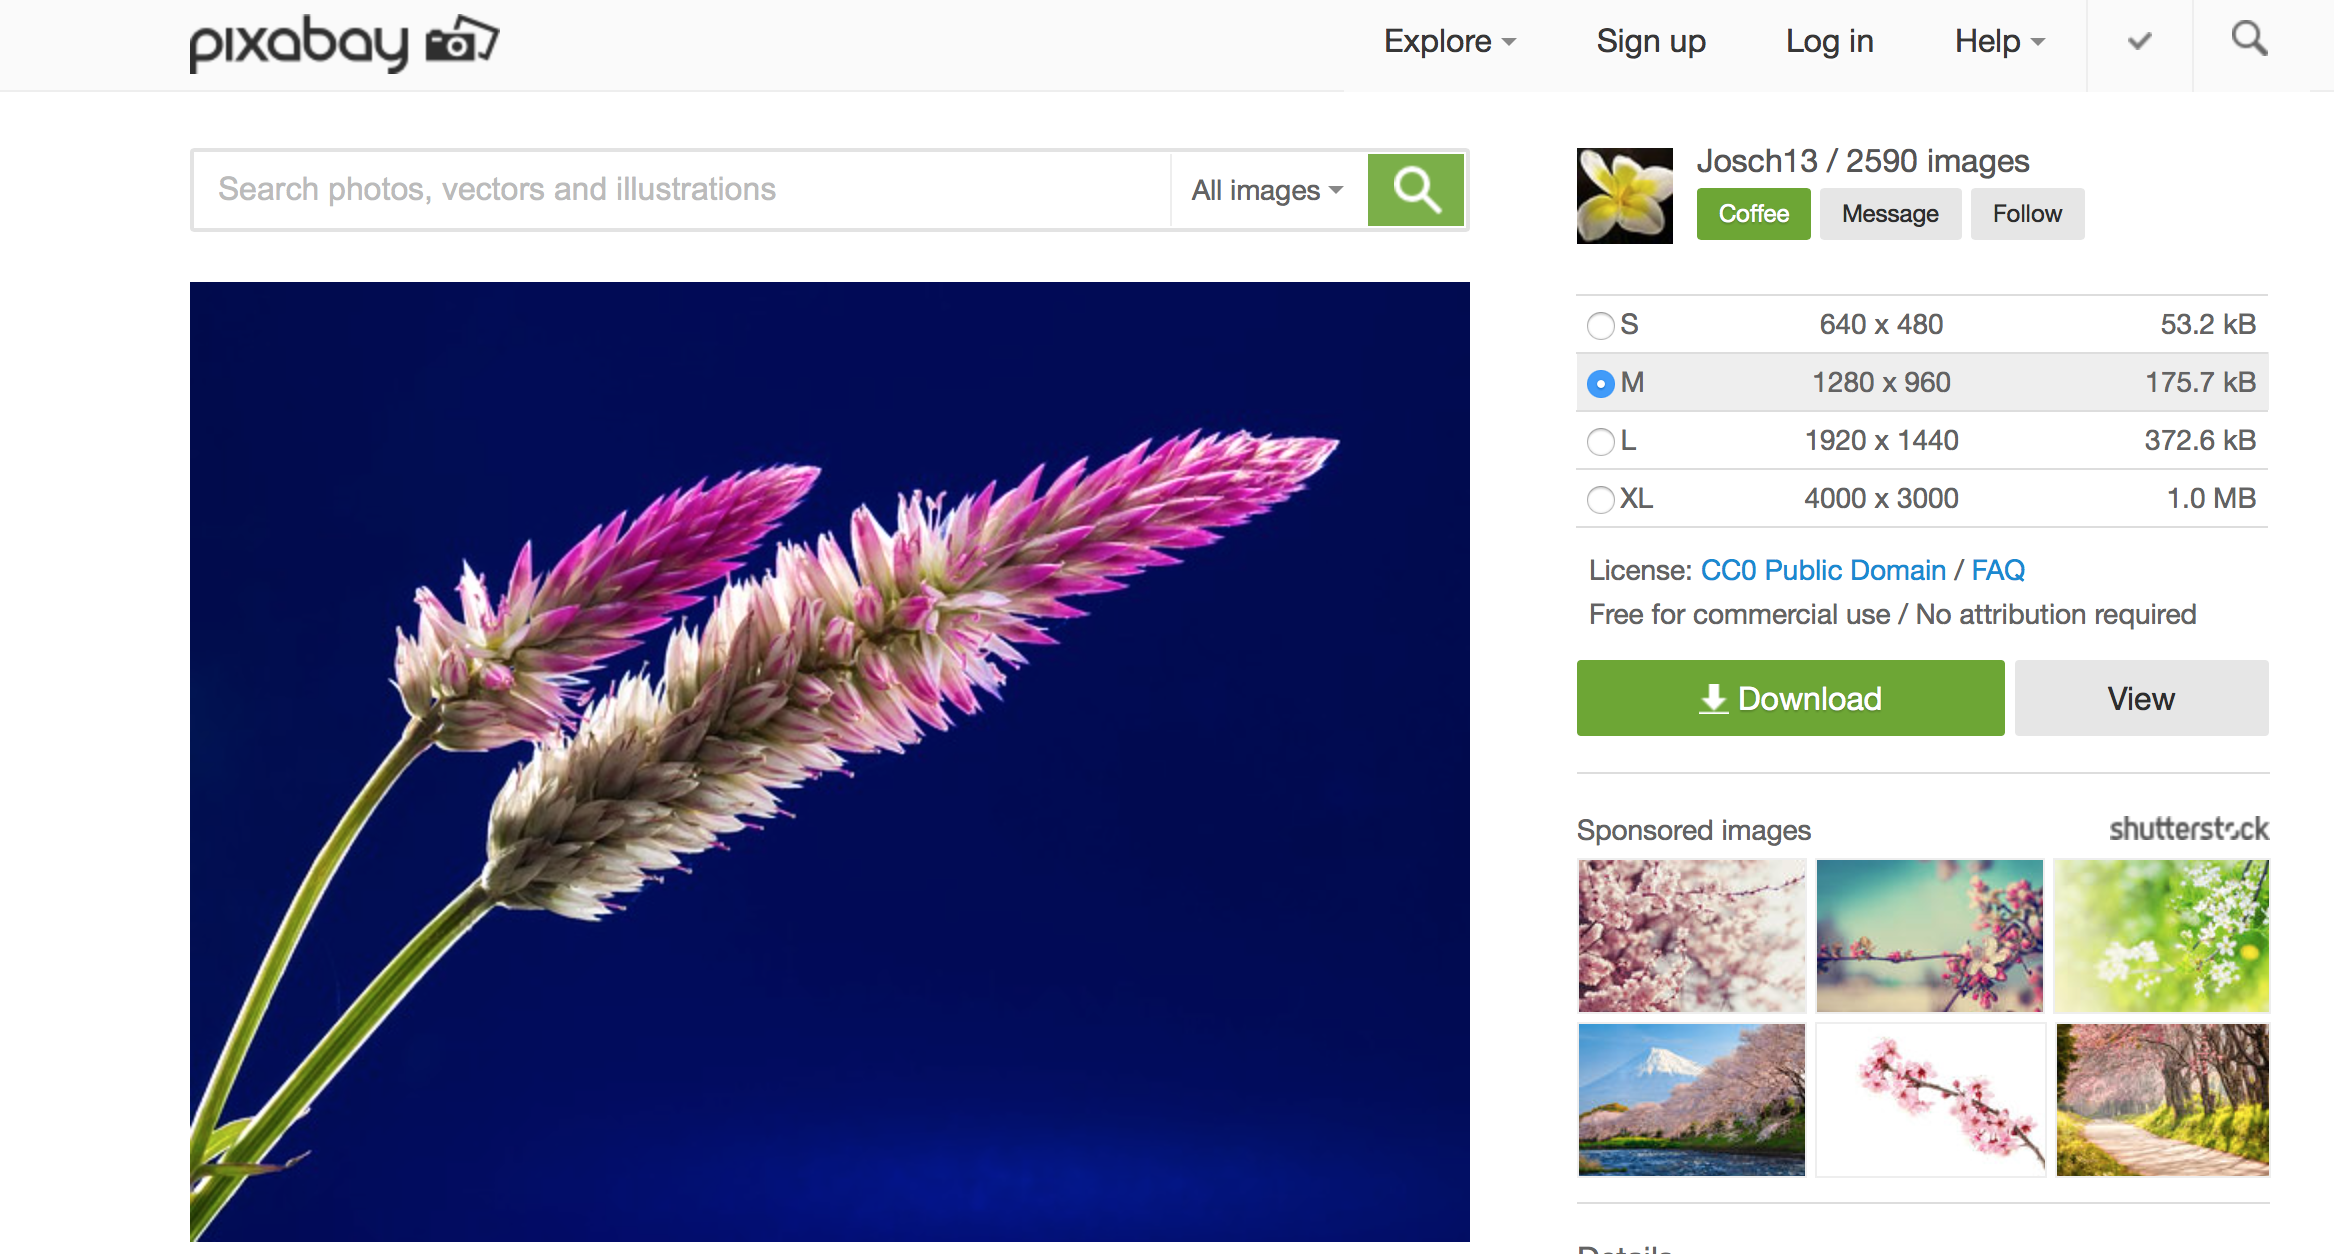
4. Use the mouse to point the arrow at a picture. The picture will get bigger so you can have a closer look.
5. When you find a picture you want, use the mouse to point the arrow at the picture. Click on the picture with the left mouse button.
6. Click the green DOWNLOAD button.
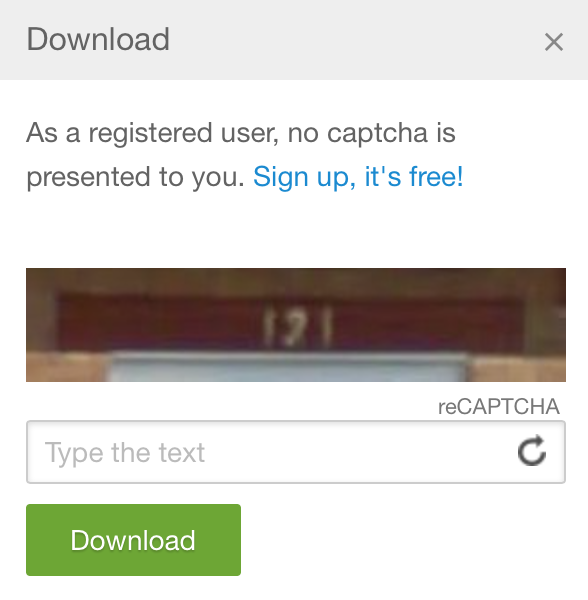
7. A little box will pop up with a picture and a place to type. Use the mouse to point the arrow over the place to type. Left click once. Type in the number you see in the picture. (The website wants to know that you are a human and not a robot!)
8. Click the green DOWNLOAD button.
9. A box will pop up along the bottom of the screen. It will ask you if you want to open or save the image. Click OPEN.
10. Click FILE and then MAKE A COPY.
11. A box will pop up. Click DESKTOP once and then double-click the FOLDER you named after yourself.
12. Type in a name that describes the picture. For example, if it’s a picture of a flower, type flower.
13. Click SAVE.
14. Click the red X to close the image.
4
Appendix 4: Scanning an Image
Scanner
A scanner is a tool that can take a picture of an image and save it on a computer. To scan an image:
1. Press the power button on your scanner to turn it on.
2. Open the program that came with your scanner. Different scanners come with different programs. If you aren’t sure what program to use, click on the Windows button in the lower left corner of the screen, and then click MY PROGRAMS. You will probably find a program with the word “Scan” in it. Click on that program.
3. Open the lid of the scanner. Lay the image face down on the glass. Place it in a corner so that you know it is straight. Close the cover.
4. Find a button on the screen that says PREVIEW. Click it.
5. The scanner will take a picture of your image so you can see it on your screen. The picture the scanner takes will include all the glass space around your image. You won’t want this. To get rid of it, draw a rectangle around your image. Left click the mouse and slowly move it around to make the shape of a rectangle. Release the mouse button when you’ve made a rectangle around your image.
6. Click the SCAN button. The scanner will now take a picture of the area you put the rectangle around.
7. You will be asked to save the image file on your computer. Click DESKTOP from the choices of folders on the left. Click the folder you named after yourself. Now you have told the computer where to save the image.
8. In the white space where you can type, enter a short name that describes your image. For example, if it’s a picture of you at the beach, you might name it Beach.
9. Click SAVE.
Repeat steps 2 to 9 to scan any other images you need.
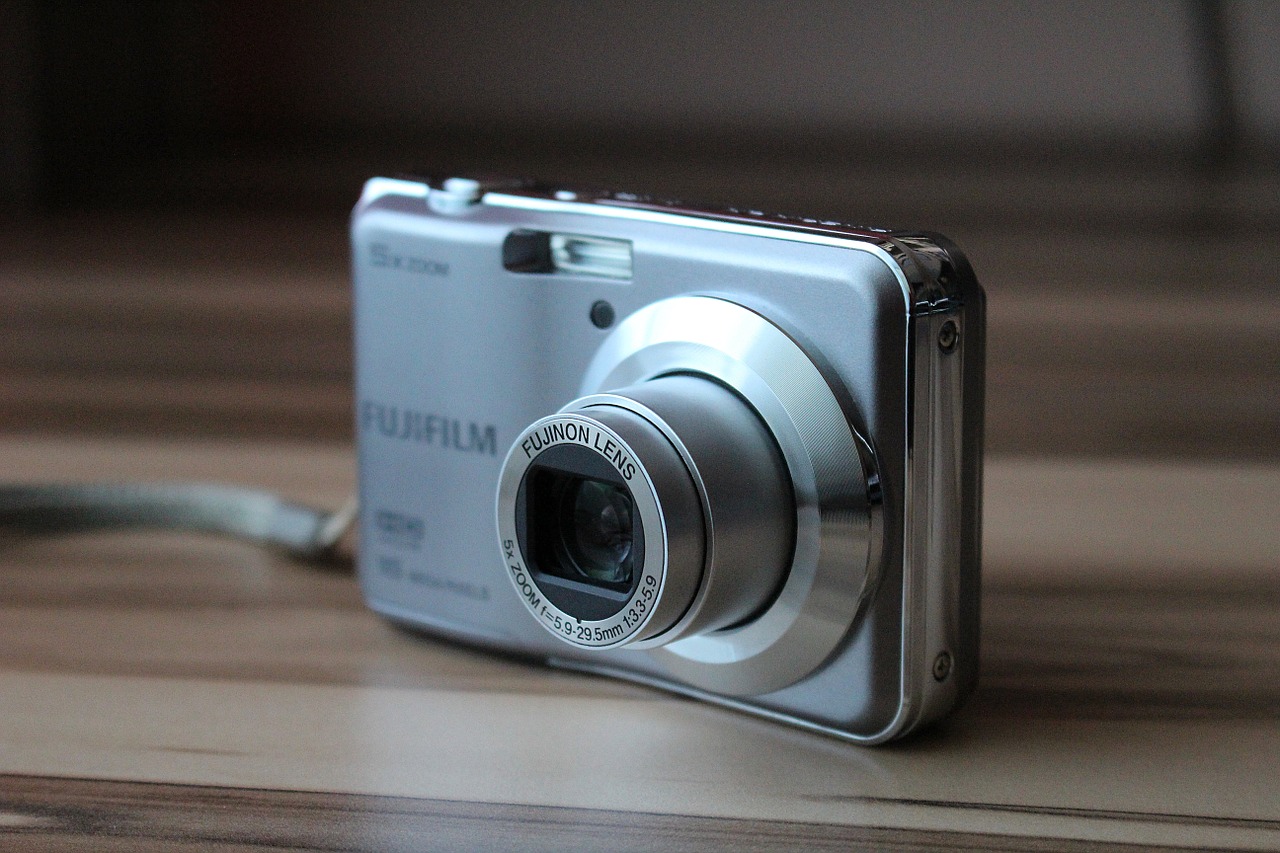
Appendix 5: Importing Pictures from Your Digital Camera
Digital camera
A digital camera takes pictures that can be imported, or transferred, directly to a computer.
If your digital camera came with a memory card like the one below, follow these steps:
Memory card
1. Make sure your computer is on and ready to use.
2. Look for a small door that opens on the side or bottom of your camera. Open it and there will be a small memory card inside. Push down on the card and it will pop out.
3. Look for a slot on your computer that fits the memory card. Slide the card into the slot.
Laptop
4. A box will pop up. Click IMPORT PICTURES.
5. Save the pictures to your folder on the desktop.
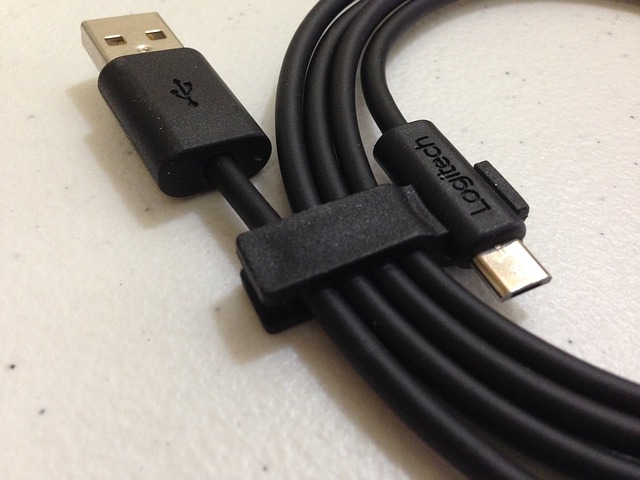
If your digital camera came with a cable, follow these steps:
Cable
1. Make sure your computer is on and ready to use.
2. Look for a slot on the camera that fits one end of the cable. Insert the cable into the slot.
USB slot
3. Look for a slot on the computer that fits the other end of the cable. Insert that end of the cable into the computer.
4. If the digital camera is off, press the power button. If the digital camera is on, go to the next step.
5. A box will pop up. Click IMPORT PICTURES.
6. Save the pictures to your folder on the desktop.
Something a person sets up so they can use the Internet services of a company
achieving
Succeeding at something by working hard
active
Put energy into something
address bar
Part of an Internet browser where you type in the address of the website you wish to visit
advice
An opinion about what someone should do
amused
Entertained
appear
To become visible
audience
The people who watch, read, or listen to something
audio elements
Parts of something that are related to hearing or the ears
available
Possible to get or use
category
A group of people or things that are similar in some way
coalition
A group of people, organizations, or countries that have joined together for a particular purpose
combine
To cause two or more things to be together
common sense
The ability to think in a reasonable way
compensation
Something that is done to make up for damage
confident
Feeling like you can do something well
convert
To change something into a different form
creation
The act or process of bringing something into existence
curious
Wanting to learn more about something or someone
deporting
Forcing a person to leave a country
desktop
An area on a computer screen where files and programs can be placed, like objects on a desk
diagnosed
Identified an illness in someone
dishonest
Pretending, cheating, or lying
display
Put something where people can see it
documents
Computer files containing written information
downloaded
When a file from the Internet is copied onto a computer
dramatic
Something that greatly affects people’s emotions
embracing
Eagerly using an opportunity
empowered
To have power
exaggerated
Described as larger or greater than something really is
examining
Looking at something closely to learn about it
facilitator
Someone who helps a workshop or discussion go smoothly
fascinated
To be very interested in something or someone
feminine
Related to girls and women
final
Happening at the end
generated
Produced or caused something
honour
To show respect for someone or something
identifies
The act of saying who or what something is
ignored
Did nothing to respond to something or someone
influenced
Changed or affected by someone or something
insight
An understanding about something or the message of something
inspired
Influenced by someone in a good way
Internet browser
A computer program used to find and look at websites.
invention
Something that is created by people
log in
To start a connection between a computer and some other system
loneliness
Sadness from being apart from other people
masculine
Related to boys and men
meaningful
Full of meaning, importance, and value
media
A way of sharing art and information.
medicine
Something used to treat pain or illness
mouse pointer
An arrow that is on a screen and can be moved with a mouse
note
Notice or pay attention to
obvious
Easy to see or notice
online
Connected to the Internet
ordinary
Normal or usual
overall
As a whole or in general
overloaded
Too much of something
overwhelming
So confusing or difficult you feel like you can’t do it
participant
A person who is involved in an activity
permission
The right to do something, from the person with the power to make decisions about what is allowed
point of view
A way of seeing and understanding the world
powerfully
Having a strong effect on someone or something
preview
An example of what something will look like
process
A series of actions that produce something
product
Something that is made as a result of a process
professional
Someone who has a lot of experience using a skill for their job
program
A system on a computer that lets you do certain tasks, like typing documents, playing games, editing images, or making films
public
Able to be seen and heard by many people
publish
To release a book you wrote or something you made on the Internet to the public
recite/recited
To say something out loud for an audience
reflect
Think carefully about something
rewarding
The feeling that you have done something good or important
role
The part or job someone has in a family, community, or group
scenes
Parts of a story where action takes place
scroll bar
A bar along the bottom or side of a computer window that you move with a mouse to see parts of the window that are hidden
stunned
Very surprised or upset
template
A document with a format for something that can be used many times
therapeutic
Producing good effects on the body or mind
thrilled
Very excited and happy
track
A song on a record or CD
untitled
Not named
uploading
Copying files from a computer to the Internet
valuable
Very useful, helpful, or important
version
A form of something that is different from other forms
virus
An extremely small living thing that can spread from one animal to another and can cause illness
visual elements
Parts of something that are related to seeing or the eyes
web address
The address where a website can be found online. It usually begins with www.
7
Bibliography
Asian and Pacific Islander Wellness Centre. [APIWellness]. (2012, May 2). All the truly important things… [Video File]. Retrieved from https://www.youtube.com/watch?v=PYoBIV75aPw
Center for Digital Storytelling. [CenterOfTheStory]. (2012, April 2). 7th Word – a digital story by Tate Blackbear. [Video File]. Retrieved from https://www.youtube.com/watch?v=dB58Z85J70Q
Center for Digital Storytelling. [CenterOfTheStory]. (2012, April 2). Memory- a digital story by Salomeja Karaseviciute. [Video File]. Retrieved from https://www.youtube.com/watch?v=9NgO-qu9UL4
Center for Digital Storytelling. [CenterOfTheStory]. (2012, April 2). Mountain of stories – a digital story by Nazbah Tom. [Video File]. Retrieved from https://www.youtube.com/watch?v=j_QNVfNXEgY
Center for Digital Storytelling. [CenterOfTheStory]. (2012, April 2). Sofas – a digital story by Wayne Richards. [Video File]. Retrieved from https://www.youtube.com/watch?v=VPrnDD51Y5s
Center for Digital Storytelling. [CenterOfTheStory]. (2012, April 2). Tanya – a digital story by Monte Hollis. [Video File]. Retrieved from https://www.youtube.com/watch?v=D0zA9q7qJZc
Center for Digital Storytelling. [CenterOfTheStory]. (2012, April 2). The 8th step – a digital story by Ed Popvitz. [Video File]. Retrieved from https://www.youtube.com/watch?v=FxO0BRZVt8I
The Center for Medical Transport Research. [The Center for Medical Transport Research]. (2014, March 10). Go around – a digital story by Cathy Jaynes. Retrieved from https://www.youtube.com/watch?v=cVuF6lHZ-BE
Wilson, B. A. (1996). Wilson reading system instructor manual. Oxford, MA: Wilson Language Training.
8
About the Author
Shantel Ivits is an instructor in the Basic Education Department at Vancouver Community College, on the unceded territories of the Musqueam, Squamish, and Tsleil-Waututh Nations.
Shantel has designed curriculum for the National Film Board of Canada, the British Columbia Teachers’ Federation, and many community-based projects.
Over the past decade, they have taught in literacy programs, university bridging programs, an ESL academy, and K-12 public schools.
They hold a Bachelor of Arts in English Literature from Trent University, as well as a Bachelor of Education and a Master of Arts in Educational Studies from the University of British Columbia.
Shantel identifies as a queer and trans person with white settler privilege. Their goal as an educator is to help people build their capacity to reach their goals and create more socially just communities.
Shantel also enjoys raising awareness that “they” can be used as a singular pronoun!


 Shantel Ivits is an instructor in the Basic Education Department at Vancouver Community College, on the unceded territories of the Musqueam, Squamish, and Tsleil-Waututh Nations.