The CC licence permits you to retain, reuse, copy, redistribute, and revise this book—in whole or in part—for free providing the authors are attributed as follows:
If you redistribute all or part of this book, it is recommended the following statement be added to the copyright page so readers can access the original book at no cost:
Facilitating Learning Online (FLO) is a collection of one- to five-week online courses that help participants develop the skills they need to confidently and effectively facilitate learning online.
The collection includes:
Two foundation courses: FLO Fundamentals (5 weeks) and FLO Design (4 weeks),
One in-depth course: FLO Synchronous (3 weeks), plus
A series of one-week MicroCourses that focus on single topics.
For those wishing to become FLO facilitators, we invite you to take our Facilitator Development Online (2 weeks) course where you can review and plan your first FLO facilitation experience in a community of supportive peers. This learning is extended through a mentorship model where alumni are invited to practice by co-facilitating FLO courses with an experienced facilitator.
Who is this guide for?
FLO courses are designed to be facilitated by those who are committed to improving the quality of online learning in their institution or organization, including:
Coordinators or managers of teaching & learning centres
Personnel who provide professional development services for educators
Administrators of learning management systems (LMS) or virtual learning environments (VLE)
Secondary audiences for this guide include faculty who:
Teach fully online or in a blended/hybrid format and are using some aspect of the online environment to facilitate learning
Are current online faculty, new-to-online, online-savvy but new to teaching/adult education, or new to both online & teaching
Are creating, converting, or revising a course for online delivery
May also be instructional designers (professionals or individuals hired to develop a specific course/program for online)
Want to develop or improve online synchronous aspects of their courses
This guide will also be useful to administrators as a way to understand the complexity and scope of the work of a facilitator. This will assist in program, budget, and resource planning. In many cases, it will be educational technologists, instructional designers, and other staff who will be performing the tasks outlined in this guide.
Individuals who are preparing to develop or facilitate similar courses may also benefit from this guide, and may choose to adapt it for their own courses. However, because the emphasis is on facilitating in a community of learners and supporting collaboration and reflective practices, it may not be as beneficial for those focusing on teacher-created content or transmissive models. We invite you to take our Facilitator Development Online (2 weeks) course where you can review and plan your first FLO facilitation experience in a community of supportive peers. Once you complete this course, you can co-facilitate FLO courses with an experienced facilitator and gain valuable experience through a mentorship model.
About this guide
The authors of this guide – Gina Bennett, Beth Cougler Blom, Sylvia Currie, and Sylvia Riessner – created it to provide all course facilitators and future FLO facilitators with details about our practices to make your job easier, and to give you a comprehensive picture of how to facilitate FLO courses. It builds on our experiences developing and facilitating the FLO courses and mentoring others to do the same. We use exemplary contributions to the courses, instructions, ideas, and materials, as well as facilitation strategies that have worked for us.
When we prepare for our upcoming courses, we frequently revisit earlier versions of our courses and planning documents. This helps us re-use our work, rethink our next moves, and enables us to write down some of the discussions, skills, and experiences we were having or trying to create and use in FLO courses, that we only share anecdotally. Through this process we are continually bringing in new ideas, and reflecting on and refining course experiences.
Ultimately, mentoring FLO facilitators through this guide, and through other forms of support, enables us to share the vision of what we are trying to accomplish with this family of courses. This guide will help us be more clear with ourselves and others about what that is, and how to keep moving forward with a robust program.
How to use this guide
This guide is not necessarily a linear read. The first three chapters are of value to all facilitators and those curious about FLO courses; however, FLO facilitators and mentors may choose to refer mainly to the course-specific chapters.
The introduction, Chapter 1: What is Facilitation?, and Chapter 2: FLO Family of Courses, are applicable to all readers. These chapters will help you understand how we approach facilitation, and the context in which we have developed and refined this collection of courses.
Chapter 3: Facilitating FLO outlines recommended steps for preparing to facilitate FLO, as well as the facilitation and hosting models for those interested in offering the courses in-house. This chapter will be of interest to all future facilitators, but also to administrative and support staff.
Chapter 4: FLO Fundamentals, Chapter 5: FLO Design, Chapter 6: FLO Synchronous and Chapter 7: FLO MicroCourses, provide specific details about planning and facilitating each course. Jump directly to the course you plan to facilitate, or read them as a way to determine if you want to expand your offerings to include other courses.
Each FLO course chapter (4 – 7) is associated with the open educational resource for that course. These courses are available in Moodle to browse online, copy, or download.We have used the Moodle Learning Management System to implement FLO courses. However, institutions have adopted FLO and hosted on other platforms.
Accessibility Statement
2
BCcampus believes that education needs to be available to everyone, which means supporting the creation of free, open, and accessible educational resources. We are actively committed to increasing the accessibility and usability of the textbooks and guides we produce.
Accessibility features of the web version for this resource
It has been optimized for people who use screen-reader technology.
all content can be navigated using a keyboard.
links, headings, and tables have been designed to work with screen readers.
images include alternative text descriptions through alt tags and long descriptions where necessary.
The webbook has the option to increase font size (see tab on top right of screen).
Videos include transcripts
Other file formats available
In addition to the web version, this guide is available in a number of file formats, including PDF, EPUB (for eReaders), MOBI (for Kindles), and various editable files. Here is a link to where you can download this book in another file format. Look for the “Download this book” drop-down menu to select the file type you want.
This book will sometimes link to external resources. For those using a print version, you can find the web addresses for all linked resources in the back matter of the book.
Known accessibility issues and areas for improvement
While we strive to ensure that this guide is as accessible and as usable as possible, we might not always get it right. Any issues we identify will be listed below.
List of Known Accessibility Issues
Location of issue
Need for improvement
Timeline
Workaround
There are currently no known accessibility issues with this resource.
Accessibility standards
The web version of this resource has been designed to meet Web Content Accessibility Guidelines 2.0, level AA. In addition, it follows all guidelines in “Appendix A: Checklist for Accessibility.” The development of the toolkit involved working with students with various print disabilities who provided their personal perspectives and helped test the content.
Let us know if you are having problems accessing this guide
We are always looking for how we can make our resources more accessible. If you are having problems accessing this guide, please contact us to let us know so we can fix the issue.
Please include the following information:
The location of the problem by providing a web address or page description
A description of the problem
The computer, software, browser, and any assistive technology you are using that can help us diagnose and solve your issue:
e.g., Windows 10, Google Chrome (Version 65.0.3325.181), NVDA screenreader
This statement was last updated on October 1, 2019.
This Accessibility Statement has been adapted from the “Accessibility Statements” chapter by Josie Gray in the Accessibility Toolkit – 2nd Edition, which is by Amanda Coolidge, Sue Doner, Tara Robertson, and Josie Gray, and is used under a CC BY 4.0 Licence. This text has been adapted to fit the needs and context of the FLO Facilitator’s Guide.
Chapter 1: What is Facilitation?
I
What is Facilitation?
1
The definition
There are many different interpretations of the term facilitation and perspectives on the role(s) of a facilitator. The Oxford English Dictionary defines the verb facilitate as:
Make (an action or process) easy or easier.
The role of a facilitator may also involve all members of a group in the decision-making or brainstorming process, mitigates any conflicts, and contributes appropriate structures and processes to help the group function effectively (The Institute of Cultural Affairs – UK).
What is facilitation in an educational context?
As educational philosophies developed and a growing number of adults began to participate in higher education (not only youth or young adults), beliefs and pedagogical practices changed to accommodate the richer experience and knowledge that learners brought to the classroom. Adult learning theory had a profound impact on the way courses were designed and delivered, and the developing ideas around social constructivist learning and humanist teaching approaches influenced many instructors to move from acting as the “sage on the stage” and instead, to begin supporting or scaffolding the learning that was meaningful for each student (e.g., acting as the “guide on the side”).
A concurrent shift in teaching practice occurred as educators recognized that traditional approaches were not successful in developing the 21st-century skills that learners needed (e.g., critical thinking and the ability to communicate effectively, innovate, and solve problems through negotiation and collaboration). Research consistently suggested that collaborative learning and personalized learning strategies were successful in supporting the deeper learning needed. See Cynthia Luna Scott. THE FUTURES of LEARNING 3: What kind of pedagogies for the 21st century? UNESCO Education Research and Foresight, Paris. [ERF Working Papers Series, No. 15] [PDF].
Many teachers began to modify their practices to include facilitative teaching rather than direct teaching. While teaching methods will still vary depending on the subject, level of learning or intended outcomes, the focus is generally on helping learners understand course content through questioning and suggestions while providing rich cases, complex problems, and opportunities to apply new knowledge in different contexts.
Facilitating learning online
A model or framework of online learning referred to as the Community of Inquiry was one of the first to identify the increasing role of the learner and the importance of having a teacher facilitate social and cognitive interactions. Research collected over 18 years demonstrated the importance of facilitation of learning through listening, connecting ideas, and involving learners in “…meaningful and educationally worthwhile learning” (p.47, Chapter 3: Facilitation – Teaching in Blended Learning Environments – Vaughan, et al, 2013).
Chapter 2: FLO Family of Courses
II
FLO Family of Courses
2
Overview
Facilitating Learning Online (FLO) is a growing collection of one- to five-week online courses that enhance the skills required to confidently and effectively facilitate learning online. Affectionately referred to as a family of courses, the program is a supportive community of educators taking facilitation of learning online to the next level—practicing, improving, and reaching out to motivate colleagues to do the same.
Listed below are the five courses in the FLO collection along with brief descriptions; we describe them more fully in subsequent chapters in this guide.
FLO Fundamentals
FLO Fundamentals is a five-week introduction to research-based adult and online learning concepts, principles, and strategies to make learning engaging and effective. You develop the skills you need to effectively facilitate learning in online environments by alternating between learner and facilitator roles to implement a series of short learning activities each week. The course includes opportunities for peer feedback and emphasizes reflection on your own experiences.
FLO Design
The four-week FLO Design course begins with a review of theories of learning, approaches to instructional and learning design, and introduces different quality and accessibility frameworks for online course design. You can bring your own design project or work with others, sharing evolving designs and receiving constructive feedback in weekly studio forums.
FLO Synchronous
FLO Synchronous is a three-week immersion into planning and facilitating synchronous online learning sessions. We introduce you to best practice strategies, you’ll learn from examples of synchronous online facilitation, and will practice in a safe environment. There are two role choices (tracks) in this workshop — Reviewing Participant and Practicing Facilitator — allowing for flexibility in learning outcomes.
FLO MicroCourses
MicroCourses are short, single-topic, hands-on and practical. In one week, you will dip into the FLO experience and leave with something practical and useful for your own teaching practice. Topics are emergent and relate to designing and facilitating learning online.
FLO Facilitator Development
FLO Facilitator Development is a two-week course that prepares individuals to facilitate FLO courses. In a community of supportive peers, you explore the architecture of FLO (primarily FLO Fundamentals) from a facilitator’s perspective and learn about the behind-the-scenes work and preparation required. You will leave with ready-to-use artefacts and resources as a headstart to co-facilitating your first FLO course.The FLO Facilitator Development course does not have a dedicated chapter in this guide. However, it is available as an OER and is recommended for organizations adopting FLO courses.
The FLO story (the short version!)
The first Facilitating Learning Online course was called the Instructional Skills Workshop Online (ISWO) that Royal Roads University developed in 2008 through the BCcampus Online Program Development [https://bccampus.ca/open-education/] fund. This course was based on the well-known Instructional Skills Workshop, but prepared faculty to facilitate online, as opposed to in person.
In 2013, BCcampus began offering what is now called FLO Fundamentals. It is an adaptation of the original ISWO, and was subsequently revised several times. In 2015, the name of the workshop changed from Instructional Skills Workshop Online (ISWO) to Facilitating Learning Online (FLO), more closely reflecting the focus on online facilitation. To increase the number of FLO facilitators, BCcampus developed FLO Facilitator Development (previously called Facilitator Development Online).
From the beginning, our goal was to prepare educators across the BC post-secondary system to effectively facilitate learning online- first by hosting, refining and growing the collection of courses, then by supporting the adoption and expansion process in a way that maintains a high quality and consistent experience for faculty and staff across institutions. All FLO courses are open educational resources (OER) and available for institutions to implement in-house. They are available for browsing and copying, and for downloading in Moodle (.mbz) file format.
The term Open Educational Resources (OER) was first defined by UNESCO in 2002 as “any type of educational materials that are in the public domain or introduced with an open license” and can “range from textbooks to curricula, syllabi, lecture notes, assignments, tests, projects, audio, video and animation.”
Over the years, participant feedback has informed our curriculum revisions and development, resulting in the redesign of FLO Fundamentals and the addition of two new courses: FLO Design and FLO Synchronous. Recently, we recognized a need to appeal to faculty and staff who were unable to commit to a course spanning several weeks, and we introduced the one-week MicroCourse. We fully expect the FLO family to continue to grow. Suggestions for course topics continue to emerge, such as assessing learning, multimedia development, open pedagogy, and digital literacy.
Who are the FLO learners?
We have attracted a range of learners to FLO courses: very experienced instructors, experienced online instructors, new-to-online instructors, and even those new to both instruction and online learning. The courses have also been popular in teaching and learning centres and with other post-secondary institution staff, as well as with individuals from private and non-profit organizations.
What makes FLO unique?
FLO courses provide you with a participatory and learner-centred experience to enhance the skills you need to facilitate your own online courses and activities. The FLO experience is very different from an independent and self-directed study. In addition, the courses provide an ideal environment to mentor future FLO facilitators.
The following list captures our philosophy and approach:
Design and Development
Experienced learning designers and educators design and develop the courses.
We undergo pilots, extensive testing and improvement cycles, incorporating feedback and suggestions from educators from various fields and institutions.
Courses are licensed CC BY, meaning you can copy, remix, transform, and build upon the work, and we hope you will!
Participants
Experience the role of the learner while learning about and experiencing the role of the facilitator (and in FLO Design, they experience design and observe others and their approaches to design).
Learn about the implementation of collaborative teamwork while doing it.
Experiment with a variety of tools, techniques, and strategies.
Participate fully in activities and discussions throughout the entire course; these courses are a commitment!
Practice, seek advice and feedback, and share learning in a small, supportive community of peers; this is not a MOOC!
Learn together with colleagues from a variety of locations, settings and academic disciplines.
Engage in reflective practice.
Maintain access to course spaces after the course is completed.
Our goal is to design and host FLO courses at BCcampus and prepare future facilitators so others can successfully implement a high-quality experience for faculty and staff. We hope there will be many, many facilitators ready to adopt FLO courses and implement them in their own institutions.
The next chapter looks at how to prepare for facilitating FLO courses.
Attributions
The OER definition from the Faculty OER Toolkit is used under a CC BY 4.0 Licence.
Long Descriptions
Figure 2.1 long description:
“The FLO family of courses are jam-packed with pedagogically sound inspiration, current ideas, helpful resources and a network of amazing participants, instructors, and facilitators, who are all interested making teaching and learning online the best it can be. The best part for me was probably how hands-on and practical the courses were and how much I’ve actually been able to use what I created for my own courses afterwards. It made investing the time and effort so much more rewarding.”
The FLO courses are well design and filled with solid online pedagogy. This in itself sets the learner up for success, but the real strength is that each course is designed so learners apply what they learn in a supportive online communicy. Learning by doing is powerful.
This FLO Facilitation Guide will help you successfully facilitate FLO courses. In this chapter, we dive into the details of what becoming a FLO facilitator involves. Subsequent chapters will guide you through the steps and considerations for facilitating each course.
Roles and functions of FLO facilitators
FLO courses are built on a foundation of social constructivist perspectives, infused with a recognition of the importance of evidence-based practices, the power of shared reflection and inquiry, and the need for personally meaningful learning experiences.
FLO facilitators adapt their roles to the needs of each cohort of learners as they progress through a course. During the first week of each course, facilitator presence is high as the facilitators take on the roles of a community builder and a guide. FLO facilitators welcome and engage learners, post frequent reminders, clarify curriculum, troubleshoot problems, and encourage each learner to participate and learn. They take time to develop connections with and among learners to help develop a sense of community and mutually supportive learning.
As the course moves on and learners become more familiar with the course expectations, content and environment, they become more active participants in the co-creation of meaningful learning. FLO facilitators take on the roles of coach and mentor. They step back and encourage learning through the use of different questioning strategies and proven facilitation techniques. They participate in discussions but don’t lead; instead, FLO facilitators highlight important concepts, weave together the ideas that participants share, and post frequent summaries to help learners keep track of the flow of conversations as they move in and out of the course environment.
FLO courses focus on helping each participant develop their own skills and knowledge. Although FLO facilitators provide frequent and constructive (formative) feedback, they also encourage participants to use the self-assessment rubrics and reflective practices embedded in each course to monitor and celebrate their own achievements. FLO facilitators help participants stay on track and make explicit links between course activities and learning outcomes.
As each course draws to a close, the FLO facilitators help individual participants complete activities and assess their progress. Participants share final reflections and often help plan and host a final wrap-up session to celebrate achievements and to look ahead to future connections and applications of new learning.
Developing skills in online facilitation is a journey, not something that can be accomplished over one iteration of a course! We encourage people interested in facilitating FLO courses to spend some time reading about online facilitation (such as in this Guide and beyond) before you facilitate your first FLO course. We also recognize that you could gain online facilitation skills while facilitating – including reflecting on that facilitation. Working with others to co-facilitate FLO courses can also support the development of online facilitation skills as we watch and learn from what our colleagues do.
We’ve gathered a list of skills that we have found effective in facilitating FLO courses and grouped them under four main categories: Support Diverse Learners Online, Build and Sustain Online Community, Manage the Online Course, and Model Effective Facilitation.
Core FLO Facilitation Skills
Core FLO Facilitation Skill
Description
Support Diverse Learners Online
Communicate goals and roles for group- and individual-learning activities.
Support learners to develop effective online learning strategies.
Encourage participatory, connected learning.
Encourage learners to take risks and try new approaches.
Respect and welcome diverse perspectives and experiences.
Promote reflective practice and critical/creative thinking.
Provide timely, formative feedback to individuals and group.
Assist learners in self-assessment of learning using rubrics.
Build and Sustain Online Community
Build a safe and supportive learning community.
Use strategies to build rapport with learners.
Develop guidelines for constructive feedback.
Model respectful, appreciative dialogue.
Encourage learners to identify norms of behaviour.
Assist learners to develop positive responses to conflicts.
Connect with external experts for selected topics or activities.
Explore open learning resources or communities.
Close community by supporting final reflections, individual self-assessments and shared learnings.
Manage Course Online
Design functional learning spaces that are easy to navigate.
Select appropriate tools within the learning system.
Organize content to make it easy to find.
Share content in varied ways.
Maintain currency and relevance of references and resources.
Aid learners to navigate the site and use tools and resources.
Model Effective Online Facilitation
Model a positive and professional presence throughout the course.
Plan effectively with co-facilitator(s).
Manage time effectively.
Seek regular feedback from learners.
Maintain a balanced presence throughout the course.
Use varied questioning techniques to extend and deepen discussions.
Develop strategies to monitor participation and respond to potential issues.
Engage in and model own reflective practice.
Explore new pedagogical approaches to enrich facilitation practice.
Develop technical skills and explore new tools.
We know it’s a big list and probably not an exhaustive one, but it’s a start. To create it, we drew skills from the self-assessment rubric included in FLO Fundamentals and crowd-sourced ideas from people who have facilitated FLO courses. We also drew some inspiration from the International Association of Facilitators (IAF)’s list of Core Competencies.
The interesting—and most exciting!—thing about facilitating FLO courses is that, in addition to talking about online facilitation skills with our participants throughout the course, we also model those same skills. We want our participants to see us continually working on enhancing the skills in ourselves – to model reflective practice as an online facilitator and to bring an authentic presence to our courses.
Throughout the chapters included in this guide, we’ll dig deeper — and provide examples — into what it looks like to use these facilitation skills.
Our Model
It is beyond the scope of this guide to delve into institutional adoption needs and processes. Instead, we offer an emergent model that is proving to be effective in preparing FLO facilitators. Your institution may wish to adopt a similar model or consider partnering with other institutions that already have.
Figure 3.2
Take a FLO course. Experiencing the role of participant in the course you wish to facilitate is one of the best ways to understand the structure, flow and resources that make up the course. You will also experience the value of facilitated learning.
Apply new learning and share experiences. In other words, practice any chance you get, and share with your colleagues. Completing one or more FLO courses will provide you with new ideas to implement in your own teaching and to share with colleagues.
Prepare to facilitate FLO. Although the facilitators in FLO Fundamentals try to make their facilitation visible, a lot of planning and adaptations still take place behind the scenes. To give future facilitators a better idea about these backstage activities, we developed a 2-week FLO Facilitator Development course. The course is about learning how to (co)facilitate the FLO Fundamentals course, but it also touches on the facilitation of other FLO courses. Every time we offer the Development course, we invite alumni to take it again so they can stay current on curriculum changes and can continue to learn alongside the newcomers.
Volunteering your time and expertise to assist — and be mentored by — experienced FLO facilitators is a perfect mutual exchange. We have used a very flexible and collaborative approach, asking mentees and facilitators to negotiate the level of commitment and tasks.
Use existing templates (see the task lists that accompany each course in this guide) as a starting point for planning and tracking tasks with your co-facilitator(s). We suggest using a collaborative online workspace so you’re both on the same page, so to speak. This can also be a real time-saver, avoiding back and forth communication to make decisions. See Tools to Support Co-Facilitation in this chapter for some examples of tools co-facilitators have used to manage their tasks.
Become a lead facilitator and mentor. An obvious next step for your institution to sustain or expand FLO offerings is to bring more facilitators on board. Once you have the experience of facilitating FLO courses you are ready to mentor incoming facilitators.
Leonne Beebe
Figure 3.3
Leonne Beebe is a seasoned FLO participant and facilitator, having returned to FLO for every offering in some capacity, each time taking on more responsibility and new challenges. Leonne transitioned from being mentored to being a full-on facilitator by boldly accepting each invitation to take on more. She brings years of teaching experience and keen participatory observation skills to the workshop.
Leonne offers this for future facilitators:
“The FLO/FDO mentoring model for learning to facilitate online makes the learning both real and realizable. As a teacher, you have the concurrent experience of being a student while also being a teacher. Through your experiences, you will develop an awareness and empathy for the learning challenges and the strategies needed for student success. You may also find one time is just the beginning…”
Case Study: Rachel Loganberg
Figure 3.4
Rachel Loganberg from College of the Rockies volunteered her time and expertise by taking on an observer role in the FLO Design pilot. This role enabled her to provide feedback on the design of the workshop based on her observations of how learners were engaging. Rachel was also keen to understand more about the 5-week FLO Fundamentals course, and volunteered to co-facilitate so she would be ready to take the lead on a future FLO workshop. She then went on to co-facilitate the 2-week FLO Facilitator Development course. Rachel is now very well equipped to mentor future FLO facilitators! This is a terrific example of a mutual exchange model — learn and practice while giving back to the FLO community.
Governance by Enthusiasm
A group called FLO Enthusiasts guides the Facilitating Learning Online curriculum and mentorship of future facilitators. This group includes educators who are working their way through the layers, as it were, and championing FLO at their own institutions. We define ourselves as:
“A group that exists to guide FLO open educational resources through the process of widespread adoption while maintaining the integrity of the program.”
In June 2017, a group of 12 FLO Enthusiasts met to envision the next steps for FLO.
An outcome of that gathering was the following list of qualities that we appreciate about FLO Fundamentals and, in the spirit of keeping this foundation course consistent, feel should remain intact going forward. Several of these qualities would apply to all FLO courses.
Required Qualities
The course design and implementation will:
Be evidence-based.
Include a reflective practice component.
Engage all participants in the experience of facilitating an activity.
Offer instructor and peer feedback on each learner’s facilitation.
Provide a safe and encouraging learning environment.
Continue to be openly licensed.
Ideal Qualities
Ideally the course design and implementation will include these qualities, but we recognize they are not applicable in all contexts:
Create opportunities to experience working in teams.
Encourage exploration of a variety of online tools.
Issue certificates of completion.
Provide ongoing access after the course wraps up, or implement takeaway processes.
Integrate a mentorship model for preparing facilitators.
We also appreciate that facilitators and their respective institutions might wish to significantly customize FLO courses or develop new courses that would fit nicely in the FLO collection. Please consider sharing these new or revised versions back to the community!Ideally all FLO offerings will be listed in the Teaching and Learning Professional Development Portal. Also, if your revised courses do not follow the list of above qualities that makes FLO courses FLO, we ask that you consider changing the course name to avoid confusion.
We hope this guide is comprehensive enough to provide you with a good foundation for facilitating FLO courses.If your institution or organization adopts FLO Fundamentals, consider also adopting FLO Facilitator Development, or partnering with other institutions to offer this professional development. Ideally, you will also seek opportunities to practice your facilitation and discuss plans and ideas with colleagues. How you go about becoming a confident and effective FLO facilitator is up to you.
The next four chapters guide you through the facilitation of each FLO course.
Long Descriptions
Figure 3.1 long description:
A puzzle with four interlocking pieces. The pieces read:
This guide includes sample task lists for co-facilitators to use for their planning, facilitation, and post-course activities. Collaborative online workspaces obviously make this job easier! Here are some examples of tools co-facilitators have used to manage their tasks.
Google Docs
Google Docs is a popular choice for managing co-facilitation tasks. Make sure you adjust your settings to be notified of new comments and make checking the page part of your daily schedule.
Figure 3.5
Meister Task
Ross McKerlich and Andy Sellwood, facilitators for FLO Fundamentals, are experimenting with an online project management tool called MeisterTask. The screenshot below gives an idea of how the tasks are organized, and some of the useful functionality. Reports so far are that it’s working well!
Figure 3.6
Trello
John McLeod and Keith Webster at Royal Roads University used Trello to manage their task list items for FLO Fundamentals.
Purpose: This course introduces participants to online facilitation strategies based on established adult learning concepts. Facilitators support participants as they practice facilitating through experiential activities and teamwork. By hosting this course for the people you support, you can build a supportive community of online educators and improve the online learning experience at your institution.
Mode: A facilitated online learning course that involves asynchronous and synchronous learning.
Length: Five consecutive weeks
Expectations – Facilitators: FLO facilitators provide ongoing guidance and support throughout the course to broaden awareness and understanding of online learning theories and pedagogical practices and to develop the online facilitation capabilities of each participant. However, we do recommend that you have some previous experience with online learning and facilitation.Ideally, FLO facilitators will have already experienced FLO as a participant (although this is not required). You may wish to preview the FLO Fundamentals course, available as an Open Educational Resource (OER) from BCcampus.
Time Requirements for Facilitators: The time commitment for facilitators varies widely. Facilitators can expect to spend anywhere from 15 to 25 hours per week during the preparation and implementation of this course. First-time hosts may require more time. Facilitators should expect to be available to the course on a daily basis.
Expectations – Participants: Participants are expected to participate actively and collaboratively throughout each week, exploring facilitation ideas and techniques and engaging in weekly activities. A key activity is to participate as a member of a team to facilitate a one-week online exercise and discussion.
Assessment: Throughout the course, participants reflect on learning through the use of learning journals and rubrics. Participants also provide constructive feedback on the team facilitation skills of others, and respond to feedback on their own team efforts.
Time Requirements for Participants: Participants should expect to spend 6 – 12 hours per week for online activities and course readings. More time will be required during the week the participant is facilitating the discussion with their team.
Primary Resource for Facilitators: All materials (introductory information, suggested readings, detailed discussion topics, etc.) for the course are included in the FLO Fundamentals OER from BCcampus, available for viewing or download. This guide is based on the 2019 version of the course.
What is FLO Fundamentals?
This is a mostly asynchronous online course, delivered over five sequential weeks. Two one-hour synchronous sessions are optional but recommended to facilitate community building and to provide valuable exposure to synchronous facilitation. Your primary role is to build and sustain the online community: pre-planning the course, communicating regularly with participants, providing supplementary materials, organizing and coaching teams, and supporting participants’ experimentation with a variety of online learning tools.
In a nutshell, the course works like this: in Week 1, you get everyone enrolled in the course, familiar with the layout, and introduced to each other. The FLO facilitators then start the discussion for Week 1’s assigned topic and guide participants to experience what it feels like to help build an active online community. By the end of Week 1, participants are organized into four teams: each team will be responsible for facilitating an assigned topic for one of the following weeks. During each of the following four weeks, you provide participants with readings and a discussion topic related to the readings. The team responsible for that week facilitates the discussion while the course facilitators provide support from the sidelines and are less visible in the discussion.
Keep in mind that in facilitating this first week’s discussion, you are demonstrating good facilitation skills and providing a model for how participant teams might facilitate a weekly activity when it’s their turn. Depending on your participants, you may wish to make this point more or less explicit.
FLO Fundamentals has proven to be an effective—and often transformative—learning experience. Our experience has shown that a class of 14 – 20 educators is a good size for this course and we highly recommend that you enlist a co-facilitator to support this group. You can expect to be involved in the course every day for a total of 15 – 25 hours per week (more if this is your first time) during the preparation and implementation of this course.
Learning outcomes
FLO Fundamentals develops key themes for successful online facilitation. At the end of this course, participants should be (better) able to:
Build and sustain online community
Reflect on the experience of an online learning community.
Explore the role of instructor presence in online learning.
Support diverse learners online
Identify ways to help diverse learners online.
Use facilitation strategies and tools to address the needs of adult learners.
Facilitate collaborative and individual learning
Facilitate collaborative group and individual activities online.
Explore group dynamics in online collaborative activities.
Provide constructive feedback and assessment
Demonstrate effective feedback and assessment.
Critically reflect on feedback and experience to self-evaluate work and learning.
Manage the online course environment
Explore effective strategies to manage the workload.
Improve the use of tools within an online learning environment.
Participants
A wide variety of educators benefit from FLO Fundamentals. Participants are often full- or part-time instructors at post-secondary educational institutions who are new to teaching online or have already been teaching online for some time but would like to develop stronger facilitation skills. Other participants may be familiar with traditional teaching practices but are seeking to develop experience and confidence with more learner-centric educational approaches.
FLO Fundamentals may be of interest to a wide variety of other educators, including instructional designers, educational developers, learning technologists and others who work in teaching and learning centres. It may also be useful for graduate students, consultants from the private sector, trainers employed by for-profit or non-profit organizations, and educational support providers.
Technology: Essential and Recommended
Facilitators and participants will need a reliable connection to the Internet. A variety of online tools can be used to host FLO Fundamentals. The necessary tools can usually be acquired through free, open source, or inexpensive means.
Essential
An online environment or collection of tools to enable:
Formation of a distinct group of participants, preferably with the option to restrict access (e.g. a learning management system or virtual learning environment such as Moodle, Blackboard Learn, Desire to Learn, Google Classrooms; or a content management system such as WordPress, Facebook groups, wiki-based groups).
Asynchronous interaction between participants, with the option to make such communication private within the group (e.g. an environment that supports forums, bulletin boards, discussion threads, etc.).
Synchronous group communication (e.g. Skype, Google Hangouts, Blackboard Collaborate, BigBlueButton, Adobe Connect).
Recommended
The Moodle learning management system provides additional benefits because a Moodle-installable version of FLO Fundamentals OER from BCcampus is available for modification and re-use.
A webcam and headset or earbuds (with microphone) for synchronous communication.
Course Content and Layout
FLO Fundamentals is a complete five-week workshop-style course with a comprehensive collection of information, activities, directions, assessments, and related resources. Within the Open Education Resources (OER) course, resources are organized into tabs, with one tab for each of the five weeks, plus one Hub tab with introductory and general information, and one tab to organize the work of the teams (see the image below for an example).
Figure 4.1
In the Hub tab, you will find:
A Course Handbook, describing for participants how the course works, what’s expected of them, learning outcomes, scheduling, etc.
A sample Schedule to help participants (and facilitators) stay on track.
Resources to help facilitators organize participant teams.
Sample forums to facilitate discussion:
An Open Forum for sharing general information (clarification, announcements, social-type sharing) not necessarily related to the weekly discussion about content. Both facilitators and participants can post and respond.
A Weekly Journal Share forum, for posting reflections on learning.
A forum to provide Feedback for participant teams.
A feedback form (Feel, Like, Improve, Feedback, or FLIF) to help participant teams reflect and receive feedback on their facilitation experience. (In the OER course, this feedback is structured using the Learning Management System’s quiz tool.)
Additional resources for facilitators to aid in coordination of the course (generally hidden from participants).
Tabs corresponding to each week’s activities include:
An overview of the topic for the week.
A forum to discuss the week’s topic (e.g. to respond to the questions posted by the facilitation team).
Other resources and/or activities specific to that week.
The tab for Facilitation Teams Workspace includes:
A detailed activity plan for each team.
A workspace forum (private, if you choose) for each team’s members to plan their facilitation strategies and tasks.
The topics discussed in this course are:
Week 1: Building Learning Community (facilitated by course facilitators).
Week 2: Diversity of Learners (facilitated by the orange team).
Week 3: Responsive Facilitation (facilitated by the blue team).
Week 4: Collaboration (facilitated by the yellow team).
Week 5: Reflective Practice (facilitated by the green team).
Course assessment strategies
This course is designed to be developmental; it is not a graded course in the traditional sense. Unless you decide otherwise, your participants will not be marked or assigned a formal grade on their performance. The course does include a number of activities to encourage self-reflection, as well as a comprehensive self-assessment rubric which could be used to assign a grade, if needed (see FLO Fundamentals Self-Assessment Rubric).
Facilitator Task List: What You Need to Do Before, During and After the Course
The successful hosting of FLO Fundamentals requires good planning, timing, and coordination. Over the years, we’ve developed a detailed, step-by-step Task List for course facilitators:
You could also use the following Task List Explanations alongside the Task List for more background information and ideas.
Task List Explanations
Several weeks (or months) before the course begins
Access the OER course. The OER course Facilitating Learning Online – Fundamentals is currently offered as a Moodle course with guest access; you should be able to enter the course and view all content.
Set up your own learning environment and copy content. Before you can offer FLO Fundamentals, you need a learning environment – a virtual place to host the course. At the very minimum, you need an online space (preferably private or securable) where facilitators and participants can conduct discussions and share facilitation discoveries and the results of experimentation. The course content must be added to the LMS or other learning space you have chosen:In your institution, an LMS Administrator, IT support, or Instructional Designer may help with this step.
If using Moodle: restore the latest version of this course into your LMS (you can download it using the link in the OER).
If NOT using Moodle: establish and configure an online learning environment (LMS, CMS, wiki, etc.) into which you can copy all relevant content from FLO Fundamentals.
If possible, find a colleague to assist you as a Co-Facilitator. Your ideal co-facilitator will be someone who can work with you to provide guidance and support to your participants, and can dedicate 15 to 25 hours per week to this task. Ideally, your co-facilitator will be familiar with online learning theories and practices, and with personal and technical skills to engage online participants. Not only do co-facilitators lessen the workload and enrich the facilitation process for you, they increase the facilitation expertise within your institution. It would help a great deal if your colleague has already taken FLO Fundamentals.
Access your FLO Fundamentals learning environment to review content and tools. Prepare the course site or learning environment and (re)acquaint yourself with the facilitation tools you plan to use. Familiarize yourself with the course content, materials, philosophy, scheduling, flow, etc. of the course.
Set up a web conferencing tool for online synchronous sessions and conversations. Depending on your institution, you may use any of a number of web conferencing applications: Blackboard Collaborate, Skype, Google Hangouts, BigBlueButton etc.
Connect with your co-facilitator for detailed pre-planning. Develop a planning regime that you’re both comfortable with. Work together to develop a detailed list of tasks to be completed before, during, and after the course runs. You have a lot to do before the course begins:
Ensure an easy-to-access place to store planning resources. Agree on planning tools and schedules.
Customize this Facilitator Task List to fit your needs.
Review the resources available in the OER and select some activities to try. You could also add your own ideas for icebreakers, discussion topics, resources, images, slides, etc.
Develop rough agendas for your synchronous sessions.
Prepare how-to resources for your participants to explain the features of the learning environments & tools.
Practice using learning environment tools. If you’re already pretty comfortable with both synchronous and asynchronous online tools, try using something new. You want to be able to model for your participants an adventurous open mind when it comes to educational technology.
Identify potential participants. Think about where you might find your course participants. Will you enlist from your institution only, or other institutions and organizations? Decide how far ahead you must start the recruitment process.
Ensure your content is accurate. Once you have a potential learner audience in mind, re-visit the learning environment and carefully review all content (forum post topics, reading lists, directions, etc.). Make sure your content is accurate for your intended group of participants, up-to-date, and reflects the goals of your institution or program. Remember, the FLO courses have been developed as Open Educational Resources and are licenced under a Creative Commons Attribution 4.0 International License so you’re free to modify whatever you like! The only requirement is that you provide attribution and don’t imply or suggest endorsement by the licensor.
(If you haven’t done so already!) Choose a start date and promote your course to your target participants.
Your Technical Skills: The Least You Need to Know
Your participants may dream up a variety of designs for their mini-session and, ideally, you and your co-facilitator will be comfortable setting up the tools they need. If you are working within an LMS, some commonly-used tools include:
Forums or discussion groups: LMS-based forums usually offer many different settings and you should be familiar with most of them. Learn to set up both open forums and team-based forums (if available) and explore other settings that can create new possibilities for structuring activities.
Polls or Choices: Many LMSs offer a tool for quickly polling participants — handy for any time you want people to indicate a preference (e.g. “what time should we meet for our synchronous session?”, or to vote on a single question.
Wikis: Wiki-based tools may be included in your LMS or used as stand-alone tools for learning. If using wikis, make sure you know how to edit, revise, revert, check the history or discussion about a page, etc. (A wiki that requires detailed knowledge of wiki markup language may not be the best choice).
One- to two weeks before the course begins
Once your FLO Fundamentals course is underway, you and your participants will be very busy indeed and you’ll want to have as much preparatory work out of the way as possible. How you set up the course site and engage the community will directly impact how the rest of the course flows; keep in mind that you are modelling good facilitation practices (a detailed list of Core FLO Facilitation Skills is included in Chapter 3 of this Guide).
Complete recruitment and register participants. You may have begun the recruitment of participants weeks or even months ahead. Make sure you have a process in place to register your participants in accordance with your institution’s policies. If you are managing your own site (e.g. a WordPress site), you may be able to organize this on your own. During recruitment, be sure to:
Communicate expectations around time and teamwork.
Provide information to your participants about what they’ll need to do and where to find what they’ll need. Your goal is not to overwhelm your participants but to provide enough information so they can jump right in when the course begins.
What’s the right number of participants for this course? A small class of 10 or fewer participants will make it difficult to sustain rich online conversations. On the other hand, a large class of more than 25 may be more than 2 facilitators can handle. Our experience has shown that a class of 14 – 20 educators is a good size for this course.
Meet with co-facilitator, finalize the week ahead. Now is the time to check the details and do final revisions of your first week’s activities & resources, including:
Discussion topics, resources, images, slides, etc.
Icebreaker activities.
Your introductory welcome post.
Agenda for the first synchronous session.
Resource to explain the basic features of the synchronous environment & tools.
Create or update co-facilitators’ profiles and contact information. Tell a little about yourself in a profile or short biography. Establish your contact information and set “office hours” (if appropriate).
Decide which aspects of the course will be displayed when the course opens and which aspects will be hidden until needed. Many learning environments will let you hide or show specific activities until you’re ready for your participants to see them.
Ensure sufficient starting information for participants. Your new participants will need detailed information about how to access the course and get started (e.g. if using Moodle, see the FLO Handbook or consider preparing a screencast).
Finalize enrollment of participants, send out a Welcome email. Provide the participants with access to the course and/or information about accessing technical support, if necessary.
Decide on your week’s start day and modify your directions to the participants and the learning environment settings accordingly (if necessary). This course is not self-paced; the work is organized around weeks. Will the first day of your course week begin on a Sunday, Monday, or some other day?
Set a time for your first (Week 1) synchronous session. Prepare the synchronous environment as much as possible: upload slides, write/draw/embed a welcome message, etc.
Set up a separate online workspace for each team. You will be dividing up your participants into 4 teams; each team will facilitate one of the weekly mini-sessions. A unique team workspace (e.g. a forum or wiki) with editing functions limited to team members should be sufficient. If possible, arrange read-only access to non-team members in the class.
Privacy and Confidentiality
In all FLO courses, our learning relies on the exchange of honest, constructive feedback, and we need to agree on rules that support this foundation of trust. Be aware of your institutional or organizational policies relating to privacy and confidentiality, determine how you will interpret these for your online learning environment, and decide how to communicate these rules to your participants. You can see an example of how privacy and confidentiality concerns are communicated in this page in the FLO Fundamentals Course Handbook. Some privacy and confidentiality rules you may wish to adopt:
Always seek permission to share content posted by participants.
When using social media and other online services to complete activities, ensure you are familiar with the levels of privacy available and how the information will be stored and shared. Communicate this information to the participants.
Let participants know who else has access to this course (e.g. participants, facilitators, assistants, website administrators, etc.).
You may wish to establish “Vegas rules,” i.e. what happens in the course, stays in the course.
Decide which teams each co-facilitator will support during the course, and decide between yourselves what kind of support you will provide.
Confirm technical support is available and adequate, if needed. If you are providing your own tech support, confirm that your site has been backed up and no significant technical issues (e.g. scheduled downtime) exist. If tech support personnel are available, confirm they are standing by and aware of your course start date and enrollments.
Review the suggested assessment options for this course and select one (or more) to recommend for your participants. A self-assessment rubric can be adapted so the facilitator can assign a grade, if needed (see FLO Fundamentals Self-Assessment Rubric).
As time permits
Practice navigating your course site and other tools. If you are using the OER Moodle version of this course, you’ll find it’s a complex environment with lots of moving parts. Take the time to familiarize yourself with the course and revise it as you see fit. Move stuff around and explore different tools, modules, and plugins (if available). Consider (judiciously!) trying some new or less-used tools outside of your LMS or main learning environment.
Streamline or otherwise improve your course’s navigation tools. When you refer to another part of your course or learning environment, provide a direct link whenever possible. Consider including a navigation screencast showing step-by-step how to get around your learning environment or LMS.
Fine-tune your reading list. In such a fascinating and fast-moving field like online facilitation, it’s easy to get carried away with the list of readings you provide for participants. Consider making all readings optional but don’t be afraid to strongly recommend a resource you know is important. After all, this course is intended to be informed by research and theory.
The readings you’ll see contained in this course have been chosen carefully to be both high quality and of reasonable length. Nevertheless, encourage your FLO participants to research and recommend better or more up-to-date readings for their own facilitation week.
A few days before the course begins
Connect with your participants. Make sure they’re able to access the learning environment, and communicate some basic information about the course, expectations around time, etc.
Write your introductory welcome post (e.g. in a Welcome or Introductions forum within the course) in a friendly, informal, and enthusiastic style that sets a tone for your online community. Encourage participants to respond with their own introductions.
Your Welcome post doesn’t have to be just text…
As a facilitator of FLO, you’ll want to set an example from the beginning of what good facilitation looks like. Take the time to craft a friendly, welcoming message to begin the process of online community building.
Some tips:
Your introductory post doesn’t need to be just text; you can be creative and adventurous with technology. Part of your job as facilitator is to model an attitude of fearless experimentation with communication technologies. What about a video introduction against a backdrop of where you live? Or a narrated slideshow? Of course, you don’t want to intimidate your participants if they’re fairly novice technology users, so be sure to offer choices.
What to include is up to you; this is your first impression. You might like to talk a bit about your teaching and other professional experience. You could share an anecdote or advice from your own online facilitation experience, or use an icebreaker-type format.
Make sure your post sets a good impression- establishes instructor presence, presents a clear message without being too long or too short.
Be sure your introductory post ends with an invitation for your participants to share their introductions in a similar way.
Figure 4.2 (NOT a playable video) illustrates how a side-by-side video was developed as a Week 1 welcome. The video introduces both facilitators and lets them share the task of briefly introducing the week and the course. Don’t forget to provide an alternative version of the information shared during the intro video—keep accessibility in mind!
Figure 4.2
Post the week’s overview post, emphasizing for participants:
Activities, etc. they must complete this week.
Tips on how to navigate the site.
The need to plan and schedule time to work on the course. Remind participants that a valuable learning experience cannot be achieved using a side-of-the-desk approach.
Even with your explicit messages about the amount of time needed, participants may still expect to be able to slide their FLO work in on the weekends or in little bits and pieces between other daily tasks. This can leave people feeling they are always working on the course, even though their time on task may be quite short. Remind your participants to book time for the course and repeat that advice early and often. Encourage them to book time to work with their facilitation team partners (and you, if they wish) well in advance.
Finalize your questions for Week 1’s forum “Building Online Community.” The following are SAMPLE QUESTIONS only (you may have other questions to engage participants on this topic):
What experiences have you had with online learning communities?
What can an instructor (or facilitator) do to develop and maintain a sense of community in an online learning environment?
What do you know about the Community of Inquiry model? How does it relate to building a sense of online community?
Organize participants into facilitation teams and post this information for all participants. You may decide to organize teams randomly or according to certain criteria. Decide how and when participants can switch teams (preferably only within a short time period at the start of the course) if they wish.
Week 1: Building Online Community
Figure 4.3
Throughout Week 1, your role is to establish a strong facilitator presence and effectively demonstrate what good online facilitation looks like. Aim to do this as transparently as possible; think out loud to your participants to show them how you plan and facilitate the various activities. This is a good opportunity to incorporate other collaboration tools, such as wikis or other co-authoring platforms, to show how it is possible to communicate outside of a forum (which tends to be the default discussion tool).
Participants may feel overwhelmed during the first week. Offer brief explanations, clarifications and practical tips in an informal and friendly way. Sometimes posting in a place that participants can choose to visit (i.e. where they are not automatically subscribed or copied on all messages) can alleviate some of the email overwhelm.
Here’s an example of a blog post used in a past course:
Post Example
Figure 4.4
Managing your workload while teaching and learning online is a journey. You have a unique opportunity in FLO to think about workload management from two perspectives: participant and facilitator.You experience the demands of the course as a participant – trying to “find your feet” to understand what’s expected, what you have to do each week.
You experience the demands as a facilitator – trying to plan and coordinate with your team members, organizing the tasks for the week for yourself, for your team, and for your participants.
What I’d like to focus on is the benefit of learning the tools – finding the Moodle tools (the learning management system in which FLO activities take place) that can make managing your workload (in both roles – participant and facilitator) a bit easier.
Channeling the FLO – some suggestions
During your first week’s activities, you may have noticed that you seem to be deluged by a constant stream of emails from the course.
Suggestion 1: Set up a filter on your email
Suggestion 2: Don’t unsubscribe; try a digest version instead
Suggestion 3: Check what’s happened
(Note: each suggestion is linked to an illustrated process, a brief explanation or a screencast.)
Week 1, Day 1 (the first day of the week):
Morning: Post facilitators’ personal intros to the Introductory Forum.
Morning: Begin the Building Online Community forum activity. Post your questions to launch and guide the discussion.
Find ways to allow participants to share their prior knowledge and experience. You can use this introductory activity to make the positive and negative perceptions of online learning visible by asking each participant to contribute words and an image that reflects their perception of online community.
Here is an example collected in Powerpoint slides and shared through a hidden YouTube video:
Figure 4.5
Evening: Finalize details for the first synchronous session in your agenda and/or slidedeck, including:
Explain the purpose of the Facilitation Team Workspace with an activity plan and planning forum.
Highlight the importance of feedback, journaling, reflection, time management tips.
Week 1 Day 2
Earlier in day: Remind participants about the synchronous session a few hours before the session begins. (Reiterate that this session is not required although it is highly recommended.) Your reminder may be a forum post, LMS message, email, etc. Re-post session time, access information, and link to technical support, if needed.
Morning: Introduce the Learning Journal (perhaps as a post to the Open Forum). In your post:
Explain the concept and the value of maintaining a record of what participants are learning and want to remember.
Remind them to regularly pause, reflect, assess and synthesize their learning.
Recommend they document these thoughts in a personal learning journal using paper-based, audio/video, or electronic means.
Encourage participants to share nuggets (insights) in a Learning Journal.
The Learning Journal is explained in more detail in the Course Handbook.
Later: Host first synchronous session. Keep in mind this is your opportunity to connect with your participants both aurally and visually, and to demonstrate the value that a synchronous collaboration tool can bring to an online learning experience. If possible:
Ensure you have technical support people (or your co-facilitator) standing by to assist with access problems.
Enter the synchronous session at least a half-hour early to greet early arrivals and troubleshoot navigation problems within the synchronous environment.
Remember to notify participants that the session will be recorded (if this is possible) and hit the record button as your session begins.
Check in with participants about their comfort level navigating the site during the session and address any confusions.
If it doesn’t come up spontaneously in the conversation: mention that the first week of an online course is often overwhelming (for both participants and facilitators), that it will get better, and that you will do what you can to mitigate start-up stresses.
Sometimes the topic of feeling overwhelmed does come up naturally. The following is an example of one participant’s experience (from the participant’s Weekly Journal Share Forum for Week 1):
Time management, reflection and empathy: one participant’s experience:
“I have a deep empathy for my students now on the first week experience. I think when we “know the material” we forget what it feels like to “not know.” As a student in my first online course, I now know how it feels to be in that place and will be more understanding of my students.”
“Well, this week was hard. In taking time for reflection I realize that the commitment of this course while I am taking on a new role at work, in conjunction with my current full-time job and a side contract, is a lot. Time management has been a reoccurring issue for me as I never feel like I have enough time.”
“I copied this sentence from the week 1 reading materials: ‘When a person is feeling anxious, the likelihood that they will interpret things negatively increases.’ I need to have this on a sticky note on my computer. I really valued the comments from others in the course about feeling overwhelmed. Online learning requires time to get used to the new ways of doing learning.”
Evening: Post a brief follow-up report about the synchronous session. Talk up the value of the session and encourage participants to attend the next synchronous session (mention the date and time). If the session was recorded, let participants know when a recording may be available.
Week 1 Day 3
Connect with members of the first participant facilitation team. Post a message in the team planning forum for Diversity of Learners to encourage this team to get underway.
Remind participants to use Schedule and begin Learning Journal. Use a post in the Open Forum to remind participants to begin their Learning Journal and to use the FLO Fundamentals Schedule to keep on track. More information about the Learning Journal and FLO Fundamentals Schedule is available in the OER course. Make sure you revise the schedule to fit your own situation.
Post the recording (if available) of the synchronous session. Use a post in the Open Forum to provide a link to the recording and to highlight any key or outstanding topics.
Week 1 Day 4
Connect with missing or inactive participants who have not yet logged into the course and with those who haven’t posted in any forum. Participants who are relatively new to online learning may not realize that this is NOT a self-paced course. Review participation in the Building Community forum and encourage more participation, especially among less active participants.
Remind participants to engage in reflective activities. Encourage them to assess their own participation using the self-assessment rubric (also available directly in the FLO Fundamentals OER). Remind them that at the end of each week, they will be asked to share a few nuggets (questions, aha moments, and ideas that grow from their experiences each week) in the Learning Journal forum. Don’t forget to maintain your own Learning Journal and be ready to share your reflections, ideas, and examples at the end of the week.
Week 1 Day 5
Post a summary of the Building Online Community discussion activity. When composing the summary, keep in mind that you are demonstrating for participants what will be expected of the facilitation teams in the weeks to come. Inform (or remind) participants that, although you won’t be asking for their feedback on this activity (due to time constraints), you will be asking them for their feedback in following weeks.
While participants are not required to submit feedback for every activity, it’s important to remind them that you welcome their feedback or questions throughout the course. Make sure participants know how to contact you privately (via email?) if they prefer.
Check in with the team facilitating Week 2’s activities. Post a message in the planning forum for the Diversity of Learners team to encourage them to get started (if they haven’t done so already).
End of Week 1
Connect with your co-facilitator about the work for the week ahead and divide the labour. Keep in mind that one of you will need to write the upcoming week’s Introductory post, with an overview of the theme topic and an outline of the work ahead for participants.
Launch week 1’s Weekly Journal Share forum thread with a starter post for facilitator and participant nuggets. Then, add your own post with your reflective thoughts, nuggets, and examples related to Facilitation Skills and Strategies. Invite participants to contribute nuggets from their Learning Journals as well as self-assessment thoughts (including any conclusions or comments from their self-assessment rubrics.)Here’s an example of a nuggets starter post:
Post Example: Week 1 Journal Share
By Sylvia Riessner – Friday, 2 October 2015, 6:53 AM
This is a nuggets starter post for everyone’s journal share for Week 1.
Please reply to this thread when posting your journal share for this week. This will have the effect of collecting all the posts each week.
A quick reminder from the Handbook:
“…each week, review your journal and extract an aha moment. This could be a quotation from a reading or forum that made something clear or made you smile. Also, share some insights you gleaned from self-assessing your participation each week (using the FLO Rubric).”
… and here’s an example of a reflective nugget that a previous facilitator shared:
Post Example: Facilitators’ Weekly Journal Share
By Leonne Beebe – Sunday, 2 October 2016, 5:12 PM
Week 1 of any course, especially an online course, is exciting and challenging. Seeing the FLO online community beginning to develop and learning of participants helping each other is motivating and rewarding. However, one of my “imaginary facilitator friends” known as Anxious Annie has a habit of showing up in Week 1 and hanging around. She keeps asking me, “What about those who haven’t posted by the suggested timeline? What about those who haven’t started working on their week’s planning yet? What about those who haven’t posted their journal yet?” Then, I remember facilitating is not about me; it’s about helping the participants as they need and ask for help. There is a saying that RRU folks often refer to called “Trust the process.” As I gain more experience and confidence with facilitating, the more I am able to trust the process and ignore Annie. Besides, it’s only 5:00 Sunday afternoon. There is lots of time left…
A question that faced me this week was, “What do you do when a team member leaves the team/course (for whatever reason)?” and “How do you best support the team member who is left to facilitate that week’s activities?”
Out of confusion comes clarity,
Leonne
Ensure the Diversity of Learners team is ready for the week ahead. If team members haven’t yet responded to your post in their planning forum, you may need to contact them more directly. Let them know how and when you will be available to help them.
Your shifting role: from Facilitator to Guide
Weeks 2 through 5 follow a relatively similar pattern: as co-facilitators, you will post a message at the beginning to welcome participants to this week’s topic and work, and you will post a summary to close the week. Throughout the week, you will monitor discussions and join in as appropriate. Although your guidance may be more hands-on in Weeks 1 and 2, by Weeks 4 and 5 you should find yourself pulling back and encouraging this week’s facilitation team to manage the discussion. Ideally, your participation will always be supportive — but not overwhelming — as you strive to scaffold your participants towards developing good facilitation skills.
Week 2: Diversity of Learners
Figure 4.6
Evening before the week begins
Ensure that this week’s facilitation team has posted an introductory message. The message should introduce the facilitators and the topic. The team should also provide instructions for the week’s activities and a recommended schedule for completion.
Post the week’s overview post (in Open Forum) with a description of activities, etc. to be completed this week.
Your overview post or weekly bulletin is an excellent way to remind participants about what’s happening this week and who’s facilitating what topic. You can mention any key deadlines or other events (e.g. a long weekend) that might impact the flow of the course. You can also use this opportunity to highlight things that went well, or to give credit to someone who shared a great resource or moved a discussion forward in a skillful way.
Here’s an example of an overview post that focuses on regrouping and encouraging participants to dig in to the course again:
Post Example: Post-Thanksgiving Weekend
By Sylvia Currie – Tuesday, 14 October 2014, 7:56 AM
Figure 4.7
Anybody feeling a little out of sorts after a l o o o o n g weekend?
It isn’t unusual for the steady rhythm in an online course to take some effort to get back on track. We all know why this happens, but what do you do about it as a facilitator?
Celebrate those who take initiative and are resourceful. Some of us have jumped in to the Week 3 readings and started conversations. Applause! Note: The actual post included a link directly to the conversations in the Week 3 forum.
Support those who might be struggling. Your facilitation team for this week has been preparing behind the scenes, but is needing a little extra time to launch the activity. (Just know we’re all rootin’ for you, Week 3 facilitation team!)
Suggest something to focus on. How about this? Kelly Warnock from Thompson Rivers University created a Digital Toolbox Wiki to compile tools. What have you used successfully that would you add to the list? Pop your ideas into the forum (linked), and/or edit Kelly’s wiki directly.
Make any necessary adjustments to the plan. This should be an ongoing practice anyway. It’s easy to get too ambitious, especially when plans involve working in teams. What would you add to this list?
By mid-week
Connect with the team facilitating the following week’s activities. Post a message in the planning forum for the team to encourage them to get started (if they haven’t done so already). Let them know how and when you will be available to help them.
Survey/poll participants to determine an optimal time for Week 3’s synchronous session. If possible, schedule the synchronous session so a maximum number can participate.
Ongoing throughout the week
Provide support for this week’s facilitation team as necessary. The co-facilitator responsible for supporting this team should check in regularly.
Monitor and participate in discussions and activities. Check the Open Forum regularly.
Later in the week
Finalize planning for Week 3’s synchronous session. Post the date and time in both the Open Forum and the Schedule.
End of the week
Connect with Week 2’s facilitation team, debrief and thank them for facilitating.
Assist the team in wrapping up their facilitation work. Team members should review and respond to feedback from classmates.
Post Example: How a Facilitating Team Gets Feedback in FLO
This short video describes how one facilitator ensures that facilitation team members get comprehensive feedback, without being heavy-handed or overly directive. A transcript is also provided below.
There are several ways that a facilitating team gets feedback for their facilitation of their activity in FLO. These are before the activity, during the activity, just after the activity, and then in response to their FLIF. Now, before the activity, as their FLO facilitator being assigned to support their team, I try to let them know what they are supposed to be doing, but I try not to be too heavy-handed in how to do it or all of the minute details of what they’re going to be up to and how they’re going to share their roles. So, I let them know I’m a support to them, but I try not to direct too much what they’re going to be doing.
After they launch their activity, I watch how things are going throughout the week as their support facilitator, and sometimes I’ll post in their planning forum to ask some open-ended questions about how they think things are going, and maybe if they think something else needs to be done by them in order to prompt the group or to spur the group on to participate a little bit more in the activity. Again, I try not to be too heavy-handed here, but I do watch and try to ask questions to help the team facilitate behind the scenes as we go along.
Now the facilitation team always asks for feedback at the end of the week from the rest of the group, and they do this through the feedback structures that we’ve provided in FLO. We’ve tried to use different structures every week, so we can show the class just how to use different feedback structures. So, the team, or one of us as FLO facilitators, will ask the rest of the group to provide feedback to that team. The team needs this feedback in order to complete their FLIF reflection activity. So we always really want to encourage the rest of the class to do this and provide meaningful feedback to the facilitating team.
The last way the team gets feedback on their facilitation is individually through the FLIF reflection tool. So, after each person on that team has had a chance to complete the FLIF, then I as their support facilitator will go in, individually, and respond to those pieces in the FLIF. Again, I try to be positive here, but I do try to bring up things that maybe they could have done differently or suggest alternatives. It almost becomes like a little conversation in the FLIF about how things could have gone if they had done something different, and also giving them kudos for what they did that I saw that was going really well. I always invite the person, individually, to contact me after they’ve seen my comments in their FLIF to get even more feedback if they want to talk about something that I’ve said.
So, those are some ways that a team gets feedback in FLO, and I wish you luck in supporting them to have that. Bye!
Explain the FLIF process (Feel, Like, Improve, Feedback) to the team and detail how FLIF can help them structure their reflection. Emphasize the value of completing the FLIF while the facilitation experience is still fresh in their minds. Provide rich, constructive feedback in a timely way. (See The FLIF Facilitation Process in Chapter 3.)
You can use a a semi-structured survey tool to collect participant responses to FLIF. This could be a quiz within the LMS, an external online survey, etc.
Connect with your co-facilitator about the week’s work and divide the labour. One of you will need to write the past week’s summary post, harvesting highlights to which you want to draw attention. And one of you will need to write the upcoming week’s introductory post, with an overview of the theme topic and an outline of the work ahead for participants.
Post a summary of Week 2 in Open Forum. Highlight any issues, surprises, what went well, etc.
Launch this week’s nuggets in the Weekly Journal Share forum. Post a starter thread for this week’s nuggets and add your own reflections, aha moments and other nuggets.
Post weekend reminders for participants in Open Forum. Participants should:
Provide feedback to this week’s team facilitators.
Review their Learning Journals and post their nuggets to the Weekly Journal Share forum.
Week 3: Responsive Facilitation
Figure 4.8
Evening before the week begins
Ensure that this week’s facilitation team has posted an introductory message. The message should introduce the facilitators and the topic. The team should also provide instructions for the week’s activities and a recommended schedule for completion.
Post the week’s overview post with description of activities, etc. to be completed this week.
Here’s an example of an overview post:
Example Post: Week 3 gets going!
Week 3 gets going! by Beth Cougler Blom – Monday, 18 April 2016, 8:54 AM
Hi everyone,
It’s the start of Week 3 and we have the Blue Team – Daniel, Lindsay and Stephanie – at the reins this week as they support the class through our Responsive Facilitation activity. When you click on your Week 3 tab – voila! – after the Week 3 overview information you’ll see a video from Daniel welcoming you to this activity. There is a case to read and the text has been modified in the forum to give you everything you need to start. You will be working on a team so do check in today to see what you need to begin.
Also coming up this week we have a synchronous Collaborate session at 7pm on Thursday night Pacific time. Sylvia and I will be co-facilitating that session and we’d like to invite you to do two small things in preparation for it:
Think about your answer to this question: “What opportunities do you see to make changes to or begin your facilitation practice, as a result of what you’ve learned in this course so far?”
What facilitation-related questions do you have cropping up for you that you haven’t gotten answered yet?
This is an optional but recommended session and it will be interactive (we’re going to try a Liberating Structure) so try to show up a little early to check your technology so we can get going on time. Thank you!
Lastly, thanks to everyone who gave feedback to the Orange team for last week’s facilitation. This feedback from you to the facilitating team each week is imperative for them to be able to reflect well on their facilitation, fill out their FLIF and of course enhance their facilitation practice overall.
Looking forward to our discussions this week!
Beth and Sylvia
Early in the week
Notify participants about Week 3’s synchronous session. Your message should include the session time, access information, and a link to technical support. Re-post a reminder about the session a few hours before it begins.
Later (on the agreed day): Host the synchronous session. Post a brief follow-up report. Post the recording of the session if/when it’s available.
Co-facilitator reviews and responds to Week 2 team’s FLIFs. The co-facilitator responsible for supporting the Week 2 facilitation team adds comments and feedback within each participant’s FLIF and notifies them when it’s complete.
By mid-week
Connect with the team facilitating Week 4’s activities. Post a message in the planning forum for the team to encourage them to get started (if they haven’t done so already). Let them know how and when you will be available to help them.
Ongoing throughout the week
Provide support for this week’s facilitation team as necessary. The co-facilitator responsible for supporting this team should check in regularly.
Monitor and participate in discussions and activities. Check the Open Forum regularly.
Are some participants not as engaged as you expect? Although full participation is ideal, the reality is that people have work, family, and other responsibilities that can cause disruptions in their ability to participate. Do what you can to assist individuals in these circumstances. Offer the opportunity to complete the work before or immediately after an absence, or suggest an alternate assignment or activity.
End of the week
Connect with Week 3’s facilitation team, debrief and thank them for facilitating.
Assist the team in wrapping up their facilitation work. Team members should review and respond to feedback from classmates. Remind team members to complete their FLIF reflection
Connect with your co-facilitator about the week’s work and divide the labour. One of you will need to write the past week’s summary post, harvesting highlights to which you want to draw attention. And one of you will need to write the upcoming week’s introductory post, with an overview of the theme topic and an outline of the work ahead for participants.
Post your (co-facilitator’s) summary of Week 3 in Open Forum. Highlight any issues, surprises, what went well, etc.
Launch this week’s nuggets in the Weekly Journal Share forum. As in previous weeks, post a starter thread for this week’s nuggets and add your own.
You can encourage richer, deeper reflection by sharing your own reflections on experience, and also some examples of how you’ve experienced facilitation during this session. Such examples can make the process of facilitation more visible to your participants — but be careful not to compromise the confidentiality of your participants.
Post week-end reminders for participants in Open Forum. Participants should:
Provide feedback to this week’s team facilitators.
Review their Learning Journals and post their nuggets to the Weekly Journal Share forum.
Week 4: Collaboration
Figure 4.9
Evening before the week begins
Ensure that this week’s facilitation team has posted an introductory message. The message should introduce the facilitators and the topic. The team should also provide instructions for the week’s activities and a recommended schedule for completion.
Post the week’s overview post with a description of activities, etc. to be completed this week.
Early in the week
Co-facilitator reviews and responds to Week 3 team’s FLIFs. The co-facilitator responsible for supporting the Week 2 facilitation team adds comments and feedback within each participant’s FLIF and notifies them when it’s complete.
By mid-week
Connect with the team facilitating Week 5’s activities. Post a message in the planning forum for the team to encourage them to get started (if they haven’t done so already). Let them know how and when you will be available to help them.
Connect with the co-facilitator and decide on a course wrap-up event. You may decide to use a synchronous or asynchronous format to wrap up the course.
If you are hosting a synchronous session in Week 5: Survey/poll the participants to determine an optimal time for Week 5’s synchronous session. If possible, schedule the synchronous session so a maximum number can participate.
Ongoing throughout the week
Provide support for this week’s facilitation team as necessary. The co-facilitator responsible for supporting this team should check in regularly.
Monitor and participate in discussions and activities. Check the Open Forum regularly.
Later in the week
Finalize planning for Week 5’s wrap-up event. If you will be hosting a synchronous session in Week 5, post the date and time in the Open Forum.
End of the week
Connect with Week 4’s facilitation team and debrief, thank them for facilitating.
Assist the team in wrapping up their facilitation work. Team members should review and respond to feedback from classmates.
Remind team members to complete their FLIF reflection.
Connect with your co-facilitator about the week’s work and divide the labour. One of you will need to write the past week’s summary post, harvesting highlights to which you want to draw attention. And one of you will need to write the upcoming week’s introductory post, with an overview of the theme topic and an outline of the work ahead for participants.
Post your (co-facilitator’s) summary of Week 4 in Open Forum. Highlight any issues, surprises, what went well, etc.
Launch this week’s nuggets in the Weekly Journal Share forum. Post a starter thread for this week’s nuggets and add your own reflections as in previous weeks.
Post week-end reminders for participants in Open Forum. Participants should:
Provide feedback to this week’s team facilitators.
Review their Learning Journals and post their nuggets to the Weekly Journal Share forum.
Week 5: Reflective Practice
Figure 4.10
Evening before the week begins
Ensure that this week’s facilitation team has posted an introductory message. The message should introduce the facilitators and the topic. The team should also provide instructions for the week’s activities and a recommended schedule for completion.
Post the week’s overview post with a description of the activities, etc. they need to complete this week.
Early in the week
Co-facilitator reviews and responds to Week 4 team’s FLIFs. The co-facilitator responsible for supporting the Week 4 facilitation team responds to Week 4 team participants in a message or email.
If you are hosting a synchronous session in Week 5: Notify participants about this week’s synchronous session. Your message should include the session time, access information, and link to technical support. Re-post a reminder about the session a few hours before it begins.
Later (on the agreed day): Host synchronous session. Post a brief follow-up report. Post the recording of the session if/when it’s available.
Ongoing throughout the week
Provide support for this week’s facilitation team as necessary. The co-facilitator responsible for supporting this team should check in regularly.
Monitor and participate in discussions and activities. Check the Open Forum regularly.
Later in the week
Conduct course wrap-up event. Use an asynchronous or synchronous tool to summarize and celebrate the participants and participation. Provide information about follow-up courses (including OER courses in the FLO “family”).
End of the week
Connect with Week 5’s facilitation team, debrief and thank them for facilitating.
Assist the team in wrapping up their facilitation work. Team members should review and respond to feedback from classmates.
Remind team members to complete their FLIF reflection.
Connect with your co-facilitator about wrapping up the course and divide the labour. One of you will need to write the past week’s summary post, harvesting highlights to which you want to draw attention.
Post co-facilitators’ wrap-up post in Open Forum. Provide a summary of Week 5, highlighting issues, surprises, what went well, etc. Add a wrap-up summary of the course. There are many different ways you can draw the course and community to a close. The example below shows how a facilitator used a mind mapping tool to acknowledge participants’ contributions and recognize the learning that took place. Read the forum post and view the mind map; you may wish to try Coggle yourself!
Post Example: Closing our Community – Thank you all!
By Beth Cougler Blom – Friday, 6 May 2016, 4:20 PMEveryone, it has been such a pleasure for Sylvia and me and Leonne to work with you all over the last five weeks. What a group! This has been a rich experience for all of us, and we hope that it has been for you as well.
Some final details:
Thanks to all of you who have posted your Looking Back Looking Forward reflections and artifacts. (It’s not too late if you haven’t had a chance to contribute something.)
…….
And one last thing…Sylvia Riessner and I have worked over the past day to encapsulate some of our group’s many varied and wonderful thoughts and quotes on facilitation, that you’ve shared throughout the course. We present them back to you here in a Coggle – enjoy!
Figure 4.11
Launch this week’s nuggets in the Weekly Journal Share forum. Post a starter thread for this week’s nuggets and add your own as in previous weeks.
Post end-of-course reminders for participants in Open Forum. Participants should:
Provide feedback to this week’s team facilitators.
Review their Learning Journals and post their nuggets to the Weekly Journal Share forum.
Thank participants and request final feedback. If you are using a survey and/or final course evaluation, emphasize the value of participant feedback, provide explicit directions about where to find the feedback forms and how to submit them.
Review the survey and/or course evaluation feedback. Now is the time to make a note of any confusing directions, outdated resources, or ineffective activities and ensure this information is available before you host the course again.
Conduct a debrief session for all involved: co-facilitators, support personnel and others. Share the feedback from course evaluations and surveys, and celebrate successes. Use this information to note changes you’d like to make when you offer this course again.
Devise a strategy to keep in touch with participants. Ensure you at least have email addresses so you can share news about additional FLO courses and other, related professional development offerings. If possible, engage past participants in a community of practice or network of shared resources and practitioners to encourage ongoing professional growth.
FLO Fundamentals Task List
6
Course Date:
Facilitators: __________________________________ and _______________________________
Several weeks (or months) before the course begins
Contributions are not related to the topic or readings.
Remarks tend to be short.
Contributions offer new insights and prompt further discussion.
Ideas from the readings are incorporated.
Demonstrates understanding of readings and contributions of others.
Takes the discussion to a deeper level by asking questions or drawing conclusions.
Fosters the development of online community.
Rarely acknowledges others’ contributions, or does so without building on their ideas (e.g. “I agree”).
Responds only when directly questioned.
Tends to post from a personal perspective.
Demonstrates awareness of the role of community in learning.
Regularly responds to other participants’ postings.
Provides feedback each week to team facilitators.
Reaches out to help other participants when possible.
Postings in forums are inclusive.
Substantial and frequent contributions weave together and extend ideas.
Frequently attempts to motivate group discussion.
Engages in the activities.
Infrequent participation.
Little or no communication with peers or co-facilitators.
Absent without communicating schedule or unexpected situations.
Participates in each activity (or informs others of an inability to participate).
Provides feedback to team facilitators.
Contributions are timely, considerate, and aim to advance learning and facilitation skills.
Encourages others to participate, develops/demonstrates facilitator skills.
Reflective practice
Reflections on the workshop experience and activities are infrequent or very brief.
Regularly shares selected journal items that highlight personal learning and insights.
Notices key ideas and strategies from both readings and colleagues, and considers implications for practice.
Summary table for weekly participation (participant role)
This summary table is a useful way to record your weekly participation as outlined in the Rubric.
Calculate your weekly score (1, 2, or 3) for each criterion over each week.
What are your calculated weekly total scores? (Maximum weekly total is 12)
Reflect: What are your critical strengths and areas needing improvement?
Weekly Participation Self-Assessment
Relevance
Fosters the development of online community
Engages in the activities
Reflective practice
Week Total (add each row)
Week 1
___ out of 15
Week 2
___ out of 15
Week 3
___ out of 15
Week 4
___ out of 15
Week 5
___ out of 15
Criteria Total (add each column)
___ out of 12
___ out of 12
___ out of 12
___ out of 12
___ out of 60
The FLIF Facilitation Process
8
The FLIF (Feel, Like, Improve, Feedback) survey is a valuable way to help your participant facilitation teams debrief their facilitation experience. As each team completes their facilitation week, you can strongly encourage them to complete the 6-question FLIF survey (see below). You can assist the team with this reflection by modelling the FLIF process yourself.
The questions posed in the FLIF are:
How do I feel about the session? Reflect on the strategies you used to facilitate and their impact on participants. Do you feel participants achieved the learning outcomes? How do you know?
What do I like about what I did?
Think about the aspects of your mini-session that you felt good about.
What do I want to improve or do differently?
Consider what you would like to do better next time you are in a facilitation role like this.
What were the key points about the feedback I received from my participants about my facilitation?
Review the feedback you received from your participants. What conclusions can you synthesize? What are the take-away ideas you’ll want to consider for next time?
How will this facilitation experience impact my teaching?
What will you take away from this experience that you can apply to your own courses?
Are there some additional points I would like feedback on?
Are there any specific aspects of your facilitation experience you’d like your course facilitators to respond to?
The survey can be developed using a semi-structured survey tool (e.g. an LMS quiz), or in a less-structured way (email or private forum).
When team participants have completed the FLIF, be sure to provide them with timely and constructive feedback, and encourage them to respond to their own team feedback in a similar way. Conclude your response with an open invitation for the participant to contact you with any questions about your feedback, or any related topics they wished to discuss with you.
Explanatory notes for participant facilitators
A strong element of the FLO Fundamentals course is critical reflection. Throughout the course, you are asked to pause, take note, examine, look forward. When you complete your mini-session facilitation, we ask that you complete a reflective survey activity referred to as FLIF, in which you structure your reflections around how you Felt, what you Liked, how you might Improve, and how you might incorporate any Feedback you received. Your FLIF responses should be honest and personal; they are shared only with course co-facilitators.
Although FLIF responses are generally private, we offer you two examples below of how others have responded to the FLIF questions:
FLIF: Facilitator 1’s Responses
Question 1: How do I feel about the session? Reflect on the strategies you used to facilitate and their impact on participants. Do you feel participants achieved the learning outcomes? How do you know?
I feel good about the activity we developed although we’ve had a few hiccups along the way (not unexpected). We had a dual purpose for this minisession – not only did we want to guide the participants in an exploration of the opportunities and challenges faced by adult learners online, but we also wanted to clearly demonstrate the process of facilitating a mini-session in FLO. I’d say we were successful in the 2nd but not, perhaps, as successful in the 1st. Based on the feedback and the summaries and the one reflective response I’ve seen so far, not everyone has accomplished the trickiest part we were trying to help them achieve.
2. What do I like about what I did? Think about the aspects of your mini-session that you felt good about.
I think we did well in terms of modelling the process, and sharing our planning session debates/ideas, including the difficult task of dividing up the workload. I think the GoogleDocs worked well.
3. What do I want to improve or do differently? Consider what you would like to do better next time you are in a facilitation role like this.
I think I would try to find a different way to encourage more discussion between team members; I feel that the way we structured the group work meant there wasn’t a real crystallization of ideas within each group. It seemed to be more of a sharing of individual responses to the questions. I also think that I wouldn’t double-post the milestone date in the instructions and in the Events Calendar. Made for too much work and difficult to change both places when we had to flex the timeline.
4. What were the key points about the feedback I received from my participants about my facilitation? Review the feedback you received your participants. What conclusions can you synthesize? What are the take- away ideas you’ll want to consider for next time?
Not all the feedback has been posted yet but, from what was there, participants found the instructions clear and the activity worthwhile.
5. How will this facilitation experience impact my teaching? What will you take away from this experience that you can apply to your own courses?
Demonstrating a mini-session was a great way to make me more aware of how/why I do the things I do — that metacognitive perspective is really powerful. Sometimes when I facilitate on my own, I don’t take the time to reflect on the “why” and “what for” questions. I’ll put up “Post-its” on my bulletin board to remind me in the future.
6. Are there some additional points I would like feedback on? Are there any specific aspects of your facilitation experience you’d like your course facilitators to respond to?
Not that I can think of at this time. Thanks!
FLIF: Facilitator 2’s responses
1. How do I feel about the session? Reflect on the strategies you used to facilitate and their impact on participants. Do you feel participants achieved the learning outcomes? How do you know?
I feel that the activity went fairly smoothly and that participants achieved the learning outcomes. I do like to balance things out in an online course so that some weeks aren’t high volume on the forum posts and too chock full of synchronous activities. However, this week felt very quiet. Then late in the week (and weekend) when the summaries were posted I felt very reassured that things were coming together. So I think it was just a little facilitator angst because by all reports people were very engaged — it just wasn’t as visible.
2. What do I like about what I did? Think about the aspects of your mini-session that you felt good about.
I like that the instructions were clear enough that everything managed to just get on with it. I was delighted to see how quickly everyone signed up for their team groups. During our planning, Facilitator 1 and I focused on keeping everything very streamlined without too many layers. Group work is already a huge layer that requires a lot of time for coordination! I think we achieved that. I also like how group summaries, as a way of sharing back, can really highlight important aspects of the reading as well as individual experiences.
3. What do I want to improve or do differently? Consider what you would like to do better next time you are in a facilitation role like this.
I’m always hesitant to mess with the timeline set out at the beginning of an activity. There are so many demands on our time as educators, so it shouldn’t be a surprise when some people can’t quite squeeze in what they need to do by the published date. The important thing is that delays and struggles are communicated to all participants. Having said that, we did make a decision to shift the completion dates and times to accommodate one team group. When I review everything more closely now, I don’t think I would have done the same thing. For one, asking everyone to attend to new admin details adds noise to the workshop right when everyone is focused in on their projects. Also, I remember what it’s like to be on the receiving end of deadline shifting and having mixed feelings about it (Now that I have more time should I spend more time?) Plus as a facilitator, it was a bit of a scramble to adjust dates in the calendar and elsewhere.
4. What were the key points about the feedback I received from my participants about my facilitation? Review the feedback you received your participants. What conclusions can you synthesize? What are the take- away ideas you’ll want to consider for next time?
The feedback is still rolling in. I love that people noticed what didn’t happen (glitches, confusion about what to do, etc.) and that they felt supported. Alignment of the activity with the learning outcomes was also noticed. This is a bonus because that observation is in itself a learning outcome 🙂
5. How will this facilitation experience impact my teaching? What will you take away from this experience that you can apply to your own courses?
Most of my current work is related to helping others learn how to facilitate. This mini-session had a dual purpose — the topic itself (adult learners online) and modelling a mini-session for the upcoming weeks. One struggle with FLO has been finding the best way to convey the expectations and (flexible) possibilities of facilitating a mini-session. I’m excited about the potential of this format for future FLO workshops.
6. Are there some additional points I would like feedback on? Are there any specific aspects of your facilitation experience you’d like your course facilitators to respond to?
While the feedback so far indicates that participants felt supported, I wonder if more facilitator presence perhaps in the form of check-ins would have been appreciated.
Chapter 5: FLO Design
V
FLO Design
9
Synopsis / Abstract
Title: Facilitating Learning Online (FLO) Design
Purpose: This course is intended to help participants develop knowledge and skills in designing effective online learning spaces and activities.
Mode: A facilitated online course that involves asynchronous and synchronous learning.
Length: Four consecutive weeks.
Expectations – Facilitators: FLO facilitators provide ongoing guidance and support throughout the course, to broaden awareness and understanding of design theories and pedagogical practices, and to develop the online learning design capabilities of each participant.
Time Requirements for Facilitators: Time to prepare the course before the start date will vary depending on the facilitators’ skills with navigating and editing the course learning management system. During the course, facilitators can expect to spend approximately 15 hours per week, potentially more in the first week and in the fourth week (due to organizing and hosting the showcase sessions). First-time hosts may require more time. Facilitators should expect to be available to the course on a daily basis.
Expectations – Participants: Participants are expected to participate actively and collaboratively throughout each week, exploring design ideas, developing their online unit designs, and participating in weekly Studio sessions to give and receive constructive feedback.
Assessment: Participants are encouraged to use a self-assessment FLO Design rubric, augmented by a selected quality framework, to monitor their developing skills and their design project. Weekly Studio sessions provide opportunities for the FLO Facilitator (and peers) to provide constructive feedback on the evolving designs.
Estimated Time Required for Participants: Participants should expect to spend approximately 6-8 hours for course activities during each of the four weeks. Those with no prior online teaching and learning experiences can expect to invest more time. Additional time may be needed to prepare for the final showcase sessions.
Primary Resource for Facilitators: All materials for the FLO Design course are included in an Open Educational Resource (OER) from BCcampus, available for viewing or download. This guide is based on the 2019 version of the course.
What is FLO Design?
Facilitating Learning Online Design (FLO Design) is a four-week course that offers participants opportunities to explore different approaches to developing effective online courses and/or learning experiences. Participants are introduced to a wide range of ideas about how people learn, best practices and recommended pedagogies to engage and support online learners, and several respected quality and accessibility frameworks to guide their design efforts.
The course is practical and developmental; participants are asked to identify a specific design project and can work alone or with others to design a short unit of learning (unit = 2-3 weeks of an online course or equivalent) and a sample online learning activity to demonstrate how they will engage learners online.
More Details
Although all FLO courses emphasize reflective practices and participatory, often collaborative, learning with a practical focus, FLO Design goes a step further by building in weekly Studio design forums. FLO Facilitators offer expert advice and suggestions, but also acknowledge the diverse range of skills and experiences that learners bring and invite them to help each other clarify and develop their design projects.
Learning Outcomes
After participating in, and contributing to, learning activities throughout FLO Design, you should be able to:
Discuss important elements of online learning design, including quality, accessibility and design guidelines.
Create a plan for a short unit of online learning that includes a prototype learning activity.
Critically reflect on your learning and progress in developing online learning design skills and knowledge.
Explain design choices and pedagogical perspectives applied to a specific learning design project.
Participants
Participants who take FLO Design are typically new online course designers/instructors and/or experienced instructional or learning designers, as well as instructors and program/course planners. The course offers participants an opportunity to review the theory and practice of online learning and teaching, to explore different design approaches and quality frameworks, and to practice important planning and design skills.
Technology: Essential and Recommended
Essential:
A learning management system or content management system to hold the asynchronous course content and activities.
A web conferencing platform such as Blackboard Collaborate Ultra, Adobe Connect, WebEx, or other similar software to host synchronous activities and content. Ideally, the platform would include more collaborative tools that allow you to share visual content or write on a collaborative whiteboard, etc.
All facilitators should have a strong Internet connection, a webcam and a headset with microphone.
Recommended:
Suggestions for drawing or charting tools that participants can use to create a visual of their design to share with others.
Access to a shared collaborative space such as Google Docs for both facilitator and participant use.
An annotation tool can be helpful to allow specific comments to be linked to the relevant portion of the design plan (e.g., Marginalia within Moodle forums).
The Course Content and Layout
The FLO Design Open Learning Resource (OER) from BCcampus is a complete four-week course with a comprehensive collection of design readings and resources and learning activities. Within the OER course on the SCoPE site, resources are organized into tabbed pages. The core structure includes tabbed pages for:
the Hub
Pre-Course Orientation (optional)
Week 1: Getting Started
Week 2: Sparks to Design
Week 3: Projects Under Construction
Week 4: Showcase Designs
The Hub
The Hub contains content/activities that are referred to throughout the course, such as:
Acknowledgements – you may choose to embed acknowledgements of funders or contributors, or recognize traditional territories (increasingly done in BC, Yukon and other parts of Canada).See the 2018 OER Pulling Together: Foundations Guide's chapter on Acknowledging Traditional Territories for an example of how to write an acknowledgement.
Course Handbook – similar to a course syllabus, the handbook explains how the course is designed and the kind of teaching and learning to expect. In addition, the Handbook includes a rubric to guide self-assessment, tips to help participants track progress and an explanation of course licensing and access.
Before offering FLO courses, you may find it helpful to refer to your institution’s policies on privacy and confidentiality in terms of online courses and participant privacy.
FLO courses are built on a model that relies on collaboration and honest, constructive exchanges to help all participants learn and develop. Facilitators and participants should discuss the expectation and importance of privacy.
Some privacy and confidentiality rules you may wish to adopt:
Always seek permission to share content posted by participants.
When using social media and other online services to complete activities, ensure you are familiar with the levels of privacy available and how the information will be stored and shared. Communicate this information to the participants.
Let participants know who else has access to this course (e.g. participants, facilitators, assistants, website administrators, etc.).
You may wish to establish Vegas rules, i.e. what happens in the course, stays in the course.
Course Schedule – a detailed, week-by-week explanation of learning events and tasks to help participants stay on track.
Announcements and Open forums – the Announcements forum is a place for facilitators to share important course notices, while the Open forum is an informal space where participants are encouraged to post questions or ideas.
Weekly Reflections forum – participants are asked to respond to a reflective question each week and their posts are gathered in the Hub.
FAQs – Tech Tips and Tools – a searchable collection of help items and tutorials.
Visuals Gallery – visuals that explain some core learning activities and demonstrate mapping learning designs.
HIDDEN resources: for Facilitators only, may include a private discussion forum, a folder to store documents and presentations to customize for weekly synchronous sessions, etc. It can be useful to embed a page listing the changes being made to the course content prior to (and sometimes during) the course delivery.
Weekly Tabbed Pages
Each week’s pages include at least a:
detailed, editable checklist,
topic-focused Overview book of readings and resources,
Studio forum to support collaborative design work,
link to the Weekly Reflections forum (contained in the Hub).
Note: If you decide to offer a pre-course orientation, you’ll add a tabbed page that contains resources and activities to help participants navigate the online course and complete essential tasks.
A Studio-based Design Approach
A unique aspect of the FLO Design course is the use of weekly collaborative Studio forums to encourage participants to share their emerging designs and to review constructive feedback provided by the FLO Facilitators (and contributed by other participants).
Participants contribute questions, thoughts, emerging designs, examples, and provide feedback to the work of their colleagues in the course. Each week’s Studio forum provides a quick reminder of design tasks.
Post Example: Week 2 Studio Forum
Figure 5.1
The weekly studio forums are a place where you can share your progress, your questions, your challenges with others.
For this second week of FLO-Design, we ask that you post a topic thread indicating:
your chosen instructional (learning) design approach (see the Week 2: Overview book),
any elements from Instruction (Learning) Design stories shared in the synchronous Blackboard Collaborate session that you plan to integrate
an update on your progress in developing your Design Project Plan
the drawing tool you’ve selected to illustrate parts of your plan (or an alternative visual method to share your emerging design)
any questions you have about how to move forward?!
Please take the time to review and respond to at least two other posts in the Studio Forum.
Assessment of Learning
FLO Design offers a developmental learning opportunity; there are no marks or grading for design projects and participation.
Participants monitor their own progress in relation to the FLO Design Learning Outcomes using the self-assessment rubric (included in the Course Handbook) AND by reviewing the detailed feedback from FLO Facilitators on their emerging learning design each week in the Studio forums.
The rubric uses five criteria and a three-stage developmental structure: Level 1: Beginning; Level 2: Developing; Level 3: Accomplished. You can review the detailed elements for each criterion in the example shared at the end of this chapter (see FLO Design Self-Assessment Rubric).
FLO Facilitators provide constructive feedback based on each participants’ stated design goals, and they are also guided by a course quality framework (see Week 3 Overview, Elements of Quality).
A final self-assessment activity in Week 4 encourages participants to reflect on and share their progress and to look forward to how they will apply what they’ve learned.
Facilitator Task List: What You Need to Do Before, During and After the Course
The successful hosting of FLO Design requires an organized approach to planning and facilitation. A detailed facilitator task list has been developed for co-facilitators to support a successful delivery of the course.
See the FLO Design Task List to review the detailed facilitator tasks alongside the following explanations.
Before the course begins:
Review the FLO Design Handbook and Schedule (in the Hub page): The Handbook and Schedule will help you understand the curriculum and intended flow of learning in the course. Spend some time and reflect on your facilitation approach and how you will manage the weekly Studio forums described in the Handbook.
Review each week’s Overview book to ensure that the content reflects your institution’s guidelines and parameters related to online course design. For example, if you have specific accessibility checklists, design standards, or policies related to inclusive design or indigenization, these should be added to the course.
Design Choices
Do you want to offer a pre-course orientation week?
Consider your participants, particularly their previous experience with your chosen online learning environment and tools. Would they benefit from a Pre-course Orientation Week?
Do you want to offer challenge activities and a digital badge?
Figure 5.2 FLO Design Explorer Badge
Offering specific tasks for participants who are new or inexperienced with your chosen learning environment can help them get started with learning new skills. You will find challenge activities in the OER that you can customize.
Do you want to try the interview activity in Week 1 instead of asking participants to post a personal introduction and briefly describe their design project ideas?
The interview activity (see the Facilitator Resources folder) helps participants clarify and extend their design project ideas, develops connections among participants and can reveal special knowledge / experiences / skills that each participant could contribute.
If you decide on the Interview activity, make sure to send out information to participants before the course starts so they have time to think through what they might ask or answer.
The risks of using this activity are the amount of time it can take for each pair of learners as they need to interview each other and post the results to the Studio before the end of the week.
Encouraging reflective practices: Do you want to pose a specific reflective question each week or ask participants to share nuggets from their personal learning journals to the Weekly Reflections forum?
Posting a new question mid-week allows you to direct the attention of participants to emerging design or related issues.
Encouraging participants to share nuggets from their personal learning journals can introduce new perspectives and unexpected ideas that stimulate creative thinking.
Make sure that the description field of the Weekly Reflections forum describes the approach you have chosen.
Encouraging Critical Thinking through Reflection
Evidence has shown that learning is improved when participants become more aware (metacognition) of how and what they are learning. FLO courses integrate structures to promote both individual and collaborative reflective practice.
We ask participants to keep a personal learning journal to track their understanding, their “aha” moments, and their ongoing questions and responses to theories and ideas presented during the course. We also ask them to share nuggets or a brief synopsis each week in a collaborative forum so they can learn from each other and engage in further exploration and critical thinking.
The OER of FLO Design uses a different approach to try to deepen the level of reflection and to encourage more meaningful discussions. Each week, a facilitator would pose a “thought” question to direct each participant’s attention to a core concept or important theory/practice. Then they ask participants to NOT question or comment on each other’s reflective posts; instead, they asked participants to pursue relevant reflections within the Studio forums so the discussions could directly inform/improve the emerging designs.
Each approach has potential benefits; choose what you believe will be of most benefit to your participants.
Do you need to offer starter ideas for design projects or do you want to rely on the design challenges presented by your participants?
Review the topics and resources offered in the Week 1 Design Project book. You can customize the topics and resources or omit the book and rely on your participants.
Do you have a back-pocket full of stories of instructional or learning design strategies you can share or do you have colleagues who are interested in sharing? How will you “spark” new ideas or inspire participants to reflect on their projects and intended approach?
Look ahead to the Week 2 Sparks to Design Forum and plan how you will find/share stories of instructional/learning designs to inspire participants.
In one version of FLO Design we invited several instructional/learning designers to share a story of an interesting design project. The facilitators (we called them “explainers”) participated in the Week 2 Sparks synchronous session and shared some slides as they described their design and pointed out what they learned about designing from the experience.
The explainers also agreed to participate asynchronously by responding to questions about their stories in the Sparks forum. Some of the explainers were able to share their story for the OER; others couldn’t due to confidentiality considerations.
Feedback: “The Collaborate sessions, especially the Explainers with the attached forum, was very useful. They made “Design” real and applicable, and they were available after in the forum to further answer or explain their presentations” Jan.2017
How can you help new participants to navigate the learning space and find the resources they need quickly? Review the links and dates in the materials for the start of the course (pre-course orientation page, the Hub, Week 1).
Add hyperlinks to your first weeks in the detailed Course Schedule page (in the Hub) and in your facilitator posts in various forums. As the participants become more comfortable with the location of activities and resources, don’t do this as often. Provide ‘scaffolding’ that encourages participants to become more self-directed and active in their learning.
During the course
Provide frequent opportunities for participants to express how they’re feeling about their learning and progress in the course. Be as accessible and responsive as you can to address frustrations before they become problems.
Monitor the progress of each design project and provide feedback relevant to the development focus of each week. Assist participants by asking questions, providing suggestions and guidance.
Week 1: Getting Started
Figure 5.3
Focus: Use your posts to begin developing a sense of community and instructor presence this week. Make sure your Welcome post sets the tone for the week (and the course!).
Participants will need more support and guidance during the first week. Respond quickly but take time to develop their independence by including brief tips, pointing out helpful resources, or connecting them with other participants.
Reinforce the essential tasks throughout the week (i.e., deciding on a design project, whether to work alone or with another participant, and to end the week with an understanding of what’s ahead.)
Interview activity (optional): If you’re using the Interview activity, make sure that participants are connecting with their assigned interviewee. Encourage them to post the results of their interview in the Studio forum in time to allow others to review and comment (and for the interviewee to clarify any misunderstandings).
First synchronous session: The purpose of this session is to launch the course, make sure participants understand the flow of activities and the expectations, and engage them in developing mutual agreements to guide their collaborative learning. Allow time for questions and highlight the ways they can monitor their progress or ask for assistance.
Try to connect directly with each participant as early in the week as possible, including some personal information or humour during your exchanges, so they get a sense of who you are as a person.
Create a tracking system or map the connections you make with participants during the first week so you don’t leave anyone out.
Provide structures to guide collaborative learning: Make sure all participants have reviewed and agree with the course Agreements posted in the Week 1 page (reviewed during synchronous session). Make sure participants have had an opportunity to refine or propose new agreements. These are important in setting the tone and minimizing misunderstandings as the group works together.Group agreements are commonly used by facilitators of community and cooperative projects - see Seeds for Change.
Support participants’ successes: Use the monitoring tools of your online environment to ensure that all participants have visited the essential places and resources. Follow up immediately with any latecomers by offering support and encouragement. Emphasize the importance of getting the essentials accomplished in the first week (see Week 1 checklist).
Posting a detailed summary of design projects at the end of the first week can help participants get a sense of the breadth of experience and ideas within the learning community. Making this visible can reduce the stress many participants feel when they are asked to choose a project and can help develop a stronger sense of community. Here is a simple example:
Summary of Design Projects
Name
Topic-Type
Intended Learners
Willing to Collaborate?
Albert
Re-useable module that focuses on group problem-solving and self-assessment of solutions
Physics students
Yes
Barbara
2 options: Orientation to English Language Studies or Intercultural Competency
1st year students of English Language Studies
–
Brenda
Improve online portion of an existing Intro to Chemistry course
Chemistry students
Yes
Catherine
Blended report writing for Justice
Students in Justice (all have undergrad)
–
Frank
Module for PIDP curriculum development course – accessibility to online learning
Adult learners, some instructors
Yes
Gary
2 options: Research Ethics or English (Close Reading)
Diverse learners
Yes
Week 2: Sparks to Design
Figure 5.4
Focus: Step back a little this week and encourage participants to connect and continue building a sense of community and shared purpose.
Use your forum posts to draw attention to important learning theories or approaches to learning design that are relevant to emerging design choices that participants share in the weekly Studio forum.
By the end of Week 2, participants should have selected a specific design approach (three approaches are offered in the Week 2 Overview).
Provide options for learning more (or reviewing) important concepts in online learning design.
Add comments to forum discussions to draw attention to relevant theories or add links to more information.
Provide complex ideas in structured ways or use digital tools to allow participants to explore easily. The Week 2 Prezi overview is an example of this – Design for Learning
Figure 5.5
Second synchronous session: The purpose of this session is to spark new ideas and encourage participants to think beyond their previous approaches to learning design. Be prepared with interesting examples (and guest presenters, if possible) to broaden the discussions.
Two key discussion forums: Make sure participants notice the purpose of both the weekly Studio forum (for posting on their specific projects) AND the Sparks forum (to host a discussion about the learning design examples provided by the explainers).
The stories and examples shared during the Week 2 synchronous session should be summarized in the Sparks forum so participants can ask further questions during the week. These examples can encourage participants to try new approaches, and to think about their own design choices and how they may affect the learners.
Monitor progress carefully and encourage participants to use the checklists and/or other methods to stay on track. Use nudge posts near the end of the week if participants haven’t identified an approach from the three shared in the Week 2 Overview book.
Make explicit links from emerging designs to theories and approaches: Focus on conversations in the Studio forum. Make sure you provide each participant with detailed, constructive feedback on their emerging design plan. Remember to draw in relevant theories and brief explanations of underlying values and beliefs about how people learn.
We were able to integrate a useful tool called “Marginalia” (a web-based annotation tool) to provide feedback on forum posts.
Marginalia allowed FLO facilitators and other participants to highlight parts of a forum post and add direct questions or comments that were only about that particular phrase or idea. We used the standard forum Reply feature feature to talk about the progress of each design project or to point out important concepts or learning approaches that were being tried.
Week 3: Projects Under Construction
Figure 5.6
Focus: Your facilitation this week will be both broad and deep! Connect with any participants who seem to be struggling while celebrating the “aha” design moments and accomplishments occurring in the weekly Studio. Take your feedback to deeper levels, making specific links between your comments and the FLO Design rubric, relevant learning or design theories or quality guidelines. Always keep the discussions learner-focused by asking questions from this perspective, based on each participant’s original context and learner descriptions.
Maintain your emphasis on participatory and connected learning. Highlight thoughtful comments or questions posed by participants. Encourage any participants who haven’t provided feedback to their peers to do so.
Encourage participants to develop a visual representation of design projects to help make the flow of each unit easier for reviewers to understand. Highlight any examples that participants have shared in the weekly Studio forum.
Third synchronous session: The purpose this session is to help participants overcome any significant challenges in the construction of their unit of learning. Allow time to discuss the purpose of developing a prototype online learning activity. Make sure participants understand that the prototype should reflect their beliefs about how people learn, and help them try out a particular approach or topic while they have a supportive audience who can provide valuable feedback.
Stay calm and carry on: Find ways to lessen the anxiety that some of your participants may be feeling this week. The pace of Week 3 can be hectic as participants are asked to sign up for a Showcase synchronous presentation in Week 4, to continue developing their units of learning, and to develop a prototype learning activity.
Be open to modifying your approach/expectations to adapt to the needs of your cohort. The purpose is to help them develop, NOT to create a “do-or-die” atmosphere.
Why Should I Draw or Map my Design?
The power of images or drawings to make difficult concepts easier to understand has been researched and demonstrated for many years in education. For a short online learning experience like FLO Design where participants are asked to share their ideas and provide constructive feedback, some form of visual or illustration of the core activities and learning approach for each design project becomes important.
The design of each project is changing each week. In addition, the underlying reasons for particular activities, assessment, and approaches are explained in lengthy paragraphs in Studio topic threads. A simple drawing or flowchart can allow participants and facilitators to quickly grasp the overall design and ask cogent questions or provide useful suggestions.
Figure 5.7 Sample Participant Map
Managing the clarity of Studio design posts: Not all participants will recognize the importance of linking back to a core design document and using each week’s Studio forum to post new design thinking or responses to constructive feedback. You can scaffold the process by creating links or inserting explanatory posts that encourage each participant to explain their thinking and highlight changes in their designs from week-to-week.
Post separate summaries that highlight significant changes you observe in the group’s emerging designs. Identify themes and interesting streams of conversations within the week’s Studio.
Encourage peer-to-peer feedback: Find ways to elicit more meaningful posts; don’t accept “that’s great” superficial responses.
Promote the value of the Showcase sessions: As you encourage participants to sign up for Week 4 showcase session(s), mention the value of concise sharing of design ideas. In general, each participant will have a maximum of 10-15 minutes.
Point out examples from elevator pitches or three-minute thesis presentations to show how this skill applies in business and academic fields.
Point participants to the Week 4 Overview for tips on how to plan their presentations.
Week 4: Showcase Designs
Figure 5.8
Focus: Your facilitation this week may involve all your managerial, coordination and inspirational skills. You need to support participants to pull together a final presentation of their design, while asking them to take time to reflect on their experiences and share some of their intended future applications of what they’ve learned. And you want them to participate in a final closing activity and complete a course evaluation survey.
Take time to collect examples, quotes, vignettes from participants to share during a final closing session – whether that be synchronous or a final open bulletin board or video, or simply a final forum posting.
Showcase session(s): Depending on the size of your group, you may schedule more than one Showcase synchronous session. We recommend keeping them to the standard one hour format and allowing only 4-5 presentations per session (to allow time for brief questions and feedback). Remind participants to post their slides, diagrams or visuals of their design and prototype learning activity in the final Studio forum. They can add further explanations or ideas there. Emphasize the importance of having other participants take on the role of the audience to support their peers.
Provide an example and a simple process to encourage those who can’t attend to create and share a screencast or audio recording that explains the final design they are asked to share in the Week 4 Studio forum.
Facilitator(s) and peer feedback: Facilitator(s) will have provided detailed formative feedback and suggestions/questions throughout each week. The final week’s feedback should include a summary and any final observations from the Showcase sessions. Acknowledge the progress each participant has made in designing and explaining their unit of learning to identify areas for growth and to encourage participants to reflect on their initial and future goals for developing and applying their learning design skills.
Encourage participants to take time to review as many final designs as they can and to provide constructive feedback.
You may choose to provide both open and private feedback to your participants for the end of the course. Make sure you refer to the criterion identified in the FLO Design rubric – the relevant learning outcomes and the quality guidelines.
Final reflective activity: Encourage participants to complete the final Looking Back/Looking Forward activity. Draw attention to the previous week’s reflections forum in the Hub and remind them of thought-provoking comments or ideas that were shared during Studio sessions.
Closing the course: An important facilitator role is to draw the course to a close and celebrate learning, connections and accomplishments. If possible, a synchronous celebration provides many opportunities for final discussions and acknowledgements. However, an asynchronous bulletin board or other online space to share final goodbyes can work as well.
During the final week, FLO facilitators will often draw the course to a close with an activity that encourages participants to take a deep breath and reflect on their learning and to think ahead to how they might use what they’ve learned in the future.
This example shows how the activity is structured and shows the use of annotated, opened licensed images and a cloud-based tool to provide an alternate way of presenting the activity.
Post Example: Looking Back, Looking Forward
Figure 5.9
Looking Back
For your final week’s reflections, we’re asking you to review your experiences throughout the workshop. As you flip through your learning journal or review your weekly Reflections-forum postings – what still resonates?
Did you notice a pattern in the way you participated, what engaged you, what confused you?
Looking Forward
And add a forward perspective – looking ahead, how do you see yourself applying what you’ve learned? Can you identify new challenges in online design you’d like to explore?
Describe at least one specific objective for your future instructional (learning) design work.
What steps do you plan to take to ensure that you “make it so”?
We call this activity “Looking Back, Looking Forward” (borrowed from the FLO foundation workshop) and encourage you to try different ways of sharing your final reflections.
Try to post as early as you can so that you can read and enjoy others’ posts.
Here’s an example of a different way to provide the instruction for this final activity – build in Microsoft Sawy.
The final challenge is to try and host a synchronous celebration of learning to close the course. Although valuable for cementing relationships and potential future connections for learning, you may have to consider an asynchronous, digital goodbye.
Post-Course
Participants often feel let down at the end of such intense learning. Consider some options to continue the connection, if possible. Leave part of the course space open so participants can report back on their success or further improvements to their design.
Within an institution, it might be possible to schedule regular check-ins with the Facilitator and interested participants.
FLO Design Task List
10
Course Date:
Facilitators: __________________________________ and _______________________________
Several weeks before the course begins
When (by)
Task
Who?
Status
✔ when complete
Notes
Arrange to have the OER version of the course downloaded (or copied), and added to the learning space you have chosen.
Find a co-facilitator, if possible.
Share and develop Facilitator Task List (with co-facilitator).
Agree on a place / tool to use for planning.
Review OER content and take time to get familiar with the structure, materials, underlying philosophy and design elements.
Identify the synchronous online collaboration tool you want to use for weekly scheduled sessions or informal group meetings.
Review-edit the content to ensure you include your institutional design model and guidelines.
Make sure you are familiar with the technologies you will use and take time to practice.
Identify potential participants. You may also want to develop promotional messages and materials and identify different ways to push out your message to potential participants.
Plan and prepare information you will send out to participants as they register, to help them prepare for the course.
Update Course Schedule.
Plan how you will share stories and examples of instructional design in Week 2.
Design choices – pre-course orientation week?
If yes, set up a separate Orientation tabbed page. Review the contents of the OER resource and modify the content and activities according to your learning space and technical support.
Design choices
Week 1 introduction forum? If yes,make sure to send out notices to participants to encourage them to identify a design project topic / focus before the course starts. Set up an Introductions forum that provides suggestions for introductory posts.
Week 1 Interview Activity (based on OER resources)? If yes, make sure to send out question prompts to help participants prepare before the course starts. Sample questions and interview directions are in the OER. Post a list of interview teams as the course starts.
Design choices – Weekly reflections?
Ask participants to record their reflections each week and post selected “nuggets” to the Weekly Reflections forum. Encourage deeper reflection through open questions., or
Post a weekly reflective topic or specific question to prompt more focused reflections.
A few days before the course begins
When (by)
Task
Who?
Status
✔ when complete
Notes
Make sure all participants are registered, have login and the course information they need to begin.
Prepare and post your introductory videos or resources.
With co-facilitator, prepare slides and plan Week 1 Launch synchronous session.
If you will post reflective questions each week, plan at least 1st week’s question and when to post.
Week 1: Welcome and Design Project
When (by)
Task
Who?
Status
✔ when complete
Notes
Unhide Weeks 2-4 (if you offered a pre-course Orientation)
Day before course begins
Post your welcome message. Include:
tasks for 1st week (link to checklist),
tips on how to navigate the site;
an emphasis on the need to plan and schedule time to work on the course,
a reminder of the synchronous Launch session.
early morning Day 1
Post facilitator(s)’ personal introductions in the Introductions Forum.
Welcome each participant by responding to their introduction.
Day 1 and during week
Monitor participant log-ins and participation. Reach out to offer assistance as soon as possible if you don’t see any activity.
Send out last minute reminders to Week 1 synchronous session.
Record the session and post it afterwards.
Monitor forums and activities; respond quickly to questions and concerns.
mid-week
Post a midpoint summary-nudge post to help participants stay on track.
Include a reflective question for them to respond to by the end of the week (or remind them to share nuggets at end of week).
End of week
Post an “end of week’” summary-nudge post.
Review the essential tasks that should be completed before Week 2 begins.
Try to connect with each participant at least once during the first week.
Encourage participants to post their chosen topic and how they plan to work on their design (alone or with a team) in the Studio Forum.
Make sure to discuss agreements that represent how the group believes they can work and learn together.
Day before Week 2
Make sure participants have indicated (visible to others) whether they will work alone or in a team AND what their design project will focus on.
Week 2: Sparks to Planning
When (by)
Task
Who?
Status
✔ when complete
Notes
Evening before 1st day
Post Week 2 intro:
review what’s ahead (briefly);
emphasize the importance of considering new approaches to design;
link to the week’s task list and Studio.
Before Day 1
Prepare Sparks Forum: either post your own or others’ stories about learning design projects.
Before sync session
Prepare slides for the Week 2 synchronous session to focus on different design stories.
Record and share them afterwards.
mid-week
Post midpoint summary-nudge to help participants stay on track:
include a reflective question for them to respond to by the end of the week in the shared forum.
encourage them to consider different design ideas and select a guiding approach for their own project this week,
encourage them to post more than once in Studio as they define their design ideas.
Provide detailed feedback (primarily questions) on each emerging design.
Emphasize the value of sharing emerging work in Studio.
Near end of week
Post Week 2 summary-nudge:
review the essential tasks that should be completed before Week 3 begins.
share highlights from Studio forum.
Near end of week
Review the posts in the Weekly Reflections forum and post relevant ideas to Studio to allow continued sharing and discussion.
Refer to the self-assessment rubric in the FLO Design Handbook. Encourage participants to track and self-assess their learning / skill development.
Week 3: Projects Under Construction
When (by)
Task
Who?
Status
✔ when complete
Notes
Evening before 1st day
Post the Week 3 intro:
review what’s ahead (briefly).
emphasize the importance of explaining emerging design so peers can provide feedback.
support the use of drawing/charting tools to illustrate emerging designs.
highlight the relevant parts of the Week 3 Overview.
Before sync session
Prepare slides for Week 3 synchronous session. Remind participants to bring challenges or questions.
Record and share it afterwards.
mid-week
Post a midpoint summary-nudge to help participants stay on track:
include a reflective question for them to respond to by the end of the week in the shared forum.
encourage them to review the recorded sync session (if they weren’t able to participate).
suggest they post further questions/challenges in Studio.
remind them of the need to identify prototype learning activity this week.
mid-week (asap)
Post the draft schedule so participants can sign up for one or two Showcase sessions in Week 4.
Promote the value of sharing final designs – explaining their choices and intended learning experiences.
Provide detailed annotations or notes on each emerging design. Encourage other participants to add suggestions and questions.
Near end of week
Post summary-nudge for Week 3:
review the essential tasks that should be completed before Week 4 begins.
share highlights from Studio.
share elements of quality-accessibility models that might be helpful to emerging designs.
Near end of week
Review contributions to Weekly Reflections forum and post relevant ideas to Studio to allow continued sharing and discussion.
Week 4: Showcase Projects
When (by)
Task
Who?
Status
✔ when complete
Notes
Evening before 1st day
Post the Week 4 intro:
review what’s ahead (briefly).
emphasize the importance of participating in Showcase sessions.
review schedules – remind them of the need to post final designs in Week 4 Studio.
promote the value of explaining pedagogical choices and supporting peers during presentations.
Before sync session
Coordinate sign-up and scheduling of presentations.
Host Showcase sessions; record and share them afterwards for those who couldn’t participate.
Post mid-week summary:
share highlights from Showcase sessions.
schedule final Celebration sync session, if possible.
remind them to check the Week 4 checklist items for final course completion tasks.
encourage the use of design rubric from the course Handbook.
point out the final feedback survey to be completed at the end.
End of week
Post the final summary and good-bye. Offer options for ongoing contact, if desired.
Identify when the final Facilitator feedback on designs will be available.
Celebrate the successes and draw the course to a close.
After the course
When? (by)
Task
Who?
Status? ✔ when complete
Notes
Review the survey and/or course evaluation feedback.
Schedule and host a debrief session for facilitators and any other support personnel.
Update the course design and resources and/or provide notes for future course facilitators.
FLO Design Self-Assessment Rubric
11
To help you self-assess your learning progress in relation to the Learning Outcomes and the focus on collaborative learning and planning, the rubric identifies different criteria to apply to your participation and project development.
FLO Design Rubric
Criterion
Level 1: Beginning
Level 2: Developing
Level 3: Accomplished
Structure of Design Project Plan
Elements of plan seem disorganized.
Difficult to discern how learning is expected to occur.
Little evidence of learner-centred design.
Basic structure is clear and logical.
Descriptions, outcomes and objectives are clearly stated and appear relevant to primary purpose.
Pedagogical choices for learning are evident; elements are aligned with outcomes statements.
Some important principles of quality and accessibility are considered in the Plan.
Plan description contains pedagogical perspective, technological considerations, reasons for prototype activity selection and design.
Plan includes consideration of learner in terms of flexibility, meaningfulness and expectations (time, resources, etc.).
Communication of Plan in Studio
Design Project Plan is presented briefly; little consideration of how to make it easier for audience to understand (language, design, method of presentation).
No visuals.
No, or little, response to questions from participants.
Plan is presented in detail – shows some consideration of how to make it easier to understand.
Plan is augmented with visuals (drawings or images or videos.)
Presenter responds to questions in a timely fashion.
Plan is presented in a concise, easy-to-understand way (visuals are integrated and aid depth of understanding of content.)
Presentor adds audio or video explanations for more complex aspects or to explain pedagogical perspectives or technological choices.
Presenter responds to questions and engages in broader and deeper exploration of design challenges in education.
Feedback on Plan
Superficial feedback responses limited to praise or pointing out minor defects.
Few references to list of online learning elements to consider, or requests for specific feedback from presenters.
Demonstrates appreciative, developmental approach when posing questions or sharing feedback.
Shows consideration of learner perspectives.
Some posts show little evidence of quality, pedagogical considerations in feedback.
Feedback is provided in a timely and meaningful way.
Questions invite further dialogue rather than stating opinions.
Reference made to requested feedback elements, links made to workshop design theory resources or related academic sources.
Participation in Workshop Events /Activities
Sporadic attendance in synchronous sessions or weekly activities.
Limited efforts to participate in discussion.
Shows little engagement in workshop.
Attends synchronous sessions or reviews recordings and posts relevant questions and comments.
Provides clear weekly descriptions of evolving Design Plan elements in Studio Forum.
Participates in weekly Reflections Forum.
Posts insightful or thought-provoking comments or questions in forums.
Responds quickly to support other participants.
Develops a consistent presence as an online community member.
Reflective Practice
Reflections on the workshop experiences and activities are infrequent or very brief.
Regularly shares selected journal items that highlight personal learning and insights.
Integrates learning from setting objectives and/or rubric.
Notices key ideas and strategies from both readings and peers, and considers implications for practice.
Purpose: This course is intended to help participants develop knowledge and skills in planning for, facilitating, and following up after facilitating synchronously online.
Mode: A facilitated asynchronous online course with mandatory and optional synchronous sessions.
Length: Three consecutive weeks.
Expectations – Facilitators: FLO facilitators provide ongoing guidance and support throughout the course and model examples of synchronous online facilitation in three separate synchronous sessions. Facilitators attend and provide feedback on the facilitation skills of participants who are taking the Practicing Facilitator track.
Time Requirements for Facilitators: Time to prepare the course before the start date will vary depending on the facilitators’ skill with the technologies used. During the course, facilitators can expect to spend approximately 15 hours per week; more time may be required to attend Practicing Facilitator sessions in the final week. First-time hosters may need even more time. Facilitators should expect to be available to the course on a daily basis.
Expectations – Participants: Participants are expected to participate fully in course activities, which are a mix of asynchronous and synchronous online activities. There are two role choices (tracks) for participants in this course — Reviewing Participant and Practicing Facilitator — allowing for flexibility in learning outcomes. Participation expectations differ depending on which track participants choose to complete. Those in the Practicing Facilitator track can expect to spend more time.
Assessment: Facilitators attend or review all Practicing Facilitator sessions and provide informal feedback – using a structured template – to the Practicing Facilitator that is open to all course participants. All participants complete a self-assessment rubric at the end of the course specific to the track they chose to complete. Facilitators review these self-assessment rubrics before determining participants’ completion of the course.
Time Requirements for Participants: Participants should expect to spend approximately 6-8 hours for course activities each week. Participants who choose the Practicing Facilitator track or who have little previous experience can expect to invest more time.
Primary Resource for Facilitators: All materials for the FLO Synchronous course are included in an Open Learning Resource (OER) from BCcampus, available for viewing or download. This guide is based on the 2019 version of the course.
What is FLO Synchronous?
Facilitating Learning Online (FLO) Synchronous is a three-week online course that helps people develop synchronous online facilitation skills. Participants learn best practice strategies to plan for, facilitate, and follow up after synchronous online learning events. FLO Synchronous provides participants with opportunities to see and learn from examples of synchronous online facilitation and, if desired, to practice synchronous online facilitation skills in a safe environment. This course is designed for faculty and staff who would like to increase their teaching and facilitation skills within a web conferencing environment.
Participants have the option to engage with the course via one of two tracks: Reviewing Participant or Practicing Facilitator. This flexibility allows people to choose what kind of learning is best for them at the time they take the course. The Reviewing Participant track is focused on reviewing and discussing best practices in synchronous online facilitation, and providing feedback. The Practicing Facilitator track is focused on planning for, and facilitating, a short synchronous online event and receiving feedback.
In a nutshell, the first week of the course is spent exploring how to prepare to facilitate synchronously online. The second week of the course is focused on facilitation skills in online synchronous environments. The last week of the course is focused on following up after facilitating online. It’s important to note that, during the last week of the course, participants who have chosen the Practicing Facilitator track will facilitate a short online session and Reviewing Participants will need to attend Practicing Facilitators’ sessions and provide feedback.
FLO Synchronous works well with 10 or more participants and can accommodate participant numbers into the 20s, most likely with two facilitators.
Learning Outcomes
There are two different sets of intended learning outcomes for the two tracks:
Reviewing Participants track
By the end of the course you will be able to:
Identify effective planning and facilitation strategies for synchronous online sessions.
Provide effective feedback to facilitators of synchronous online sessions.
Explain the importance of evaluation for synchronous online sessions.
Practicing Facilitators track
By the end of the course you will be able to:
Apply effective design strategies to plan for synchronous online sessions.
Lead synchronous online sessions using appropriate facilitation skills.
Use a web-based platform at a basic level to facilitate synchronous online sessions.
Use reflection and feedback gathering to evaluate synchronous online sessions.
Participants
Participants who take FLO Synchronous are typically full- or part-time instructors at post-secondary institutions who are new to teaching online or have already been teaching online for some time and would like to develop teaching skills in the synchronous online mode. Participants may also include those who support teaching faculty, such as instructional designers, educational consultants and learning technologists.
Other potential participants may include graduate students, consultants from the private sector, and trainers employed by for-profit or non-profit organizations.
Technology: Essential and Recommended
Essential
A learning management system or content management system to hold the asynchronous course content and activities.An OER version of FLO Synchronous is available for download for Moodle LMS use from BCcampus, so using a Moodle system may be advantageous
A web conferencing platform such as Blackboard Collaborate Ultra, Adobe Connect, WebEx, or other similar software, to host the synchronous course content and activities. Ideally, the platform would include more teaching-focused tools such as breakout rooms and the ability to write on a collaborative whiteboard, etc.
All facilitators should have a strong Internet connection, a webcam and a headset.
Recommended
Access to a shared collaborative space such as Google Docs for both facilitator and participant use.
The Course Content and Layout
The FLO Synchronous OER from BCcampus is a complete three-week course with a collection of content, activities and resources about facilitating in online synchronous (sometimes called web conferencing) environments.
The course structure itself is divided into four sections:
Hub
Week 1: Preparing for Synchronous Sessions
Week 2: Facilitating Synchronous Sessions
Week 3: Following Up After Synchronous Sessions
The Hub
The Hub is a general section that contains:
Traditional Acknowledgement: This item is optional but it is becoming a common practice in Canada to include in both online and face-to-face courses. It acknowledges the land on which the particular institution sits as the traditional territory of the local Indigenous Peoples. This could be a short paragraph of text or potentially a link to a video from an Indigenous chief or elder extending a traditional welcome. We recommend that you work with your own local Indigenous groups to respectfully craft such an acknowledgement if you choose to include one in your course.
Course Overview: This includes course syllabus information such as a course description, descriptions of the participant tracks and related activities and outcomes, details about the Practicing Facilitator sessions, participation expectations and information about providing effective feedback throughout the course, and information about privacy and confidentiality and the course license.
Course Schedule: This is a week-by-week schedule which is updated with new dates and times for each iteration of the course.
Open Forum: Any participant can post to this forum. This design choice was made to bring facilitator announcements and cafe-type conversations into one place.
A link to a Booking Calendar to allow Practicing Facilitators to book the use of the web conferencing platform.
Links to two web conferencing rooms that will be used by any participant.
Privacy and Confidentiality
Here is an example of the privacy and confidentiality statement that we have included in the FLO Synchronous Course Overview. Consider your own environment and context to create your version:
Understanding privacy
Trust is an essential part of any successful online course. Our learning relies on the exchange of honest, constructive feedback, and we need to agree that our online learning environment will be private and confidential. Always seek permission from the participants to share their posts or content.
If, during the course, you use free-online services or social media to complete course activities, please ensure that you are familiar with the levels of privacy available, how the information will be stored and shared, and that any participants you involve are also aware of these aspects.
Thank you for doing your part.
Access to this course space
This offering is accessible to the course participants, facilitators, special assistants (individuals who are supporting or preparing to facilitate the course in the future) and, occasionally, website administrators whom we may call upon to assist with technical issues and editing. You will continue to have access to the course content and participants’ contributions after the end date, and for as long as this website is supported.
The Hub also contains some resources hidden from participants. These resources are provided for facilitators and may also be helpful when many facilitators from the same institution take turns facilitating the course and want to share resources with each other. Examples of hidden resources include:
A Facilitator Resources Folder to hold lesson plans and slide decks for the three synchronous sessions that facilitators host for participants.
Instructor-only links for the synchronous online platform that you will be using for the course.
Any notes that past facilitators of the course want to keep inside the course for the next facilitators – or future facilitators – to see, such as recommendations for minor or major redevelopments of the course for future iterations.
Weekly Sections
Each of the Week 1 through 3 sections features a poll, pages that describe that week’s activities, details about the live synchronous session being hosted by course facilitators that week, weekly course content, and a discussion forum. Week 3 also includes an upload area so participants can submit their self-assessment rubric, and a course feedback survey.
Course Assessment
As noted above, all participants complete a self-assessment rubric at the end of the course specific to the track they chose to complete.
The rubric details:
The requirements ALL participants need to complete, and
The requirements they need to complete if they are Reviewing Participants, or
The requirements they need to complete if they are Practicing Facilitators.
The rubric is a three-point rubric with the categories of “did not meet requirements,” “met requirements” and “exceeded” requirements. Rubric criterion include the following for all participants:
Participation in the synchronous sessions facilitated by the course facilitators.
Participation in weekly discussion forums.
Participation in weekly activities other than discussions.
As well as (for Reviewing Participants):
Participation in synchronous sessions of Practicing Facilitators.
Giving feedback to Practicing Facilitators.
Or (for Practicing Facilitators):
Participating in synchronous sessions of Practicing Facilitators (note that the requirement is different than for Reviewing Participants).
Giving feedback to Practicing Facilitators.
Leading a synchronous online session
Reflecting on their facilitation of their session.
Participants are tasked with completing the self-assessment rubric (FLO Synchronous Self-Assessment Rubric) by the end of the course and submitting it to course facilitators.The self-assessment rubric references the “Providing Effective Feedback” section in the Course Overview to further illustrate the expectations to participants around what effective feedback should look like.
Facilitator Task List: What You Need to Do Before, During and After the Course
The successful hosting of FLO Synchronous requires an organized approach to planning and facilitation. A detailed facilitator task list has been developed for co-facilitators to support a successful delivery of the course.
See the FLO Synchronous Task List to review the detailed facilitator tasks alongside the following explanations. Note that not all items on the facilitator task list are further explained here, only those requiring some extra discussion and detail.
Before the course begins
Set up the two web conferencing rooms: We advise setting up two web conferencing rooms on your platform of choice because Practicing Facilitator practice sessions and real sessions may overlap, especially with a large class. Decide what type of links you want to give participants for the rooms. For example, for the first synchronous session that course facilitators will facilitate, you might want to give participants an access link that allows them to enter the room from a participant viewpoint only, and not give them access to moderator tools. Later, for the second synchronous session in Week 2, you might want to give them moderator links so you can scaffold their learning to now see things from a moderator’s perspective.
Create a booking calendar: The booking calendar is what everyone in the course will use to book space in one of the two web conferencing rooms to hold practice or real sessions at any time throughout the course. This should be a tool, such as a wiki, that everyone has access to update.
Schedule the three synchronous online sessions that you will lead (as a facilitator) into your calendar: Because there are three pre-planned synchronous online sessions in FLO Synchronous, it is important to pick times for these and book them well ahead of the course in your calendar. Advertise the dates in advance to the participants so they can register for the course because it is part of the course completion rubric to attend at least two of the three sessions.
Create/update the lesson plan and slide deck for the first synchronous session: It is important in FLO Synchronous to model the kinds of synchronous online facilitation skills that we hope participants will be able to learn and practice in the course. (This goes for all synchronous sessions that the facilitators facilitate, not just this first one.) This includes:
Creating and using lesson plans (not just slide decks) to model good design skills.
Creating sessions that model the kinds of sessions we’d like to see participants design and facilitate in the course, i.e. sessions that are interactive, participatory, etc.
Creating and including evaluations or feedback-eliciting mechanisms after each of the synchronous sessions to, again, model what we teach in the course. For example, after this first session we send out a short feedback survey to gather participants’ feedback on the first session.
If you are co-facilitating this course, it is important to plan together with your co-facilitator to prepare for this session. A sample slide deck for this first session is in the OER version of FLO Synchronous, in the Facilitator Resources folder.
Choose and set up the tool for the Video Introductions activity: For course introductions during Week 1, we ask participants to submit introductions by video. This activity serves a two-fold purpose: it helps facilitators and participants get to know each other, and it gives participants a chance to practice and get comfortable with recording and being seen on video.
Choose a tool that will allow participants to contribute short video clips (approx. 90 seconds) introducing themselves, and responding to one or two prompts that you provide.
In 2016/2017 we used FlipGrid as the platform for the Video Introductions activity, which allowed us to embed one grid into our learning management system to house everyone’s videos. Participants’ videos show up together in a grid of thumbnails so you can see everyone in the course at a glance.
Of course, you may have another appropriate tool for this, or the capability for participants to record and include videos within their posts using tools embedded in your LMS. There are many ways to technically achieve this for your course!
It is important for facilitators to model good examples of your own video introductions within this activity. Good” examples include having an authentic and real presence, looking at the camera, not reading verbatim from a script, etc.
The Video Introductions activity also helps us achieve one more purpose within the course. In other FLO courses, such as FLO Fundamentals, we have seen that engaging in an introductions activity in the first week can sometimes take a lot of time when people are excited to begin the course and contribute a large amount of posts. This can sometimes be overwhelming for people, particularly those new to online learning. While FLO Fundamentals is a five-week course, FLO Synchronous is a shorter, three-week course. Asking participants to contribute timed video-based introductions, no longer than 90 seconds each, helps participants limit the amount of time they need to spend on an introductions activity – either contributing an introduction or responding to the introductions of others. While we still want to include introductions as part of community-building in FLO Synchronous courses, shorter video-based introductions allow us to make space for other content and activities that we also need to engage in during that first week of the course.
Decide on Tech Times sessions: Tech Times are informal times that we hold twice in the course – one in Week 1 and one in Week 2 – to allow participants a chance to informally explore and get to know the web conferencing platform that we are using. Tech Times are optional to attend and there is no set agenda. Facilitators do not need a lesson plan to host Tech Times; you simply need to show up at the appointed time and support participants to learn about aspects of the synchronous platform you are using for the course.
Not every participant needs to attend a Tech Time but we’ve found that they can be very valuable for participants who are quite new to web conferencing technology or technology in general. Facilitators should know the platform well enough to host these technology-oriented sessions themselves, but could also invite learning technologist or IT-based colleagues at your institution to support participants during these Tech Times. Tech Times can also be informal opportunities to build community and establish relationships with participants in the course. On a more practical note, Tech Times can also help course facilitators talk informally with participants about which track they might want to be on for the course.
Block time in personal calendars during Week 3: Week 3 of FLO Synchronous can be quite busy, particularly if you are facilitating the course alone. Book time in your calendar before the course begins to attend as many Practicing Facilitator sessions as you can at the end of Week 2/start of Week 3. While the course specifically indicates to participants that course facilitators may not be able to attend all sessions, it is a good idea – and a richer experience for all – if you attend as many as you can. Having a co-facilitator throughout the duration of the course helps for this with a big class! In our experience, and understandably, many more Practicing Facilitators tend to choose times for their sessions early in Week 3 rather than later in Week 2.
It may also be helpful for you to use a time tracking system to track the time you spend on the course, both while preparing in advance of the course and during the course itself. Time tracking helps you spend enough – but not too much – time on the course, finding a balance that is workable with the rest of your life and work commitments. Tracking your time on course facilitation tasks the first time you facilitate FLO can also help make you more aware of how much time you need to save in your schedule for the next time you teach FLO.
During the course
Week 1: Preparing for Synchronous Sessions
Figure 6.1
Write a welcome post: We recommend that facilitators use the Open Forum throughout the course to let participants know what is happening and to build a sense of community. Posting a welcome post to participants on the first day of the course sets the tone and practice for many similar posts to come.
Video Introductions activity: Throughout the first week of the course, facilitators should regularly monitor incoming video introductions and make sure at least one facilitator responds to every participant video. Responding to participant videos offers a welcoming course presence and allows participants to begin to get to know you as course facilitators.
First synchronous online session: At the beginning of the course, facilitators should hold their first synchronous online session. We’ve found that if the course starts on a Monday, Tuesday is a good time. The first slide of the sample deck (found in the Facilitator Resources folder in the OER version of FLO Synchronous) lists the technical skills (such as knowing how to turn on microphones, type in the chat box and raise hands) that we want participants to learn during that session. While the web conferencing platform that you choose may have slightly different tools, the concept is the same: think about the basic technical skills that you’d like participants to build during that first session, and plan your lesson and slide deck accordingly.
This first synchronous online session also starts building community with, and among, course participants. Participants get to know each other a little, talk briefly about course overview details, find out what the course is all about, and start thinking about the track they’d like to be on for the course. (Remember, they can choose from Reviewing Participant or Practicing Facilitator; participants need to choose their track by the end of Week 1.)
In FLO Synchronous, participants must attend at least two of the three synchronous sessions led by course facilitators. You will likely want to post links to the recordings of the sessions after each one. It may also be a good idea to recap a few of the most important things that happened or were discussed in the session so participants who couldn’t make it don’t miss key course messages. An example of one of these posts is below.
Post Example: Link to synchro session recording
By Beth Cougler Blom – Tuesday, 29 November 2016, 7:12 PM
Thanks to all of you who came out to this afternoon’s synchro session to kick off our course. If you weren’t able to make it, you can view the recording via this link. (A link to the recordings page for Room 1 is also in the Quick Links block in the course).
Our main points in the session were some introduction, overviewing the course and getting clear on the Reviewing Participant versus Practicing Facilitator tracks and the group spent some time in triads in breakout rooms getting to know each other and discussing their tracks and possible topics for facilitated sessions.
I’m attaching a copy of the slide deck for your reference.
Additional Open Forum posts: As mentioned above, we recommend that course facilitators write posts in the Open Forum throughout the course to keep participants on track and to maintain instructor presence in the course. Opening and closing posts for every week are a good idea, and you might also need to add in extra posts for other reasons mid-week, such as:
Posting the link to the recordings of synchronous sessions and highlighting key information for people who weren’t able to make them.
Encouraging/celebrating participation in course activities.
Noting upcoming events, such as the Tech Times or Practicing Facilitator sessions.
Responding to poll results or other weekly activities.
When writing Open Forum posts you may wish to consider using different strategies to make your posts interesting and engaging. Options here include, but aren’t limited, to:
Including relevant Creative Commons or open-licensed images that may enhance the content of your post or provide a fun and light-hearted accompaniment.
Creating short informal videos instead of text-based posts.Keep accessibility top-of-mind: you may need to include a transcript of your video.
Incorporating other tech tools depending on what you’re trying to achieve (e.g. posting an annotated screen capture to show participants where something can be found in the course).
Sharing links to related or current events content that is relevant to course topics.
Be in touch with participants who haven’t logged in/aren’t participating: As facilitators of online learning, one of our roles is to maintain an awareness of how engaged our participants are in the course and to use strategies to support them if their attention appears to be flagging. We do this right from the beginning of the course. A good idea is to set expectations with participants right from Week 1 about their course contributions. This is a particularly important time to see if participants have logged in and, if they haven’t, reach out to them individually to see if they need help.
Checking in with participants who haven’t yet logged in – or who logged in initially but have taken a break of several days – is a good idea to make sure they are getting over any technological hurdles with the course platform. In some cases we’ve found out, after contacting an absent participant early in Week 1, that they never received the course registration email with login details! One strategy to use with participants who have logged in but not really engaged with any activity yet is to email them individually and invite them in (or back into) the course, so they know you have noted their absence. Often these kinds of emails result in a good exchange between participant and facilitator, and sometimes illuminate events going on in the participant’s life that have just temporarily gotten in the way.
FLO courses requires a lot of commitment and participation in order to be effective. If you find out a participant is deeply struggling, perhaps from an overwhelming schedule, your role is to help them decide if now is the right time to take the course. We strongly advise against allowing participants to audit FLO courses for many reasons, the least of which is that they will not be able to achieve course learning outcomes if they do.
In other situations, a direct connection between facilitator and participant can uncover the fact that the participant is struggling with the course platform or other technology. In this case, it is a facilitator’s role to attempt to support the participant as much as you can. Sending illustrative screen captures, meeting one-on-one in a web conferencing tool (if possible) where you can share your screen with the participant to show them things, or enlisting the help of learning technologists or IT professionals at your institution, are all options to draw from to provide early technological support to course participants.
One idea to help you track interactions with your participants to ensure you engage with them fairly equally throughout the course is to use a tracking matrix. This can be a simple spreadsheet with all your participants’ names in the first column on the left and many blank columns next to them on the right. Every time you respond to a participant, make a mark in a column next to their name. Over time, you can use this matrix to try to spread out your forum post responses to participants. This may help each participant feel heard by you as their facilitator throughout the course. Here is a simple example:
Fatimah
John
Carlos
Mei
Help participants choose which track they want to be on for the course: By the end of the first week, FLO Synchronous participants must choose the track they want to be on for the course (by declaring their intention in a response to a facilitator’s Open Forum post). As mentioned above, the two tracks are Reviewing Participant and Practicing Facilitator.
Having two tracks of engagement for a course can be a bit of a dicey endeavour! Our aim is to ensure that enough people choose the Practicing Facilitator track so everyone has enough sessions to attend in Week 3, and to see several (or many) examples of synchronous online facilitation. Say, for example, that you have a class size of 20. You wouldn’t want only two of the 20 participants to choose the Practicing Facilitator track! Ideally 6-8 participants or more would choose to go that route in that size of class.
This means that part of our role as course facilitators is to encourage participants to take a risk and choose the potentially harder track of Practicing Facilitator, when their natural inclination might be telling them to play it safe on the Reviewing Participants track. Happily, the time that you spend in the first synchronous session and the Tech Time in Week 1 can help you uncover potentially keen participants whom you think may be willing to stretch themselves on the Practicing Facilitator track. You may be able to encourage participants on a one-on-one basis through emails or private course messages, but certainly an Open Forum post to encourage risk-taking is a good idea as well. See the image below for an example post that attempts to do just that.
Something else to keep in mind while helping participants choose their track is that FLO Synchronous offers a tremendous opportunity – because of the existence of the two tracks – for participants to take the course more than once. Some participants may wish to stay in the relatively safe zone of the Reviewing Participants track while taking the course for the first time, with the expectation and offer that if they take the course again, they could choose to challenge themselves a little more on the Practicing Facilitator track in the future.
Post Example: First Synchronous Session tomorrow at 12pm
By Beth Cougler Blom – Wednesday, 25 October 2017, 4:36 PM
Consider this your encouragement! You know, for everyone “listening” here… the FLO courses are somewhat based on the ISW model… and one of the tenets of the Instructional Skills Workshop is encouraging some risk-taking to help us grow our teaching practice.
Risk-taking can look different for all of us, depending on where we are in our teaching practice. For one of us, risk-taking could be practising designing and facilitating more interactive lessons synchronous online. For another of us, risk-taking could simply be getting used to looking directly at the camera and feeling comfortable being on video.
It certainly would help our whole class out (in terms of opportunities to attend more sessions) if a few more people could be Practicing Facilitators… would anyone else be willing to take such a step, knowing that this is a safe environment and we are here to support each other’s success?
Week 2: Facilitating Synchronous Sessions
Figure 6.2
Second synchronous online session: Early in Week 2, facilitators should hold their second synchronous online session. There are several purposes for the second synchronous session:
Provide time for participants to talk about their synchronous online facilitation goals using the Facilitation Session Guide (found in the Course Overview) as a point of discussion.
Create an opportunity for participants to experience a very active and participatory synchronous online learning environment, and see course facilitators modelling how to facilitate such an environment.
Give participants a chance to see and learn about the web conferencing platform from a moderator perspective.
In one version of FLO Synchronous we used a 1-2-4-All activity from Liberating Structures to involve participants in a discussion activity. This activity asks participants to think individually – in response to a question prompt we gave them – in silence for 1 minute, work in pairs (in breakout rooms) for two minutes, and work in foursomes (in new breakout rooms) for four minutes, then return to the larger group for a debrief.
In the second session we also have the opportunity to showcase and model a different kind of check-in activity, to continue building our participants’ toolbox full of synchronous online activities that they can potentially use in their own sessions or work beyond the course.
It is important to mention that the second session should also include a feedback-eliciting activity, to (again) model that we are asking for feedback from our participants – the topic of Week 2. Since we modelled the after-session feedback form after the first synchronous online session, in Week 2’s synchronous online session we have tended to include the feedback-eliciting activity within the lesson plan of the session itself.
One example of an activity that you can use to gather feedback from participants at the end of the second synchronous online session is a modified User Experience Fishbowl from Liberating Structures. You can find instructions for this particular activity in the lesson plan and slide deck for Session 2 in the Facilitator Resources Folder in the OER version of FLO Synchronous.
There is a sample lesson plan and slide deck in the Facilitator Resources folder in the OER version of FLO Synchronous.
If you are co-facilitating this course and would like to practice facilitating the second synchronous session together, consider opening up that practice session for viewing to course participants! Put it into the Booking Calendar and mention it in one of your Open Forum posts that anyone is welcome to attend. Make it clear that your participants will be observers only if they choose to drop in. This could give your participants a rare behind-the-scenes glimpse into how experienced facilitators plan lessons and prepare to co-facilitate together online, and provide a rich learning opportunity at the same time.
Connect with Practicing Facilitators: Early in Week 2 it is important to connect with Practicing Facilitators – likely via an Open Forum post – to make sure they are aware of the requirements for their role and facilitated session. It may be worthwhile to point out the Participant Facilitation Sessions page of the Course Overview and the Facilitation Session Guide document located near the bottom of that page.
The Facilitation Session Guide is a form that you and other participants can use to capture and give Practicing Facilitators feedback after participating in their session. The Guide includes many skills, divided into sections, that have to do with facilitating synchronously online. It features blank boxes to jot down areas of particular skill and areas for improvement that you’d like to note for the facilitator.
Connect with Reviewing Participants: In the same vein, it’s important early in Week 2 to connect with Reviewing Participants to ensure they know they need to be an active participant in the course throughout; they have to give feedback to Practicing Facilitators as they prepare for their facilitation, and must also participate in at least two synchronous sessions of Practicing Facilitators and give feedback to them. An Open Forum post to Reviewing Participants is a great idea to reinforce these expectations with them in Week 2. They are definitely not just auditing the course!
Mention the Self-Assessment Rubric: Remember the self-assessment rubric we discussed above? Week 2 is a good time for course facilitators to remind participants that they will need to complete it at the end of the course. This is an opportunity for participants to evaluate – in an informal and formative way – their course engagement to-date and take action to potentially increase their course engagement and make more time for course activities. Reminding participants about course expectations half-way through the course is another great opportunity to set them up for success to achieve all the learning outcomes for their track by the end of FLO Synchronous.
Sample Synchros Activity: The Sample Synchros activity in Week 2 provides opportunities for course participants to watch short video examples of other people facilitating synchronously online. Over time, you may wish to replace the sample videos included in the OER version of the course with your own sample synchros, particularly as platform technology changes.
It is important to reinforce to participants that the sample synchros are not meant to provide expert examples of synchronous online facilitation. In fact, most of the sample synchros included in the OER course are recordings of faculty members learning how to facilitate synchronously online, just like your participants will be! However, providing samples of any kind allows us to facilitate a discussion about what strategies we saw the facilitators using that were effective and not. The samples provide a jumping-off point for a rich discussion about effective online facilitation strategies. (Discussion prompts are already included in the activity.)
Week 3: Following Up After Synchronous Sessions
Figure 6.3
Practicing Facilitator sessions: The first few days of Week 3 are usually a rush of attending Practicing Facilitator sessions. Ensure that all participants know the expectations around attending these sessions. That is, we don’t just want people to show up to the session; we want to see that they are actively engaging in it. (And of course, giving feedback on them later!)
Remember, you have not promised to attend all Practicing Facilitator sessions; however, you should try your best to make as many as you can (or split them up when co-facilitating so at least one of you could be at all sessions). If you need to miss a session, ensure that you watch the recording in a timely manner, fill out the Facilitation Session Guide and give robust feedback to the Practicing Facilitator by the end of Week 3.
If you have access to a scanner, you can scan in your completed Facilitation Session Guide full of handwritten notes and attach it for the particular Practicing Facilitator when writing your feedback post for them during Week 3. Alternatively, you could create an electronic version and input your comments electronically.
Final synchronous session: The final synchronous session that you will facilitate in FLO Synchronous is an opportunity to gather one last time with your participants, look back on everyone’s experience in the course and reflect on learning. Not surprisingly, with this session – as with all sessions – your purpose is to showcase activities that participants can take away and use on their own, and to model effective online facilitation.
The last session also allows you to offer one last facilitation opportunity to one or more of your participants. Late in Week 2 or early in Week 3 you could mention in an Open Forum post that you’d like to invite one or more participants to co-facilitate the final synchronous online session with you. In our experience, you won’t always find a participant to step up to accept this invitation but when they do, it can be a wonderful learning opportunity for both you and the participant.
Want to give your participants another chance at behind-the-scenes learning? Do your lesson planning for your final synchronous session in the open by posting the lesson plan in a Google Doc or other shared site. Then, give your participants access to it as you’re building it. Invite them to make comments in the document – likely using a built-in comment feature so they are easy to see – so they can engage with you and ask you questions during your preparation process. This is yet another opportunity for participants to see the preparation and lesson planning process – and all the inherent decision-making within – that you carried out along the way, in addition to your finished product of facilitation.
Write closing Open Forum post: Your closing Open Forum post is one of your last opportunities to make a connection with course participants and (hopefully!) leave them with a positive impression of the course. This post will likely contain last housekeeping bits of information, such as the need for participants to complete and submit their self-assessment rubric as well as the course feedback form. You should also include warm words of thanks to everyone involved for engaging in the course and wish them well on their online facilitation journeys in the future. As always, you will bring your own personal flair and authenticity to the crafting of this post.
After the course
Respond to self-assessment rubrics: While you may have had the opportunity to respond to participant self-assessment rubrics in the last days of the course – if they submitted them early – you may also need to spend some time after the course ends to finish up this last task. Remember that the self-assessment rubric is directly tied to the course outcomes. If you see an issue or a mismatch with how the participant perceives their course engagement and how you perceive it, you may wish to reach out directly by phone or email to that person to invite a discussion about their course completion.
Reading course feedback forms and reflect on own facilitation: Reflection on your facilitation practice is an important part of facilitating online. Ensure you make time to read course feedback forms and debrief with any co-facilitators that you worked with throughout the course. Make notes of things that you’d like to enhance or change for next time – especially while it’s fresh in your memory! Recognize both the strengths you brought to the course as an online facilitator and what you’d like to continue to learn about and practice as you go forward on your own journey in online facilitation.
FLO Synchronous Task List
13
Course Date:
Facilitators: ______________________________ and _______________________________
Course set-up may be done by LMS Administrator and/or IT Support.
Several weeks before the course begins
When (by)
Task
Who?
Status ✔
Notes
Create this task list and put it somewhere (e.g. a Google Doc) where all facilitators can access it and update it
Set up two web-conferencing rooms on the webinar/synchronous platform of your choice)
Update the Course Schedule
Create a Booking Calendar and put a link to it in the Hub.
Schedule the three synchronous online sessions that facilitators will lead into your calendar (e.g. Tuesday of Week 1, Monday of Week 2 and Friday of Week 3). Make sure this information is sent out to registering participants and/or included in public course description
Create/update the lesson plan and slide deck for the first synchronous session (a sample is in the Facilitator Resources folder in OER)
Create/update the lesson plan and slide deck for the second synchronous session
Create a very short (2-3 questions max) feedback survey to send to participants after the first synchro session (modelling Week 3 content). (a sample is in the Facilitator Resources folder in OER)
Choose and set up the tool for the Video Introductions activity in Week 1. Put a video/text or text prompt in there for participants to respond to
Create your own responses to the Video Introductions activity before the course opens
Open the course on Friday afternoon before Week 1. Hide Weeks 2 and 3 (if desired) until the course opens on Monday
Decide on tech times sessions (one in Week 1 and one in Week 2) and put them into the course schedule
Block time in personal calendars to be able to attend practicing facilitator sessions in late Week 2/early Week 3. Try to attend as many as possible
Week 1
When (by)
Task
Who?
Status ✔
Notes
Mon
Unhide Weeks 2 and 3 (if relevant)
Mon
Write a welcome post in the Open Forum to launch the course early in the day:
Highlight the date and time of the first synchro session hosted by facilitators
Introduce the Video Introductions activity
Highlight the date of the tech time this week
Note that participants should choose which track they are on in the course (Reviewing Participant or Practicing Facilitator) by the end of the week or earlier (you can start a separate thread in the Open Forum for this purpose)
Mon
Begin to submit video responses to participants’ Video Introductions
Tue
Write an Open Forum post to remind participants about synchronous session and tell them how to get into it, which recommended browser to use
Tue
Host the first synchronous online session
Wed
Write an Open Forum post to:
Send out the recording link and slide deck from the first synchronous session (give participants a list of key highlights from the session and where they happened timewise in the recording, if possible)
Send out the short feedback survey and ask participants to give their feedback about the first synchronous session
Remind people to declare which track they are on by the end of the week
Highlight the informal tech time this week to help people explore the web conferencing platform
Thu (or another day)
Host the first informal tech time
All week
Remember to keep looking at Video Introductions; make sure that a facilitator replies to everyone to welcome them
All week
Facilitate the discussion in the Week 1 Discussion Forum
All week
Be in touch with participants who haven’t logged in/aren’t participating/aren’t regularly visiting the course to see if they need help and invite them to engage. Counsel out, if appropriate
All week
Help participants choose which track they want to be on for the course
Sat-Sun
End post on Saturday or Sunday in Open Forum:
Talk about the results of the Week 1 poll
Highlight Booking Calendar and what it’s for
Remind participants about the Week 2 synchronous session
Week 2
When (by)
Task
Who
Status ✔
Notes
Mon
Write a post in Open Forum (or leave this if you did one on Sunday and can combine the end of Week 1/start of Week 2 in that post)
Remind participants about the synchronous session this week facilitated by course facilitators
Thank participants for giving feedback on last week’s session
Highlight what’s coming up this week
Mon/Tue
Host a synchronous online session on one of the early days of this week; potentially include a guest to either interview or guest host
Use Liberating Structure (or something else) to demonstrate synchronous process facilitation. End with User Experience Fishbowl so this IS the evaluation portion of this session (again, modelling here)
Consider opening up the practice session for this (if you have one) to the participants of the course to watch; put in the Booking Calendar
Mon/Tue
Connect with Practicing Facilitators to outline for them the steps required for their facilitation, including using the Facilitation Session Guide or another evaluation, and posting the 3-2-1 structure for feedback
Mon/Tue
Connect with Reviewing Participants to outline for them the expectations around giving feedback to Practicing Facilitators (if they ask for it) while they plan their facilitation, and attending PF sessions
Wed
Mid-Week post
Remind participants about watching the Booking Calendar and putting the times in their schedules
Note that Synchro Samples activity posts should go in by Wednesday
Include any follow-up from the synchronous session, including posting the recording link, lesson plan and slide deck from the session
Talk about the answers to the Week 2 poll
Mention the self-assessment rubric as a reminder to people to check their participation
Highlight any Practicing Facilitator sessions that may be coming up in the remainder of this week
Thu (or another day)
Host the second tech time
All week
Facilitate the discussion in the Week 2 Discussion Forum
By Sun
Make any updates needed to the course feedback form and make them visible
Sat/Sun
End post on Saturday or Sunday in Open Forum
Week 3
When (by)
Task
Who
Status ✔
Notes
Mon
Write a post in the Open Forum
Remind participants about the last synchro session this week. Ask if anyone would be interested in co-facilitating the session and potentially plan it in the open in a Google Doc
Highlight any Practicing Facilitator sessions coming up
Post any extra examples of facilitation of synchronous sessions that you may have from your contexts if you feel the group would be interested in seeing more
Mon-Wed
Attend as many synchronous online sessions of Practicing Facilitators as your schedule allows
All week
Facilitate the discussion in the Week 3 Discussion Forum
Wed
Mid-week post to:
Remind participants to attend any final Practicing Facilitator sessions that remain this week
Remind participants to complete the self-assessment rubric and submit it to one of the facilitators by Sunday
Ask participants to fill out the course feedback form
Post about results of Week 3
Note any pertinent discussion happening in the forum
Fri
Host a synchronous online session to wrap up the course
Fri/Sat
Write a closing post in Open Forum
Include the recording link from the last synchronous online session
Ask participants to complete the course feedback and give a due date
After the course
When (by)
Task
Who
Status ✔
Notes
Respond to all participants regarding self-assessment rubrics
Read course feedback forms and reflect on your own facilitation
FLO Synchronous Self-Assessment Rubric
14
Please assess your own achievements in this course using the following rubric. To successfully meet course requirements, you should be able to mark yourself as having “met requirements” or “exceeded requirements” for all criteria that pertain to all participants and additionally the course track that you were on (Reviewing Participant or Practicing Facilitator).
Self-Assessment Rubric (For all participants)
Criterion
Did not meet requirements
Met requirements
Exceeded requirements
Participate in synchronous sessions facilitated by the course facilitators
Participated in one or no sessions, or attended sessions but did not participate in any of them
Participated in two of the three sessions
Participated in all three sessions
Participate in weekly discussion forums
Did not participate in the weekly discussion or activity or missed posting either an original post or a reply to someone else’s post
Posted at least one meaningful contribution* as an original post for the weekly discussion or activity. Posted at least one meaningful contribution as a reply to someone else’s post
Posted more than one original post for the weekly discussion or activity. Posted more than one meaningful contribution* as a reply to someone else’s posts
Self-Assessment Rubric (Additional items for reviewing participants)
Criterion
Did not meet requirements
Met requirements
Exceeded requirements
Participate in synchronous sessions of Practicing Facilitators
Participated in only one session or did not participate in any sessions of Practicing Facilitators
Participated in two sessions of Practicing Facilitators
Participated in more than two sessions of Practicing Facilitators
Give feedback to Practicing Facilitators
Did not provide feedback to two sessions or feedback provided to sessions was not effective**
Provided effective feedback** for two sessions
Provided effective feedback** for more than two sessions
Self-Assessment Rubric (Additional items for practicing facilitators)
Criterion
Did not meet requirements
Met requirements
Exceeded requirements
Participate in synchronous sessions of Practicing Facilitators
Did not participate in another Practicing Facilitator session or attended the session but did not participate in it
Participated in one other session of a Practicing Facilitator
Participated in more than one other session of Practicing Facilitators
Give feedback to Practicing Facilitators
Did not provide feedback to one session or feedback provided to sessions was not effective**
Provided effective feedback** for one session
Provided effective feedback** for more than one session
Lead synchronous online session using a web-based platform
Facilitated session of less than 15 minutes in length or did not facilitate session, or employed very few of the skills and strategies listed on the Facilitation Session Guide
Facilitated session of at least 15 minutes in length, employing many of the skills and strategies listed on the Facilitation Session Guide
Facilitated session of at least 15 minutes in length, employing most or all skills and strategies listed on the Facilitation Session Guide
Reflect on facilitation of session
Did not reflect on session or reflection appeared to be cursory from the 3-2-1 structure and/or did not invite feedback
Reflected on facilitation of session and used the 3-2-1 structure, inviting at least one piece of feedback from course peers and facilitators
Reflected on facilitation of session and identified specific ideas for what could be improved for next time, posting more than the 3-2-1 structure. Asked specific questions of course peers and facilitators to advance own practice forward
Purpose: These courses provide an opportunity to dip into the FLO experience and leave with something practical and useful for your own teaching practice. Each MicroCourse focuses on a different topic; new MicroCourses are added as topics are put forward by educators or suggested by emergent trends. This enables educators to selectively explore relevant issues, tools and strategies. The spirit of FLO MicroCourses is to offer an open and flexible experience within a scheduled framework that enables mentored facilitators to practice their skills.
Mode: A facilitated asynchronous online course
Length: Five days
Expectations – Facilitators: Facilitators provide support throughout the course and foster a comfortable and inviting space to encourage sharing of unfinished work for peer review. The facilitator does not need to be an expert in the subject area.
Time Requirements for Facilitators: The time commitment varies depending on the number of facilitators, their prior experience, and the number of participants. Typically, facilitators are also involved in the design of the course materials unless they are re-using a previously implemented MicroCourse. Each facilitator can expect to spend at least 5 hours during the week, more if they are providing direct feedback on the participants’ work.
Expectations – Participants: Participants are expected to follow the steps for the course activities and can choose how detailed they wish to make their drafts and prototypes. However, there is an expectation that participants reciprocate with feedback; if they are offering something for peer review, they should also provide feedback to others.
Assessment: Through peer review, participants give and receive feedback, reflect on what is useful and relevant, and refine their prototypes. Rubrics can also guide the process of giving feedback, so this skill is also noticed and refined.
Time Requirements for Participants: Participants should expect to spend 5 hours for course activities. Those with no prior online teaching and learning experiences can expect to invest more time.
Primary Resource for Facilitators: All MicroCourses contain familiar elements — templates for designers and facilitators to use and modify for their specific topic. After a MicroCourse is implemented, it is made available as an Open Educational Resource (OER). Facilitators can then download a course, implement it, or completely re-work it for a new topic.
What are FLO MicroCourses?
Facilitating Learning Online (FLO) MicroCourses are five-day courses that focus on a single topic. Participants engage in a 10-step processOf course it doesn't need to be 10 steps, but we suggest making it clear to participants how many steps are ahead of them. to create a draft or prototype, and then give and receive feedback. Participants could then leave with something practical and useful for their own teaching practice, whether it’s of their own creation or borrowed from their peers.
Many participants reported being astounded at how much they learned from their first full intensive FLO course, and how valuable participatory and collaborative learning was. However, the length of the foundational FLO courses could be a barrier for some people. For example, it could be challenging for faculty to devote 5 weeks to complete the FLO Fundamentals course during a semester with a full teaching load. Therefore, FLO MicroCourses offer a dip into the FLO experience without the full-time commitment.
Here are some suggested topics for MicroCourses:
Make your course intro video.
Creating and using rubrics.
Experience and design a community-building activity.
Write your teaching philosophy statement.
Design course evaluation surveys.
Benefits of MicroCourses:
They’re short, manageable chunks of productive learning.
They provide a taste before committing to a full FLO course and allows participants to experience facilitated, active, peer-supported, outcome-based learning.
They provide an opportunity to practice facilitation.
As outlined in Chapter 3, the mentorship model for preparing future FLO facilitators requires that we provide opportunities to practice. These short courses are a smaller time commitment for FLO facilitators than the 3-, 4- or 5-week courses, yet they provide a rich experience in both activity planning and facilitation. Offering the courses frequently, and working in teams, opens up more possibilities. These courses have been referred to as a capstone or culminating experience for those involved in FLO facilitator development.
Learning Outcomes
A MicroCourse provides a framework for introducing any number of topics and projects. As such, the learning outcomes will change from one course to the next. However, there is a common set of general outcomes. You will leave a FLO MicroCourse with:
new ideas and skills for creating (fill in the blank)
a first prototype, with feedback
Participants
Participants who take FLO MicroCourses are typically full- or part-time instructors at post-secondary education institutions. Participants may also include those who support teaching faculty such as instructional designers, educational consultants and learning technologists.
Other potential participants include graduate students, consultants from the private sector and staff who work at for-profit or non-profit organizations.
There are no prerequisites for MicroCourses so participants could potentially come from any domain.
FLO MicroCourses work well with 10 or more active participants which allows for sufficient variety in the prototypes and more exposure to new ideas and examples. The course model can certainly accommodate more than 10, mainly because of the peer review element. To-date, we have not placed a limit on enrolment and fully expect that not all participants will be active.
Technical Requirements
Essential:
A learning management system or content management system to hold the asynchronous course content and activities.
All facilitators should have a strong Internet connection.
Optional but recommended:
Access to create and maintain shared collaborative workspaces (e.g. Google Docs).
What has worked for us?
We have had success using the Moodle open-source learning management system for FLO MicroCourses.
Moodle offers flexible options to link to and integrate outside tools and content, as well as to control the openness of a course. Also, in a cohort-based model, single sign on/member management is very useful.
A centralized HUB for course content and activities and the ability to self-manage subscriptions and notifications makes it easy to stay on top of expectations and course contributions. Since MicroCourses rely on active and regular participation, broadcast and collaborative communication tools are essential.
Other go-to course tools we have used alongside Moodle include Google Docs, Sheets, and Slides. For web conferences we have used Collaborate Ultra because it is available to us; however; there are also open source and free service options. In some cases, there are restrictions on the number of individual logins, so watch for that.
Of course there are unlimited possibilities for hosting these courses. Each course is different and we always encourage further tool exploration and learning. We have two mottos that guide this:
You don’t know ‘til you try!
What’s the worst thing that could happen? (Sometimes we find out!)
This approach works well when you have a communication channel for asking questions and many willing peers to offer support!
The Course Content and Layout
The FLO MicroCourse OERs from BCcampus are complete 5-day courses with a collection of content, activities and resources.[footnote]The BCcampus MicroCourses are open to the public. Anyone can access the courses without enrolling. Also, past offerings of MicroCourses remain open for browsing.[/footnote] As mentioned, topics change from one course to the next; however, these course elements remain consistent.
MicroCourse Handbook
This resource outlines details about participation, course tools, and course content.
Activity Packet – 10 steps / 5 days
Figure 7.1
This is the core resource for MicroCourses. From this page, participants follow steps that include research, contemplation, reflection, design processes, instructions for sharing prototypes, and providing and using feedback.
The activity packet includes 10 steps. This is an example from the ‘Make your course intro video’ MicroCourse. Of course, you can modify the steps to suit your offering, but sticking to 10 helps keep the courses consistent.
Step 1 – Why?
Step 2 – What have others done?
Step 3 – What should I include in my video?
Step 4 – What format should I use?
Step 5 – What tools should I use?
Step 6 – How do I prepare?
Step 7 – Do it!
Step 8 – Post it!
Step 9 – Review others and give feedback
Step 10 – Refine your prototype
Announcements Forum
This forum is for facilitators to welcome participants, post daily reminders and commentary on progress, and close the course. These posts are more likely to be noticed because they are in their own, separate forum.
Questions & Answers / Open Forum
This forum is where you ask for — and give — help/clarification/guidance. While there will be some overlap with the conversations that take place in the Sharing & Feedback forum described below, having this Q&A as a separate forum makes it easier to zone in on precisely what is relevant at that moment.
Sharing & Feedback Forum
This forum is used for sharing prototypes and providing feedback. It includes prompts for presenting the work as well as for providing peer feedback.
Collaborative Resources
All participants can edit these resources. For example, throughout the MicroCourse, facilitators might want to offer a way for all participants to harvest key resources or tips.
Course Assessment
There are no set requirements for completing MicroCourses. However, all participants who share prototypes receive feedback from peers and/or the facilitators. Guidelines for providing quality feedback are outlined, so in that sense, it is a self-assessment tool for rating feedback efforts. (See FLO MicroCourse Peer Feedback Rubric.)
Facilitator Task List: What You Need to Do Before, During and After the Course
The successful hosting of a FLO MicroCourse requires an organized approach to planning and facilitation. The following suggestions will support the facilitation team to successfully implement the course.
Two Heads are Better Than One!
Figure 7.2
This is what Robin Leung had to say in his “lessons learnt” report after his first MicroCourse co-facilitation experience:
I learnt that you need a co-facilitator that balances with your life well. I had a more technical background and my co-facilitator had more of the facilitation background. I am a night owl (catching most of the activities at night), and she’s the early riser (catching most of the activities in the day time). I think we complemented one another very well.
— Robin Leunghttps://proflearn.bccampus.ca/facilitating-a-flo-microcourse/
Before the course begins
Promote the course: Think about ways to get the word out about your course in a way that appeals to individuals from a variety of backgrounds and disciplines. The more diversity in your course the richer the discussions and feedback. In your communication, emphasize the informal and practical nature of the course, as well as the potential to leave with a full bag of ideas and examples.
Consider using social media to help build interest, to share snippets from the course while it is in progress, and to post highlights from participants’ feedback. This is especially helpful as a way to sustain interest if you offer the MicroCourses as a series.
Figure 7.3
Review the MicroCourse Handbook: This handbook is intended to be very general so that it can be used in every MicroCourse. However, you may need to remove any information that is not relevant to your offering.
Adjust the course dates to match your offering: In the BCcampus version of the course, the dates are listed on the main page as well as in the poll. Your learning management system may also require dates to be set for each course.
Invite self-enrolment: You may choose to organize the registration process in a way that suits your institution. However, we have found that self-enrolment works well for this course because we are not limiting the enrolment.
Edit the Activity Packet: The activity packet should include all the information a participant needs to complete the 10 steps. This includes essential details, but also links to other resources and forums mentioned in the steps.
Keep the activity packet concise. It is not meant to be a dumping ground for content related to your topic. Encourage exploration of the subject matter and perhaps link to a few key readings.
Create a co-facilitation plan: There is no shortage of ways to spend your time as a facilitator! With a plan for how you will divvy up the tasks, you can maintain a manageable workload and avoid overstepping. For example, two concurrent responses containing similar information to a participant’s question is not value-added. You may decide to alternate days, allowing for breaks from the course or more time to simply sit back and enjoy browsing the contributions. Another possibility is to divide participants into groups and each facilitator declares responsibility for individuals in their group. This way you can ensure that all participants receive some form of acknowledgement of their work.
Open the course a few days before the start date: This suggestion is optional, but we have found that participants are ready to roll up their sleeves on day one of the course if given this opportunity to preview what’s ahead.
Decide how participants will become acquainted: A 5-day course does not allow much time for community building! So, you may wish to create a shared Google Doc and ask everyone to respond to one or two “about me” questions. This way, everyone can stay on schedule and use their time wisely. In Moodle, we have used the Glossary tool for introductions because it avoids the subscription issues that can sometimes come with using forums. It also gives better display and sorting options and allows comments.
During the course
Write a welcome post: You may have already posted a “doors are open” announcement to invite participants to see what is ahead in the week to come. Your post on the first day should include details about what participants should attend to immediately. This conveys the fast-paced nature of the course, and zones in on exactly what is relevant for that day.
The tone of your post is important. Avoid pressuring participants to comply with course deadlines, or suggesting they are only welcome if they are committed to following the activity plan. This is an informal, adult learning environment; expect that individuals will have their own agenda.
Establishing a protocol for facilitator posts can help them to be noticed and reinforce the timeframe. For example, the subject heading for this post is Day 1: Rise and Shine. The next day’s post was Day 2: Dig In, and so on.
Post Example: Day 1: Rise and Shine
Figure 7.4
By Sylvia Currie – Monday, 17 September 2018, 7:08 AM
With MicroCourses we just jump right in. Let’s do this!
Almost everything you need is in the Activity Packet.
Today is all about the research phase: steps 1 to 6. The recommended timeframe for completion is, gulp, today! Don’t worry, some of it is quite light, and mostly requires solo pondering and reflection.
Thanks to everyone who posted a quick hello over the weekend! Drop a comment or two if you feel compelled.
Questions? Ask anything, anytime in the Questions & Answers form.
Your facilitators,
Sylvia Currie, Bettina Boyle, Jacquie Harrison
Acknowledge the arrival of participants: How you do this will depend on the way the course is set up. If you have included a self-introduction activity, facilitators should quickly respond to those who have taken this first step. If there is no planned way of “arriving” to the course, you can still send direct messages or personal email. Any effort to reach out early in the course will help establish facilitator presence.
Attend to the calls for help: Ideally, if the activity packet is clearly laid out, there won’t be too many of these. However, you should respond to any questions pertaining to the course process as quickly as possible. Make sure you coordinate with your co-facilitator who will respond.
Monitor the sharing of drafts and prototypes: It’s exciting when the prototypes begin to roll in! What is the facilitator’s role when peer review is the centre of the course design? This is an area that requires balance and judgment. The best advice is to:
Be concerned only if an uncomfortable amount of time goes by without any replies.
Only offer genuine feedback.
Resist the urge to be thorough, but be clear that you’re only commenting on one or two aspects of the artefact.
Invite participants to jump in and elaborate, using your curious voice: “I can’t wait to read others’ first impressions and advice.”
Also, consider the impact if facilitators only respond to one or two contributions. Will others feel neglected? Quite possibly! So, it’s important to establish expectations that you may acknowledge contributions but not provide comprehensive feedback. After all, other participants might have more subject matter expertise than you, and they will provide valuable feedback.
Jumping in too quickly to offer your advice or feedback, or to respond to questions, might discourage others from engaging.
Continue with daily facilitator posts: Plan to begin each day with a forum post (announcement) that shines a light on progress, and brings attention to where participants should be in the process.
Post Example: Day 2: Dig in!
By Jacquie Harrison – Tuesday, 18 September 2018, 9:43 AM
Figure 7.5
Good morning!
It’s so nice to see you all in the quick hello. We are a talented group!
If you are following the suggested timeline for this MicroCourse, you spent some time thinking about what rubrics are, maybe looking at few examples and considering how and why you could use a rubric in a course that you teach.
Now, it’s time to roll up your sleeves and develop a first draft. We’re moving in to Step 7 in the Activity Packet.
Please post your draft rubric in the Sharing and Feedback by Wednesday evening.
Happy developing!
Harvest the gems! Throughout the course, it’s useful to create a routine that brings together the resources that the participants are sharing. Often this falls on the facilitators, but certainly encourage everyone to compile and organize artefacts.
After the course
Write a closing post: Facilitators need to gauge the opportune moment to wrap up this 5five-day course. Since there can still be a lot of buzz on the Friday. , Saturday could be better so it doesn’t look like you are checking out early, and there may still be participants busily working away on course activities. In any case, open up the opportunity for participants to share their revised prototypes even if it is past the moment of receiving further feedback. You might also suggest they can still offer encouragement and appreciation to their classmates. Also, remind participants that the course remains open, if that is how your establishment chooses to handle these courses. If you have this information, mention the upcoming MicroCourses; word of mouth is the best way to build interest in open learning opportunities!
Evaluation Survey: So much can be gleaned from these surveys! Remind participants about the importance of providing course feedback. A sample basic evaluation survey can be found in Appendix 3: Generalized Course Evaluation Survey.
Facilitator Debrief: Don’t part company with your co-facilitators without scheduling a debrief. It’s important to share experiences and ideas about the facilitation process, otherwise you are destined to repeat what could have been improved! Keep notes and share them with other facilitators, if possible.
Here are some snippets from past debriefs:
“Maybe we could be more explicit? Give them a heads-up about what they can’t do on mobile devices?”
“Not really useful to share tools that are only available within big institutions, or that require logins that don’t adhere to workplace guidelines”
“Opening up the course early made a big difference. Let’s do that again next time!”
Summary report: Publishing a summary of what transpired can help participants feel a sense of accomplishment, and can also help build interest in upcoming MicroCourses. Consider including participation data, quotes from the evaluation survey or forum posts. For example, this graph clearly illustrates a high level of participant engagement in the “Creating and using rubrics” MicroCourse — probably higher than anyone realized.The course ran from September 17 - 21, but opened a few days early
Figure 7.6. Member views is the top line, member posts is the bottom line. [Long Description]
This collage captures the thumbnails of videos shared during the “Create your course intro video” MicroCourse and sparked up the summary report.
Figure 7.7
Long Descriptions
Figure 7.6 Long Description:
FLO MicroCourse: Creating and using rubrics – All activity (member views and posts)*numbers have been estimated based on original graph
Gives broad statements that could apply to any project
Is specific
The feedback refers to actual elements in the project
Refers to the project, but it is unclear which elements align with the feedback
Does not refer to elements of the project in feedback, indicating that the project has not been thoroughly reviewed
Is respectful
Acknowledges strengths and/or potential
Offers advice without pointing out promising elements
Emphasizes inadequacies
Is useful
Offers rationale on critique, and perhaps suggestions
Identifies areas for improvement but could do more to elaborate on why
Does not elaborate beyond a judgment of work (e.g. I like your idea)
Engages
Invites further dialogue using an inquisitive tone that demonstrates genuine interest
Asks questions in an effort to prompt further discussion
Does not elaborate beyond statements about project
Is realistic
Considers both the scope of the project and expected skill level of the learner
Demonstrates an understanding of the work involved
Provides suggestions that would not necessarily be feasible to undertake
Appendix 1: Annotated Bibliography
1
Anderson, T. (2017). How Communities of Inquiry Drive Teaching and Learning in the Digital Age. Tools and Trends. Contact North | Contact Nord Online Learning. Retrieved from https://teachonline.ca/tools-trends/insights-online-learning/2018-02-27/how-communities-inquiry-drive-teaching-and-learning-digital-age
FLO facilitators reflect many of the facilitation techniques described in the well-researched Community of Inquiry model. The important elements of 18 years of research are reported by the original proponent of the model, Professor Terry Anderson.
The concept of “teaching and social presences” and the acknowledgement of the more active role of learners online has been documented and analyzed in a wide range of academic environments. FLO facilitators are constantly adapted their facilitation practices to engage learners in a more active and participatory online learning environment.
Professor Bates modeled open and participatory practices in the writing of this open textbook, releasing sections through his website and inviting world-wide input. The final book has numerous chapters that have informed practices and understanding about online learning for many FLO course participants.
A very ambitious use of studio-based learning scaled for a large enrollment course and for students from various subject disciplines. The authors reported significant changes in learning using a collaborative studio model supported by technology. Their findings and the positive feedback from many participants in FLO Design support the use of the studio model in online environments to create a creative, collaborative, “hands-on” learning experience.
A recent research report about the roles of online instructors and the perception of the effectiveness of each role from students’ perspectives.
Although their role-based models do not directly coincide with FLO facilitator skills categories, the individual skills they identified after applying a factor analysis reflected many similar skills (e.g., comprehensive, useful course materials, effective online facilitation strategies, course design, social or community-building skills, promoting student success or life skills.)
Cross-comparison of the three cases revealed the following reasons why instructor facilitation is preferred:
to prevent the discussion from going off track;
to resolve conflicts in the discussion;
to provide information particularly when the topic of discussion is new; and
to motivate the discussion when students’ participation wanes.
On the other hand, peer facilitation is preferred:
when the participants desire greater freedom in voicing their own views;
when the participants want ownership in determining the direction of the discussion; and,
when the participants want actual hands-on-facilitation-experience.
Hrastinski, S. (2008, November 17). Asynchronous and synchronous e-learning. Retrieved from https://er.educause.edu/articles/2008/11/asynchronous-and-synchronous-elearning
In this article the author defines asynchronous and synchronous e-learning, and overviews types of communication that are important for building and sustaining e-learning communities. He discusses benefits and limitations of both asynchronous and synchronous online learning (based on research completed for a PhD dissertation) and “when, why and how” to use asynchronous vs. synchronous e-learning.
Learners were pleased with online courses that were:
structured (Ke and Xie 2009; Song et al. 2004);
interactive, that is, constructivist instructional design (Aragon, Johnson, and Shaik 2002;
Ke and Xie, 2009; Muilenberg and Berge 2005; Ruey 2010),
relevant, that is, application based with practical significance (Park and Choi 2009; Ruey 2010), and,
instructor-facilitated in terms of interactions/feedback (Eom, Wen, and Ashill 2006; Muilenberg and Berge 2005; Ruey 2010; Song et al. 2004).
All these factors come down to instructional and course design. Instructors need to align instructional methods, activities and assessment methods with learning objectives (Blumberg 2009). Instructors should provide timely feedback and facilitate discussion and interaction, as they do in traditional courses. Courses should provide opportunities for peer collaboration and sharing of ideas to develop an online community of learners.
Martin, F., & Parker, M. (2014). Use of synchronous virtual classrooms: Why, who and how? [PDF] MERLOT Journal of Online Learning and Teaching. Vol. 10 (No. 2). Retrieved from https://www.researchgate.net/profile/Florence_Martin4/publication/265335172_Use_of_Synchronous_Virtual_Classrooms_Why_Who_and_How_MERLOT_Journal_of_Online_Learning_and_Teaching_10_2_192-210/links/5408a12d0cf2822fb7354c1f.pdf
This article discusses research undertaken on synchronous virtual classrooms, why instructors adopt them and how they use them after their adoption. Organizations interested in offering FLO Synchronous may wish to read this article to learn about organizational, technological, social and personal factors that influence adoption and use of virtual classrooms.
This article explores the integration of the studio-based learning approach to teacher development as a way to foster inquiry learning. The FLO Design course used a similar collaborative inquiry-focused, studio-based approach to encourage participants to explore different ways of designing effective online learning.
Pratt, D. (1998). Five Perspectives on Teaching in Adult and Higher Education. Malabar FL: Krieger Publishing Company.
FLO courses encourage self-reflection and awareness of perspectives and beliefs about teaching and learning. FLO Fundamentals often includes a teaching perspectives framework (available online at http://www.teachingperspectives.com/tpi/) that encourages participants to self-assess and recognize the range of perspectives (and how they can change through learning and experience).
This article used the Community of Inquiry model’s identification of social and teaching presences in online learning and reviewed the ways in which 12 online instructors manifested these “presences.” They identified different strategies instructors used and derived a series of roles that are considered (and tested) in FLO courses:
Advocating: instructor encourages learners to take ownership and have confidence to participate in course activities and learning.
Facilitating: instructor prompts, invites discussion (often by using questions) and may guide conversations to consider specific topics. Provides summaries.
Sensemaking: scaffolds students by clarifying points, providing resources and examples, demonstrating, and sharing both formative and summative feedback.
Organizing: instructor provides structure, assists with scheduling, using time well, etc.
Maintaining: maintains course flow through various administrative actions and technological assistance.
This UNESCO working paper is based on a comprehensive, international perspective on education. Most of the pedagogical changes identified in the section “Overall Vision of Twenty-First Century Pedagogy” are reflected in the practices and activities used throughout the FLO family of courses (for example: encourage collaboration and communication, foster participation, personalize and customize learning, etc.).
An important role of FLO facilitators is to build and sustain a sense of community in each course. The authors of this 2016 study reviewed 47 published studies and research on online teaching and learning since 2008 and concluded that effective online instruction depends on three major factors – one of which is the creation of a sense of online learning community.
A strong reinforcement, from four leading educational researchers, of the importance of the instructor or facilitator’s role in the facilitation of learning – both in virtual and face-to-face classes, and within the more complex blending learning options. The facilitator presence we emphasize in FLO courses is examined in terms of how it affects the cognitive and social processes in learning communities that support individually meaningful and educationally recognized learning.
Wiggins, G. & McTighe, J. (2007). Schooling by Design. Alexandria, Virginia: Association for Supervision & Curriculum Development (ASCD). Retrieved from http://www.ascd.org/publications/books/107018.aspx
An interesting perspective (and early recognition) of the changing roles of teachers. Grant Wiggins and Jay McTighe are well-known authors, researchers and instructors. Their 2007 book differentiated the roles of teachers into direct instruction, facilitation of understanding, and coaching of performance. They defined a type of facilitative teaching that seems directly relevant to what is modeled within FLO courses:
“…help students construct meaning and come to an understanding of important ideas and processes….guide student inquiries into complex problems, texts, cases, projects or situations…principle methods are questioning, probing, and process-related commentary…” (excerpt from Chapter 5)
Yamagata-Lynch, L.C. (2014). Blending Online Asynchronous and Synchronous Learning, The International Review of Research in Open and Distributed Learning, Vol.15, No.2. Retrieved from http://www.irrodl.org/index.php/irrodl/article/view/1778/2837
Describes why you might choose asynchronous over synchronous (or vice versa) and how communication strategies can be chosen such that one supports/complements the other.
The author discusses how learning can be facilitated via a spectrum of response times.
Appendix 2: Glossary
2
A list of abbreviations, acronyms, and terminology used in this document.
Asynchronous
Asynchronous communication involves a separation of time between listening (or reading) and responding. Examples of asynchronous communication include postal systems, discussion forums, email, and various bulletin board type tools. For synchronous communication, see the definition below.
BCcampus
BCcampus provides teaching, learning, educational technology, and open education support to post-secondary institutions in the province of British Columbia, Canada. Through partnerships with B.C.’s post-secondary institutions, as well as government agencies and nonprofit groups and associations, BCcampus evaluates, facilitates, and collaborates on complex and innovative education projects.
CC BY
The Creative Commons Attribution-Only licence. Any work (text, images, video, etc.) licensed CC BY can be freely used by others and edited, revised, added to and distributed (even commercially), as long as the user gives credit to the original source or author. For more information, view the Creative Commons website.
Community of Inquiry Model
A theoretical framework (originally proposed by researchers at the University of Athabasca) used to analyze ways in which instructors (and students) create a deep and meaningful learning experience in online and blended learning environments through the development of three interdependent elements: social, cognitive and teaching presence. Teaching presence is the design, facilitation and direction of activities within a course.
Content Management System
A Content Management System (CMS) is a software program or set of related programs used to create and manage digital content. Some common CMSs (as of 2018) are WordPress, Wix, and Weebly. CMS products can be configured for learning management, but they generally require a higher level of user expertise than a product specifically designed for educational delivery (i.e. an LMS or VLE — see the definition below).
Facilitator
A facilitator works within a group to engage the group’s members in decision-making or brainstorming processes, mitigating conflicts and actively fostering course community. A facilitator working in an educational context helps learners understand course content through questioning, suggestions, examples and problem-solving, rather than through more directive teaching methods.
FAQ
Frequently Asked Questions. In any organized activity, many of the questions participants ask tend to be the same ones time and again. By providing a list of FAQs (with answers), you can help your participants get immediate answers to their most common questions.
Forum
In online learning, a forum is a site where participants and facilitators can post their comments, questions, etc. to discuss and debate ideas and aspects of the course content or learning activities. Discussion can take place asynchronously and topics are often organized by threads as participants reply to a specific posting.
Hosting
Hosting, in the context related to FLO courses, means the act of providing a content management system or learning management system for use to offer FLO courses to participants. Institutions may be able to host their own system, or they may need to purchase access to a system hosted by an external provider.
Learning outcome
Statements that describe important, intentional knowledge or skills that students can demonstrate at the end of a course or learning activity. A learning outcome statement usually begins with an action verb (to identify the action or level of learning) and a description of what the learner can reliably demonstrate within a specific context.
LMS / VLE
Learning Management System / Virtual Learning Environment. (LMS is the term more commonly used in North America; VLE is more common in Europe and other parts of the world). An LMS or VLE is a software product often used to organize online courses and classes. Some common LMS/VLE products are Moodle, Blackboard, Canvas, Desire2Learn. Other platforms used for LMS/VLE include WordPress, Google Classrooms, iTunesU.
Open Educational Resources (OER)
Open Educational Resources (OER) are teaching, learning or research materials that are in the public domain or released with intellectual property licenses that facilitate the free use, adaptation and distribution of resources. (UNESCO)
Post
A post is a message that a facilitator or learner writes in a forum or another conversational space that is included in a course. Individuals have the ability to post and reply to posts within conversational spaces in all FLO courses.
Reflection / reflective practice
Reflective practice, as described by educational researchers such as David Kolb and Stephen Brookfield, refers to the ability to pay critical attention to learning by examining actions both during and after they take place (i.e., reflectively and reflexively). The underlying theory is that people do not learn from experience alone; they benefit from considering actions and events from different perspectives, and by identifying important connections or underlying beliefs and theories.
Rubric
A rubric is a guide — often presented in table form — listing specific criteria for assessing or grading academic work (papers, projects, tests, etc.). Rubrics add value to the educational process by communicating expectations about performance, and by supporting constructive feedback on works in progress. By making performance standards explicit, rubrics can help students develop understanding, skill, and more dependable judgments about the quality of their own work. Rubrics are provided in FLO courses primarily to help participants assess their own progress towards facilitation goals.
Scaffolding
Much like the scaffolding that supports workers on a tall building, scaffolding in an instructional context refers to the supports an educator provides for students to help them learn. Educational scaffolding is based on the common-sense understanding that it’s almost impossible to learn a new concept or skill in its entirety; we learn best in incremental steps, with one concept or skill building upon another. The supports are gradually removed as the student becomes more independent and no longer needs additional aid.
Self-assessment
Self-assessment is the process of examining one’s own work and comparing it against identified criteria or goals. Based on the results of the assessment, learners can make a judgment as to whether (or how well) they have met these goals. In the FLO family of courses, self-assessment plays a critical role in the process of self-reflection and reflective practice (see the definition above), and is often supported with rubrics (see the definition above).
Synchronous
Synchronous communication (including communication for learning) is real-time communication where participants listen and respond to each other within the same timeframe. Examples of tools used for synchronous communication include telephones, Skype, Blackboard Collaborate, and FaceTime. For asynchronous communication, see the definition above.
Traditional acknowledgement
A traditional acknowledgement is a short message (text, video, or audio) acknowledging that the land on which the particular institution sits occupies the traditional territory of local Indigenous peoples. This may be a standardized message produced by the institution or a link to a media resource from an Indigenous chief or elder extending a traditional welcome. The traditional acknowledgement is optional but becoming a common practice in Canada to include in both online and face-to-face courses.
Web conferencing
Refers to synchronous online meetings supported by various kinds of technologies (e.g., Blackboard Collaborate/Ultra or Big Blue Button) that allow audio and video sharing supported by interactive tools like whiteboards or slide-image-document sharing options.
Appendix 3: Generalized Course Evaluation Survey
3
Recommended mode: Anonymous
How would you rate the quality of this learning/professional development experience?
High quality
Fair
Low quality
How much time did you spend on the course activities [adjust numbers to fit your own course]?
Less than 5 hours per week
5-10 hours per week
More than 10 hours per week
How was your experience of the online tools used in this course (e.g. technology, apps, learning management system)?
What should FLO [name of course] facilitators start, stop, or keep doing?
Overall, how satisfied were you with [name of FLO course]?
Very satisfied
Satisfied
Not Satisfied
What factors influence your satisfaction rating?
What, specifically, was helpful to you in this course?
What do you wish had been included in this course?
Which activities would you cut/revise, and why?
Do you have additional comments about the course experience? Perhaps some feedback or advice we can publish for potential future participants?
Versioning History
4
This page provides a record of edits and changes made to this book since its initial publication in the B.C. Open Textbook Collection. Whenever edits or updates are made in the text, we provide a record and description of those changes here. If the change is minor, the version number increases by 0.01. If the edits involve substantial updates, the version number increases to the next full number.
The files posted by this book always reflect the most recent version. If you find an error in this book, please fill out the Report an Open Textbook Error form.
This page contains a list of links to external resources referenced in this book for people who are using a print copy. Links are listed by the chapters in which they appear and are listed alphabetically. Internal links are not included in this list.
CC BY 4.0 Licence: https://creativecommons.org/licenses/by/4.0/
Download this book in another file format: https://opentextbc.ca/flofacilitatorguide/
Report an Open Textbook Error form: https://open.bccampus.ca/reporting-an-open-textbook-error/
Web version of the FLO Facilitator’s Guide: https://opentextbc.ca/flofacilitatorguide/
Chapter 1: What is Facilitation?
ERF Working Papers Series (http://unesdoc.unesco.org/images/0024/002431/243126E.pdf)
Institute of Cultural Affairs – UK (https://www.ica-uk.org.uk/what-is-facilitation)
Oxford English Dictionary (https://en.oxforddictionaries.com/definition/facilitate)
Teaching in Blended Learning Environments (http://www.aupress.ca/index.php/books/120229)
Chapter 2: FLO Family of Courses
CC BY (https://creativecommons.org/licenses/by/4.0/)
Faculty OER Toolkit (https://pressbooks.bccampus.ca/facultyoertoolkit/)
UNESCO in 2002 (http://www.unesco.org/new/en/communication-and-information/access-to-knowledge/open-educational-resources/what-are-open-educational-resources-oers/)

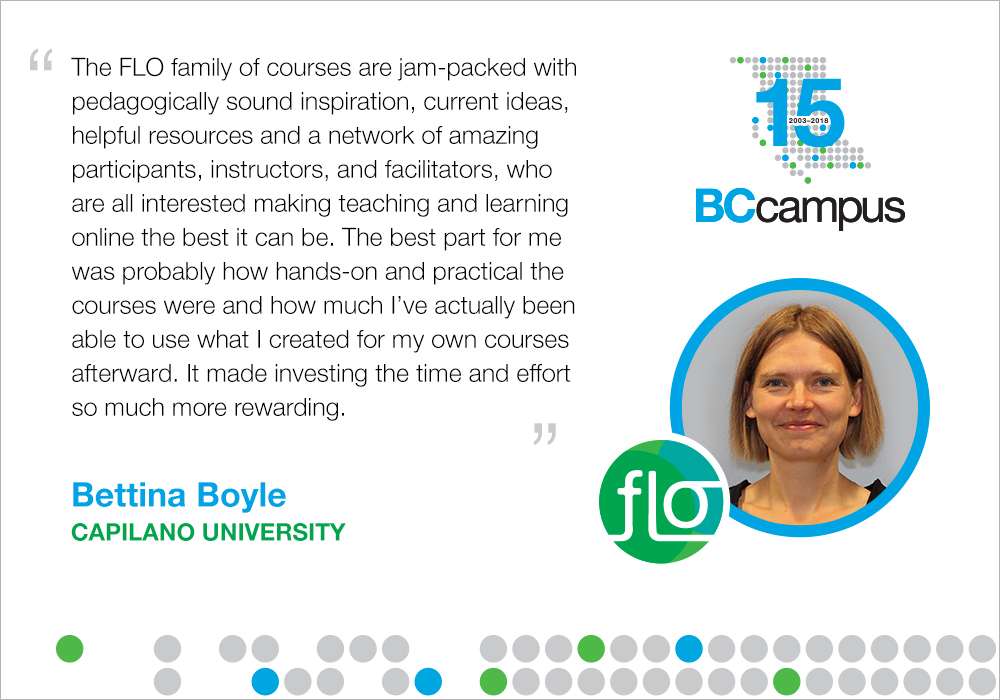


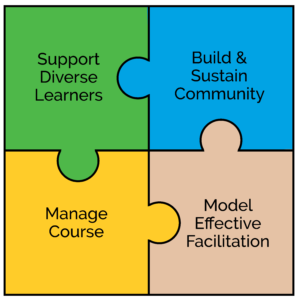
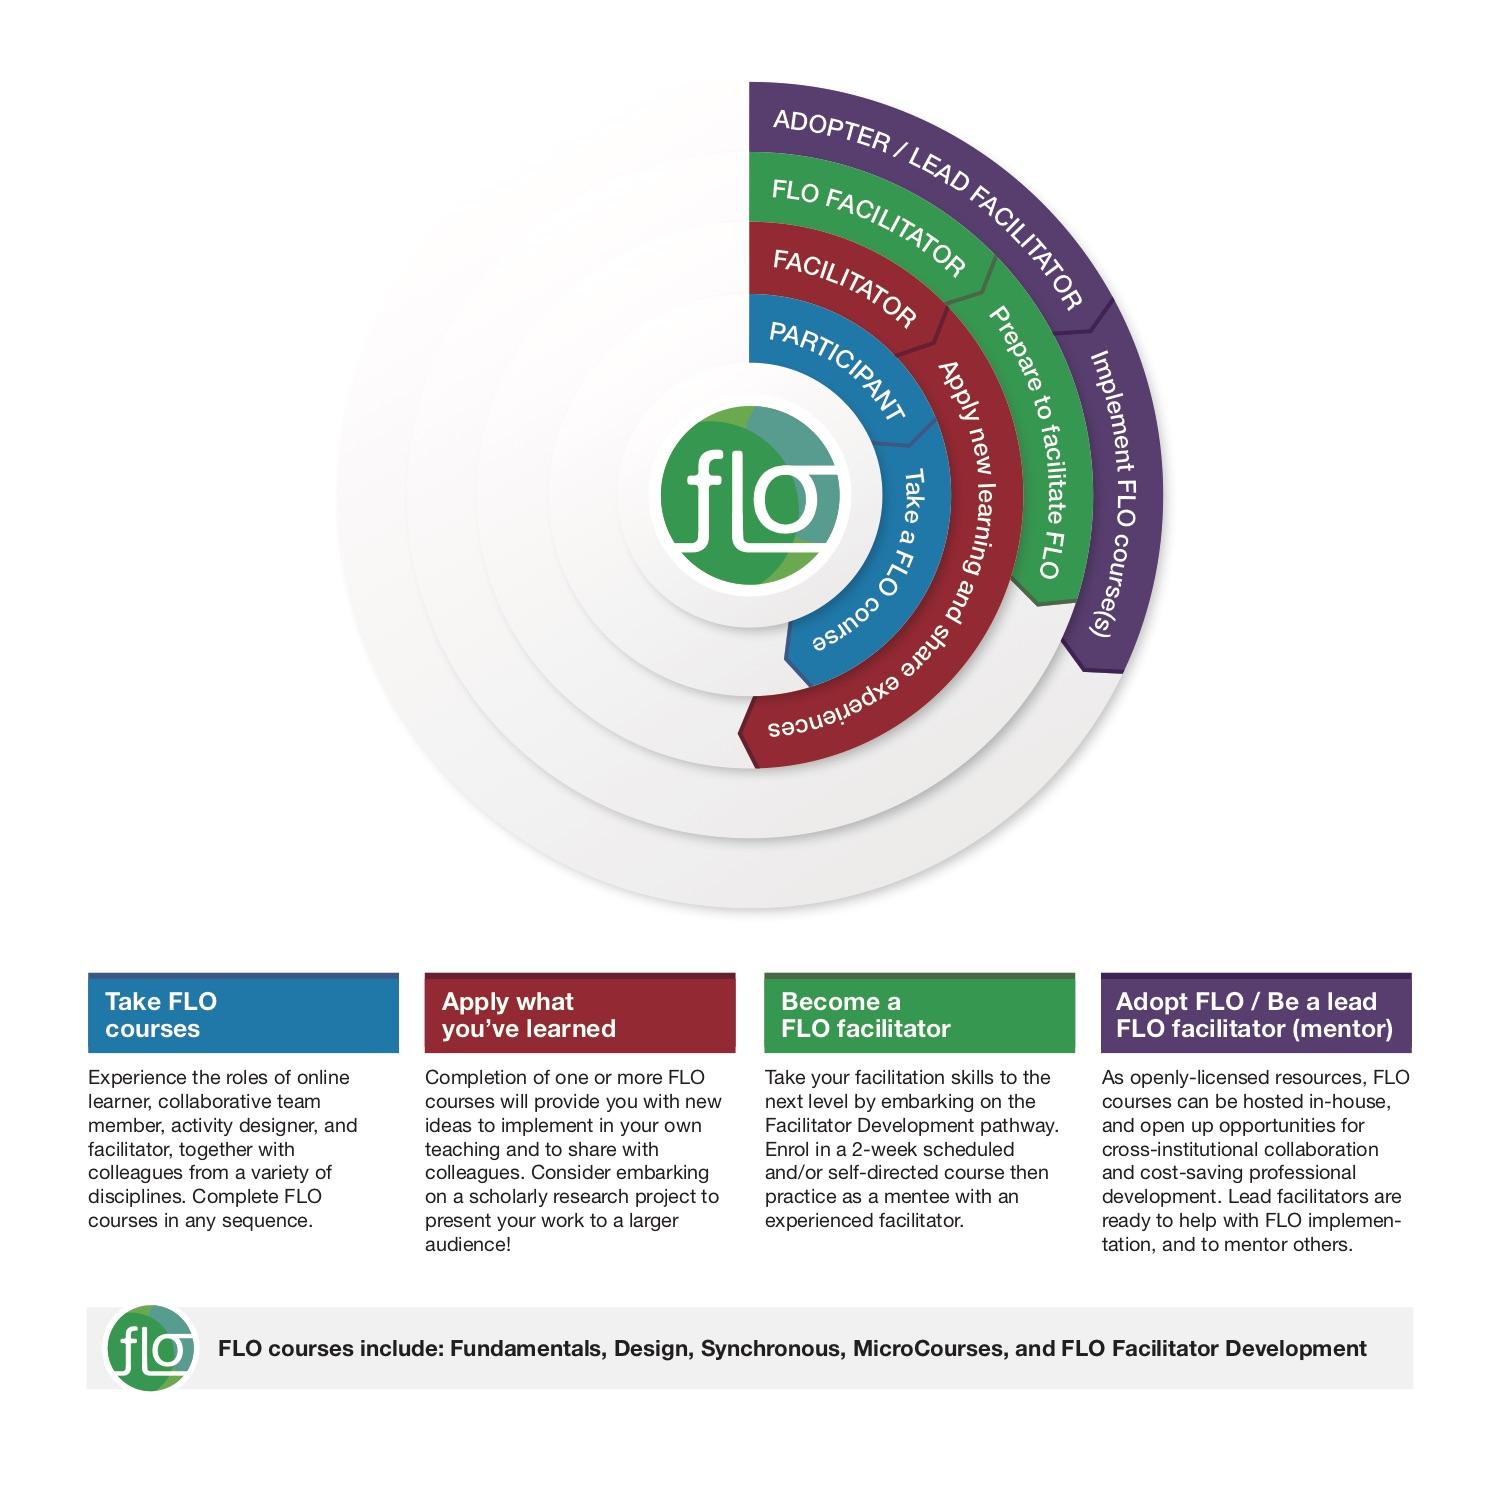
 Use existing templates (see the task lists that accompany each course in this guide) as a starting point for planning and tracking tasks with your co-facilitator(s). We suggest using a collaborative online workspace so you’re both on the same page, so to speak. This can also be a real time-saver, avoiding back and forth communication to make decisions. See

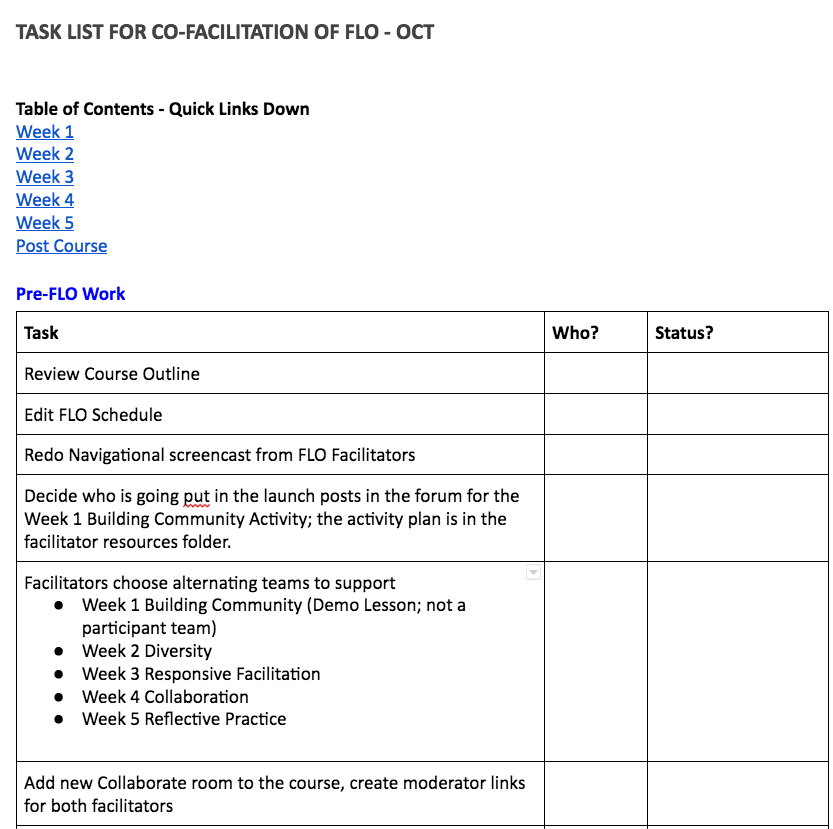
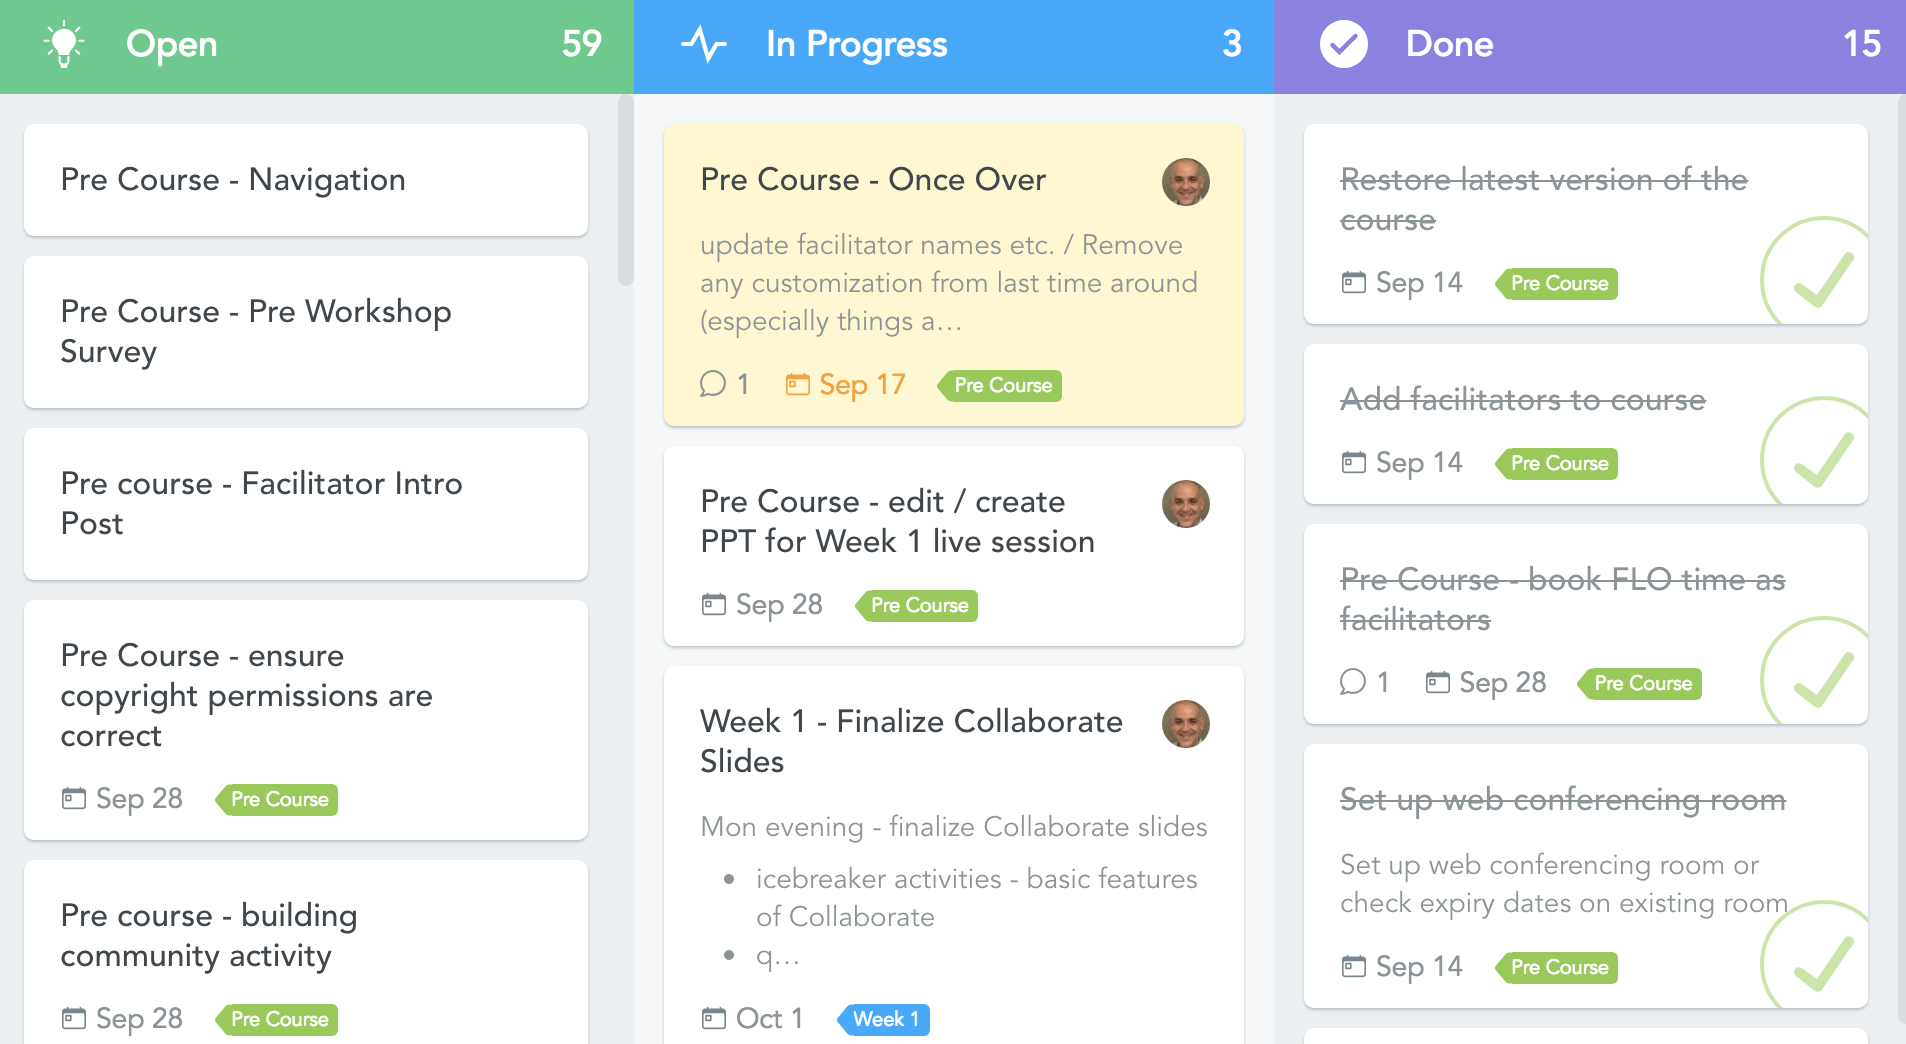
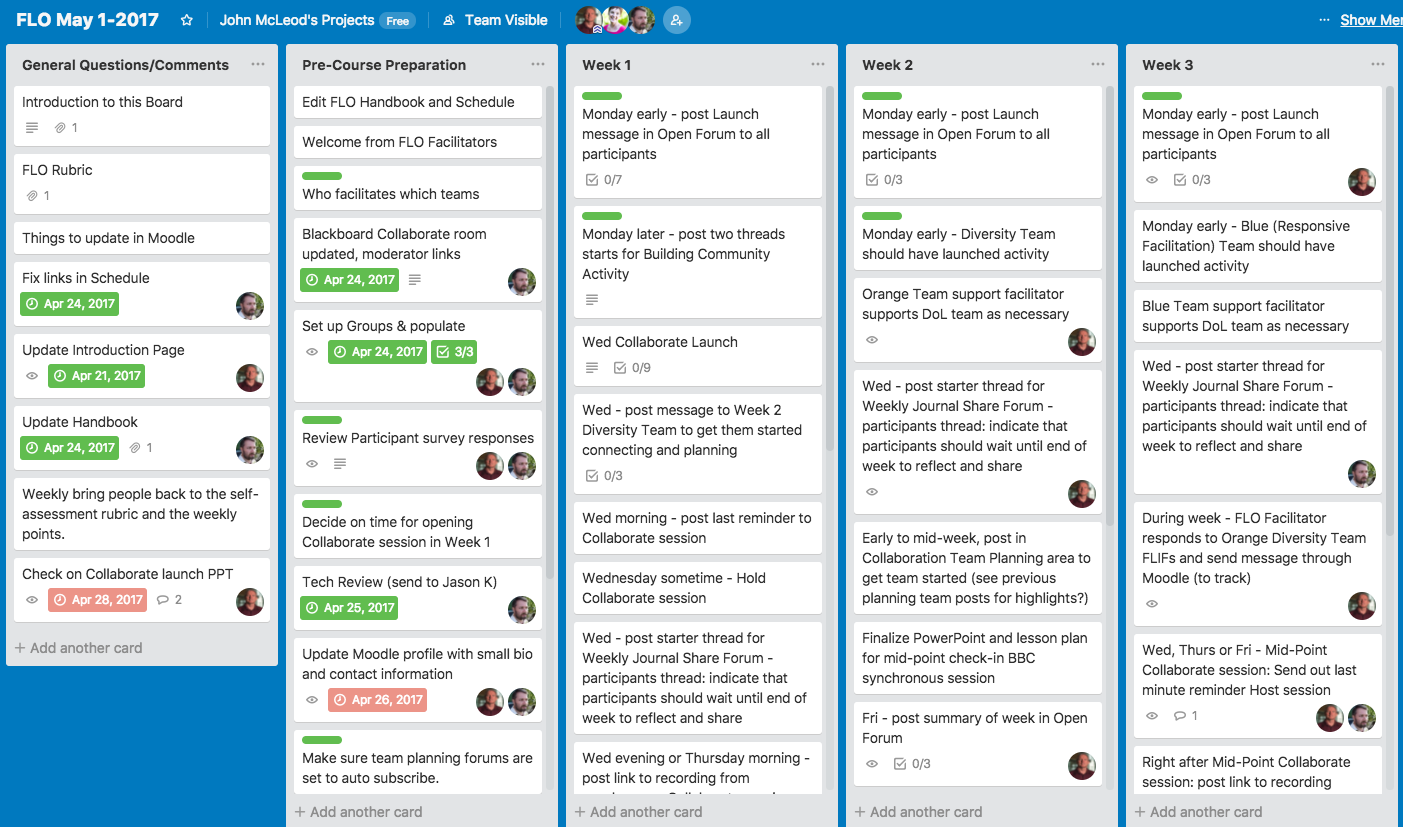
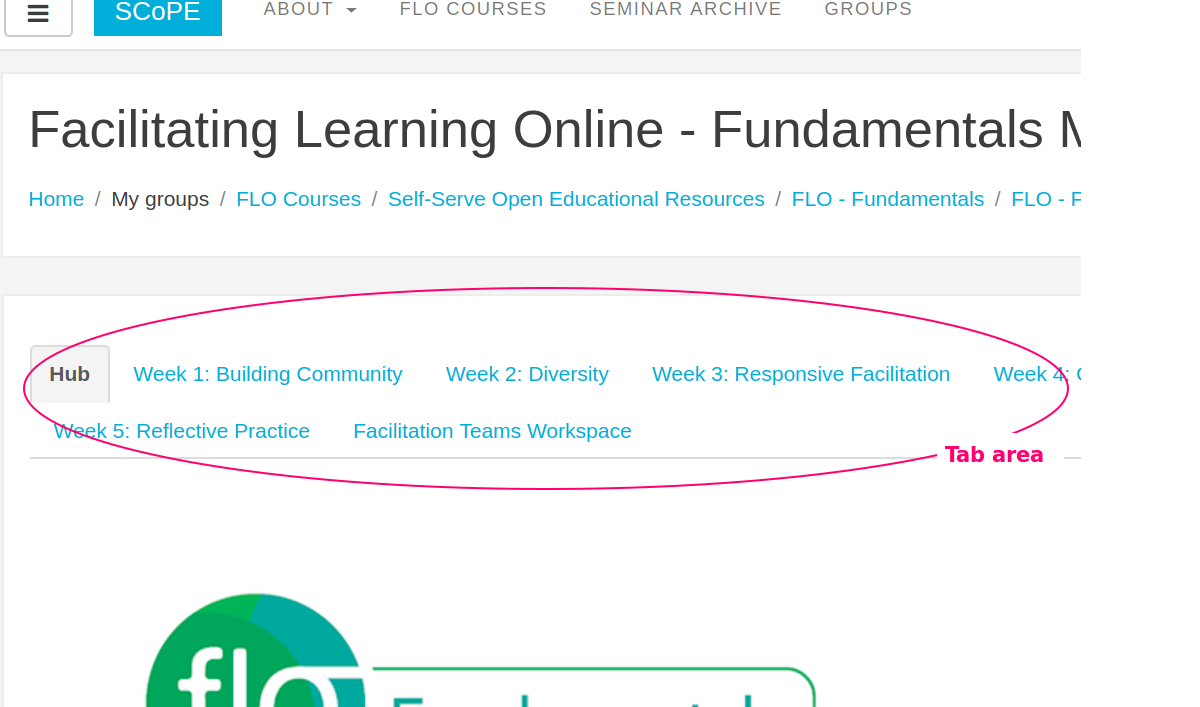
 Your participants may dream up a variety of designs for their mini-session and, ideally, you and your co-facilitator will be comfortable setting up the tools they need. If you are working within an LMS, some commonly-used tools include:
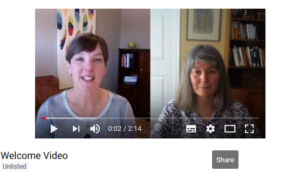


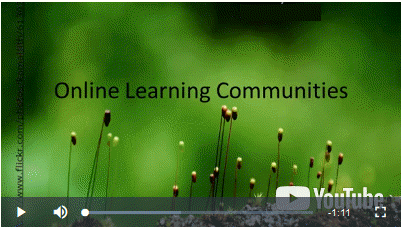
 “I have a deep empathy for my students now on the first week experience. I think when we “know the material” we forget what it feels like to “not know.” As a student in my first online course, I now know how it feels to be in that place and will be more understanding of my students.”


 Question 1: How do I feel about the session? Reflect on the strategies you used to facilitate and their impact on participants. Do you feel participants achieved the learning outcomes? How do you know?
 Before offering FLO courses, you may find it helpful to refer to your institution’s policies on privacy and confidentiality in terms of online courses and participant privacy.


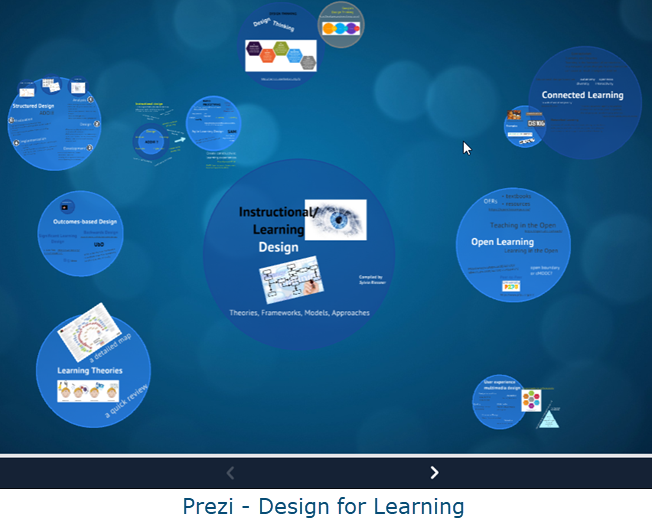
 We were able to integrate a useful tool called “
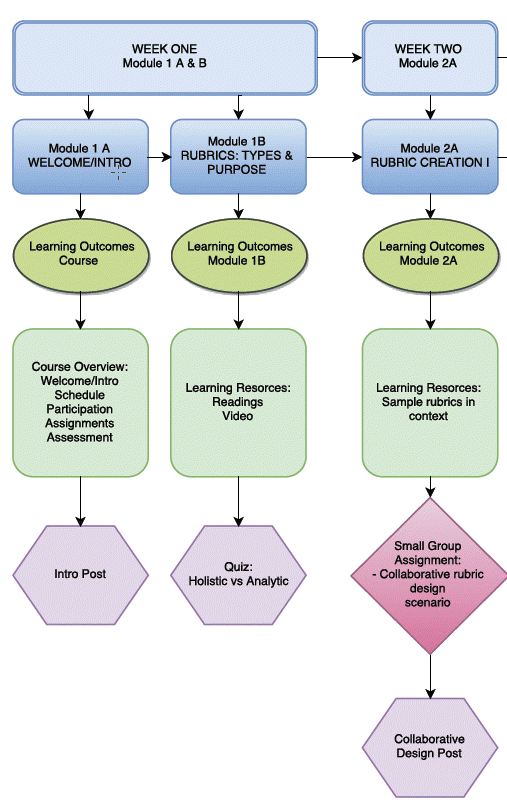


 One idea to help you track interactions with your participants to ensure you engage with them fairly equally throughout the course is to use a tracking matrix. This can be a simple spreadsheet with all your participants’ names in the first column on the left and many blank columns next to them on the right. Every time you respond to a participant, make a mark in a column next to their name. Over time, you can use this matrix to try to spread out your forum post responses to participants. This may help each participant feel heard by you as their facilitator throughout the course. Here is a simple example: