Authoring Techniques for Accessible Office Documents: Word Processing Applications
II
Usage Notes
Google Docs lacks several features that enable accessible office document authoring, most notably, the ability to create complex accessible tables and a built-in accessibility checker.
While there is no accessibility checking feature built into Google Docs, you can install a third-party add-on called Grackle Docs. Grackle is a third-party plug-in that includes an accessibility checker along with other features that enhance accessibility on Google Docs (see Technique 11).
Due to the nature of Google Docs, some accessibility features, such as tables, are only fully accessible when exporting the document to another format, like a PDF file.
What’s an “Office Document”?
You should use these techniques when you are using Google Docs to create documents that are:
- Intended to be used by people (i.e., not computer code),
- Text-based (i.e., not simply images, although they may contain images),
- Fully printable (i.e., where dynamic features are limited to automatic page numbering, table of contents, etc. and do not include audio, video, or embedded interactivity),
- Self-contained (i.e., without hyperlinks to other documents, unlike web content), and
- Typical of office-style workflows (i.e., reports, letters, memos, budgets, presentations, etc.).
If you are creating forms, web pages, applications, or other dynamic and/or interactive content, these techniques will still be useful to you, but you should also consult the W3C-WAI Web Content Accessibility Guidelines (WCAG 2.0) because these are specifically designed to provide guidance for highly dynamic and/or interactive content.
File Formats
Google Docs does not have a default file format as it is a web-based authoring tool. Google Docs offers a number of word processor and web format saving options. Most of these have not been checked for accessibility, but some information and/or instructions are available for the following formats in Technique 12:
- Microsoft Word (.docx)
- OpenDocument Format (.odt)
- Rich Text Format (.rtf)
- PDF (.pdf)
- Plain Text (.txt)
- Web Page (.html, zipped)
- EPUB Publication (.epub)
Document Conventions
We have tried to formulate these techniques so that they are useful to all authors, regardless of whether they use a mouse. However, for clarity there are several instances where mouse-only language is used. Below are the mouse-only terms and their keyboard alternatives:
- *Right-click: To right-click with the keyboard, select the object using the Shift+Arrow keys and then press either (1) the “Right-Click” key (some keyboard have this to the right of the spacebar) or Shift+F10.
Disclaimer and Testing Details:
Following these techniques will increase the accessibility of your documents, but it does not guarantee accessibility to any specific disability groups. In cases where more certainty is required, it is recommended that you test the office documents with end users with disabilities, including screen reader users. Files are easily saved as various file formats (see Technique 12).
Editor’s note: Since the content of this page has been heavily updated from the original article (Authoring Techniques for Accessible Office Documents: Google docs: Documents), the usual editor’s notes that flag new content will be omitted. The application-specific steps and screenshots were updated in December 2019.
Technique 1. Use Accessible Templates
Google Docs lacks support for some accessibility features, such as table headers that repeat. With this in mind, be cautious of templates available in the Google Docs template gallery and be sure that they comply the techniques discussed here.
All office documents start with a template, which can be as simple as a blank standard-sized page or as complex as a nearly complete document with text, graphics and other content. For example, a “Meeting Minutes” template might include headings for information relevant to a business meeting, such as “Actions” above a table with rows to denote time and columns for actions of the meeting. Because templates provide the starting-point for so many documents, accessibility is critical. If you are unsure whether a template is accessible, you should check a sample document produced when the template is used (see Technique 11).
Google Docs’s default template for new documents is a blank page. The basic installation also includes a wide variety of templates ranging from blank business letters and memos to blank business cards and schedules. These are all accessible by virtue of being blank. It is possible to create your own templates from scratch in Google Docs. As well, you can edit and modify the existing templates, ensuring their accessibility as you do so and saving them as a new template.
 Curb Cuts:
 Updating templates is also a good opportunity to improve document consistency, copy editing, and branding.
To select a template
- Go to Google Docs.
- At the top right, click on Template Gallery.
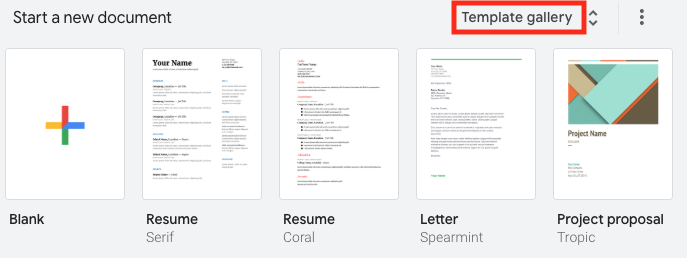
- Select a template.
- A copy of the template will open.
To create an accessible template
- Create a new document (from the default template or from an existing template).
Note: If creating a template from an existing document, go to File > Make a copy. Type a name and choose where to save it, then, click Ok.
- Rename your document. Be sure to indicate that the document is an accessible template by using terms such as “accessible” (e.g., “Accessible Memo Template”). This will improve its searchability and promote its use as an accessible template.
- Ensure that you follow techniques in this document. You may also check the accessibility (see Technique 11).
To share your accessible template as a new document
You can share your accessible template, but it may be more useful to share the file as copy that other users can add to their Google Drive.
- Go to the address bar change the end of the URL before sending it.
- Replace “edit” at the end of the URL with “copy”.
For example:
Before: http://docs.google.com/document/d/12345678/edit
After: http://docs.google.com/document/d/12345678/copy
- Send the modified copy link.
- When the recipient follows the modified copy link, they’re instructed to click on Make a copy.
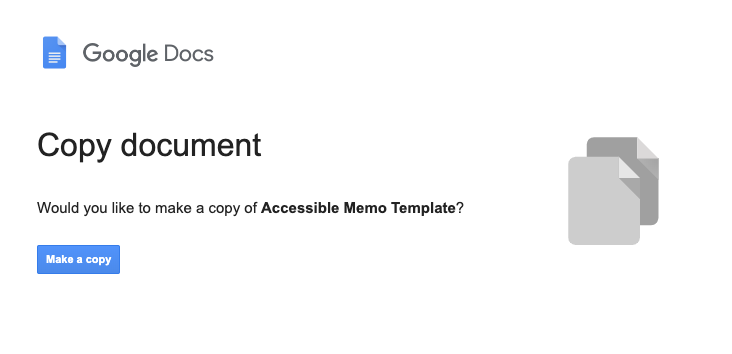
- They can then work on a copy of the accessible template.
For more information, see the resources below:
Technique 2. Specify Document Language
At this time (December 2019), Google Docs does not offer an explicit language selection mechanism to indicate the natural language of your document or changes in natural language at any point within the content. Google Docs defaults the natural language to the language selected for your Google Account. Users can change your typing language in Google Docs (see Google: Change Your Typing Language).
When exporting to other document formats, there is no guarantee that the natural language of your Google Account will be indicated as the natural language of your document. In order for assistive technologies (e.g., screen readers) to be able to present your document accurately, it is important to indicate the natural language of the document. If a different natural language is used for a paragraph or selected text, this also needs to be clearly indicated.
Use Grackle Docs to specify document language
While Google Docs does not offer an explicit language selection mechanism, users can set the document language when using the Grackle Docs plugin (see Technique 11). Using Grackle, users can set document properties including document title and document language. This is mainly needed if using Grackle to export to other file formats, like PDF.
Technique 3. Provide Text Alternatives for Images and Graphical Objects
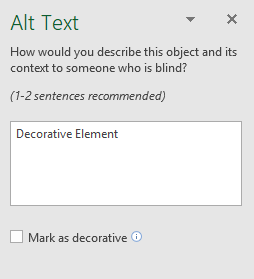
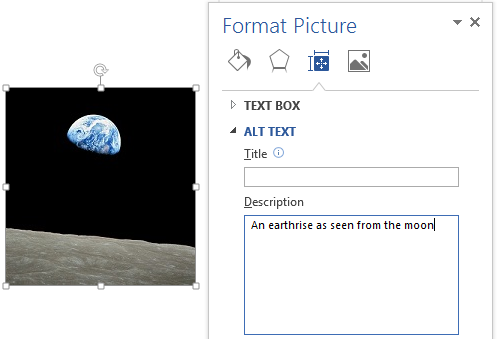
Google Docs offers a mechanism for adding alternative text to images and objects where it can be readily accessed by screen reader users. While you can add alt text, you will need to ensure that you provide the longer descriptions in the body of the document, near the images and objects. While this solution is not optimal for screen reader users and will complicate your own accessibility testing, it is necessary until long descriptions are supported.
When using images or other graphical objects, such as charts and graphs, it is important to ensure that the information you intend to convey by the image is also conveyed to people who cannot see the image. This can be accomplished by adding concise alternative text to each image. If an image is too complicated to concisely describe in the alternative text alone (artwork, flowcharts, etc.), provide a short text alternative and a longer description as well.
Tips for writing alternative text
- Try to answer the question “what information is the image conveying?”
- If the image does not convey any useful information, leave the alternative text blank
- If the image contains meaningful text, ensure all of the text is replicated
- Alternative text should be fairly short, usually a sentence or less and rarely more than two sentences
- If more description is required (e.g., for a chart or graph), provide a short description in the alternative text (e.g., a summary of the trend) and more detail in the long description, see below
- Test by having others review the document with the images replaced by the alternative text
Tips for writing longer descriptions
- Long descriptions should be used when text alternatives (see above) are insufficient to answer the question “what information is the image conveying?”
- In some situations, the information being conveyed will be how an image looks (e.g., an artwork, architectural detail, etc.). In these cases, try to describe the image without making too many of your own assumptions.
- One approach is to imagine you are describing the image to a person over the phone
- Ensure that you still provide concise alternative text to help readers decide if they are interested in the longer description
- Alternatively, you can include the same information conveyed by the image within the body of the document, providing the images as an alternate to the text. In that case, you do not have to provide alternate text within the image.
To add alternative text to images and graphical objects
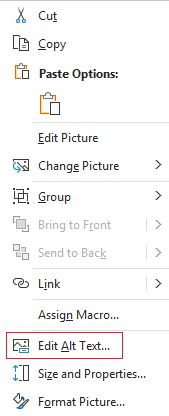
- Right-click* on the image.
- Select Alt Text from the contextual menu.
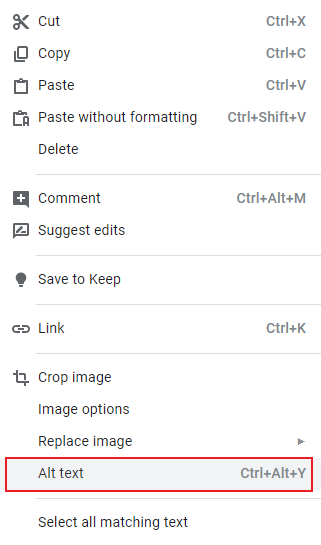
- Add your alt text to the Description field.
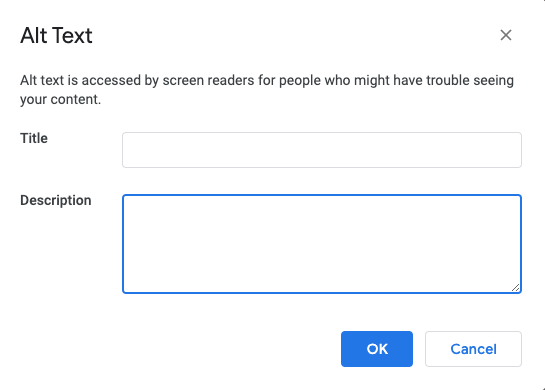
- Press OK to saveNote: Enter a description in the Title field will show a pop-up tooltip when users hover over the image with their mouse. However, it is recommended to put the image description in the Description field.
Technique 4. Avoid “Floating” Elements
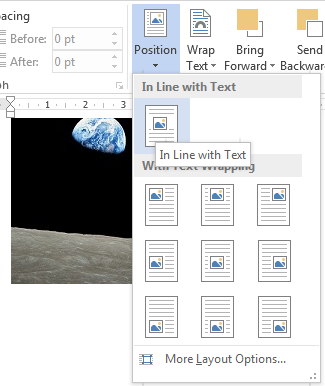
When images and objects are inserted into Google Docs they default to being positioned “inline” with the text. There is also the option to attach images and objects to a fixed position on the page. A “floating” object keeps its position relative to the page, while text flows around it. As content moves up or down on the page, the object stays where it was placed. To ensure that images and objects remain with the text that references it, always position it as “inline” with the text at the end of the in-text reference. Similarly, avoid placing drawing objects directly into the document (e.g., as borders, to create a diagram). Instead, create borders with page layout tools and insert complete graphical objects.
Technique 5. Use Headings
Any document longer than a few paragraphs could benefit from adding structure to make content easier for readers to understand. One of the simplest ways to do this is to use actual headings (or “true headings”) to create logical divisions between paragraphs. Using actual headings means applying a built-in heading style — rather than just formatting content with bolded, enlarged, or centered text. Built-in heading styles are structural elements that communicate order and levels, which provide a meaningful sequence to users of assistive technologies.
Curb Cuts: Using actual headings provides several important benefits:
- Headings are used by Google Docs to auto-generate a table of contents (see Technique 7.5: Use a Table of Contents).
- Headings are used by the Outline function in Google Docs to create a navigation pane, especially helpful for long documents (see Google: Use document outlines); and you can update all of the headings of a particular type at once, which keeps them consistent.
Tips for headings
- Use the default headings styles provided (“Heading “, “Heading 2”, …, “Heading 9”).
- Six (6) levels of headings are supported.
- Nest headings properly (e.g., the sub-headings of a “Heading 1” are “Heading 2”, etc.). Do not skip headings.
- If you plan to create a Word document that will have an automatically generated table of contents, remember that text marked with “Heading 1” will appear in the table of contents. Therefore, you may want to mark the top-level title of the document, which typically wouldn’t be included in the document’s table of contents, with the “Title” style. On the other hand, if you plan to convert to HTML, the main title is usually marked with a “Heading 1” which will be mapped to an
<h1> HTML element.
To apply headings from the Format menu
- Highlight the text that you want to make into a navigational heading.
- Go to menu item: Format > Paragraph Styles.
- Select the desired heading you would like to apply to the text.
For details on how to modify a heading or text style, see Google: Set and change a default style.
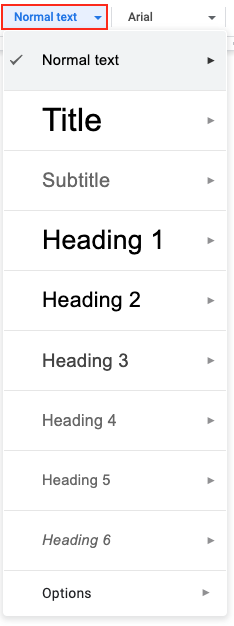
To apply headings using the Heading drop-down menu
- Highlight the text that you want to make into a navigational heading.
- Go to the Styles drop-down menu.

- Select the desired heading you would like to apply to the text.
To apply headings using keyboard shortcuts
- Highlight the text that you want to make into a navigational heading
- Select Ctrl+Alt+1 (for Heading 1),Ctrl+Alt+2 (for Heading 2), etc.
For a complete listing of keyboard shortcuts, see Google: Keyboard shortcuts for Google Docs.
Technique 6. Use Named Styles
As with actual or “true” headings (see Technique 5), you should attempt to make use of the named styles that are included with the office application (e.g., “emphasis”, “caption”, etc.) before creating your own styles or using the character formatting tools directly. Named styles help your readers understand why something was formatted in a given way, which is especially helpful when there are multiple reasons for the same formatting (e.g., it is common to use italics for emphasis, Latin terms and species names). For more information on formatting using named styles, see Technique 9. Note: While office application suites support headings in much the same way, the named styles often differ.
To use default named styles
- Default named styles can be applied the same way as headings (see Technique 5).
Technique 7. Use Built-In Document Structuring Features
7.1 Tables
At this time, Google Docs does not offer a mechanism that allows you to select and indicate headings for rows and columns. Since it is not possible to create complex tables in Google Docs that are accessible, avoid creating complex tables since table headers cannot be designated.
If you use the Grackle Docs add-on, tables can be given structure and table headings can be indicated. While these fixes won’t be useful for making tables more accessible in Google Docs, it does allow you to export the document into another format with appropriate table tags intact. For more on Grackle Docs, see Technique 11.
When using tables, it is important to ensure that they are clear and appropriately structured. This helps all users to better understand the information in the table and allows assistive technologies (e.g., screen readers) to provide context so that the information within the table can be conveyed in a meaningful way.
Since Google Docs does not provide a feature to repeat header rows at the top of each page, you would need to break your table into separate tables. Then, you would manually add a row at the top of the table and copy/paste header info at the top of each page. For detailed instructions on how to work with tables in Google Docs, see Google: Add and edit Tables.
Tips for tables
- Only use tables for tabular information, not for formatting, such as to position columns.
- Use “real tables” rather than text formatted to look like tables using the TAB key or space bar. These will not be recognized by assistive technology.
- Keep tables simple by avoiding merged cells and dividing complex data sets into separate smaller tables, where possible.
- If tables split across pages, set the header to show at the top of each page. Also set the table to break between rows instead of in the middle of rows.
- Create a text summary of the essential table contents. Any abbreviations used should be explained in the summary.
- Table captions or descriptions should answer the question “what is the table’s purpose and how is it organized?” (e.g., “A sample order form with separate columns for the item name, price and quantity”).
- Table cells should be marked as table headers when they serve as labels to help interpret the other cells in the table.
- Table header cell labels should be concise and clear.
- Ensure the table is not “floating” on the page (see Technique 4).
7.2 Lists
When you create lists, it is important to format them as “real lists”. Otherwise, assistive technologies will interpret your list as a series of short separate paragraphs instead of a coherent list of related items.
To create an ordered or unordered list
- Go to menu item: Format > List styles.
- Select the list style you want to use.
7.3 Columns
Use Columns feature for placing text in columns. Note: Because columns can be a challenge for users of some assistive technologies, consider whether a column layout is really necessary.
7.4 Page Breaks
Start a new page by inserting a page break (Windows: CTRL + Enter; Mac: ⌘ + Enter) instead of repeated hard returns.
7.5 Use a Table of Contents
Creating an index or table of contents to outline office-document content can provide a means of navigating the meaningful sequence of content. You can see your document’s structure with a table of contents. Each item in the table of contents links to your document’s headings.
The best way to generate a table of contents is after applying the predefined heading styles, such as “Heading 1” as described above, to the headings that you want to include in your table of contents. After you apply these styles, you can then create a table of contents.
To insert a Table of Contents
- Position cursor where you would like to place the table within your document.
- Go to menu item: Insert > Table of contents.
To update a Table of Contents
- Click within the table.
- Select the Refresh button.

For more details, see: Google: How to add or change a table of contents.
7.6 Use Page Numbering
In Google Docs, you can add page numbers and the number of total pages to a document.
Numbering the pages of your document helps those reading and editing your document effectively navigate and reference its content. For users of assistive technologies, it provides a valuable point of reference within the document.
To insert page numbers
- In the top left, select Insert and then Header & page number.
- Then choose:
Page number: Choose where you want the page numbers to go, and whether you want the first page to be skipped.
Page count: The page count will be added wherever your cursor is placed in the document.
- The page numbers or page count will be added automatically.
For more details, see Google: Add or remove headers, footers and page numbers.
7.7 Document Title
At this time, Google Docs makes use of a single document name. Within Google Docs, this serves well as a title, but when exporting to ODT, the document name is used to form the file name and the ODT “Title” properties field is left blank. Note: In case the document is ever converted into HTML, it should be given a descriptive and meaningful title.
If using third-party add-on Grackle Docs, you can add a document title. After updating this setting, the document title will be preserved in the document’s metadata when exporting to PDF using Grackle. It is one of the first checks that appears in the Grackle Docs sidebar after launching (see Technique 11).
To change the file name of the current document
- Go to menu item: File > Rename.
- In the Rename Document dialog, enter a new document name.
- Click OK.
Technique 8. Create Accessible Charts
Charts can be used to make data more understandable for some audiences. However, it is important to ensure that your chart is as accessible as possible to all members of your audience. All basic accessibility considerations that are applied to the rest of your document must also be applied to your charts and the elements within your charts. For example, use shape and color, rather than color alone, to convey information. As well, some further steps should be taken to ensure that the contents are your chart are appropriate labeled to give users reference points that will help them to correctly interpret the information.
Other Chart Considerations
- When creating line charts, use the formatting options to create different types of dotted lines to facilitate legibility for users who are color blind
- When creating bar charts, it is helpful to apply textures rather than color to differentiate the bars
- Change the default colors to a color safe or gray-scale palette
- Use the formatting options to change predefined colors, ensuring that they align with sufficient contrast requirements (see Technique 9.2)
Curb Cuts: If the chart data is also provided in an appendix, it will be easier for all users to make use of the data.
To add a chart to Google Docs
Charts that you create in Google Sheets can be linked to a Google Docs document.
- Go to Insert > Chart.
- Select the type of chart you want to add.
- When you add a new chart, it will link to a new Google Sheet. To update the the data in the chart, update the numbers in the linked Google Sheet.
For more details, see the following:
Technique 9. Make Content Easier to See
9.1 Format of Text
When formatting text, especially when the text is likely to printed, try to:
- Use font sizes between 12 and 18 points for body text.
- Use fonts of normal weight, rather than bold or light weight fonts. If you do choose to use bold fonts for emphasis, use them sparingly.
- Use standard fonts with clear spacing and easily recognized upper and lower case characters. Sans serif fonts (e.g., Arial, Verdana) may sometimes be easier to read than serif fonts (e.g., Times New Roman, Garamond).
- Avoid large amounts of text set all in caps, italic or underlined.
- Use normal or expanded character spacing, rather than condensed spacing.
- Avoid animated or scrolling text.
But can’t users just zoom in? Office applications do typically include accessibility features such as the ability to magnify documents and support for high contrast modes. However, because printing is an important aspect of many workflows and changing font sizes directly will change documents details such the pagination, the layout of tables, etc., it is best practice to always format text for a reasonable degree of accessibility.
9.2 Use Sufficient Contrast
The visual presentation of text and images of text should have a contrast ration of at least 4.5:1. To help you determine the contrast, here are some examples on a white background:
- Very good contrast (Foreground=black, Background=white, Ratio=21:1)
- Acceptable contrast (Foreground=#767676, Background=white, Ratio=4.54:1)
- Unacceptable contrast (Foreground=#AAAAAA, Background=white, Ratio=2.32:1)
Also, always use a single solid color for a text background rather than a pattern. In order to determine whether the colors in your document have sufficient contrast, you can consult an online contrast checker, such as:
9.3 Avoid Using Color Alone
Color should not be used as the only visual means of conveying information, indicating an action, prompting a response, or distinguishing a visual element. In order to spot where color might be the only visual means of conveying information, you can create a screenshot of the document and then view it with online gray-scale converting tools, such as:
- GrayBit v2.0: Grayscale Conversion Contrast Accessibility Tool
Editor’s note: GrayBit v2.0 is no longer available. However, multiple tools can be found online: Google Search: gray-scale conversion tool.
9.4 Avoid Relying on Sensory Characteristics
The instructions provided for understanding and operating content should not rely solely on sensory characteristics such as the color or shape of content elements. Here are two examples:
- Do not track changes by simply changing the color of text you have edited and noting the color. Instead use Google Docs’s review functionality features to track changes, such as the revision history and TextFlow mechanisms.
- Do not distinguish between images by referring to their appearance (e.g., “the bigger one”). Instead, label each image with a figure number and use that for references.
9.5 Avoid Using Images of Text
Before you use an image to control the presentation of text (e.g., to ensure a certain font or color combination), consider whether you can achieve the same result by styling “real text”. If this is not possible, as with logos containing stylized text, make sure to provide alternative text for the image following the techniques noted in Technique 3.
Technique 10. Make Content Easier to Understand
10.1 Write Clearly
By taking the time to design your content in a consistent way, it will be easier to access, navigate, and interpret for all users:
- Whenever possible, write clearly with short sentences.
- Introduce acronyms and spell out abbreviations.
- Avoid making the document too “busy” by using lots of whitespace and by avoiding too many different colors, fonts and images.
- If content is repeated on multiple pages within a document or within a set of documents (e.g., headings, footings, etc.), it should occur consistently each time it is repeated.
10.2 Provide Context for Hyperlinks
Hyperlink text in your document should be meaningful when read out of context. To be an effective navigation aid, the link text should describe the destination of the link.
Consider the experience of screen reader users: Generally, screen readers generate a list of links, and screen reader users navigate this list alphabetically. Hyperlink text such as “click here” or “more” is meaningless in this context.
In order to be useful to someone using a screen reader, ensure that hyperlink text is self-describing and meaningful on its own.
To add hyperlinks with meaningful text
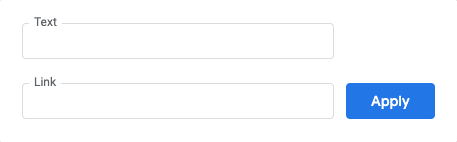
- Go to menu item: Insert > Link. Alternately, you can select the text you’d like to add a link to and press Ctrl+K (or Cmd+K on Macs).
- In the pop-up box, enter descriptive text in the Text display box.
- Enter the link address in the Link.
- Select Apply.
Technique 11. Check Accessibility
In order to get some indication of the accessibility of your document or template (see Technique 1), then you may consider saving the file into HTML or PDF in order to perform an accessibility check in one of those formats, as described below.
While there is no accessibility checking feature built into Google Docs, you can install a third-party add-on called Grackle Docs.
Grackle Docs
What is Grackle Docs? Grackle Docs is a third-party add-on that runs on documents created in Google Docs. It helps with checking and improving the digital accessibility of your document. Due to the nature of Google Docs, some accessibility features, such as tables, are only fully accessible when exporting the document to another format, like a PDF file.
How does it work? After Grackle is launched, It scans the current document for accessibility issues and identifies and locates errors. Feedback appears in a sidebar that is docked on right-side of the screen. By exploring the sidebar, you can immediately learn about accessibility issues and find and fix the detected errors by interacting with the Grackle sidebar.
Note: Grackle’s accessibility checker is free to use; however, the ability to export and produce accessible HTML and PDF documents is only free for the first 30 days (as of December 2019).
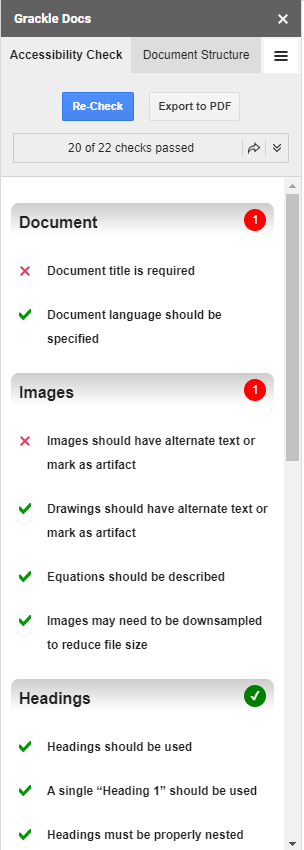
At present, Grackle Docs performs the following 22 accessibility checks:
- Document
- Document title is required
- Document language should be specified
- Images
- Images should have alternate text or mark as artifact
- Drawings should have alternate text or mark as artifact
- Equations should be described
- Images may need to be downsampled to reduce file size
- Headings
- Headings should be used
- A single “Heading 1” should be used
- Headings must be properly nested
- Tables
- Tables must be tagged or marked as layout tables
- The use of merged cells is not recommended
- The use of empty cells is not recommended
- Landmarks
- Headers and footers should be used
- Footnotes should have ids and alt text
- Lists should be used where appropriate
- Content
- Document should not contain unsupported content
- High color contrast should be used
- Fine print should be avoided
- All-caps styling should be avoided
- Adjusted alignment not suggested for non-heading text
- Lengthy paragraphs should be avoided
- Links should be informative
How to install Grackle Docs
Grackle Docs can be installed from the Add-ons menu of a Google Docs document.
- Open a Google document.
- Select Add-ons > Get Add-ons.
- Search for “Grackle” in the search field.
- Select the add-on and click Install.
- Note: A message will appear requesting access to data that the add-on needs to work. Review the message and click Allow.
How to launch and use Grackle Docs
Grackle Docs is simple to launch and is accessed from the Add-ons menu. Open a Google document
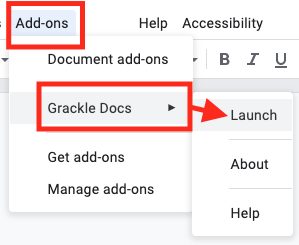
- From the Add-ons menu, select Grackle Docs, then select Launch.
- A sidebar launches that identifies errors and warnings.
- Clicking on each error and warning will expand the selection and provide guidance on how to resolve each issue.
- Select the “Locate” button on any flagged item will take you to that line of the document to review.

- Continue to review and address each flagged item.
- Select the “Re-Check” button at the top of the sidebar to update the report.
- Continue to revise until all checks have passed.
To view a sample Google Doc that will give you a sense of how Grackle Docs works, see Grackle Docs Walkthrough Document from Grackle. Automated accessibility checkers cannot be trusted to check for all accessibility concerns, so be sure to review the recommended techniques in this document.
Evaluating Accessibility in Other Formats
To evaluate HTML accessibility
Save the document into HTML format and use one of the web accessibility checkers available online. Such as:
To evaluate PDF accessibility
If you saved your document in tagged PDF format, you can use the following tools and steps to evaluate the accessibility of the PDF document:
To evaluate PDF accessibility in Adobe Acrobat Professional
- Go to menu item: Advanced > Accessibility > Full Check…
- In the Full Check dialog, select all the checking option
- Select the Start Checking button
Editor’s note: For detailed instructions, see our section on how to check accessibility using Adobe Acrobat Professional.
Technique 12. Use Accessibility Features when Saving/Exporting to Other Formats
In some cases, additional steps must be taken in order to ensure accessibility information is preserved when saving/exporting to formats other than the default.
Alternate formats
- Go to menu item: File > Download as
- Select format Note: documents saved as HTML format may require some cleaning up. The steps below will help you with this.
PDF
PDF documents are not always accessible. Accessible PDF documents are often called “Tagged PDF” because they include “tags” that encode structural information required for accessibility. To evaluate the accessibility of your PDF document, see Technique 11 .
To clean up your HTML file
- Remove unnecessary styles, line breaks, etc.
- Remove unnecessary id, class, and attributes
- Remove font tags
- Remove styles in the <head> tag
- Ensure the <th> tags have a scope attribute
- Remove <p> tags nested inside <th> and <td> tags
- Check for accessibility (see Technique 11) Note: you may wish to use HTML editors or utilities to help with this process.
Technique 13. Consider Using Accessibility Support Applications/Plugins
Disclaimer: This list is provided for information purposes only. It is not exhaustive and inclusion of an application or plug-in on the list does not constitute a recommendation or guarantee of results.
Accessibility Help
If you are interested in what features are provided to make using Google Docs more accessible to users, documentation is provided through online articles and Help forums:
- Go to menu item: Help > Google Docs Help Center
References and Resources
- Google Docs help
- GAWDS Writing Better Alt Text
Acknowledgments
This document was produced as part of the Accessible Digital Office Document (ADOD) Project.
This project has been developed by the Inclusive Design Research Centre, OCAD University as part of an EnAbling Change Partnership project with the Government of Ontario and UNESCO (United Nations Educational, Scientific and Cultural Organization).

Source: Authoring Techniques for Accessible Office Documents: Google docs: Documents by the Inclusive Design Research Centre (IDRC) used under CC-BY-SA 3.0.
n accessibility checking feature.
Microsoft Word 2013, 2016, and 2019
4
Usage Notes

This icon highlights “curb cut” opportunities in these techniques. “Curb cuts” are situations in which accommodations made for accessibility reasons will also result in significantly better and more efficient outcomes for everyone. The name comes from sidewalk “curb cuts” that were added for people in wheelchairs, but are commonly used by people with baby strollers, handcarts, wheeled luggage, and others.
At the time of testing (December 2019), Word provides a set of accessibility features that is sufficient to enable the production of accessible digital office documents. In addition, Word includes an accessibility checking feature. This guide is intended to be used for documents that are:
- Intended to be used by people (i.e., not computer code),
- Text-based (i.e., not simply images, although they may contain images),
- Fully printable (i.e., where dynamic features are limited to automatic page numbering, table of contents, etc. and do not include audio, video, or embedded interactivity),
- Self-contained (i.e., without hyperlinks to other documents, unlike web content), and
- Typical of office-style workflows (e.g., Reports, letters, memos, budgets, presentations, etc.).
If you are creating forms, web pages, applications, or other dynamic and/or interactive content, these techniques will still be useful to you, but you should also consult the W3C-WAI Web Content Accessibility Guidelines (WCAG 2.0) because these are specifically designed to provide guidance for highly dynamic and/or interactive content.
File Formats
The default file format for Word is Office Open XML (DOCX).
In addition, Word offers many other word processor and web format saving options (e.g., PDF, HTML, OpenDocument Text, Rich Text Format, etc.). Most of these have not been checked for accessibility, but some information and/or instructions are available in Technique 11.
Document Conventions
We have tried to formulate these techniques so that they are useful to all authors, regardless of whether they use a mouse. However, for clarity there are several instances where mouse-only language is used. Below are the mouse-only terms and their keyboard alternatives:
- *Right-click: To right-click with the keyboard, select the object using the Shift+Arrow keys and then press either (1) the “Right-Click” key (some keyboard have this to the right of the spacebar) or (2) Shift+F10.
Disclaimer and Testing Details
- Following these techniques will increase the accessibility of your documents, but it does not guarantee accessibility to any specific disability groups. In cases where more certainty is required, it is recommended that you test the office documents with end users with disabilities, including screen reader users.
- The application-specific steps and screenshots in this document were created using Microsoft Word 2013 and Microsoft Word included with Office 365 while creating a DOCX document.
Technique 1. Use Accessible Templates
All office documents start with a template. These can be as simple as a blank standard-sized page or complex nearly complete document with text, graphics, and other content (e.g., a “meeting minutes” template). Because templates provide the starting-point for so many documents, accessibility is critical. If you are unsure whether a template is accessible, you should check a sample document produced when the template is used (see Technique 10. Check Accessibility). Word’s default template for new documents is a blank page. The basic installation also includes a variety of other blank office-related documents. These are all accessible by virtue of being blank. It is also possible to create your own accessible templates.
Curb Cuts: Updating templates is also a good opportunity to improve document consistency, copy-editing, and branding.
To create an accessible template
- Create a new document (from the default blank template or from one of the prepackaged templates).
- Ensure that you follow all of the techniques in this document.
- When finished, check the accessibility of the document (see Technique 10. Check Accessibility).
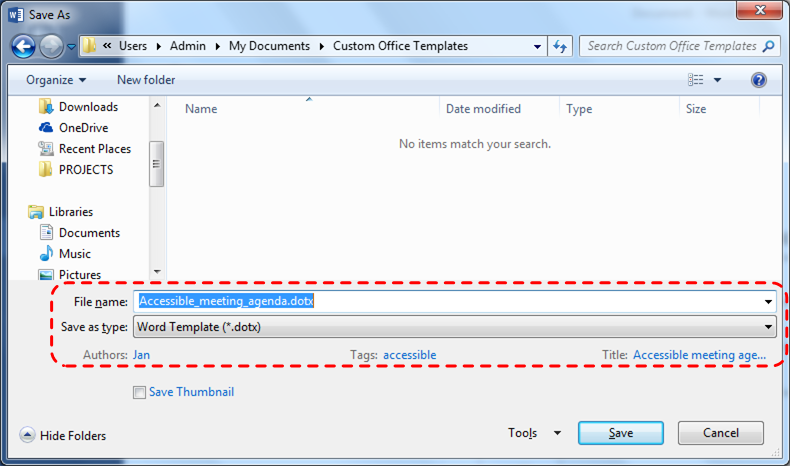
- Go to menu item: File > Save As.
- Select Templates.
- In the Save as type list, select Word Template (*.dotx).
- In the File name box, type a name for the template. Using a descriptive File name (e.g., “Accessible Memo Template”) may increase the prominence of the accessibility status. As well, filling in the text boxes labeled Tags and Title with the terms that include “accessibility” may improve the discoverability of the template as an accessible file.
- Select Save.
To select an accessible template
Only use these steps if you have an accessible template available (e.g., one that you previously saved). Otherwise, simply open a new (blank) document.
- Go to menu item: File > New.
- Select Personal.
- Select your accessible template from the list.
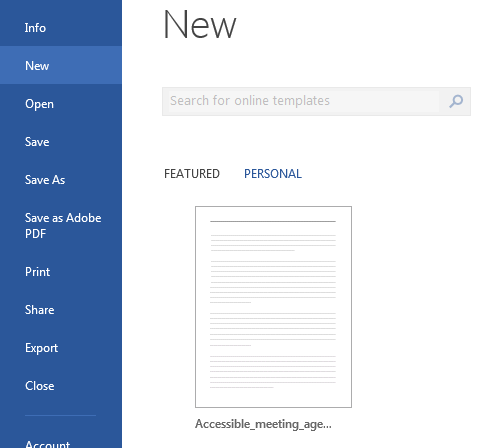
- A new document based on the template will be displayed. If you chose an accessible template, the document will be accessible at this point.
- As you add your content (e.g., text, images, etc.), ensure that you consult the sections that follow to preserve accessibility.
Technique 2. Specify Document Language
WCAG 2.0 Applicability:
- 3.1.1 Language of Page
- 3.1.2 Language of Parts
In order to enable for assistive technologies (e.g., screen readers) to present your document accurately, you must indicate the natural (human) language of the document. If a different natural language is used for a paragraph or selected text, this also needs to be clearly indicated.
Curb Cuts: The specified document language is also used by the spelling and grammar checker. In Canada, make sure to choose “English (Canada)” to avoid having to override American spellings of words such as “colour.”
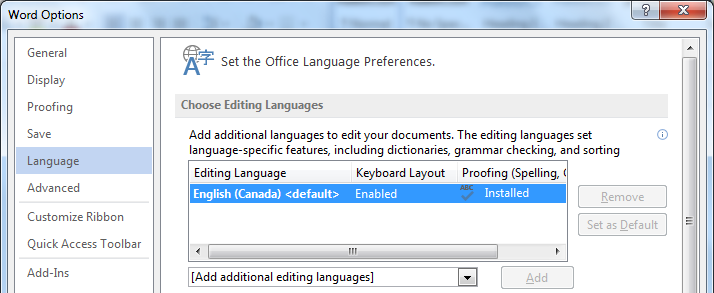
To change the default language
- Go to menu item: File.
- Select Options from the list in the left window pane.
- Select Language from the list in the left of the Options dialog.
- Under Choose Editing Languages, select the editing language you want to use.
Note: To add an editing language, select the language from the drop down list labeled “Add additional editing languages.”
- Select Set as Default.
- Close all Office documents and open them again for the changes to take effect.
Word has an automatic language detection mechanism, which can automatically detect the language of your text. If you type a section of text in a different language than the rest of your document, Word should programmatically mark the language of that section of text appropriately.
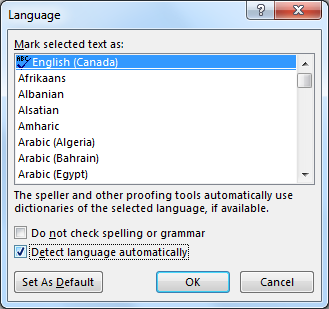
To turn on automatic language detection
- Go to menu item: Review.
- In the Language section, select the Language button.
- Select Set Proofing Language.
- In the Language dialog, select the Detect language automatically check box.
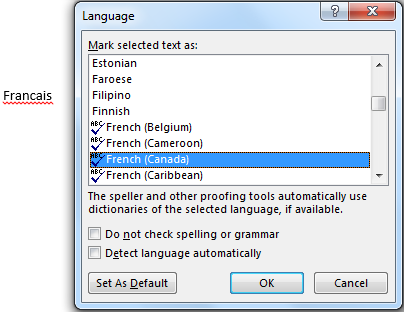
To apply a language directly to selected text
- Select the text.
- Go to menu item: Review.
- In the Language section, select the Language button.
- Select Set Proofing Language.
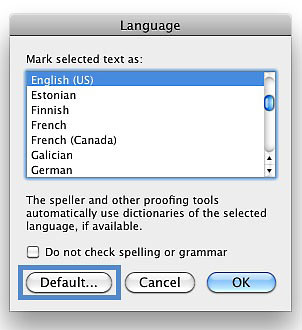
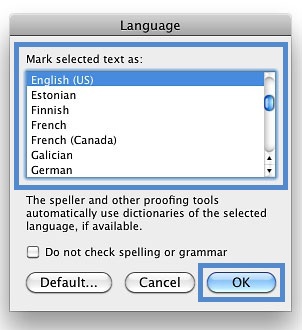
- In the Mark selected text as box, select the language from the list.
- Select OK.
Technique 3. Provide Text Alternatives for Images and Graphical Objects
When using images or other graphical objects, such as charts and graphs, it is important to ensure that the information you intend to convey by the image is also conveyed to people who cannot see the image. This is done by adding concise alternative text to of each image. If an image is too complicated to concisely describe in the alternative text alone (e.g., artwork, flowcharts, etc.), provide a short text alternative and a longer description as well.
Curb Cuts: Sometimes it may not be clear what a particular image is meant to convey and alternative text can provide that clarity. Also, alternate text has been shown to be included in search engines rankings.
Tips for writing alternative text
- Try to answer the following question: “What information is the image conveying?”
- If the image does not convey any useful information, leave the alternative text blank.
- If the image contains meaningful text, include all of the text in the alternative.
- Alternative text should be fairly short, usually a sentence or less and rarely more than two sentences.
- If more description is required (e.g., for a chart or graph), provide a short description in the alternative text (e.g., a summary of the trend) and more detail in the long description, see below.
- Test by having others review the document with the images replaced by the alternative text.
Tips for writing longer descriptions
- Long descriptions should be used when text alternatives (see above) are insufficient to answer the question: “What information is the image conveying?”
- In some situations, the information being conveyed will be how an image looks (e.g., an artwork, architectural detail, etc.). In these cases, try to describe the image without making too many of your own assumptions.
- One approach is to imagine you are describing the image to a person over the phone.
- Ensure that you still provide concise alternative text to help readers decide if they are interested in the longer description.
Alternatively, you can include the same information conveyed by the image within the body of the document, providing the images as an alternate to the text. In that case, you do not have to provide alternate text within the image.
To add alternative text to images and graphical objects
- Right-click* the object.
- Select Format Picture…
- Select the Layout & Properties tab.
- Select the Alt Text option from the list under that tab.
- Fill in the Description field (not the “Title” field).
When inserting a very small image (or resizing a larger image to be much smaller) and following it with text, Word sometimes assumes that the image is intended to be a bullet-point for a bulleted list. Once Word defines the image as a bullet, the option to add alternative text disappears. Select Undo, to redefine the bullet as an image.
Editor’s note: For later versions of Word, the Alt Text menu is also available in the right-click, pop-up menu that appears when you right-click on an image.
For more information, see these resources:
Technique 4. Avoid “Floating” Elements
WCAG 2.0 Applicability:
- 1.3.2 Meaningful Sequence
When certain elements (e.g., images, objects, text boxes) are inserted into Word documents they default to being an “inline object”. Inline objects keep their position on the page relative to a position in the text. This is beneficial for users of assistive technologies (e.g., screen readers), because the position of the object in the document order is clear, so the screen reader can read the object’s alternative content (e.g., Description field) when the user moves keyboard focus to that position. However, Word also provides the option to have these elements “float” outside of the text order, with text flowing around, under or over it. This is a problem because the position of the object in the document is no longer clear and the screen reader will often read the alternative text out of context, which can be confusing. These text flow options should be avoided. Similarly, avoid placing drawing objects such as arrows, lines and shapes directly into the document (e.g., as borders, to create a diagram). Instead, create borders with page layout tools and insert complete graphical objects (e.g., pictures).
Curb Cuts: In-line elements are often easier to work with than floating elements, which can end up being shifted into strange positions as editing earlier parts of a document cause repagination.
To prevent an image or object from “floating”
- Select the object.
- Go to menu item: Page Layout.
- Select Position from the Arrange section.
- Select In Line with Text.
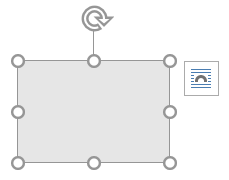
Editor’s note: In later versions of Word, you can also keep pictures in-line with text by selecting the object and choose a wrapping option from the pop-up icon.
Technique 5. Use Headings
WCAG 2.0 Applicability:
- 1.3.1 Info and Relationships
- 2.4.1 Bypass Blocks
- 2.4.6 Headings and Labels
- 2.4.10 Section Headings
Any documents that are longer than a few paragraphs require structuring to make them easier for readers to understand. One of the simplest ways to do this is to use “True Headings” to create logical divisions between paragraphs. True headings are more than just bolded, enlarged, or centred text; they are structural elements that order and levels provide a meaningful sequence to users of assistive technologies.
Curb Cuts: Using true headings provides several important benefits: (1) Headings are used by Word to auto-generate a table of contents (see
Technique 6.5 Use a Table of Contents); (2) Headings are used by the “Navigation Pane” which is especially helpful for long documents (see
Word’s “Navigation” Feature); and you can update all of the headings of a particular type at once, which keeps them consistent.
Tips for headings
- Use the default headings styles provided (“Heading “, “Heading 2”, …, “Heading 9”).
- Nine levels of headings are supported.
- Nest headings properly (e.g., the sub-headings of a “Heading 1” are “Heading 2”, etc.).
- If you plan to create a Word document that will have an automatically generated table of contents, remember that text marked with “Heading 1” will appear in the table of contents. Therefore, you may want to mark the top-level title of the document, which typically wouldn’t be included in the document’s table of contents, with the “Title” style. On the other hand, if you plan to convert to HTML, the main title is usually marked with a “Heading 1” which will be mapped to an
<h1> HTML element.
To apply headings to selected text
- Select text.
- Right-click* and select Styles.
- Select the heading style (Heading 1, Heading 2, and so on) from the list.
To apply headings using the Styles toolbar
- Select text.
- Go to menu item: Home.
- In the Styles section, select the heading style that you wish to apply
Note: You can scroll through the multiple heading styles using the arrows on the right side of the Styles section. You can also change the Style design by selecting the Change Styles button on the right.
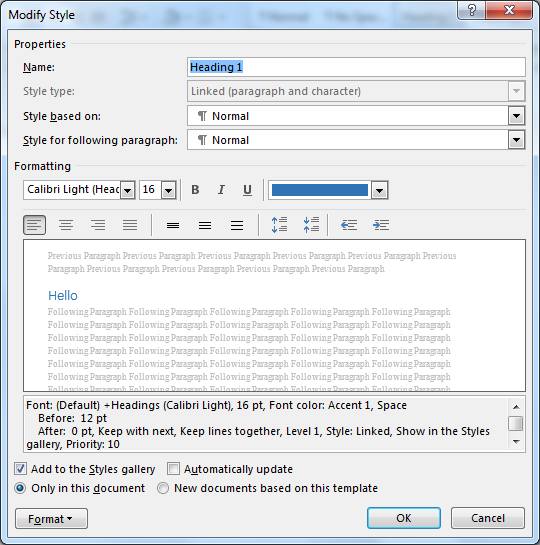
To modify heading styles
- Go to menu item: Home.
- In the Styles section, right-click* the style you wish to modify from the Styles Gallery.
- Select Modify.
- In the Modify Style dialog, make your desired changes to style characteristics.
- Select OK.
Adding heading style that is not listed
Sometimes heading levels may not appear in lists described above. For example, the list might contain “Heading 1” and “Heading 2”, but not “Heading 3”. In this case, it is still possible to apply the unlisted style:
- Select text.
- Go to menu item: Home.
- In the Styles section, select the arrow to expand the list of style options.
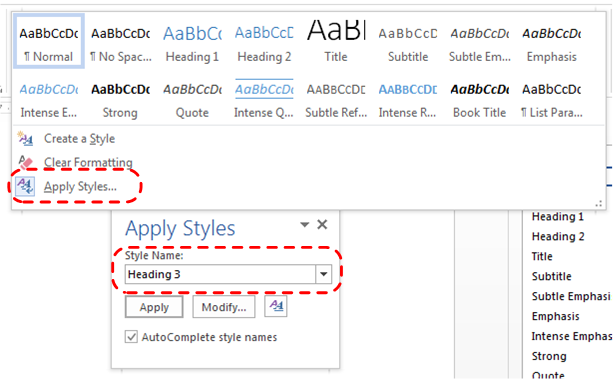
- Select Apply Styles.
- In the Style Name, enter the heading style (“Heading 1” to “Heading 9”).
- Select Apply button.
Technique 6. Use Built-In Document Structuring Features
WCAG 2.0 Applicability:
- 1.3.1 Info and Relationships
- 1.3.2 Meaningful Sequence
- 2.4.2 Page Titled
Curb Cuts: Using built-in structural features is much more reliable that trying to use typography for formatting (e.g., tabs to separate table cells, repeated new lines for a page break).
6.1 Tables
When using tables, it is important to ensure that they are clear and appropriately structured. This helps all users to better understand the information in the table and allows assistive technologies (e.g., screen readers) to provide context so that the information within the table can be conveyed in a meaningful way.
Tips for tables
- Only use tables for tabular information, not for formatting, such as to position columns.
- Use “real tables” rather than text formatted to look like tables using the TAB key or space bar. These will not be recognized by assistive technology.
- Keep tables simple by avoiding merged cells and dividing complex data sets into separate smaller tables, where possible.
- If tables split across pages, set the header to show at the top of each page. Also set the table to break between rows instead of in the middle of rows.
- Create a text summary of the essential table contents. Any abbreviations used should be explained in the summary.
- Table captions or descriptions should answer the question “what is the table’s purpose and how is it organized?” (e.g. “A sample order form with separate columns for the item name, price and quantity”).
- Table cells should be marked as table headers when they serve as labels to help interpret the other cells in the table.
- Table header cell labels should be concise and clear.
- Ensure the table is not “floating” on the page (see Technique 4. Avoid “Floating” Elements).
To insert a table
- Go to menu item: Insert.
- In the Tables section, select Insert Table.
- Select the Number of columns and the Number of rows you would like your table to have.
- Select the OK button.
To a heading row
- Place the cursor in the top-row of the table that you would like to make into the heading row.
- The Table Tools menu item should appear.
- Go to menu item: Table Tools > Layout.
- In the Table section, select Properties.
- Select the Row tab.
- Select the Repeat as header row at the top of each page checkbox.
6.2. Lists
When you create lists, it is important to format them as “real lists.” Otherwise, assistive technologies will interpret your list as a series of short separate paragraphs instead of a coherent list of related items.
To create an ordered or unordered list
- Go to menu item: Home.
- In the Paragraph section, select the Bullets icon for unordered lists or select the Numbering icon for ordered lists.
To modify list styles
- Go to menu item: Home.
- In the Paragraph section, select the arrow beside the Bullets icon for unordered lists or select the arrow beside the Numbering icon for ordered lists.
- Select Define New Bullet… to create a new unordered list format.
- Select Define New Number Format… to create a new ordered list format.
- In the New Bullet dialog or the New Number Format dialog, select the list characteristics.
- Select OK.
6.3 Columns
Use the Columns feature for placing text in columns. Note: Because columns can be a challenge for some users with disabilities (e.g., people using magnifiers), consider whether a column layout is really necessary.
6.4 Page Breaks
Start a new page by inserting a page break instead of repeated hard returns.
To add a page break
- Go to menu item: Page Layout.
- In the Page Setup section, select the arrow beside the Breaks icon.
- Select the type of break to add. Page break is used to start a new page with the same page layout (page orientation, headers, page numbering, etc.). Section break is used if you want to start a new section of the document with a differing page layout.
6.5 Table of Contents
Creating an index or table of contents to outline office document content can provide a means of navigating the meaningful sequence of content. The best way to generate a table of contents is after applying the predefined heading styles (e.g., “Heading 1,” “Heading 2,” “Heading 3”) as described above, to the headings that you want to include in your table of contents. After you apply these styles, you can then create a table of contents. Note: If you do not want the main title of the document to appear in the generated table of contents, mark it with the “Title” style.
To insert a table of contents
- Place the cursor in your document where you want to create the table of contents.
- Go to menu item: References.
- In the Table of Contents section, select Table of Contents.
- Select the style that you want to use.
To update a table of contents
- Select the table of contents.
- Go to menu item: References.
- In the Table of Contents section, select the Update Table button.
6.6 Page Numbering
Numbering the pages of you document helps those reading and editing your document effectively navigate and reference its content. For users of assistive technologies, it can provide a valuable point of reference within the document.
To insert page numbers
- Go to menu item: Insert.
- In the Header & Footer section, select Page Number.
- Select where you would like to insert your page numbers.
- Select the style of page number you would like to use.
To format page numbers
- Go to menu item: Insert.
- In the Header & Footer section, select Page Number.
- Select Format Page Numbers…
- In the Page Number Format dialog, select the page format characteristics you would like to use.
Note: These changes are applied to the predefined page format styles. It does not create a new page format style.
6.7 Document Title
If you plan to convert the document into HTML, it should be given a descriptive and meaningful title.
To change the title of the current document
- Go to menu item: File.
- Select Info from the list in the left window pane
- In the right window pane, select the Title text box and enter an appropriate title.
Note: The Title defined in the properties is different than the file name.
Editor’s note: For later versions of Word, follow these steps:
- Select Info, then click on Properties in the right-most pane.
- Next, select Advanced Properties.
- From there, the Title text box can be updated.
Technique 7. Create Accessible Charts
WCAG 2.0 Applicability:
- 1.1.1 Non-text Content
- 1.3.1 Info and Relationships
Charts can be used to make data more understandable for some audiences. However, it is important to ensure that your chart is as accessible as possible to all members of your audience.
- All the basic accessibility considerations that are applied to the rest of your document must also be applied to your charts and the elements within your charts. For example, use shape and color, rather than color alone, to convey information.
- When creating line charts, use the formatting options to create different types of dotted lines to facilitate legibility for users who are color blind.
- When creating bar charts, it is helpful to apply textures rather than colours to differentiate the bars
- Ensure that the contents are your chart are appropriate labeled to give users reference points that will help them to correctly interpret the information.
- Use the formatting options to change predefined colours, ensuring that they align with sufficient contrast requirements (see Technique 8.2 Use Sufficient Contrast)
- Consider providing the data that you used to create the chart in tabular form (e.g., as an appendix).
Curb Cuts: If the chart data is also provided in an appendix, it will be easier for all users to make use of the data.
Technique 8. Make Content Easier to See
WCAG 2.0 Applicability:
- 1.3.3 Sensory Characteristics
- 1.4.1 Use of Color
- 1.4.3 Contrast (Minimum)
- 1.4.5 Images of Text
- 2.2.2 Pause, Stop, Hide
Curb Cuts: All users will benefit from content that is easier to see.
8.1 Format of Text
When formatting text, especially when the text is likely to printed, try to:
- Use font sizes between 12 and 18 points for body text.
- Use fonts of normal weight, rather than bold or light weight fonts. If you do choose to use bold fonts for emphasis, use them sparingly.
- Use standard fonts with clear spacing and easily recognized upper and lower case characters. Sans serif fonts (e.g., Arial, Verdana) are typically easier to read than serif fonts (e.g. Times New Roman, Garamond).
- Avoid large amounts of text set all in caps, italic or underlined.
- Use normal or expanded character spacing, rather than condensed spacing.
- Avoid animated or scrolling text.
But can’t users just zoom in? Office applications do typically include accessibility features such as the ability to magnify documents and support for high contrast modes. However, because printing is an important aspect of many workflows and changing font sizes directly will change documents details such as the pagination, the layout of tables, etc., it is best practice to always format text for a reasonable default level of accessibility.
To change the text size for a default named style
- Go to menu item: Home.
- In the Styles section, right-click* the Style you wish to modify.
- Select Modify Style.
- Under Formatting in the Modify dialog box, select the appropriate font size.
- Exit with OK.
8.2 Use Sufficient Contrast
The visual presentation of text and images of text should have a contrast ration of at least 4.5:1.
To help you determine the contrast, here are some examples on a white background:
- Very good contrast (Foreground=black, Background=white, Ratio=21:1)
- Acceptable contrast (Foreground=#767676, Background=white, Ratio=4.54:1)
- Unacceptable contrast (Foreground=#AAAAAA, Background=white, Ratio=2.32:1)
Also, always use a single solid colour for a text background rather than a pattern. In order to determine whether the colours in your document have sufficient contrast, you can consult an online contrast checker, such as the TPG Contrast Analyser or the WebAIM: Contrast Checker.
8.3 Avoid Relying on Color or Sensory Characteristics
The instructions provided for understanding and operating content should not rely solely on sensory characteristics such as the colour or shape of content elements. Here are two examples:
- Do not track changes by simply changing the colour of text you have edited and noting the colour. Instead use Word’s “Track Changes” feature to track changes.
- Do not distinguish between images by referring to their appearance (e.g., “the bigger one”). Instead, label each image with a figure number and use that for references.
8.4 Avoid Using Images of Text
Before you use an image to control the presentation of text (e.g., to ensure a certain font or colour combination), consider whether you can achieve the same result by styling “real text.” If this is not possible, as with logos containing stylized text, make sure to provide alternative text for the image following the techniques noted above.
Technique 9. Make Content Easier to Understand
WCAG 2.0 Applicability
- 2.4.4 Link Purpose (In Context)
- 3.1.4 Abbreviations
- 3.1.5 Reading Level
- 3.2.3 Consistent Navigation
- 3.2.4 Consistent Identification
9.1 Write Clearly
Curb Cuts: By taking the time to design your content in a consistent way, it will be easier to access, navigate and interpret for all users.
- Whenever possible, write clearly with short sentences.
- Introduce acronyms and spell out abbreviations.
- Avoid making the document too “busy” by using lots of whitespace and by avoiding too many different colors, fonts and images.
- If content is repeated on multiple pages within a document or within a set of documents (e.g. headings, footings, etc.), it should occur consistently each time it is repeated.
9.2 Provide Context for Hyperlinks
Hyperlink text in your document should be meaningful when read out of context. To be an effective navigation aid, the link text should describe the destination of the link.
Consider the experience of screen reader users: Generally, screen readers generate a list of links, and screen reader users navigate this list alphabetically. Hyperlink text such as “click here” or “more” is meaningless in this context.
In order to be useful to someone using a screen reader, ensure that hyperlink text is self-describing and meaningful on its own.
To add hyperlinks with meaningful text
- Type (or paste in) a web address and press spacebar or “Enter” to convert into a hyperlink.
- Select the link and right-click*.
- Select Edit Hyperlink (Ctrl + K).
- Edit the text in the Text to display box.
Technique 10. Check Accessibility
If you wish to check the accessibility of your document or template (see Technique 1. Use Accessible Templates), Word offers an “Accessibility Checker” to review your document against a set of possible issues that users with disabilities may experience in your file.
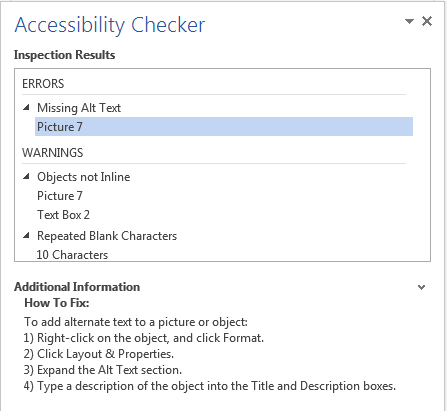
Important Note: No checker can detect all types of accessibility issues. For example it can tell if alternative text is missing, but it cannot tell if alternative text is actually correct. It also doesn’t test for some issues, including colour contrast. The Office website provides more information about the Accessibility Checker, including the rules it uses to identify and classify accessibility issues. The “Accessibility Checker” classifies issues as
- Error – content that makes a file very difficult or impossible for people with disabilities to understand
- Warning – content that in most, but not all, cases makes a file difficult for people with disabilities to understand
- Tip – content that people with disabilities can understand, but that might be better organized or presented in a way that would maximize their experience
To use the “Accessibility Checker”
- Make sure the file is saved as a DOCX. (Note: Older DOC files are not compatible with the checker).
- Go to menu item: File.
- Select Info in the left window pane.
- Select the Check for Issues dropdown.
- Select the Check Accessibility item.
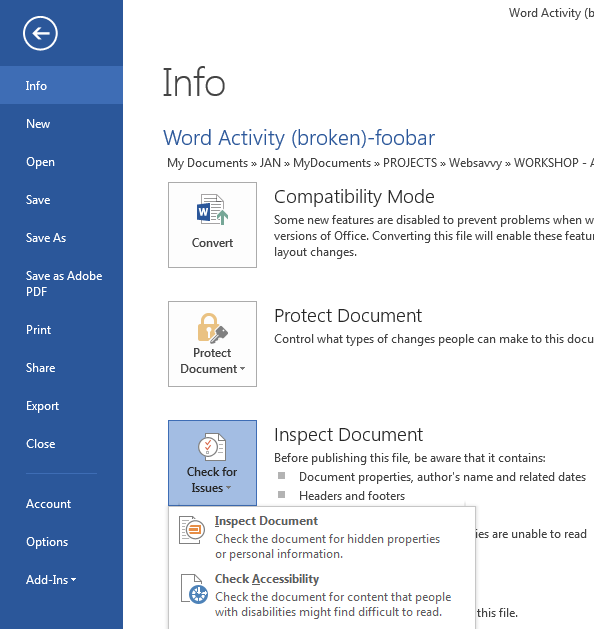
- An Accessibility Checker task pane will open, showing the inspection results.
- Select a specific issue to see Additional Information.
- Follow the steps provided to fix or revise the content.
Technique 11. Use Accessibility Features when Saving/Exporting to Other Formats
In some cases, additional steps must be taken in order to ensure accessibility information is preserved when saving/exporting to formats other than the default.
Saving to PDF
PDF documents are not always accessible. Accessible PDF documents are often called “Tagged PDF” because they include “tags” that encode structural information required for accessibility. To evaluate the accessibility of your PDF document, see Technique 10. Check Accessibility.
- Go to menu item: File.
- Select Save As.
- In the File name box, type a name for the file.
- In the Save as type list, select PDF (*.pdf).
- Select the Options button.
- Ensure that the Document structure tags for accessibility checkbox is selected.
- Select OK and Save.

Saving to HTML
- Go to menu item: File.
- Select Save As.
- In the File name box, type a name for the file.
- In the Save as type box, select Web Page (*.htm).
- Check the title in the Title text box. To change it, select the Change Title… to open an “Enter Text” dialog box.
- Select Save.
- Check the HTML file for accessibility (see Technique 10. Check Accessibility).
To clean up your HTML file
- Remove unnecessary styles, line breaks, etc.
- Remove unnecessary id, class, and attributes.
- Remove font tags.
- Remove styles in the <head> tag.
- Ensure the <th> tags have a scope attribute.
- Remove <p> tags nested inside <th> and <td> tags.
- Check for accessibility (see Technique 11, above).
Note: you may wish to use HTML editors or utilities to help with this process.
Other Application Features
Word’s “Navigation” Feature
After you have populated your document with content and true headings have been applied, you may wish to rearrange the content. In order to maintain the integrity and accessibility of the altered sequence, you will need to ensure that structural information (e.g. heading levels) is adjusted accordingly. Word provides a “Navigation” mechanism which displays all parts of the document, such as headings, paragraphs, objects, etc. in sequential order. It helps you navigate, access, and manipulate the content. You can move headings or subordinate text up or down, rearranging their sequence in a way that can be programmatically determined and therefore accessible to assistive technologies.
To use the “Navigation” feature
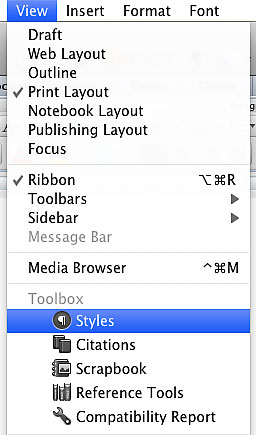
- Go to menu item: View.
- In the Show section, select the Navigation Pane check box.
- The Navigation pane will open to the left of your document.
To jump to a location in a document
- Select one of three navigation options:
- Select HeadingsNote: select the heading to view hierarchical headings and content below it.
- Select Pages.
- Select the (Search) Results.
- Scroll through the sequential list and double-click* on the location you would like to jump to
To move content up or down in a document
- Select and drag the content to a new location in the list.
Accessibility Help
If you are interested in what features are provided to make using Word more accessible to users, documentation is provided in the Help system:
- Go to menu item: File.
- Select Help from the list on the left.
- Under the Support section, select the Help icon.
- Enter “Accessibility” as your search term in the Help dialog box.
References and Resources
- Microsoft Accessibility Page
- Microsoft: Use a screen reader to explore and navigate Word
- Microsoft Accessibility Tutorials
- Microsoft: Keyboard shortcuts in Word
- Ryerson University: Microsoft Word Accessibility Tipsheet (PDF)
- Microsoft Word: Video Tutorials
Acknowledgments
Authors: Jan Richards, Sabrina Ruplall
This document was produced as part of the Accessible Digital Office Document (ADOD) Project.
This project has been developed by the Inclusive Design Research Centre, OCAD University as part of an EnAbling Change Partnership project with the Government of Ontario and UNESCO (United Nations Educational, Scientific and Cultural Organization).
Source: Authoring Techniques for Accessible Office Documents: Microsoft Word 2013 by the Inclusive Design Research Centre (IDRC) used under CC-BY-SA 3.0.
Microsoft Word for Mac 2011, 2016, and 2019
5
Usage Notes
At the time of testing (December 2019), Word for Mac provides a set of accessibility features that is sufficient to enable the production of accessible digital office documents. However, Word 2011 for Mac does not include an accessibility checking feature.
Editor’s note: Later versions of Word for Mac include an accessibility checker (for 2016 and later versions). For more information, see Technique 11 or review how to make your Word documents accessible to people with disabilities.
This guide is intended to be used for documents that are:
- Intended to be used by people (i.e., not computer code),
- Text-based (i.e., not simply images, although they may contain images),
- Fully printable (i.e., where dynamic features are limited to automatic page numbering, table of contents, etc. and do not include audio, video, or embedded interactivity),
- Self-contained (i.e., without hyperlinks to other documents, unlike web content), and
- Typical of office-style workflows (Reports, letters, memos, budgets, presentations, etc.).
For more information on creating forms, web pages, applications, or other dynamic and/or interactive content that are accessible, you should consult the W3C-WAI Web Content Accessibility Guidelines (WCAG 2.0) because these are specifically designed to provide guidance for highly dynamic and/or interactive content.
File Formats
The default file format for Word for Mac is Office Open XML (DOCX).
In addition, Word for Mac offers many other word processor and web format saving options, however most of these have not been checked for accessibility.
Disclaimer and Testing Details
- The following techniques will increase the accessibility of your documents, but it does not guarantee accessibility to any specific disability groups. In cases where more certainty is required, it is recommended that you test the office documents with end users with disabilities, including screen reader users.
- The application-specific steps and screenshots in this document were created using Microsoft Word 2011:Mac and Microsoft Word for Mac 2016 (version 16.16.16) while creating a DOCX document.
- This document is provided for information purposes only and is neither a recommendation nor a guarantee of results. If errors are found, please report them to: adod-comments@idrc.ocad.ca.
Technique 1. Use Accessible Templates
All office documents start with a template, which can be as simple as a blank standard-sized page or as complex as a nearly complete document with text, graphics and other content.
Microsoft Word for Mac’s default template for a new documents is a blank page. It is possible to create your own accessible templates from scratch in Word for Mac. As well, you can edit and modify the existing prepackaged templates, ensuring accessibility as you do so and saving them as a new template.
To create an accessible template
- Create a new document (from the default blank template or from one of the prepackaged templates)
- Follow the techniques in this guide.
- Go to menu item: File > Save As.
- In the Save As box, insert a name for the template.Tip: Using a descriptive File name (e.g., “Accessible Memo Template”) may increase the prominence of the accessibility status.
- In the Format box, select Word Template.
- Select Save.

To select an accessible template
Only use the following steps if an accessible template is available (e.g. a previous templates that is already created). Otherwise, simply open a new blank document.
- Select the template icon (top left corner).
- Under Templates, select My Templates (in the word document gallery).
- Select the template from the scrolling gallery.
- Select Choose.
Technique 2. Specify Document Language
In order for assistive technologies (e.g., screen readers) to be able to present the document accurately, it is important to indicate the natural language of the document (e.g., English, French). If a different natural language is used for a paragraph or selected text, this also needs to be clearly indicated.
To change the default language
- Go to menu item: Tools >Language…
- In the Mark selected text as: box, select the language.
- Select Default…
To apply a language directly to selected text
- Select the text.
- Go to menu item: Tools > Language…
- In the Mark selected text as: box, select the language.
- Select OK.
Technique 3. Provide Alternatives Text for Images and Graphical Objects
Tips for writing alternative text
- Try to answer the question “what information is the image conveying?”
- If the image does not convey any useful information, leave the alternative text blank.
- If the image contains meaningful text, ensure all of the text is replicated.
- Alternative text should be fairly short, usually a sentence or less and rarely more than two sentences.
- If more description is required (e.g., for a chart or graph), provide a short description in the alternative text (e.g., a summary of the trend) and more detail in the long description, see below.
- Test by having others review the document with the images replaced by the alternative text.
Tips for writing longer descriptions
- Long descriptions should be used when text alternatives (see above) are insufficient to answer the question “what information is the image conveying?”
- In some situations, the information being conveyed will be how an image looks (e.g., an artwork, architectural detail, etc.). In these cases, try to describe the image without making too many of your own assumptions.
- One approach is to imagine you are describing the image to a person over the phone.
- Ensure that you still provide concise alternative text to help readers decide if they are interested in the longer description.
Alternatively, you can include the same information conveyed by the image within the body of the document, providing the images as an alternate to the text. In that case, you do not have to provide alternate text within the image.
To add alternative text to images and graphical objects
- Select Image.
- (*Right click or Control+click) Select Format Picture…
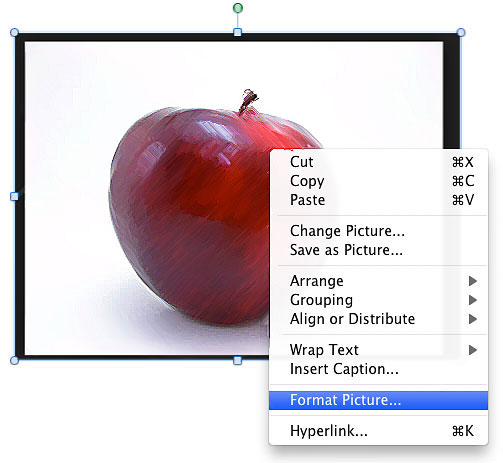
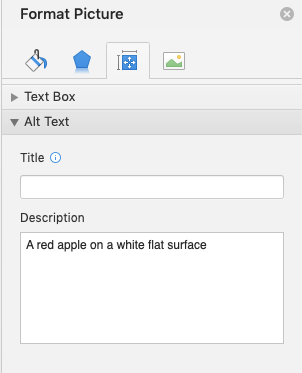
- In the “Format Picture” window left menu, select Alt Text.
- Insert description.
- Select OK.
Editor’s note: To learn more about adding alternative text to images and graphical objects, see the video on how to improve accessibility with alt text.
Technique 4. Avoid “Floating” Elements
When images and objects are inserted into Word for Mac documents, they default to being an “in line with text.” In this case, you do not need to change anything.
However, if you are editing a document that includes a “floating” image or object, use the procedure below:
To prevent an image or object from “floating”
- Under Arrange (top navigation bar).
- Select Wrap text.
- Select In Line with Text.

Editor’s note: For later versions of Word, the instructions are simplified slightly, as follows:
- Select the image.
- Under the Picture Format tab, you’ll see the drop-down menu for Wrap text.
Technique 5. Use Headings
Any documents that are longer than a few paragraphs require structuring to make them more straightforward for readers to understand. One of the easiest ways to do this is to use “True Headings”. True headings are more than just bolded, enlarged, or centred text; they are structural elements that order and levels provide a meaningful sequence to users of assistive technologies.
To apply headings
- Select text.
- In the Styles panel select the heading you wish to apply (in the Home bar)

Note: If the Styles panel is not in view, go to menu item: View > Toolbox, Styles.
Editor’s note: In later versions of Word for Mac, the Styles Pane button is visible on the right side of the Home tab.

To modify heading styles
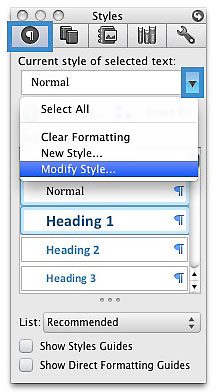
This refers to changing the appearance of all text marked with a certain style.
- In the Styles dialog box, select the heading you want to modify.
- Select the drop down menu on the side of the selected heading.
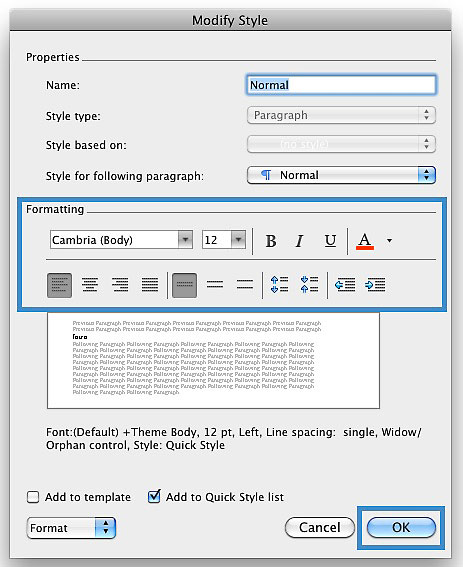
- Select Modify Style…
- In the Modify Style dialog, make the appropriate changes to style characteristics.
- Select OK.
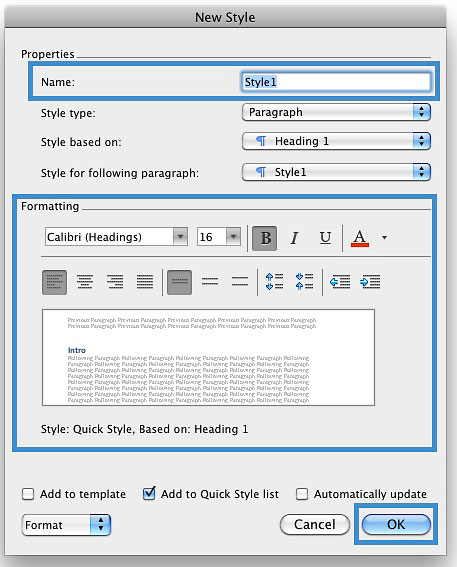
To create a new style
- In the Styles dialog box (View > Toolbox, Styles).
- Select New Style…
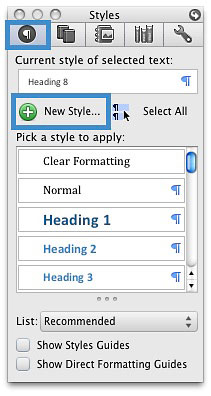
- In the Name box, enter a name for the new style.
- Format the characteristics of the new style.
- Select OK.
Technique 6. Use Named Styles
Named styles help your readers understand why something was formatted in a given way, which is especially helpful when there are multiple reasons for the same formatting (e.g., it is common to use italics for emphasis, Latin terms and species names).
To use default named styles
Default named styles can be applied the same way as headings (see Technique 5).
Technique 7. Use Built-In Document Structuring Features
7.1 Tables
When using tables, it is important to ensure that they are clear and appropriately structured. This helps all users to better understand the information in the table and allows assistive technologies (e.g., screen readers) to provide context so that the information within the table can be conveyed in a meaningful way.
Tips for tables
- Only use tables for tabular information, not for formatting, such as to position columns.
- Use “real tables” rather than text formatted to look like tables using the TAB key or space bar. These will not be recognized by assistive technology.
- Keep tables simple by avoiding merged cells and dividing complex data sets into separate smaller tables, where possible. Whenever possible, use just one row of headings.
- If tables split across pages, set the header to show at the top of each page. Also set the table to break between rows instead of in the middle of rows.
- For more complicated tables, consider creating a text summary of the essential table contents. Any abbreviations used should be explained in the summary.
- Table captions or descriptions should answer the question “what is the table’s purpose and how is it organized?” (e.g., “A sample order form with separate columns for the item name, price and quantity”).
- Table cells should be marked as table headers when they serve as labels to help interpret the other cells in the table.
- Table header cell labels should be concise and clear.
- Ensure the table is not “floating” on the page.
Adding a table
- Go to Table (top navigation bar).
- Under Table Options select New.
- In the “New” drop down menu drag the columns and rows need.
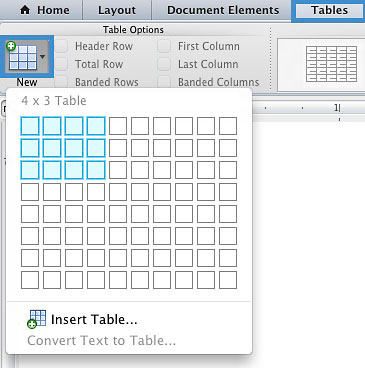
Note: To style the table select the table on the page and choose the design available in the Table Styles panel.

Editor’s note: For later versions of Word for Mac, the insert table functions are in found in the Insert tab.
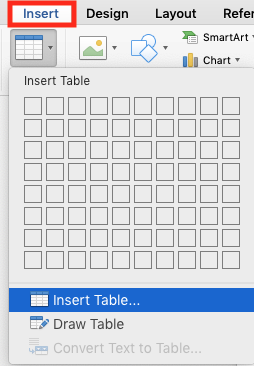
Note: Be sure to designate table headers: In the Table Design tab, select the checkbox for Header Row, to indicate table headings.
7.2. Lists
When you create lists, it is important to format them as “real lists”. Otherwise, assistive technologies will interpret your list as a series of short separate paragraphs instead of a coherent list of related items.
To create an ordered or unordered list
- Select Home (top navigation bar).
- Under Paragraph select the style (e.g., bullets, number).

7.3 Columns
Use Columns feature for placing text in columns. However, because columns can be a challenge for users of some assistive technologies, you should consider whether a column layout is really necessary.
7.4 Page Breaks
Start a new page by inserting a page break instead of repeated hard returns.
7.5 Use a Table of Contents
Creating an index or table of contents to outline office document content can provide a means of navigating the meaningful sequence of content.
To insert a table of contents
- Place the cursor in your document where you want to create the table of contents.
- Document Elements > Table of Contents.
- In the Table of Contents select the style you want to use.

Note: in order for the table of content to automatically set up the user must change all the heading to Heading 1.
Editor’s note: In later versions of Word for Mac, the Table of Contents drop-down menu is located under the References menu.
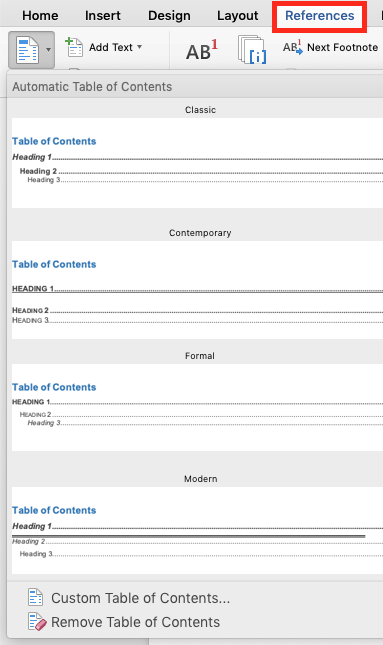
To update table of contents
- Select the table.
- Select the drop down menu beside Table of Contents.
- Select Update Table…
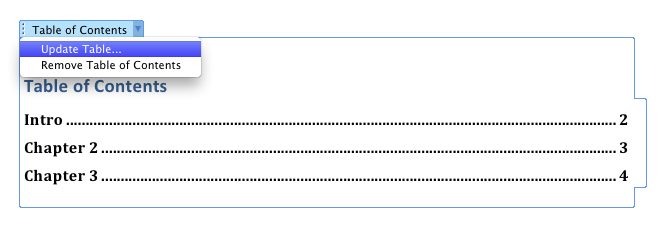
Editor’s note: In later versions of Word for Mac, the Update Table button is located under the References tab.
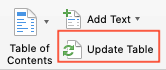
7.6 Use Page Numbering
Numbering the pages of your document helps those reading and editing your document effectively navigate and reference its content. For users of assistive technologies, it provides a valuable point of reference within the document.
Insert page numbers
- Go to menu item: Insert >Page Numbers…
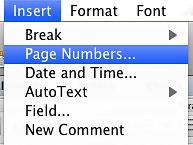
- In the Page Numbers dialog, select the page number characteristics (Position, Alignment, Show number on first page).
- Select OK.
Editor’s note: For later versions of Word for Mac, go to the Insert tab to find the Page Number button.

Formatting page numbers
- In the Page Numbers dialog, select Format…
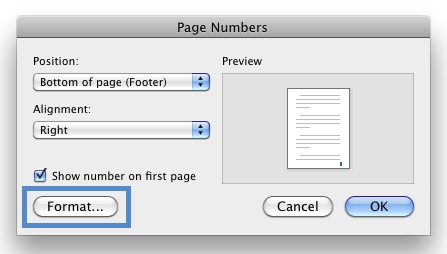
- Select the format characteristics in the Page Number Format dialog.
- Select OK.
Note: These changes are applied to the predefined page format styles. It does not create a new page format style.
7.7 Document Title
In case the document is ever converted into HTML, it should be given a descriptive and meaningful title.
To change title
- Go to menu item: File > Properties.
- In the Document Properties dialog, select Summary.
- Enter the title in the Title text box.
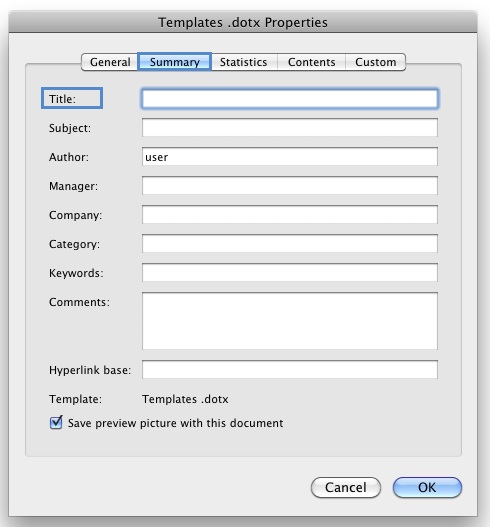
Tip: you can also fill in the subject, author and other descriptions if necessary
Technique 8. Make Charts Accessible
Charts can be used to make data more understandable for some audiences. However, it is important to ensure that your chart is as accessible as possible to all members of your audience.
- All basic accessibility considerations that are applied to the rest of your document must also be applied to your charts and the elements within your charts. For example, use shape and color, rather than color alone, to convey information.
- When creating line charts, use the formatting options to create different types of dotted lines to facilitate legibility for users who are color blind.
- When creating bar charts, it is helpful to apply textures rather than colors to differentiate the bars.
- Ensure that the contents are your chart are appropriate labeled to give users reference points that will help them to correctly interpret the information.
- Use the formatting options to change predefined colors, ensuring that they align with sufficient contrast requirements (see Technique 9.2).
- Consider providing the data that you used to create the chart in tabular form (e.g. as an appendix).
Technique 9. Make Content Easier to See
Here are some other things to keep in mind:
9.1 Format of Text
When formatting text, especially when the text is likely to printed, try to:
- Use font sizes between 12 and 15 points for body text.
- Use fonts of normal weight, rather than bold or light weight fonts. If you do choose to use bold fonts for emphasis, use them sparingly.
- Use standard fonts with clear spacing and easily recognized upper and lower case characters. Sans serif fonts (e.g., Arial, Verdana) may sometimes be easier to read than serif fonts (e.g., Times New Roman, Garamond).
- Avoid large amounts of text set all in caps, italic or underlined.
- Use normal or expanded character spacing, rather than condensed spacing.
- Avoid animated or scrolling text.
9.2 Use Sufficient Contrast
The visual presentation of text and images of text should have a contrast ration of at least 4.5:1. To help you determine the contrast, here are some examples on a white background:
- Very good contrast (Foreground=black, Background=white, Ratio=21:1)
- Acceptable contrast (Foreground=#767676, Background=white, Ratio=4.54:1)
- Unacceptable contrast (Foreground=#AAAAAA, Background=white, Ratio=2.32:1)
Also, always use a single solid color for a text background rather than a pattern. In order to determine whether the colors in your document have sufficient contrast, you can consult an online contrast checker, such as:
9.3 Avoid Relying on Color or other Sensory Characteristics
Content should not rely solely on sensory characteristics such as the colour or shape of content elements. Here are two examples:
- Do not track changes by simply changing the colour of text you have edited and noting the colour. Instead use Word for Mac’s “Track Changes” feature to track changes.
- Do not distinguish between images by referring to their appearance (e.g., “the bigger one”). Instead, label each image with a figure number and use that for references.
9.4 Avoid Using Images of Text
Before you use an image to control the presentation of text (e.g., to ensure a certain font or colour combination), consider whether you can achieve the same result by styling “real text”. If this is not possible, as with logos containing stylized text, make sure to provide alternative text for the image following the techniques noted above.
Technique 10. Make Content Easier to Understand
10.1 Write Clearly
By taking the time to design your content in a consistent way, it will be easier to access, navigate and interpret for all users:
- Whenever possible, write clearly with short sentences.
- Introduce acronyms and spell out abbreviations.
- Avoid making the document too “busy” by using lots of whitespace and by avoiding too many different colours, fonts and images.
- If content is repeated on multiple pages within a document or within a set of documents (e.g., headings), it should occur consistently each time it is repeated.
10.2 Provide Context for Hyperlinks
Hyperlink text in your document should be meaningful when read out of context. To be an effective navigation aid, the link text should describe the destination of the link.
Consider the experience of screen reader users: Generally, screen readers generate a list of links, and screen reader users navigate this list alphabetically. Hyperlink text such as “click here” or “more” is meaningless in this context.
In order to be useful to someone using a screen reader, ensure that hyperlink text is self-describing and meaningful on its own.
Technique 11. Check Accessibility
At this time, Word 2011 for Mac does not offer a mechanism to check for potential accessibility errors in your document prior to publishing.
Editor’s note: For later versions of Word for Mac, there is an accessibility checker, located under the Tools menu. For detailed instructions, see the following resources:
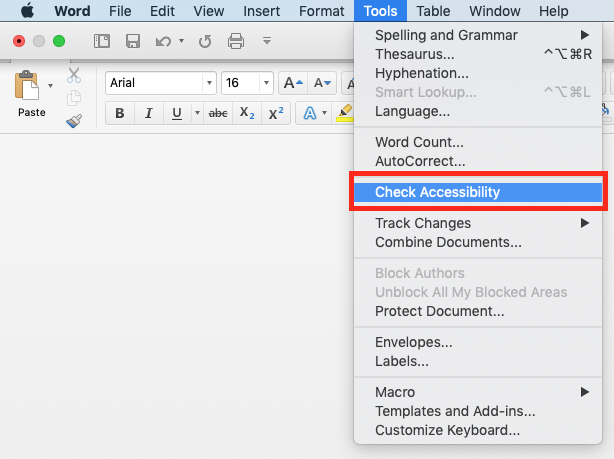
It is also possible possible to create tagged PDFs using later versions of Word for Mac:
- Select File: Save As (or press Command+Shift+S)
- Enter the file name in the Save As field, then choose where you want the file to be saved.
- In the Save As dialog, go to the File Format drop down box and select PDF.
- Select the radio button Best for electronic distribution and accessibility (uses Microsoft online service). This ensures the PDF is tagged.
Note: If you do not see this option, you may need to update your version of Word.
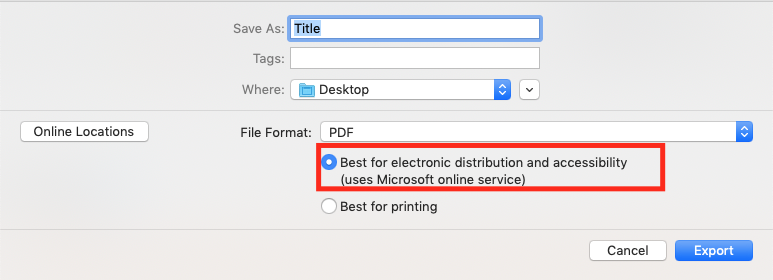
- Select Save.
Accessibility Help
If you are interested in what features are provided to make using Word more accessible to users, documentation is provided in the Help system:
- Go to menu item: File.
- Select Help from the list on the left.
- Under the Support section, select the Help icon.
- Enter “Accessibility” as your search term in the Help dialog box.
References and Resources
- Microsoft Accessibility Page
- Microsoft: Use a screen reader to explore and navigate Word
- Microsoft Accessibility Tutorials
- Microsoft: Keyboard shortcuts in Word
- Ryerson University: Microsoft Word Accessibility Tipsheet (PDF)
- Microsoft Word: Video Tutorials
Acknowledgments
Authors: Vellicia Christanto, Jan Richards
This document was produced as part of the Accessible Digital Office Document (ADOD) Project.
This project has been developed by the Inclusive Design Research Centre, OCAD University as part of an EnAbling Change Partnership project with the Government of Ontario and UNESCO (United Nations Educational, Scientific and Cultural Organization).
Source: Authoring Techniques for Accessible Office Documents: Microsoft Word 2011:Mac by the Inclusive Design Research Centre (IDRC) used under CC-BY-SA 3.0.
Usage Notes
This icon highlights “curb cut” opportunities in these techniques. “Curb cuts” are situations in which accommodations made for accessibility reasons will also result in significantly better and more efficient outcomes for everyone. The name comes from sidewalk “curb cuts” that were added for people in wheelchairs, but are commonly used by people with baby strollers, handcarts, wheeled luggage, and others.
At the time of testing (September 30, 2010), Word 2010 provides a set of accessibility features that is sufficient to enable the production of accessible digital office documents. In addition, Word 2010 includes an accessibility checking feature.
This guide is intended to be used for documents that are:
- Intended to be used by people (i.e., not computer code),
- Text-based (i.e., not simply images, although they may contain images),
- Fully printable (i.e., where dynamic features are limited to automatic page numbering, table of contents, etc. and do not include audio, video, or embedded interactivity),
- Self-contained (i.e., without hyperlinks to other documents, unlike web content), and
- Typical of office-style workflows (Reports, letters, memos, budgets, presentations, etc.).
If you are creating forms, web pages, applications, or other dynamic and/or interactive content, these techniques will still be useful to you, but you should also consult the W3C-WAI Web Content Accessibility Guidelines (WCAG 2.0) because these are specifically designed to provide guidance for highly dynamic and/or interactive content.
File Formats
The default file format for Word 2010 is Office Open XML (DOCX).
In addition, Word 2010 offers many other word processor and web format saving options. Most of these have not been checked for accessibility, but some information and/or instructions are available for the following formats in Technique 12 (below).
Document Conventions
We have tried to formulate these techniques so that they are useful to all authors, regardless of whether they use a mouse. However, for clarity there are several instances where mouse-only language is used. Below are the mouse-only terms and their keyboard alternatives:
- *Right-click: To right-click with the keyboard, select the object using the Shift+Arrow keys and then press either (1) the “Right-Click” key (some keyboard have this to the right of the spacebar) or (2) Shift+F10.
Disclaimer and Testing Details
- Following these techniques will increase the accessibility of your documents, but it does not guarantee accessibility to any specific disability groups. In cases where more certainty is required, it is recommended that you test the office documents with end users with disabilities, including screen reader users.
- The application-specific steps and screenshots in this document were created using Microsoft Word 2010 (ver.14.0.4762.1000, Windows XP, Aug. 2010) while creating a DOCX document.
- This document is provided for information purposes only and is neither a recommendation nor a guarantee of results. If errors are found, please report them to: adod-comments@idrc.ocad.ca.
Technique 1. Use Accessible Templates
All office documents start with a template. These can be as simple as a blank standard-sized page or complex nearly-complete document with text, graphics and other content (e.g., a “Meeting Minutes” template). Because templates provide the starting-point for so many documents, accessibility is critical. If you are unsure whether a template is accessible, you should check a sample document produced when the template is used (see Technique 10. Check Accessibility).
Word 2010’s default template for new documents is a blank page. The basic installation also includes blank business card, blank label templates, and other blank office-related documents. These are all accessible by virtue of being blank. It is possible to create your own accessible templates.
Curb Cuts: Updating templates is also a good opportunity to improve document consistency, copy-editing, and branding.
To create an accessible template
- Create a new document (from the default blank template or from one of the prepackaged templates).
- Ensure that you follow all of the techniques in this document.
- When you are finished, check the accessibility of the document (see Technique 10. Check Accessibility)
- Go to menu item: File > Save As.
- Select Templates.
- In the Save as type list, select Word Template.
- In the File name box, type a name for the template. Using a descriptive File name (e.g. “Accessible Memo Template”) may increase the prominence of the accessibility status. As well, filling in the text box labeled Tags with the term “accessibility” may improve its discoverability as an accessible file.
- Select Save.
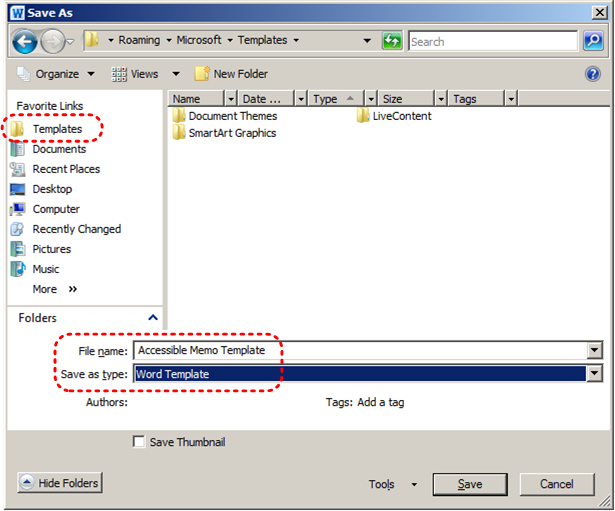
To select an accessible template
Only use these steps if you have an accessible template available (e.g., that you previously saved). Otherwise, simply open a new (blank) document.
- Go to menu item: File > New.
- Under Available Templates, select My Templates.
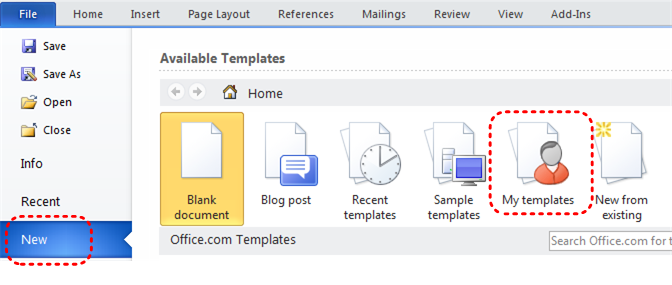
- In the New document dialog, select your accessible template from the list.
- Select OK.
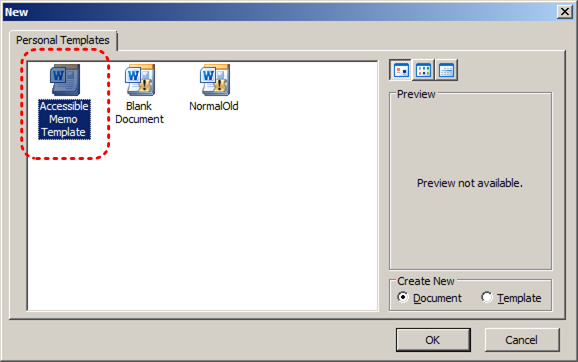
- A new document based on the template will be displayed. If you have chosen an accessible template, the document will be accessible at this point.
- As you add your content (e.g. text, images, etc.), ensure that you consult the sections that follow to preserve accessibility.
Technique 2. Specify Document Language
WCAG 2.0 Applicability:
- 3.1.1 Language of Page
- 3.1.2 Language of Parts
In order for assistive technologies (e.g. screen readers) to be able to present your document accurately, you must indicate the natural (human) language of the document. If a different natural language is used for a paragraph or selected text, this also needs to be clearly indicated.
Curb Cuts: The specified document language is also used by the spelling and grammar checker. In Canada, make sure to choose “English (Canada)” to avoid having to override American spellings of words such as “colour.”
To change the default language
- Go to menu item: File.
- Select Options from the list in the left window pane.
- Select Language from the list in the left of the Options dialog.
- Under Choose Editing Languages, select the editing language you want to useNote: to add an editing language, select the language from the drop down list labeled “Add additional editing languages.”
- Select Set as Default.
- Close all Office 2010 programs and open them again for the changes to take effect.
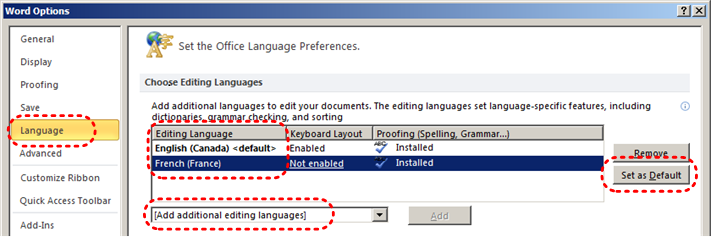
Word 2010 has an automatic language detection mechanism, which can automatically detect the language of your text. If you type a section of text in a different language than the rest of your document, Word 2010 will programmatically mark the language of that section of text appropriately.
To turn on automatic language detection
- Go to menu item: Review.
- In the Language section, select the Language button.
- Select Set Proofing Language.
- In the Language dialog, select the Detect language automatically check box.
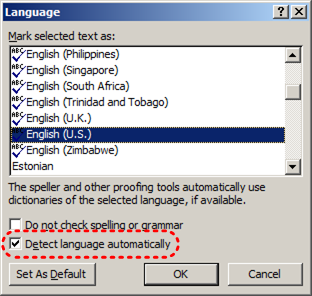
To apply a language directly to selected text
- Select the text.
- Go to menu item: Review.
- In the Language section, select the Language button.
- Select Set Proofing Language.
- In the Mark selected text as box, select the language from the list.
- Select OK.
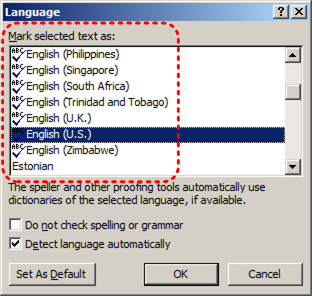
Technique 3. Provide Text Alternatives for Images and Graphical Objects
When using images or other graphical objects, such as charts and graphs, it is important to ensure that the information you intend to convey by the image is also conveyed to people who cannot see the image. This is done by adding concise alternative text to of each image. If an image is too complicated to concisely describe in the alternative text alone (e.g. artwork, flowcharts, etc.), provide a short text alternative and a longer description as well.
Curb Cuts: Sometimes it may not be clear what a particular image is meant to convey and alternative text can provide that clarity. Also, alternate text has been shown to be included in search engines rankings.
Tips for writing alternative text
- Try to answer the question “what information is the image conveying?”.
- If the image does not convey any useful information, leave the alternative text blank.
- If the image contains meaningful text, include all of the text in the alternative.
- Alternative text should be fairly short, usually a sentence or less and rarely more than two sentences.
- If more description is required (e.g. for a chart or graph), provide a short description in the alternative text (e.g. a summary of the trend) and more detail in the long description, see below.
- Test by having others review the document with the images replaced by the alternative text.
Tips for writing longer descriptions
- Long descriptions should be used when text alternatives (see above) are insufficient to answer the question “what information is the image conveying?”.
- In some situations, the information being conveyed will be how an image looks (e.g. an artwork, architectural detail, etc.). In these cases, try to describe the image without making too many of your own assumptions.
- One approach is to imagine you are describing the image to a person over the phone.
- Ensure that you still provide concise alternative text to help readers decide if they are interested in the longer description.
Alternatively, you can include the same information conveyed by the image within the body of the document, providing the images as an alternate to the text. In that case, you do not have to provide alternate text within the image.
To add alternative text to images and graphical objects
- Right-click* the object.
- Select Format Picture…
- Select the Alt Text option from the list.
- Fill in the Description.
If a Word 2010 document is saved to HTML, the Title and Description fields are combined into a single entry within the HTML <alt> tag. [Tested: September 30th, 2010]

When inserting a very small image, or resizing a larger image to be much smaller, Word 2010 assumes that the image is intended to be a bullet-point for a bulleted list. Once Word 2010 defines the image as a bullet, the option to add alternative text disappears. Select Undo, to redefine the bullet as an image. When you right-click* the image, select Format Picture… and select the Alt Text tab in the Format Picture dialog. Alternative text can be found, or can be entered, into the Alternative text box.
Technique 4. Avoid “Floating” Elements
WCAG 2.0 Applicability:
- 1.3.2 Meaningful Sequence
When certain elements (e.g., images, objects, text boxes) are inserted into Word 2010 documents they default to being an “inline object”. Inline objects keep their position on the page relative to a position in the text. This is beneficial for users of assistive technologies (e.g., screen readers), because the screen reader can simply read the object (or its alternative text) when it reaches that point in the text flow, so the context is clear.
However, Word 2010 also provides the option to have these elements “float” outside of the text order, with text flowing around, under or over it. This is a problem for screen reader users because their screen reader will often read the text (or alternative text) out of context, which can be confusing. These text flow options should be avoided.
Similarly, avoid placing drawing objects such as arrows, lines and shapes directly into the document (e.g. as borders, to create a diagram). Instead, create borders with page layout tools and insert complete graphical objects (e.g., pictures).
Curb Cuts: In-line elements are often easier to work with than floating elements, which can end up being shifted into strange positions as editing earlier parts of a document cause re-pagination.
To prevent an image or object from “floating”
- Select the object.
- Go to menu item: Page Layout.
- Select Position from the Arrange section.
- Select In Line with Text.
Technique 5. Use Headings
WCAG 2.0 Applicability:
- 1.3.1 Info and Relationships
- 2.4.1 Bypass Blocks
- 2.4.6 Headings and Labels
- 2.4.10 Section Headings
Any documents that are longer than a few paragraphs require structuring to make them easier for readers to understand. One of the simplest ways to do this is to use “True Headings” to create logical divisions between paragraphs. True headings are more than just bolded, enlarged, or centered text; they are structural elements that order and levels provide a meaningful sequence to users of assistive technologies.
Curb Cuts: Using true headings provides several important benefits: (1) Headings are used by Word 2010 to auto-generate a table of contents (see
Technique 6.5 Use a Table of Contents); (2) Headings are used by the “Navigation Pane” which is especially helpful for long documents (see
Word 2010’s “Navigation” Feature); and you can update all of the headings of a particular type at once, which keeps them consistent.
Tips for headings
- Use the default headings styles provided (“Heading “, “Heading 2”, etc.)
- Nest headings properly (e.g. the sub-headings of a “Heading 1” are “Heading 2”, etc.)
To apply headings to selected text
- Select text.
- Right-click* and select Styles.
- Select the heading style from the list.
To apply headings using the Styles toolbar
- Select text.
- Go to menu item: Home.
- In the Styles section, select the heading you wish to applyNote: You can scroll through the multiple heading styles using the arrows on the right side of the Styles section. You can also change the Style design by selecting the Change Styles button on the right.
To modify heading styles
- Go to menu item: Home.
- In the Styles section, right-click* the style you wish to use from the Styles Gallery.
- Select Modify.
- In the Modify Style dialog, make the appropriate changes to style characteristics.
- Select OK.
To return to the default heading styles:
- Go to menu item: Home.
- In the Styles section, select Change Styles.
- Select Style Set.
- Select Word 2010 from the list.
Technique 6. Use Built-In Document Structuring Features
WCAG 2.0 Applicability:
- 1.3.1 Info and Relationships
- 1.3.2 Meaningful Sequence
- 2.4.2 Page Titled
Curb Cuts: Using built-in structural features is much more reliable that trying to use typography for formatting (e.g. tabs to separate table cells, repeated new lines for a page break).
6.1 Tables
When using tables, it is important to ensure that they are clear and appropriately structured. This helps all users to better understand the information in the table and allows assistive technologies (e.g. screen readers) to provide context so that the information within the table can be conveyed in a meaningful way.
Tips for tables
- Only use tables for tabular information, not for formatting, such as to position columns.
- Use “real tables” rather than text formatted to look like tables using the TAB key or space bar. These will not be recognized by assistive technology.
- Keep tables simple by avoiding merged cells and dividing complex data sets into separate smaller tables, where possible.
- If tables split across pages, set the header to show at the top of each page. Also set the table to break between rows instead of in the middle of rows.
- Create a text summary of the essential table contents. Any abbreviations used should be explained in the summary.
- Table captions or descriptions should answer the question “what is the table’s purpose and how is it organized?” (e.g. “A sample order form with separate columns for the item name, price and quantity”).
- Table cells should be marked as table headers when they serve as labels to help interpret the other cells in the table.
- Table header cell labels should be concise and clear.
- Ensure the table is not “floating” on the page (see Technique 4. Avoid “Floating” Elements).
To add a table with headings
- Go to menu item: Insert.
- In the Tables section, select the Tables icon.
- Select the number of rows and columns you would like your table to have.
- Select the table and a Table Tools menu item should appear.
- Go to menu item: Table Tools > Design.
- In the Table Style Options section, select the Header Row check boxNote: Whenever possible, keep tables simple with just one row of headings.
6.2. Lists
When you create lists, it is important to format them as “real lists”. Otherwise, assistive technologies will interpret your list as a series of short separate paragraphs instead of a coherent list of related items.
To create an ordered or unordered list
- Go to menu item: Home.
- In the Paragraph section, select the Bullets icon for unordered lists or select the Numbering icon for ordered lists.
- To choose a different list format, select the arrow beside the icon.
- Select a format from the format Library that appears in the drop-down menu.
To modify list styles
- Go to menu item: Home.
- In the Paragraph section, select the arrow beside the Bullets icon for unordered lists or select the arrow beside the Numbering icon for ordered lists.
- Select Define New Bullet… to create a new unordered list format.
- Select Define New Number Format… to create a new ordered list format.
- In the New Bullet dialog or the New Number Format dialog, select the list characteristics.
- Select OK.
6.3 Columns
Use the Columns feature for placing text in columns.
Note: Because columns can be a challenge for some users with disabilities (e.g., people using magnifiers), consider whether a column layout is really necessary.
6.4 Page Breaks
Start a new page by inserting a page break instead of repeated hard returns.
To add a page break
- Go to menu item: Page Layout.
- In the Page Setup section, select the arrow beside the Breaks icon.
- Select the type of break to add. Page break is used to start a new page with the same page layout (page orientation, headers, page numbering, etc.). Section break is used if you want to start a new section of the document with a differing page layout.
6.5 Table of Contents
Creating an index or table of contents to outline office document content can provide a means of navigating the meaningful sequence of content.
The best way to generate a table of contents is after applying the predefined heading styles, such as “Heading 1” as described above, to the headings that you want to include in your table of contents. After you apply these styles, you can then create a table of contents.
To insert a table of contents
- Place the cursor in your document where you want to create the table of contents.
- Go to menu item: References.
- In the Table of Contents section, select Table of Contents.
- Select the style that you want to use.
To update a table of contents
- Select the table.
- Go to menu item: References.
- In the Table of Contents section, select the Update Table button.
6.6 Page Numbering
Numbering the pages of you document helps those reading and editing your document effectively navigate and reference its content. For users of assistive technologies, it provides a valuable point of reference within the document.
To insert page numbers
- Go to menu item: Insert.
- In the Header & Footer section, select Page Number.
- Select where you would like to insert your page numbers.
- Select the style of page number you would like to use.
To format page numbers
- Go to menu item: Insert.
- In the Header & Footer section, select Page Number.
- Select Format Page Numbers…
- In the Page Number Format dialog, select the page format characteristics you would like to use
Note: These changes are applied to the predefined page format styles. It does not create a new page format style.
6.7 Document Title
In case the document is ever converted into HTML, it should be given a descriptive and meaningful title.
To change the title of the current document
- Go to menu item: File.
- Select Info from the list in the left window pane.
- In the right window pane, select on the Title text box.
- Enter the TitleNote: The Title defined in the properties is different than the file name. It is also unrelated to the template name, discussed above.
Technique 7. Create Accessible Charts
WCAG 2.0 Applicability:
- 1.1.1 Non-text Content
- 1.3.1 Info and Relationships
Charts can be used to make data more understandable for some audiences. However, it is important to ensure that your chart is as accessible as possible to all members of your audience.
- All basic accessibility considerations that are applied to the rest of your document must also be applied to your charts and the elements within your charts. For example, use shape and color, rather than color alone, to convey information.
- When creating line charts, use the formatting options to create different types of dotted lines to facilitate legibility for users who are color blind.
- When creating bar charts, it is helpful to apply textures rather than colors to differentiate the bars
- Ensure that the contents are your chart are appropriate labeled to give users reference points that will help them to correctly interpret the information.
- Use the formatting options to change predefined colors, ensuring that they align with sufficient contrast requirements (see Technique 8.2 Use Sufficient Contrast)
- Consider providing the data that you used to create the chart in tabular form (e.g., as an appendix).
Curb Cuts: If the chart data is also provided in an appendix, it will be easier for all users to make use of the data.
Technique 8. Make Content Easier to See
WCAG 2.0 Applicability:
- 1.3.3 Sensory Characteristics
- 1.4.1 Use of Color
- 1.4.3 Contrast (Minimum)
- 1.4.5 Images of Text
- 2.2.2 Pause, Stop, Hide
Curb Cuts: All users will benefit from content that is easier to see.
8.1 Format of Text
When formatting text, especially when the text is likely to printed, try to:
- Use font sizes between 12 and 18 points for body text.
- Use fonts of normal weight, rather than bold or light weight fonts. If you do choose to use bold fonts for emphasis, use them sparingly.
- Use standard fonts with clear spacing and easily recognized upper and lower case characters. Sans serif fonts (e.g., Arial, Verdana) are typically easier to read than serif fonts (e.g., Times New Roman, Garamond).
- Avoid large amounts of text set all in caps, italic or underlined.
- Use normal or expanded character spacing, rather than condensed spacing.
- Avoid animated or scrolling text.
But can’t users just zoom in? Office applications do typically include accessibility features such as the ability to magnify documents and support for high contrast modes. However, because printing is an important aspect of many workflows and changing font sizes directly will change documents details such as the pagination, the layout of tables, etc., it is best practice to always format text for a reasonable degree of accessibility.
To change the text size for a default named style
- Go to menu item: Home.
- In the Styles section, right-click* the Style you wish to modify.
- Select Modify Style.
- Under Formatting in the Modify dialog box, select the appropriate font size.
- Exit with OK.
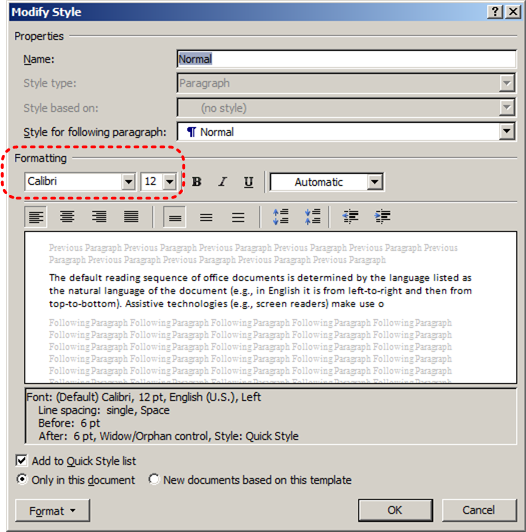
8.2 Use Sufficient Contrast
The visual presentation of text and images of text should have a contrast ration of at least 4.5:1. To help you determine the contrast, here are some examples on a white background:
- Very good contrast (Foreground=black, Background=white, Ratio=21:1)
- Acceptable contrast (Foreground=#767676, Background=white, Ratio=4.54:1)
- Unacceptable contrast (Foreground=#AAAAAA, Background=white, Ratio=2.32:1)
Also, always use a single solid color for a text background rather than a pattern.
In order to determine whether the colors in your document have sufficient contrast, you can consult an online contrast checker, such as the TPG Contrast Analyser or the WebAIM: Contrast Checker.
8.3 Avoid Relying on Color or Sensory Characteristics
The instructions provided for understanding and operating content should not rely solely on sensory characteristics such as the color or shape of content elements. Here are two examples:
- Do not track changes by simply changing the color of text you have edited and noting the color. Instead use Word 2010’s “Track Changes” feature to track changes.
- Do not distinguish between images by referring to their appearance (e.g. “the bigger one”). Instead, label each image with a figure number and use that for references.
8.4 Avoid Using Images of Text
Before you use an image to control the presentation of text (e.g. to ensure a certain font or color combination), consider whether you can achieve the same result by styling “real text”. If this is not possible, as with logos containing stylized text, make sure to provide alternative text for the image following the techniques noted above.
Technique 9. Make Content Easier to Understand
WCAG 2.0 Applicability:
- 2.4.4 Link Purpose (In Context)
- 3.1.4 Abbreviations
- 3.1.5 Reading Level
- 3.2.3 Consistent Navigation
- 3.2.4 Consistent Identification
9.1 Write Clearly
Curb Cuts: By taking the time to design your content in a consistent way, it will be easier to access, navigate and interpret for all users.
- Whenever possible, write clearly with short sentences.
- Introduce acronyms and spell out abbreviations.
- Avoid making the document too “busy” by using lots of whitespace and by avoiding too many different colors, fonts and images.
- If content is repeated on multiple pages within a document or within a set of documents (e.g. headings, footings, etc.), it should occur consistently each time it is repeated.
9.2 Provide Context for Hyperlinks
Hyperlink text in your document should be meaningful when read out of context. To be an effective navigation aid, the link text should describe the destination of the link.
Consider the experience of screen reader users: Generally, screen readers generate a list of links, and screen reader users navigate this list alphabetically. Hyperlink text such as “click here” or “more” is meaningless in this context.
In order to be useful to someone using a screen reader, ensure that hyperlink text is self-describing and meaningful on its own.
To add hyperlinks with meaningful text
- Type (or paste in) a web address and press spacebar or “Enter” to convert into a hyperlink.
- Select the link and right-click*.
- Select Edit Hyperlink (Ctrl + K).
- Edit the text in the Text to display box.
Technique 10. Check Accessibility
If you wish to check the accessibility of your document or template (see Technique 1. Use Accessible Templates), Word 2010 offers an “Accessibility Checker” to review your document against a set of possible issues that users with disabilities may experience in your file.
Important Note: No checker can detect all types of accessibility issues. For example it can tell if alternative text is missing, but it cannot tell if alternative text is actually correct. It also doesn’t test for some issues, including colour contrast.
The Office website provides more information about the Accessibility Checker, including the rules it uses to identify and classify accessibility issues.
The “Accessibility Checker” classifies issues as
- Error – content that makes a file very difficult or impossible for people with disabilities to understand
- Warning – content that in most, but not all, cases makes a file difficult for people with disabilities to understand
- Tip – content that people with disabilities can understand, but that might be better organized or presented in a way that would maximize their experience
To use the “Accessibility Checker”
- Make sure the file is saved as a DOCX (Older DOC files are not compatible with the checker).
- Go to menu item: File.
- Select Info in the left window pane.
- Under Prepare for Sharing, an alert will appear if a potential accessibility issue has been detected.

- To view and repair the issues, select Check for Issues and then Check Accessibility.
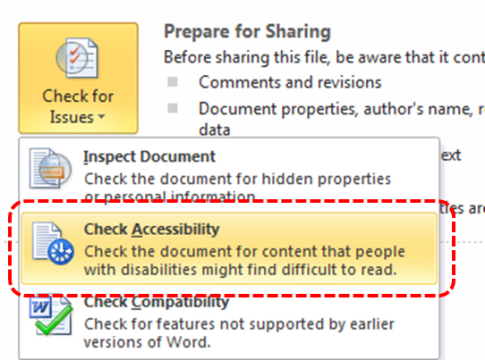
- An Accessibility Checker task pane will open, showing the inspection results.
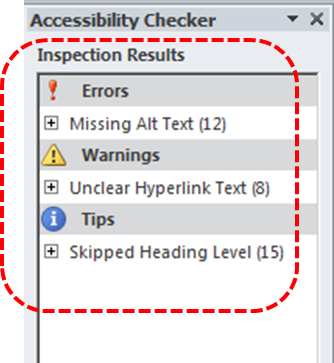
- Select a specific issue to see Additional Information.
- Follow the steps provided to fix or revise the content.
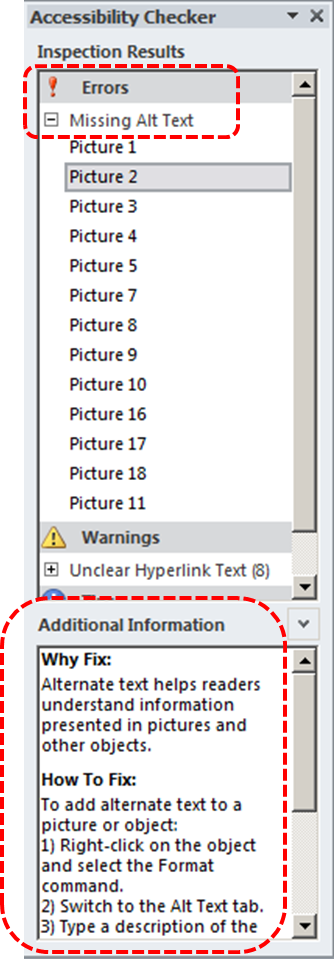
Technique 11. Use Accessibility Features when Saving/Exporting to Other Formats
In some cases, additional steps must be taken in order to ensure accessibility information is preserved when saving/exporting to formats other than the default.
Saving to PDF
PDF documents are not always accessible. Accessible PDF documents are often called “Tagged PDF” because they include “tags” that encode structural information required for accessibility. To evaluate the accessibility of your PDF document, see Technique 10. Check Accessibility.
- Go to menu item: File.
- Select Save As.
- In the File name box, type a name for the file.
- In the Save as type list, select PDF or XPS Document.
- Select the Options button.
- Under Include non-printing information in the Options dialog, ensure that the Document structure tags for accessibility check box is selected.
- Select OK and Save.
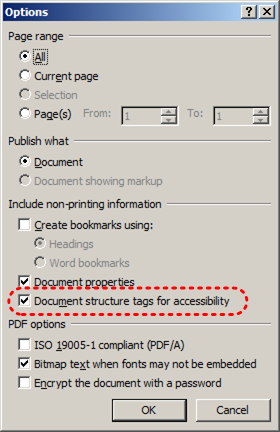
Saving to HTML
- Go to menu item: File.
- Select Save As.
- In the File name box, type a name for the file.
- In the Save as type box, select Web Page.
- Select Save.
- Check the HTML file for accessibility (see Technique 10. Check Accessibility).
To clean up your HTML file
- Remove unnecessary styles, line breaks, etc.
- Remove unnecessary id, class, and attributes.
- Remove font tags.
- Remove styles in the <head> tag.
- Ensure the <th> tags have a scope attribute.
- Remove <p> tags nested inside <th> and <td> tags.
- Check for accessibility (see Technique 11, above).
Note: you may wish to use HTML editors or utilities to help with this process.
Technique 12. Consider Using Accessibility Support Applications/Plugins
Disclaimer: This list is provided for information purposes only. It is not exhaustive and inclusion of an application or plug-in on the list does not constitute a recommendation or guarantee of results.
Other Application Features
Word 2010’s “Navigation” Feature
After you have populated your document with content and true headings have been applied, you may wish to rearrange the content. In order to maintain the integrity and accessibility of the altered sequence, you will need to ensure that structural information (e.g., heading levels) is adjusted accordingly.
Word 2010 provides a “Navigation” mechanism which displays all parts of the document, such as headings, paragraphs, objects, etc. in sequential order. It helps you navigate, access, and manipulate the content. You can move headings or subordinate text up or down, rearranging their sequence in a way that can be programmatically determined and therefore accessible to assistive technologies.
To use the “Navigation” feature
- Go to menu item: View.
- In the Show section, select the Navigation Pane check box.
- The Navigation pane will open to the left of your document.
To jump to a location in a document:
- Select one of three navigation options:
- Select the Browse headings icon
Note: select the heading to view hierarchical headings and content below it.
- Select the Browse pages icon
- Select the Search text

- Scroll through the sequential list and double-click* on the location you would like to jump to
To move content up or down in a document:
- Select and drag the content to a new location in the list
Accessibility Help
If you are interested in what features are provided to make using Word 2010 more accessible to users, documentation is provided in the Help system:
- Go to menu item: File.
- Select Help from the list on the left.
- Under the Support section, select the Help icon.
- Enter “Accessibility” as your search term in the Help dialog box.
References and Resources
- Microsoft Word Help Center
- WebAIM: “Alternative Text”
- Microsoft Accessibility
- Andrew Godwin, Mail Archive, Thread: [JAWS-Users] Re: Tables in Word
- Ryerson University: Microsoft Word Accessibility Tipsheet (PDF)
- Microsoft Word: Video Tutorials
Acknowledgments
Authors: Jan Richards, Sabrina Ruplall
This document was produced as part of the Accessible Digital Office Document (ADOD) Project.
This project has been developed by the Inclusive Design Research Centre, OCAD University as part of an EnAbling Change Partnership project with the Government of Ontario and UNESCO (United Nations Educational, Scientific and Cultural Organization).
Source: Authoring Techniques for Accessible Office Documents: Microsoft Word 2010 by the Inclusive Design Research Centre (IDRC) used under CC-BY-SA 3.0.
Microsoft Word 2008 for Mac
7
Usage Notes
At the time of testing (January 26, 2011), Word 2008 for Mac lacks several features that enable accessible office document authoring, most notably: the ability to add alternative text to image and objects. As a result, some of the other features that might otherwise support accessibility, such as its extensive templates are not as effective. In addition, Word 2008 for Mac does not include an accessibility checking feature.
This guide is intended to be used for documents that are:
- Intended to be used by people (i.e., not computer code),
- Text-based (i.e., not simply images, although they may contain images),
- Fully printable (i.e., where dynamic features are limited to automatic page numbering, table of contents, etc. and do not include audio, video, or embedded interactivity),
- Self-contained (i.e., without hyperlinks to other documents, unlike web content), and
- Typical of office-style workflows (Reports, letters, memos, budgets, presentations, etc.).
If you are creating forms, web pages, applications, or other dynamic and/or interactive content, these techniques will still be useful to you, but you should also consult the W3C-WAI Web Content Accessibility Guidelines (WCAG 2.0) because these are specifically designed to provide guidance for highly dynamic and/or interactive content.
File Formats
The default file format for Word for Mac is Office Open XML (DOCX).
In addition, Word 2008 for Mac offers many other word processor and web format saving options. Most of these have not been checked for accessibility, but some information and/or instructions are available for the following formats in Technique 11 (below):
- DOC (MS Word 97–2004)
- PDF
- HTML
Document Conventions
We have tried to formulate these techniques so that they are useful to all authors, regardless of whether they use a mouse. However, for clarity there are several instances where mouse-only language is used. Below are the mouse-only terms and their keyboard alternatives:
- *Right-click: To right-click with the keyboard, select the object using the Shift+Arrow keys and then press either (1) the “Right-Click” key (some keyboard have this to the right of the spacebar) or Shift+F10.
Disclaimer and Testing Details
Following these techniques will increase the accessibility of your documents, but it does not guarantee accessibility to any specific disability groups. In cases where more certainty is required, it is recommended that you test the office documents with end users with disabilities, including screen reader users.
The application-specific steps and screenshots in this document were created using Microsoft Word 2008 for Mac (ver.12.0.0 (071130), Mac OS X, Jan. 2011) while creating a DOCX document. Files are also easily saved as other file formats, which is useful for checking accessibility (see Technique 12, below).
This document is provided for information purposes only and is neither a recommendation nor a guarantee of results. If errors are found, please report them to: adod-comments@idrc.ocad.ca.
Technique 1. Use Accessible Templates
All office documents start with a template, which can be as simple as a blank standard-sized page or as complex as a nearly complete document with text, graphics and other content. For example, a “Meeting Minutes” template might include headings for information relevant to a business meeting, such as “Actions” above a table with rows to denote time and columns for actions of the meeting.
Because templates provide the starting-point for so many documents, accessibility is critical. If you are unsure whether a template is accessible, you should check a sample document produced when the template is used.
Word for Mac’s default template for new documents is a blank page. The basic installation also includes blank business card, blank label templates, and other blank office-related documents. These are all accessible by virtue of being blank.
It is possible to create your own accessible templates from scratch in Word for Mac. As well, you can edit and modify the existing prepackaged templates, ensuring their accessibility as you do so and saving them as a new template.
To create an accessible template
- Create a new document (from the default blank template or from one of the prepackaged templates).
- Ensure that you follow the techniques in this document.
- When you are finished you should also check the accessibility of the document (see Technique 10, below).
- Go to menu item: File > Save As.
- In the Save As box, type a name for the template. Using a descriptive File name (e.g., “Accessible Memo Template”) may increase the prominence of the accessibility status.
- In the Format box, select Word Template.
- Select Save.
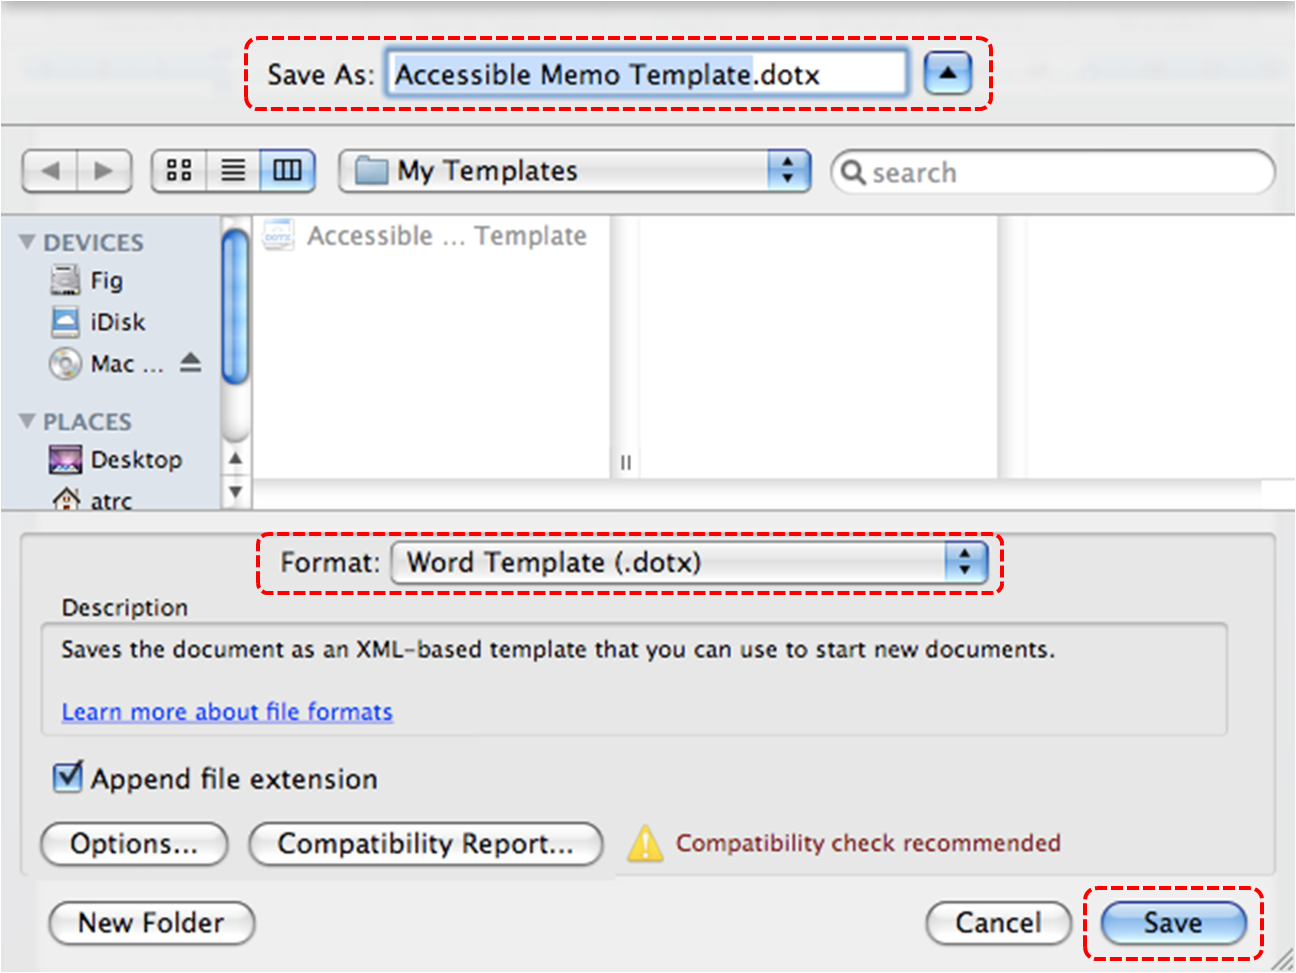
To select an accessible template
Note: Only use these steps if you have an accessible template available (e.g., that you previously saved). Otherwise, simply open a new (blank) document.
- Go to menu item: File > Project Gallery…
- Under Category, select My Templates (or select the location you saved your accessible template).
- Select the template from the scrolling gallery.
- Select Open.
- A new document based on the template will be displayed. If you have chosen an accessible template, the document will be accessible at this point. As you add your content (e.g., text, images, etc.), ensure that you consult the sections that follow to preserve accessibility.
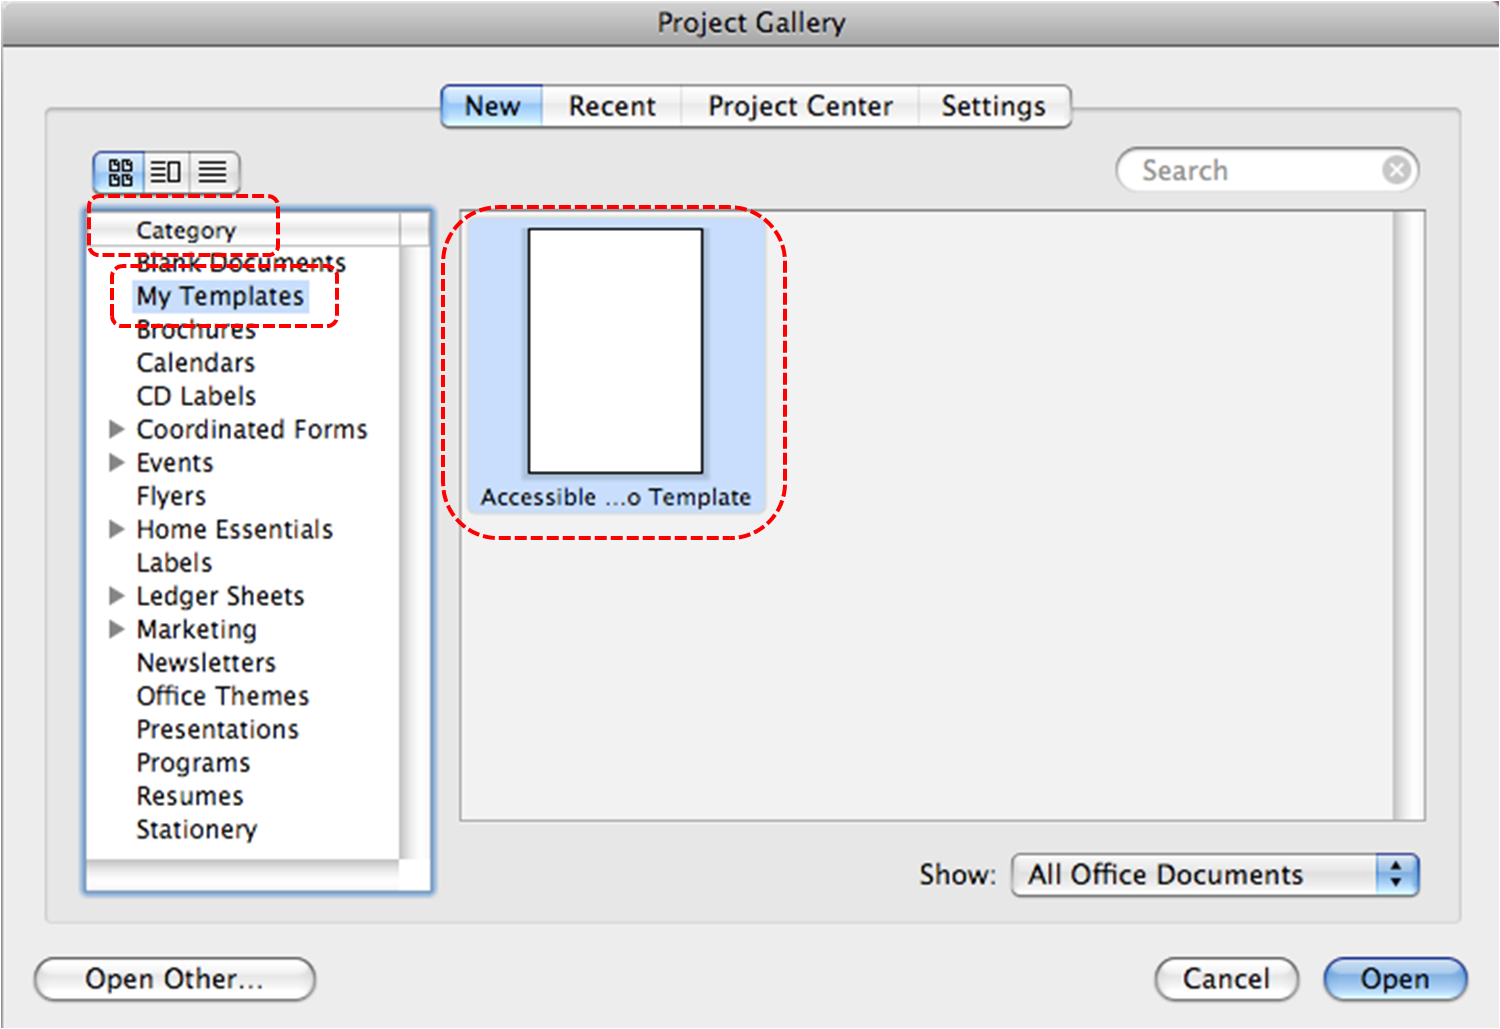
Technique 2. Specify Document Language
In order for assistive technologies (e.g., screen readers) to be able to present your document accurately, it is important to indicate the natural language of the document. If a different natural language is used for a paragraph or selected text, this also needs to be clearly indicated.
To change the default language
- Go to menu item: Tools > Language…
- In the Language dialog, select the language.
- Select Default…
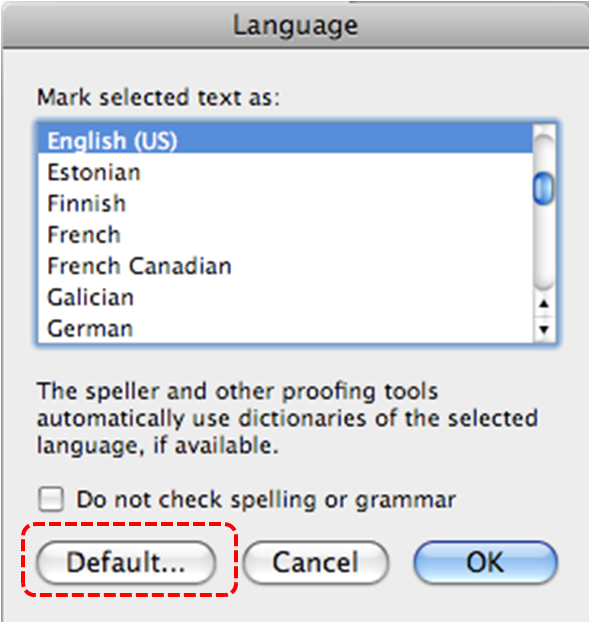
To apply a language directly to selected text
- Select the text.
- Go to menu item: Tools > Language…
- In the Mark selected text as box, select the language from the list.
- Select OK.
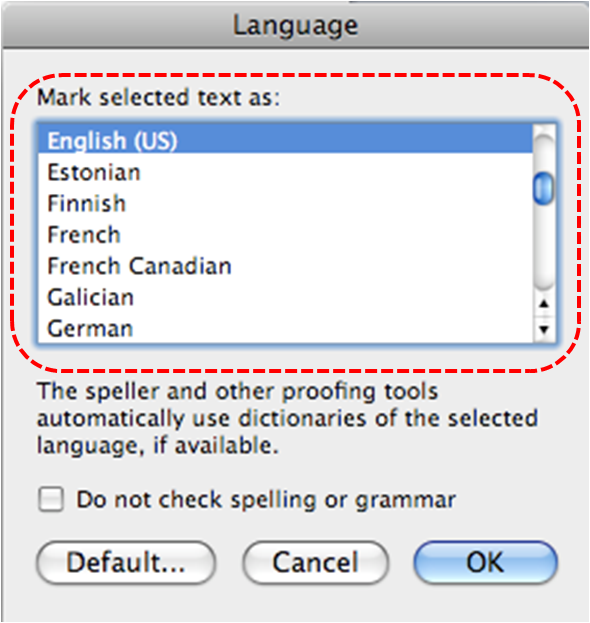
Technique 3. Provide Text Alternatives for Images and Graphical Objects
At this time, Word 2008 for Mac does not offer a mechanism which enables the user to add alternative text descriptions to images or objects. [Tested: January 26, 2011]
When using images or other graphical objects, such as charts and graphs, it is important to ensure that the information you intend to convey by the image is also conveyed to people who cannot see the image. This can be accomplished by adding concise alternative text to of each image. If an image is too complicated to concisely describe in the alternative text alone (artwork, flowcharts, etc.), provide a short text alternative and a longer description as well.
Tips for writing alternative text
- Try to answer the question “what information is the image conveying?”
- If the image does not convey any useful information, leave the alternative text blank
- If the image contains meaningful text, ensure all of the text is replicated
- Alternative text should be fairly short, usually a sentence or less and rarely more than two sentences
- If more description is required (e.g., for a chart or graph), provide a short description in the alternative text (e.g., a summary of the trend) and more detail in the long description, see below
- Test by having others review the document with the images replaced by the alternative text
Tips for writing longer descriptions
- Long descriptions should be used when text alternatives (see above) are insufficient to answer the question “what information is the image conveying?”
- In some situations, the information being conveyed will be how an image looks (e.g., an artwork, architectural detail, etc.). In these cases, try to describe the image without making too many of your own assumptions.
- One approach is to imagine you are describing the image to a person over the phone
- Ensure that you still provide concise alternative text to help readers decide if they are interested in the longer description
Alternatively, you can include the same information conveyed by the image within the body of the document, providing the images as an alternate to the text. In that case, you do not have to provide alternate text within the image.
Technique 4. Avoid “Floating” Elements
When images and objects are inserted into Word 2008 for Mac documents they default to being an “inline object”. Inline objects keep their position on the page relative to a portion of the text.
A “floating” object keeps its position relative to the page, while text flows around it. As content moves up or down on the page, the object stays where it was placed. To ensure that images and objects remain with the text that references it, always position it as an inline object.
Similarly, avoid placing drawing objects directly into the document (e.g., as borders, to create a diagram). Instead, create borders with page layout tools and insert complete graphical objects.
To prevent an image or object from “floating”
- Select the object.
- Go to menu item: Format > Picture…
- Select Layout.
- Under Wrapping style, select In Line with Text
- Select OK.
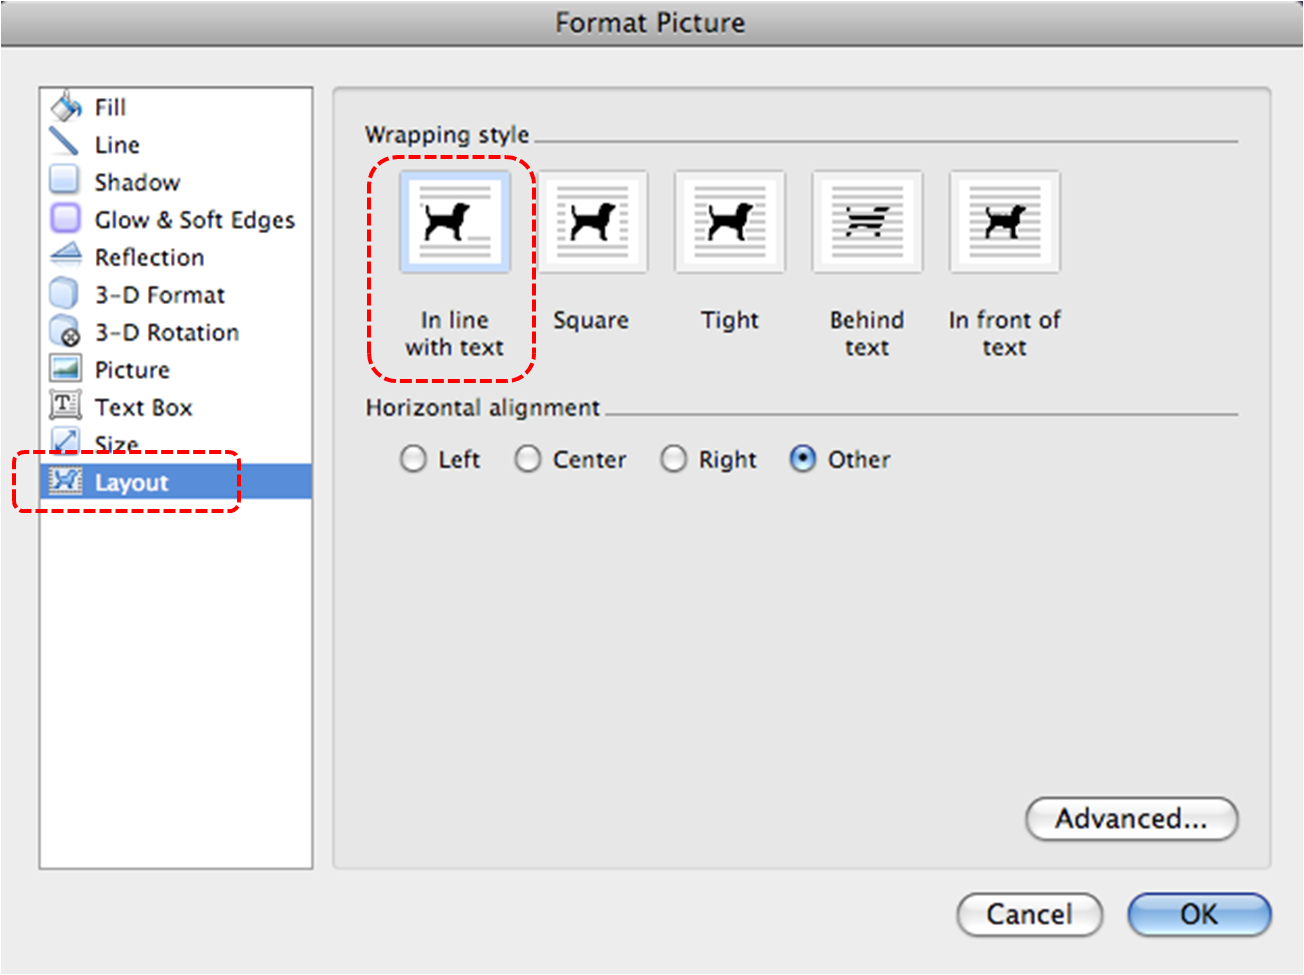
Technique 5. Use Headings
Any documents that are longer than a few paragraphs require structuring to make them more straightforward for readers to understand. One of the easiest ways to do this is to use “True Headings” to create logical divisions between paragraphs. True headings are more than just bolded, enlarged, or centered text; they are structural elements that order and levels provide a meaningful sequence to users of assistive technologies.
Tips for headings
- Use the default headings styles provided (“Heading “, “Heading 2”, etc.)
- Nest headings properly (e.g., the sub-headings of a “Heading 1” are “Heading 2”, etc.)
- Do not skip heading levels
To apply headings
- Select text.
- If the Formatting Palette is not in view, go to menu item: View > Toolbox, Formatting Palette.
- In the Formatting Palette, if the Styles section is not open, select Styles.
- Headings can be found under Pick style to apply.
- Select the heading you wish to apply.
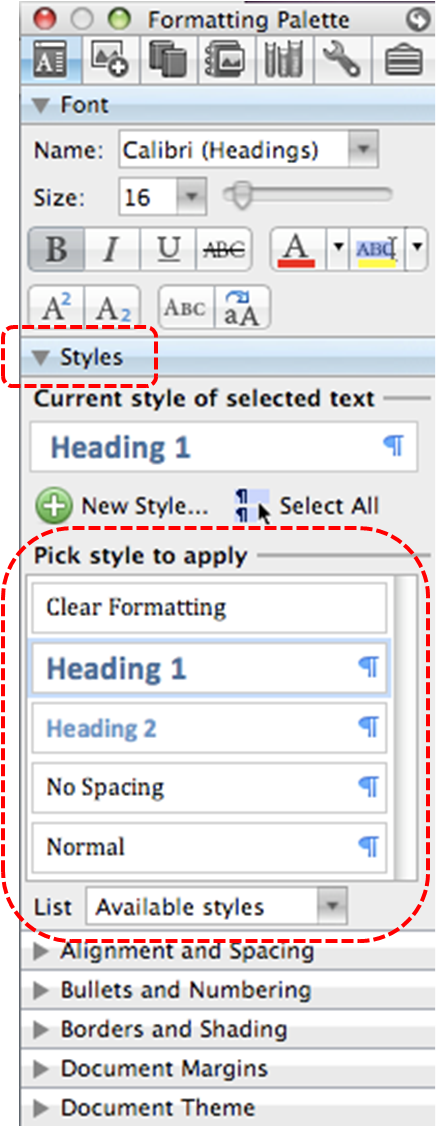
To modify heading styles
- If the Formatting Palette is not in view, go to menu item: View > Toolbox, Formatting Palette.
- In the Formatting Palette, if the Styles section is not open, select Styles.
- Headings can be found under Pick style to apply.
- Select the menu icon beside the heading you want to modify.
- Select Modify Style…
- In the Modify Style dialog, make the appropriate changes to style characteristics.
- Select OK.
To create a new style
- If the Formatting Palette is not in view, go to menu item: View > Toolbox, Formatting Palette.
- In the Formatting Palette, if the Styles section is not open, select Styles.
- Headings can be found under Pick style to apply.
- Select New Style…
- In the Name box, enter a name for the new style.
- Format the characteristics of the new style.
- Select OK and the new style will be added to the Pick style to apply scrolling list.
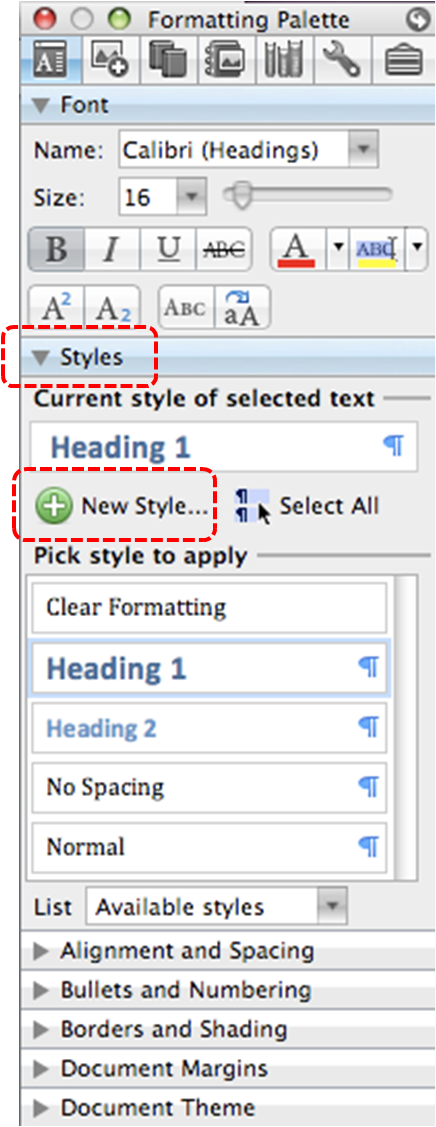
Technique 6. Use Named Styles
As with “True Headings” (see Technique 5), you should attempt to make use of the named styles that are included with the office application (e.g., “emphasis”, “caption”, etc.) before creating your own styles or using the character formatting tools directly. Named styles help your readers understand why something was formatted in a given way, which is especially helpful when there are multiple reasons for the same formatting (e.g., it is common to use italics for emphasis, Latin terms and species names).
For more information on formatting using named styles, see Technique 9.
Note: While office application suites support headings in much the same way, the named styles often differ.
To use default named styles
- Default named styles can be applied the same way as headings (see Technique 5).
Technique 7. Use Built-In Document Structuring Features
7.1 Tables
When using tables, it is important to ensure that they are clear and appropriately structured. This helps all users to better understand the information in the table and allows assistive technologies (e.g., screen readers) to provide context so that the information within the table can be conveyed in a meaningful way.
Tips for tables
- Only use tables for tabular information, not for formatting, such as to position columns.
- Use “real tables” rather than text formatted to look like tables using the TAB key or space bar. These will not be recognized by assistive technology.
- Keep tables simple by avoiding merged cells and dividing complex data sets into separate smaller tables, where possible. Whenever possible, use just one row of headings.
- If tables split across pages, set the header to show at the top of each page. Also set the table to break between rows instead of in the middle of rows.
- Create a text summary of the essential table contents. Any abbreviations used should be explained in the summary.
- Table captions or descriptions should answer the question “what is the table’s purpose and how is it organized?” (e.g., “A sample order form with separate columns for the item name, price and quantity”).
- Table cells should be marked as table headers when they serve as labels to help interpret the other cells in the table.
- Table header cell labels should be concise and clear.
- Ensure the table is not “floating” on the page (see Technique 4).
To add a table with headings
- Go to menu item: Table > Insert > Table…
- Select the characteristics of the table and select OK.
- Go to menu item: Table > Table Properties…
- In the Table Properties dialog, select Row.
- Under Options, select the Repeat as header row at the top of each page check box
- Select OK.
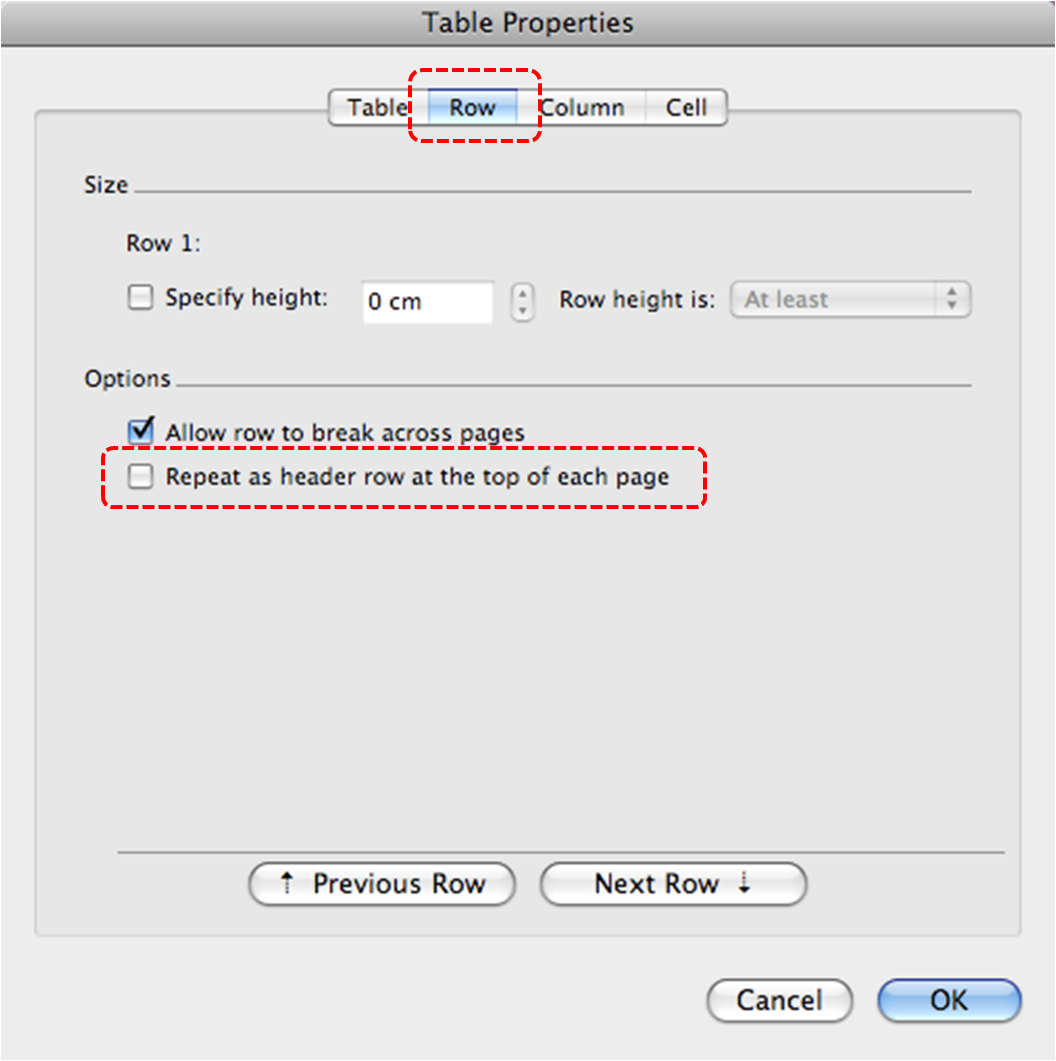
7.2. Lists
When you create lists, it is important to format them as “real lists”. Otherwise, assistive technologies will interpret your list as a series of short separate paragraphs instead of a coherent list of related items.
To create an ordered or unordered list
- Select the text.
- If the Formatting Palette is not in view, go to menu item: View > Toolbox, Formatting Palette.
- In the Formatting Palette, select Bullets and Numbering if it is not already open.
- In the Bullets and Numbering dialog, select Type, Bullets for bulleted lists or Type, Numbering for numbered lists.
- To change the style, select a list style from the Style drop-down list.
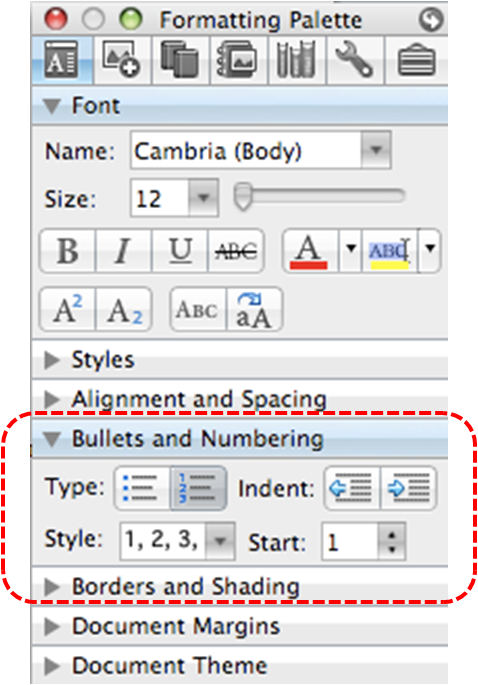
At this time, it is not possible to modify pre-formatted list styles or to create your own list styles. [Tested: January 26, 2011]
7.3 Columns
Use Columns feature for placing text in columns. However, because columns can be a challenge for users of some assistive technologies, you should consider whether a column layout is really necessary.
7.4 Page Breaks
Start a new page by inserting a page break instead of repeated hard returns.
7.5 Use a Table of Contents
Creating an index or table of contents to outline office document content can provide a means of navigating the meaningful sequence of content.
The best way to generate a table of contents is after applying the predefined heading styles, such as “Heading 1” as described above, to the headings that you want to include in your table of contents. After you apply these styles, you can then create a table of contents.
To insert a table of contents
- Place the cursor in your document where you want to create the table of contents.
- Go to menu item: Insert > Document Elements > Table of Contents.
- In the Table of Contents section that opens above the document pane, select the style you want to use.

To update a table of contents
- Select the table,
- Select the icon beside Table of Contents,
- Select Update Table…

7.6 Use Page Numbering
Numbering the pages of your document helps those reading and editing your document effectively navigate and reference its content. For users of assistive technologies, it provides a valuable point of reference within the document.
To insert page numbers
- Go to menu item: Insert > Page Numbers…
- In the Page Numbers dialog, select the page number characteristics (Position, Alignment, Show number on first page),
- Select OK.
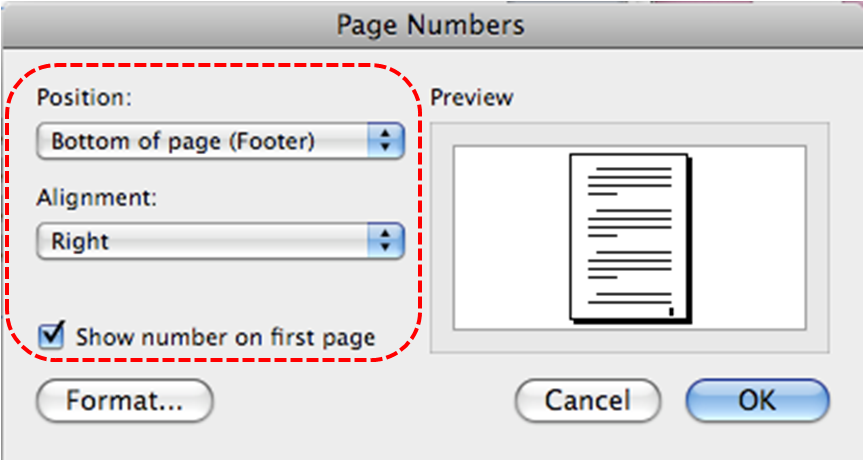
To format page numbers
- In the Page Numbers dialog, select Format…
- Select the format characteristics in the Page Number Format dialog.
- Select OK
- Note: These changes are applied to the predefined page format styles. It does not create a new page format style.
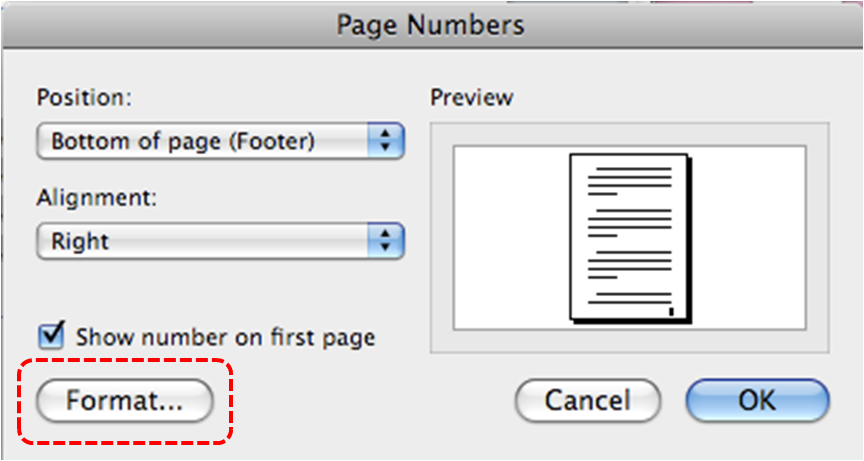
7.7 Document Title
In case the document is ever converted into HTML, it should be given a descriptive and meaningful title.
To change the title of the current document
- Go to menu item: File > Properties.
- In the Document Properties dialog, select Summary.
- Enter the title in the Title text box.
Note: The title defined in the properties is different than the file name. It is also unrelated to the template name, discussed above.
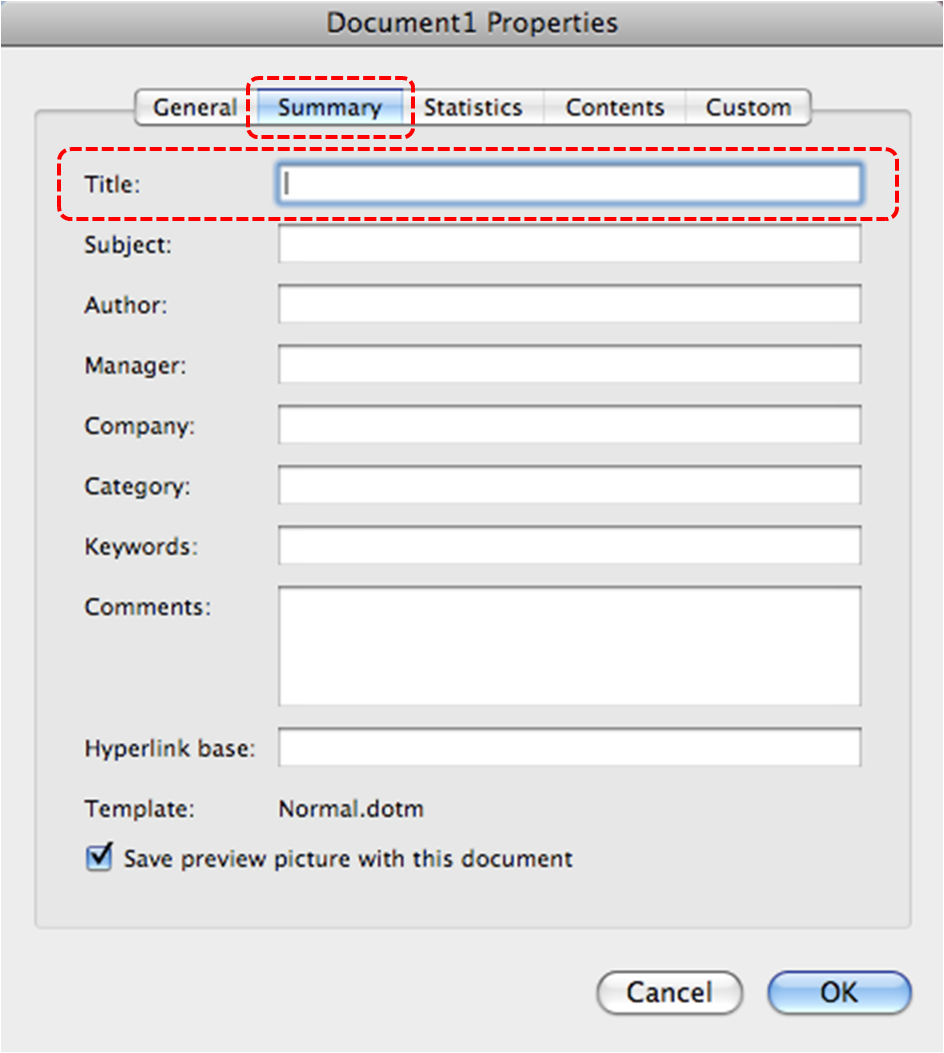
Technique 8. Create Accessible Charts
Charts can be used to make data more understandable for some audiences. However, it is important to ensure that your chart is as accessible as possible to all members of your audience.
- All basic accessibility considerations that are applied to the rest of your document must also be applied to your charts and the elements within your charts. For example, use shape and color, rather than color alone, to convey information.
- When creating line charts, use the formatting options to create different types of dotted lines to facilitate legibility for users who are color blind.
- When creating bar charts, it is helpful to apply textures rather than colors to differentiate the bars
- Ensure that the contents are your chart are appropriate labeled to give users reference points that will help them to correctly interpret the information.
- Use the formatting options to change predefined colors, ensuring that they align with sufficient contrast requirements (see Technique 9.2).
- Consider providing the data that you used to create the chart in tabular form (e.g. as an appendix).
Technique 9. Make Content Easier to See
Here are some other things to keep in mind:
9.1 Format of Text
When formatting text, especially when the text is likely to printed, try to:
- Use font sizes between 12 and 18 points for body text.
- Use fonts of normal weight, rather than bold or light weight fonts. If you do choose to use bold fonts for emphasis, use them sparingly.
- Use standard fonts with clear spacing and easily recognized upper and lower case characters. Sans serif fonts (e.g., Arial, Verdana) may sometimes be easier to read than serif fonts (e.g., Times New Roman, Garamond).
- Avoid large amounts of text set all in caps, italic or underlined.
- Use normal or expanded character spacing, rather than condensed spacing.
- Avoid animated or scrolling text.
But can’t users just zoom in? Office applications do typically include accessibility features such as the ability to magnify documents and support for high contrast modes. However, because printing is an important aspect of many workflows and changing font sizes directly will change documents details such the pagination, the layout of tables, etc., it is best practice to always format text for a reasonable degree of accessibility.
To change the text size for a default named style
- Go to menu item: View > Formatting Palette.
- If the Styles section is not open, select Styles.
- Under Pick Style to the Style you wish to modify.
- Select Modify…
- Under Formatting in the Modify dialog box, select the appropriate font size.
- Exit with OK.

9.2 Use Sufficient Contrast
The visual presentation of text and images of text should have a contrast ration of at least 4.5:1. To help you determine the contrast, here are some examples on a white background:
- Very good contrast (Foreground=black, Background=white, Ratio=21:1)
- Acceptable contrast (Foreground=#767676, Background=white, Ratio=4.54:1)
- Unacceptable contrast (Foreground=#AAAAAA, Background=white, Ratio=2.32:1)
Also, always use a single solid color for a text background rather than a pattern.
In order to determine whether the colors in your document have sufficient contrast, you can consult an online contrast checker, such as:
9.3 Avoid Using Color Alone
Color should not be used as the only visual means of conveying information, indicating an action, prompting a response, or distinguishing a visual element. In order to spot where color might be the only visual means of conveying information, you can create a screenshot of the document and then view it with online gray-scale converting tools, such as:
- GrayBit v2.0: Grayscale Conversion Contrast Accessibility Tool
Editor’s note: GrayBit v2.0 is no longer available. However, multiple tools can be found online: Google Search: gray-scale conversion tool.
9.4 Avoid Relying on Sensory Characteristics
The instructions provided for understanding and operating content should not rely solely on sensory characteristics such as the color or shape of content elements. Here are two examples:
- Do not track changes by simply changing the color of text you have edited and noting the color. Instead use Word 2008 for Mac’s “Track Changes” feature to track changes.
- Do not distinguish between images by referring to their appearance (e.g. “the bigger one”). Instead, label each image with a figure number and use that for references.
9.5 Avoid Using Images of Text
Before you use an image to control the presentation of text (e.g., to ensure a certain font or color combination), consider whether you can achieve the same result by styling “real text”. If this is not possible, as with logos containing stylized text, make sure to provide alternative text for the image following the techniques noted above.
Technique 10. Make Content Easier to Understand
10.1 Write Clearly
By taking the time to design your content in a consistent way, it will be easier to access, navigate and interpret for all users:
- Whenever possible, write clearly with short sentences.
- Introduce acronyms and spell out abbreviations.
- Avoid making the document too “busy” by using lots of whitespace and by avoiding too many different colors, fonts and images.
- If content is repeated on multiple pages within a document or within a set of documents (e.g., headings, footings, etc.), it should occur consistently each time it is repeated.
10.2 Provide Context for Hyperlinks
Hyperlink text in your document should be meaningful when read out of context. To be an effective navigation aid, the link text should describe the destination of the link.
Consider the experience of screen reader users: Generally, screen readers generate a list of links, and screen reader users navigate this list alphabetically. Hyperlink text such as “click here” or “more” is meaningless in this context.
In order to be useful to someone using a screen reader, ensure that hyperlink text is self-describing and meaningful on its own. To make the address of hyperlink clear when printing, you may wish to include the address in brackets following the descriptive text of the hyperlink.
To add hyperlinks with meaningful text
- Type (or paste in) a web address and press spacebar or “Enter” to convert into a hyperlink.
- Highlight the link.
- Go to menu item: Insert > Hyperlink…
- Edit the text in the Display box
- Select OK.
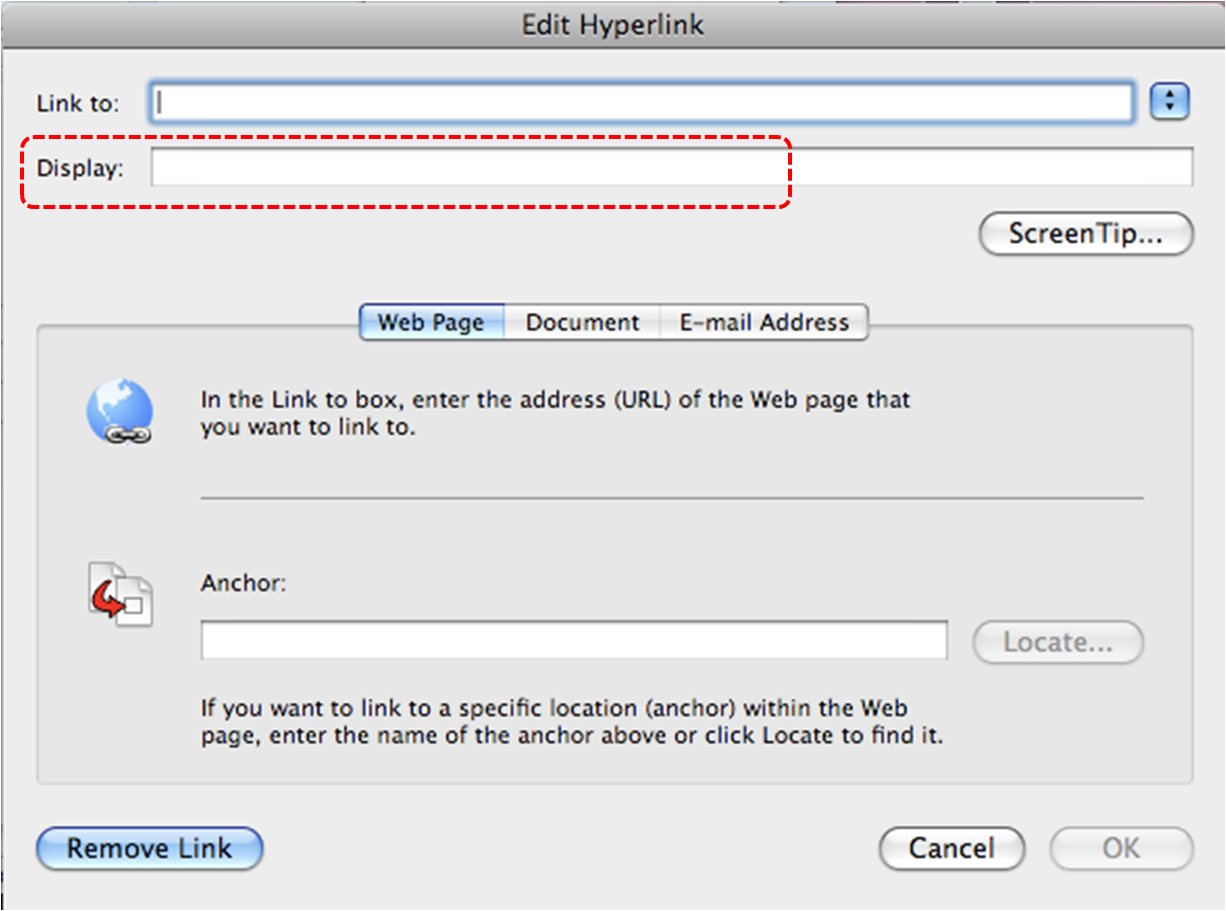
Technique 11. Check Accessibility
At this time, Word 2008 for Mac does not offer a mechanism to check for potential accessibility errors in your document prior to publishing. [Tested: January 26th, 2011]
Technique 12. Use Accessibility Features when Saving/Exporting to Other Formats
In some cases, additional steps must be taken in order to ensure accessibility information is preserved when saving/exporting to formats other than the default.
Note: Before saving in other formats, you may want to run the Compatibility Report feature by selecting Compatibility Report… from the Save As dialog. This checks the compatibility of your existing document with the format you have selected save your document as. The results of this check are revealed in the Compatibility Report dialog, where you have explanations of errors and options to fix them. To run this check at any time, go to menu item: View > Toolbox, Compatibility Report.
DOC
- Go to menu item: File > Save As…
- In the Save As box, type a name for the file.
- In the Format box, select Word 97-2004 Document (.doc).
- Select Save.
PDF
While Word 2008 for Mac allows you to save documents in the PDF format. However, at this time, it does not offer an explicit option to save your document in the tagged PDF format. [Tested: January 26th, 2011]
To evaluate PDF accessibility
If you saved your document in tagged PDF format, you can use the following tools and steps to evaluate the accessibility of the PDF document:
HTML
- Go to menu item: File > Save as Web Page…
- In the Save As box, type a name for the file.
- Select Save.
- Check the HTML file for accessibility (see below).
To clean up your HTML file
- Remove unnecessary styles, line breaks, etc.
- Remove unnecessary id, class, and attributes.
- Remove font tags.
- Remove styles in the <head> tag.
- Ensure the <th> tags have a scope attribute.
- Remove <p> tags nested inside <th> and <td> tags.
- Check for accessibility.
Note: you may wish to use HTML editors or utilities to help with this process.
To evaluate HTML accessibility
Use one of the web accessibility checkers available online, such as:
Technique 13. Consider Using Accessibility Support Applications/Plugins
Disclaimer: This list is provided for information purposes only. It is not exhaustive and inclusion of an application or plug-in on the list does not constitute a recommendation or guarantee of results by the IDRC.
Accessibility Help
If you are interested in what features are provided to make using Word 2008 for Mac more accessible to users, documentation is provided in the Help system:
- Go to menu item: Help
- Enter “Accessibility” as your search term in the Search box
References and Resources
- Microsoft Word 2008 for Mac
- GAWDS Writing Better Alt Text
- Ryerson University: Microsoft Word Accessibility Tipsheet (PDF)
- Microsoft Word: Video Tutorials
Acknowledgments
Authors: Jan Richards, Sabrina Ruplall
This document was produced as part of the Accessible Digital Office Document (ADOD) Project.
This project has been developed by the Inclusive Design Research Centre, OCAD University as part of an EnAbling Change Partnership project with the Government of Ontario and UNESCO (United Nations Educational, Scientific and Cultural Organization).
Source: Authoring Techniques for Accessible Office Documents: Word 2008 for Mac by the Inclusive Design Research Centre (IDRC) used under CC-BY-SA 3.0.
Usage Notes
At the time of testing (January 10, 2011), Word 2007 provides a set of accessibility features that is sufficient to enable the production of accessible digital office documents. However, Word 2007 does not include an accessibility checking feature.
This guide is intended to be used for documents that are:
- Intended to be used by people (i.e., not computer code),
- Text-based (i.e., not simply images, although they may contain images),
- Fully printable (i.e., where dynamic features are limited to automatic page numbering, table of contents, etc. and do not include audio, video, or embedded interactivity),
- Self-contained (i.e., without hyperlinks to other documents, unlike web content), and
- Typical of office-style workflows (Reports, letters, memos, budgets, presentations, etc.).
If you are creating forms, web pages, applications, or other dynamic and/or interactive content, these techniques will still be useful to you, but you should also consult the W3C-WAI Web Content Accessibility Guidelines (WCAG 2.0) because these are specifically designed to provide guidance for highly dynamic and/or interactive content.
File Formats
The default file format for Word 2007 is Office Open XML (DOCX).
In addition, Word 2007 offers many other word processor and web format saving options. Most of these have not been checked for accessibility.
Document Conventions
We have tried to formulate these techniques so that they are useful to all authors, regardless of whether they use a mouse. However, for clarity there are several instances where mouse-only language is used. Below are the mouse-only terms and their keyboard alternatives:
- *Right-click: To right-click with the keyboard, select the object using the Shift+Arrow keys and then press either (1) the “Right-Click” key (some keyboard have this to the right of the spacebar) or Shift+F10.
Disclaimer and Testing Details
- Following these techniques will increase the accessibility of your documents, but it does not guarantee accessibility to any specific disability groups. In cases where more certainty is required, it is recommended that you test the office documents with end users with disabilities, including screen reader users.
- The application-specific steps and screenshots in this document were created using Microsoft Word 2007 (ver.12.0.6545.5000, Windows 7, Jan. 2011) while creating a DOCX document. Files are also easily saved as other file formats (see Technique 11).
- This document is provided for information purposes only and is neither a recommendation nor a guarantee of results. If errors are found, please report them to: adod-comments@idrc.ocad.ca.
Technique 1. Use Accessible Templates
All office documents start with a template, which can be as simple as a blank standard-sized page or as complex as a nearly complete document with text, graphics and other content. For example, a “Meeting Minutes” template might include headings for information relevant to a business meeting, such as “Actions” above a table with rows to denote time and columns for actions of the meeting.
Because templates provide the starting-point for so many documents, accessibility is critical. If you are unsure whether a template is accessible, you should check a sample document produced when the template is used (see Accessibility Checking, below).
Word 2007’s default template for new documents is a blank page. The basic installation also includes blank business card, blank label templates, and other blank office-related documents. These are all accessible by virtue of being blank.
It is possible to create your own accessible templates from scratch in Word 2007. As well, you can edit and modify the existing prepackaged templates, ensuring their accessibility as you do so and saving them as a new template.
To create an accessible template
- Create a new document (from the default blank template or from one of the prepackaged templates)
- Ensure that you follow the techniques in this document
- When you are finished you should also check the accessibility of the document (See Technique 10, below)
- Go to menu item: Office > Save As > Word Template
- Save the template in the Microsoft > Templates folder
- In the File name box, type a name for the template. Using a descriptive File name (e.g., “Accessible Memo Template”) may increase the prominence of the accessibility status. As well, filling in the text box labeled Tags with the term “accessibility” may improve its searchability as an accessible file.
- Select Save
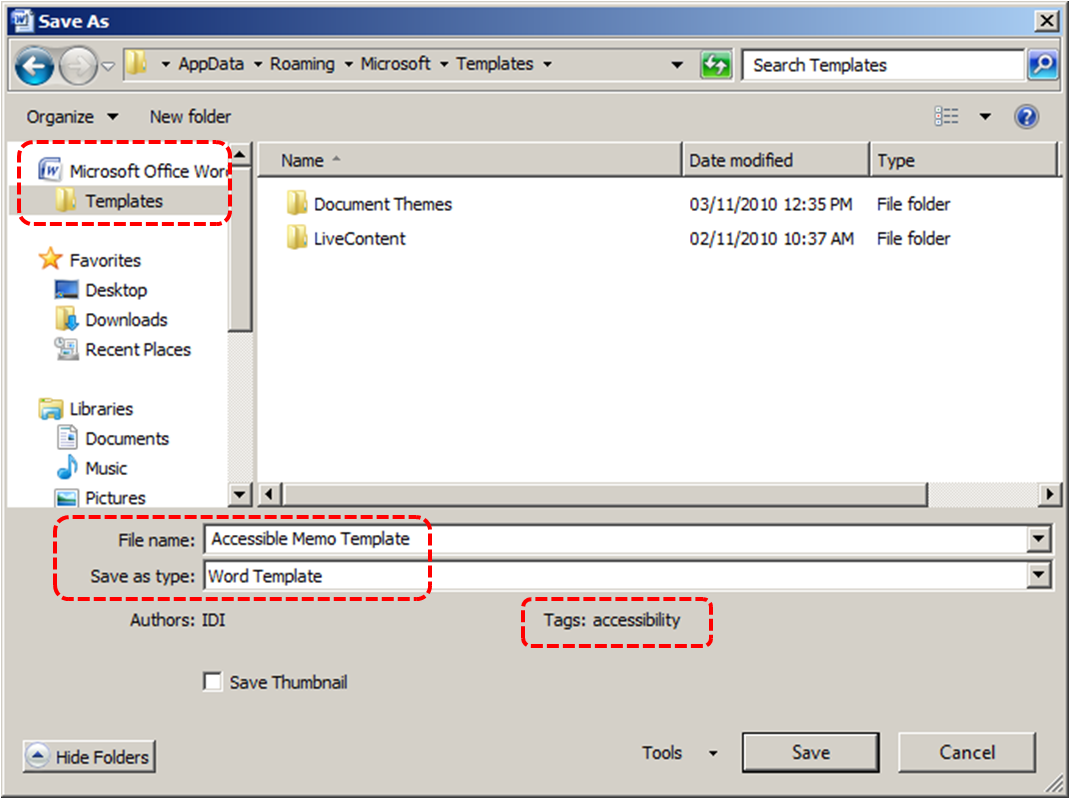
To select an accessible template
Note: Only use these steps if you have an accessible template available (e.g. that you previously saved). Otherwise, simply open a new (blank) document.
- Go to menu item: Office > New
- Under Templates, select My templates…
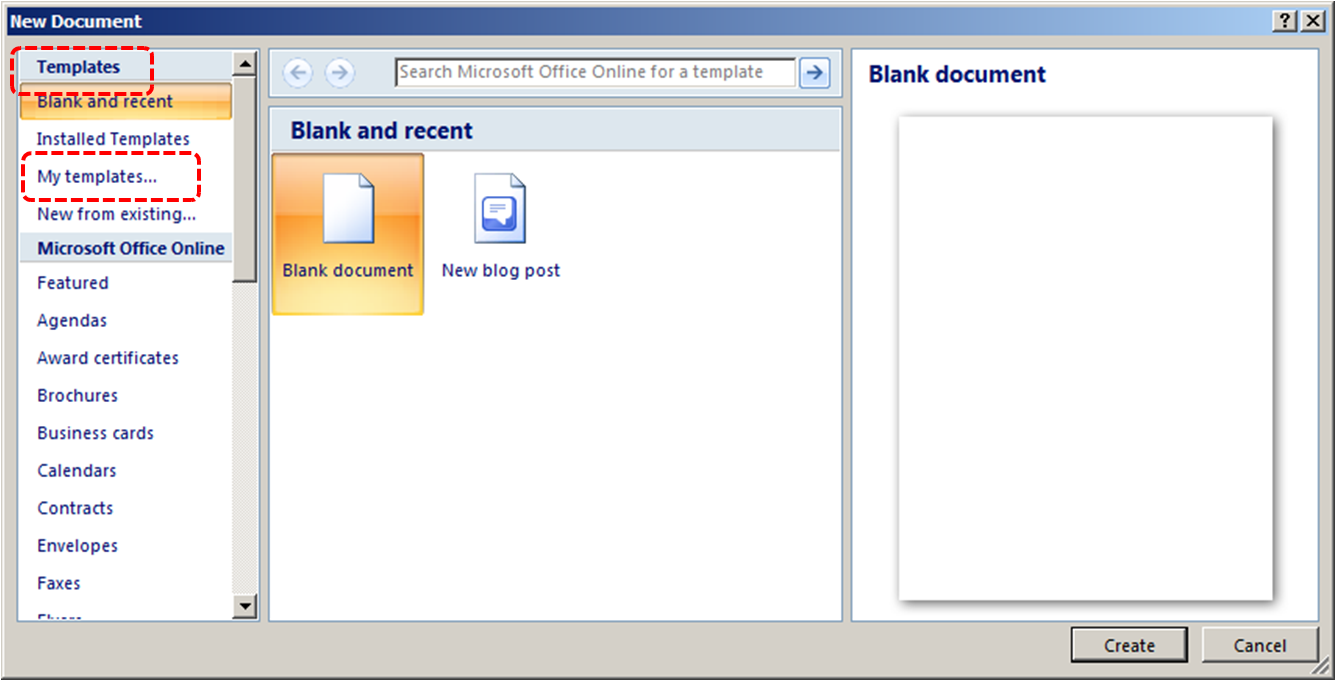
- In the New document dialog, select your accessible template from the list in the My Templates tab
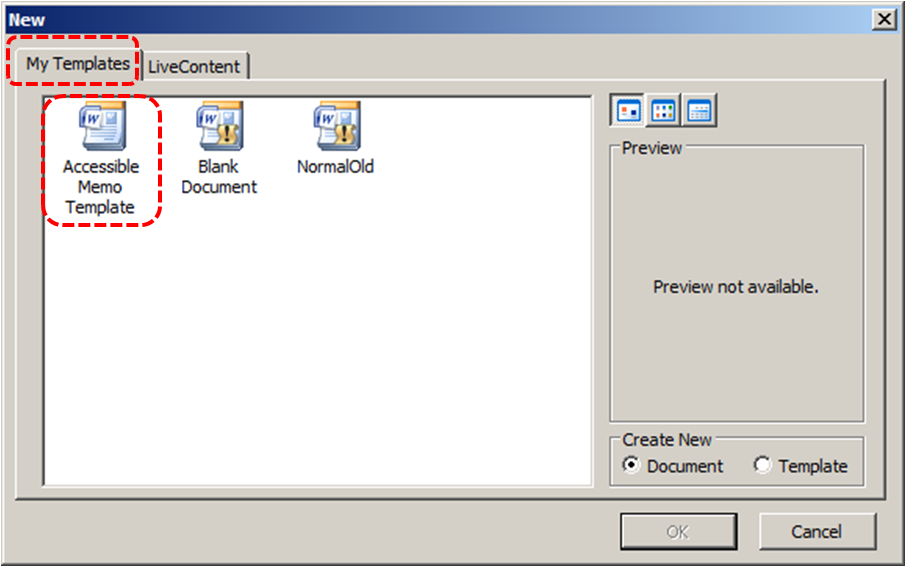
- Select OK
- A new document based on the template will be displayed. If you have chosen an accessible template, the document will be accessible at this point. As you add your content (e.g., text, images, etc.), ensure that you consult the sections that follow to preserve accessibility.
Technique 2. Specify Document Language
In order for assistive technologies (e.g., screen readers) to be able to present your document accurately, it is important to indicate the natural language of the document. If a different natural language is used for a paragraph or selected text, this also needs to be clearly indicated.
To change the default language
- In the operating system, activate the keyboard layout for the language in which you want to create and edit text
- Right-click* the status bar at the bottom of the window, ensure that Language is selected, this displays a reminder of the active keyboard layout in the status bar
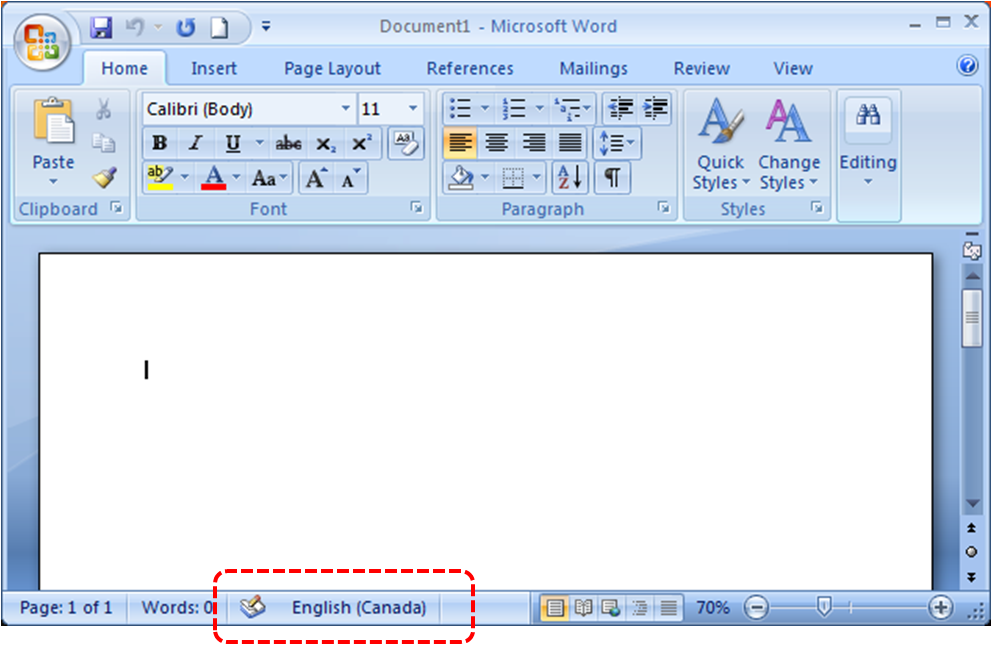
Word 2007 has an automatic language detection mechanism, which can automatically detect the language of your text. If you type a section of text in a different language than the rest of your document, Word 2007 will programmatically mark the language of that section of text appropriately.
To turn on automatic language detection
- Go to menu item: Review
- In the Proofing section, select the Set Language button
- In the Language dialog, select the Detect language automatically check box
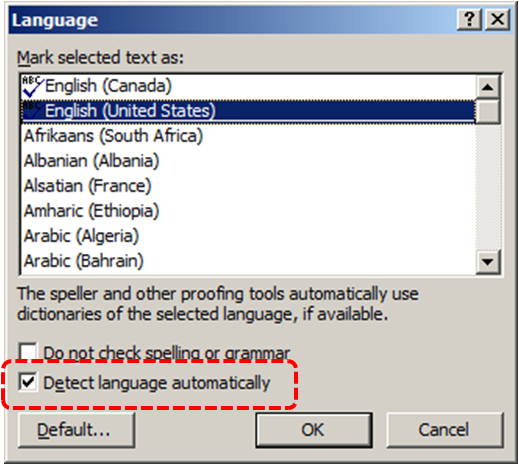
To apply a language directly to selected text
- Select the text
- Go to menu item: Review
- In the Proofing section, select the Set Language button
- In the Mark selected text as box, select the language from the list
- Select OK
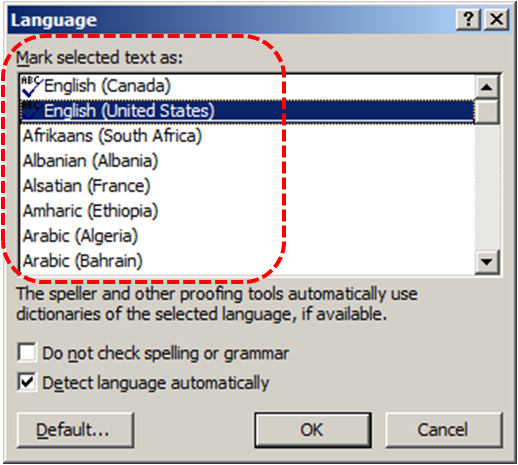
Technique 3. Provide Text Alternatives for Images and Graphical Objects
When using images or other graphical objects, such as charts and graphs, it is important to ensure that the information you intend to convey by the image is also conveyed to people who cannot see the image. This can be accomplished by adding concise alternative text to of each image. If an image is too complicated to concisely describe in the alternative text alone (artwork, flowcharts, etc.), provide a short text alternative and a longer description as well.
Tips for writing alternative text
- Try to answer the question “what information is the image conveying?”
- If the image does not convey any useful information, leave the alternative text blank
- If the image contains meaningful text, ensure all of the text is replicated
- Alternative text should be fairly short, usually a sentence or less and rarely more than two sentences
- If more description is required (e.g., for a chart or graph), provide a short description in the alternative text (e.g., a summary of the trend) and more detail in the long description, see below
- Test by having others review the document with the images replaced by the alternative text
Tips for writing longer descriptions
- Long descriptions should be used when text alternatives (see above) are insufficient to answer the question “what information is the image conveying?”
- In some situations, the information being conveyed will be how an image looks (e.g., an artwork, architectural detail, etc.). In these cases, try to describe the image without making too many of your own assumptions.
- One approach is to imagine you are describing the image to a person over the phone
- Ensure that you still provide concise alternative text to help readers decide if they are interested in the longer description
Alternatively, you can include the same information conveyed by the image within the body of the document, providing the images as an alternate to the text. In that case, you do not have to provide alternate text within the image.
To add alternative text to images and graphical objects
- Right-click* the object
- Select Size…
- Select the Alt Text tab in the Size dialog
- Fill in the Alternative Text
- Select Close
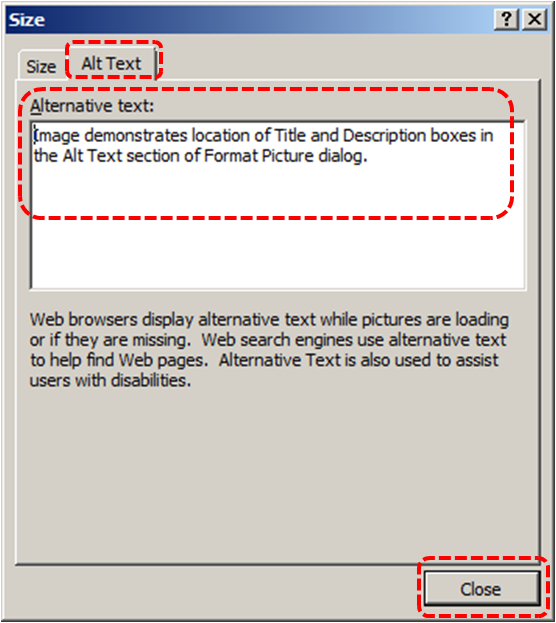
When inserting a very small image, or resizing a larger image to be much smaller, Word 2007 assumes that the image is intended to be a bullet-point for a bulleted list. Once Word 2007 defines the image as a bullet, the option to add alternative text disappears. Select Undo, to redefine the bullet as an image. When you right-click* the image, select Format Picture… and select the Alt Text tab in the Format Picture dialog. Alternative text can be found, or can be entered, into the Alternative text box.
Technique 4. Avoid 'Floating' Elements
When images and objects are inserted into Word 2007 documents they default to being an “inline object”. Inline objects keep their position on the page relative to a portion of the text. A “floating” object keeps its position relative to the page, while text flows around it. As content moves up or down on the page, the object stays where it was placed. To ensure that images and objects remain with the text that references it, always position it as an inline object.
Similarly, avoid placing drawing objects directly into the document (e.g., as borders, to create a diagram). Instead, create borders with page layout tools and insert complete graphical objects.
To prevent an image or object from “floating”
- Select the object
- Go to menu item: Page Layout
- Select Position from the Arrange section
- Select In Line with Text
Technique 5. Use Headings
Any documents that are longer than a few paragraphs require structuring to make them more straightforward for readers to understand. One of the easiest ways to do this is to use “True Headings” to create logical divisions between paragraphs. True headings are more than just bolded, enlarged, or centered text; they are structural elements that order and levels provide a meaningful sequence to users of assistive technologies.
Tips for headings
- Use the default headings styles provided (“Heading “, “Heading 2”, etc.)
- Nest headings properly (e.g., the sub-headings of a “Heading 1” are “Heading 2”, etc.)
- Do not skip heading levels
To apply headings using the Styles toolbar
- Select text
- Go to menu item: Home
- In the Styles section, select the heading you wish to apply
Note: You can scroll through the multiple heading styles using the arrows on the right side of the Styles section. You can also change the Style design by selecting the Change Styles button on the right.
To modify heading styles
- Go to menu item: Home
- In the Styles section, right-click* the style you wish to use from the Styles Gallery
- Select Modify
- In the Modify Style dialog, make the appropriate changes to style characteristics
- Select OK
To return to the default heading styles
- Go to menu item: Home
- In the Styles section, select Change Styles
- Select Style Set
- Select Word 2007 from the list
Technique 6. Use Built-In Document Structuring Features
6.1 Tables
When using tables, it is important to ensure that they are clear and appropriately structured. This helps all users to better understand the information in the table and allows assistive technologies (e.g., screen readers) to provide context so that the information within the table can be conveyed in a meaningful way.
Tips for tables
- Only use tables for tabular information, not for formatting, such as to position columns.
- Use “real tables” rather than text formatted to look like tables using the TAB key or space bar. These will not be recognized by assistive technology.
- Keep tables simple by avoiding merged cells and dividing complex data sets into separate smaller tables, where possible. Whenever possible, use just one row of headings.
- If tables split across pages, set the header to show at the top of each page. Also set the table to break between rows instead of in the middle of rows.
- Create a text summary of the essential table contents. Any abbreviations used should be explained in the summary.
- Table captions or descriptions should answer the question “what is the table’s purpose and how is it organized?” (e.g., “A sample order form with separate columns for the item name, price and quantity”).
- Table cells should be marked as table headers when they serve as labels to help interpret the other cells in the table.
- Table header cell labels should be concise and clear.
- Ensure the table is not “floating” on the page (see Technique 4).
To add a table with headings
- Go to menu item: Insert
- In the Tables section, select the Tables icon
- Select the number of rows and columns you would like your table to have
- Select the table and a Table Tools menu item should appear
- Go to menu item: Table Tools > Design
- In the Table Style Options section, select the Header Row check box
6.2. Lists
When you create lists, it is important to format them as “real lists”. Otherwise, assistive technologies will interpret your list as a series of short separate paragraphs instead of a coherent list of related items.
To create an ordered or unordered list
- Go to menu item: Home
- In the Paragraph section, select the Bullets icon for unordered lists or select the Numbering icon for ordered lists
- To choose a different list format, select the arrow beside the icon
- Select a format from the format Library that appears in the drop-down menu
To modify list styles
- Go to menu item: Home
- In the Paragraph section, select the arrow beside the Bullets icon for unordered lists or select the arrow beside the Numbering icon for ordered lists
- Select Define New Bullet… to create a new unordered list format
- Select Define New Number Format… to create a new ordered list format
- In the New Bullet dialog or the New Number Format dialog, select the list characteristics
- Select OK
6.3 Columns
Use Columns feature for placing text in columns. However, because columns can be a challenge for users of some assistive technologies, you should consider whether a column layout is really necessary.
6.4 Page Breaks
Start a new page by inserting a page break instead of repeated hard returns.
6.5 Use a Table of Contents
Creating an index or table of contents to outline office document content can provide a means of navigating the meaningful sequence of content.
The best way to generate a table of contents is after applying the predefined heading styles, such as “Heading 1” as described above, to the headings that you want to include in your table of contents. After you apply these styles, you can then create a table of contents.
To insert a table of contents
- Place the cursor in your document where you want to create the table of contents
- Go to menu item: References
- In the Table of Contents section, select Table of Contents
- Select the style that you want to use
To update a table of contents
- Select the table
- Go to menu item: References
- In the Table of Contents section, select the Update Table button
6.6 Use Page Numbering
Numbering the pages of your document helps those reading and editing your document effectively navigate and reference its content. For users of assistive technologies, it provides a valuable point of reference within the document.
To insert page numbers
- Go to menu item: Insert
- In the Header & Footer section, select Page Number
- Select where you would like to insert your page numbers
- Select the style of page number you would like to use
To format page numbers
- Go to menu item: Insert
- In the Header & Footer section, select Page Number
- Select Format Page Numbers…
- In the Page Number Format dialog, select the page format characteristics you would like to use
Note: These changes are applied to the predefined page format styles. It does not create a new page format style.
6.7 Document Title
In case the document is ever converted into HTML, it should be given a descriptive and meaningful title.
To change the title of the current document
- Go to menu item: Office > Prepare > Properties
- In the Document Properties section that appears, select the Title text box
- Enter the Title
Note: The Title defined in the properties is different than the file name. It is also unrelated to the template name, discussed above.
Technique 7. Create Accessible Charts
Charts can be used to make data more understandable for some audiences. However, it is important to ensure that your chart is as accessible as possible to all members of your audience.
- All basic accessibility considerations that are applied to the rest of your document must also be applied to your charts and the elements within your charts. For example, use shape and color, rather than color alone, to convey information.
- When creating line charts, use the formatting options to create different types of dotted lines to facilitate legibility for users who are color blind.
- When creating bar charts, it is helpful to apply textures rather than colors to differentiate the bars
- Ensure that the contents are your chart are appropriate labeled to give users reference points that will help them to correctly interpret the information.
- Use the formatting options to change predefined colors, ensuring that they align with sufficient contrast requirements (see Technique 9.2)
- Consider providing the data that you used to create the chart in tabular form (e.g. as an appendix).
Technique 8. Make Content Easier to See
Here are some other things to keep in mind:
8.1 Format of Text
When formatting text, especially when the text is likely to printed, try to:
- Use font sizes between 12 and 18 points for body text.
- Use fonts of normal weight, rather than bold or light weight fonts. If you do choose to use bold fonts for emphasis, use them sparingly.
- Use standard fonts with clear spacing and easily recognized upper and lower case characters. Sans serif fonts (e.g., Arial, Verdana) may sometimes be easier to read than serif fonts (e.g., Times New Roman, Garamond).
- Avoid large amounts of text set all in caps, italic or underlined.
- Use normal or expanded character spacing, rather than condensed spacing.
- Avoid animated or scrolling text.
But can’t users just zoom in? Office applications do typically include accessibility features such as the ability to magnify documents and support for high contrast modes. However, because printing is an important aspect of many workflows and changing font sizes directly will change documents details such the pagination, the layout of tables, etc., it is best practice to always format text for a reasonable degree of accessibility.
To change the text size for a default named style
- Go to menu item: Home
- In the Styles section, right-click* the Style you wish to modify
- Select Modify Style
- Under Formatting in the Modify dialog box, select the appropriate font size
- Exit with OK
8.2 Use Sufficient Contrast
The visual presentation of text and images of text should have a contrast ration of at least 4.5:1. To help you determine the contrast, here are some examples on a white background:
- Very good contrast (Foreground=black, Background=white, Ratio=21:1)
- Acceptable contrast (Foreground=#767676, Background=white, Ratio=4.54:1)
- Unacceptable contrast (Foreground=#AAAAAA, Background=white, Ratio=2.32:1)
Also, always use a single solid color for a text background rather than a pattern.
In order to determine whether the colors in your document have sufficient contrast, you can consult an online contrast checker, such as:
8.3 Avoid Using Color Alone
Color should not be used as the only visual means of conveying information, indicating an action, prompting a response, or distinguishing a visual element. In order to spot where color might be the only visual means of conveying information, you can create a screenshot of the document and then view it with online gray-scale converting tools, such as:
- GrayBit v2.0: Grayscale Conversion Contrast Accessibility Tool
Editor’s note: GrayBit v2.0 is no longer available. However, multiple tools can be found online: Google Search: gray-scale conversion tool.
8.4 Avoid Relying on Sensory Characteristics
The instructions provided for understanding and operating content should not rely solely on sensory characteristics such as the color or shape of content elements. Here are two examples:
- Do not track changes by simply changing the color of text you have edited and noting the color. Instead use Word 2007’s “Track Changes” feature to track changes.
- Do not distinguish between images by referring to their appearance (e.g., “the bigger one”). Instead, label each image with a figure number and use that for references.
8.5 Avoid Using Images of Text
Before you use an image to control the presentation of text (e.g., to ensure a certain font or color combination), consider whether you can achieve the same result by styling “real text”. If this is not possible, as with logos containing stylized text, make sure to provide alternative text for the image following the techniques noted above.
Technique 9. Make Content Easier to Understand
9.1 Write Clearly
By taking the time to design your content in a consistent way, it will be easier to access, navigate and interpret for all users:
- Whenever possible, write clearly with short sentences.
- Introduce acronyms and spell out abbreviations.
- Avoid making the document too “busy” by using lots of whitespace and by avoiding too many different colors, fonts and images.
- If content is repeated on multiple pages within a document or within a set of documents (e.g., headings, footings, etc.), it should occur consistently each time it is repeated.
9.2 Provide Context for Hyperlinks
Hyperlink text in your document should be meaningful when read out of context. To be an effective navigation aid, the link text should describe the destination of the link.
Consider the experience of screen reader users: Generally, screen readers generate a list of links, and screen reader users navigate this list alphabetically. Hyperlink text such as “click here” or “more” is meaningless in this context.
In order to be useful to someone using a screen reader, ensure that hyperlink text is self-describing and meaningful on its own. To make the address of hyperlink clear when printing, you may wish to include the address in brackets following the descriptive text of the hyperlink.
To add hyperlinks with meaningful text
- Type (or paste in) a web address and press spacebar or “Enter” to convert into a hyperlink
- Select the link and right-click*
- Select Edit Hyperlink (Ctrl + K)
- Edit the text in the Text to display box
Technique 10. Check Accessibility
At this time, Word 2007 does not offer a mechanism to check for potential accessibility errors in your document prior to publishing. [Tested: January 10th, 2011]
In order to get some indication of the accessibility of your document or template, then you may consider saving the file into HTML or PDF in order to perform an accessibility check in one of those formats, as described below.
To evaluate HTML accessibility
Save the document into HTML format and use one of the web accessibility checkers available online, such as:
To evaluate PDF accessibility
If you saved your document in tagged PDF format, you can use the following tools and steps to evaluate the accessibility of the PDF document:
To evaluate PDF accessibility in Adobe Acrobat Professional
- Go to menu item: Advanced > Accessibility > Full Check…
- In the Full Check dialog, select all the checking option.
- Select the Start Checking button.
Editor’s note: For detailed instructions, see our section on how to check accessibility using Adobe Acrobat Professional.
Technique 11. Use Accessibility Features when Saving/Exporting to Other Formats
In some cases, additional steps must be taken in order to ensure accessibility information is preserved when saving/exporting to formats other than the default.
PDF
PDF documents are not always accessible. Accessible PDF documents are often called “Tagged PDF” because they include “tags” that encode structural information required for accessibility.
To evaluate the accessibility of your PDF document, see below.
- Make sure the file is saved as a DOCX (Older DOC files are not compatible with the checker).
- Go to menu item: Office > Save As > PDF or XPS
- In the File name box, type a name for the file
- Select the Options button
- Under Include non-printing information, ensure that the Document structure tags for accessibility check box is selected
- Under PDF options, ensure that Bitmap text when fonts may not be embedded check box is de-selected
- Select OK and Save
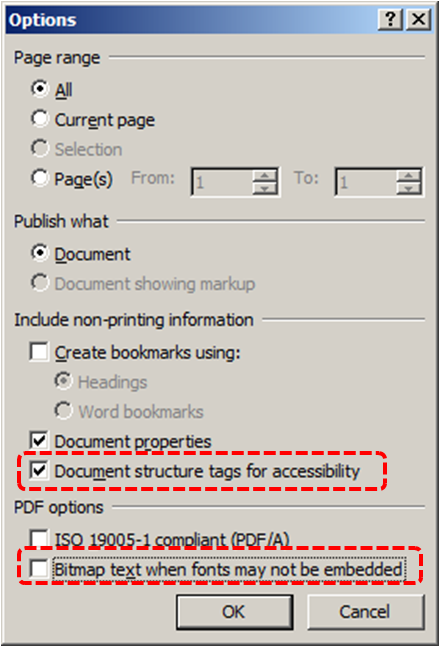
If you saved your document in tagged PDF format, you can use the following tools and steps to evaluate the accessibility of the PDF document:
Editor’s note: For detailed instructions, see our section on how to check accessibility using Adobe Acrobat Professional.
HTML
- Go to menu item: Office > Save As > Other Formats
- In the File name box, type a name for the file
- In the Save as type box, select Web Page
- Select Save
- Check the HTML file for accessibility (see Technique 10, above)
To clean up your HTML file
- Remove unnecessary styles, line breaks, etc.
- Remove unnecessary id, class, and attributes
- Remove font tags
- Remove styles in the <head> tag
- Ensure the <th> tags have a scope attribute
- Remove <p> tags nested inside <th> and <td> tags
- Check for accessibility (see Technique 10, above)
Note: you may wish to use HTML editors or utilities to help with this process.
To evaluate HTML accessibility
Save the document into HTML format and use one of the web accessibility checkers available online, such as:
Technique 12. Consider Using Accessibility Support Applications/Plugins
Disclaimer: This list is provided for information purposes only. It is not exhaustive and inclusion of an application or plug-in on the list does not constitute a recommendation or guarantee of results.
Accessibility Help
If you are interested in what features are provided to make using Word 2007 more accessible to users, documentation is provided in the Help system:
- Select the Help icon from the right corner of the Toolbar or select F1
- Enter “Accessibility” as your search term in the Help dialog box
References and Resources
- Microsoft Word 2007 Help
- Ryerson University: Microsoft Word Accessibility Tipsheet (PDF)
- Microsoft Word: Video Tutorials
Acknowledgments
Authors: Jan Richards, Sabrina Ruplall
This document was produced as part of the Accessible Digital Office Document (ADOD) Project.
This project has been developed by the Inclusive Design Research Centre, OCAD University as part of an EnAbling Change Partnership project with the Government of Ontario and UNESCO (United Nations Educational, Scientific and Cultural Organization).
Source: Authoring Techniques for Accessible Office Documents: Word 2007 by the Inclusive Design Research Centre (IDRC) used under CC-BY-SA 3.0.
Usage Notes
At the time of testing (September 30, 2010), Pages ’09 lacks several features that enable accessible office document authoring, most notably: the ability to add alternative text to image and objects. As a result, some of the other features that might otherwise support accessibility, such as its extensive templates are not as effective.
Editor’s note: In later versions of Pages, users have the ability to add alt text to images and graphical objects. Apple has added significant accessibility improvements to its iWork applications, but an accessibility checker is not a feature yet.
In addition, Pages does not include an accessibility checking feature.
What’s an “Office Document”?
You should use these techniques when you are using Pages to create documents that are:
- Intended to be used by people (i.e., not computer code),
- Text-based (i.e., not simply images, although they may contain images),
- Fully printable (i.e., where dynamic features are limited to automatic page numbering, table of contents, etc. and do not include audio, video, or embedded interactivity),
- Self-contained (i.e., without hyperlinks to other documents, unlike web content), and
- Typical of office-style workflows (Reports, letters, memos, budgets, presentations, etc.).
If you are creating forms, web pages, applications, or other dynamic and/or interactive content, these techniques will still be useful to you, but you should also consult the W3C-WAI Web Content Accessibility Guidelines (WCAG 2.0) because these are specifically designed to provide guidance for highly dynamic and/or interactive content.
File Formats
The default file format for Pages is the native iWork format.
In addition, Pages offers many other word processor and web format saving options. Most of these have not been checked for accessibility, but some information and/or instructions are available for the following formats in Technique 12:
Document Conventions
We have tried to formulate these techniques so that they are useful to all authors, regardless of whether they use a mouse. However, for clarity there are several instances where mouse-only language is used. Below are the mouse-only terms and their keyboard alternatives:
- *Right-click: To right-click with the keyboard, select the object using the Shift+Arrow keys and then press either (1) the “Right-Click” key (some keyboard have this to the right of the spacebar) or Shift+F10.
Disclaimer and Testing Details
Following these techniques will increase the accessibility of your documents, but it does not guarantee accessibility to any specific disability groups. In cases where more certainty is required, it is recommended that you test the office documents with end users with disabilities, including screen reader users.
The application-specific steps and screenshots in this document were created using iWork Pages ’09 (ver.4.0.3 (766), Mac OS X, Sept. 2010) and Pages (version 8.1) while producing a document in the native iWork file format. Files are also easily saved as other file formats (see Technique 12).
Technique 1. Use Accessible Templates
All office documents start with a template, which can be as simple as a blank standard-sized page or as complex as a nearly complete document with text, graphics and other content. For example, a “Meeting Minutes” template might include headings for information relevant to a business meeting, such as “Actions” above a table with rows to denote time and columns for actions of the meeting.
Because templates provide the starting-point for so many documents, accessibility is critical. If you are unsure whether a template is accessible, you should check a sample document produced when the template is used (see Technique 11).
The default template for new documents in Pages is a blank page. The basic installation also includes blank letter templates and blank business reports. These are all accessible by virtue of being blank.
It is possible to create your own accessible templates from scratch in Pages. As well, you can edit and modify the existing prepackaged templates, ensuring their accessibility as you do so and saving them as a new template.
To create an accessible template
- Go to menu item: File > New or File > New from Template Chooser… (Shift+Apple+N).
- In the Template Chooser dialog, select the Blank template or select one of the other existing template designs.
- A new document in your selected template style will open.
- Ensure that you follow the techniques in this document.
- When you are finished you should also check the accessibility of the document (See Accessibility Checking, below).
- Go to menu item: File > Save as Template…
- In the Export As box, type a name for the template. Using a descriptive template name (e.g., “Accessible Memo Template”) will increase the prominence of the accessibility status.
- Specify a folder in which to save your template. To save the template in a different location than the default, create a new folder in the Templates folder. The folder name is then used as a template category in the Template Chooser.
Note: By default, it will be saved in your home folder in Library/Application Support/iWork/Pages/Templates/My Templates pane of the Template Chooser.
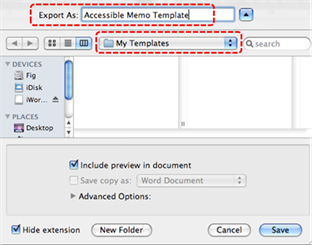
- Click Save.
To select an accessible template
Note: Only use these steps if you have an accessible template available (e.g., that you previously saved). Otherwise, simply open a new (blank) document.
- Go to menu item: File > New from Template Chooser… (Shift+Apple+N).
- In the Template Chooser dialog, select My Templates from the left pane.
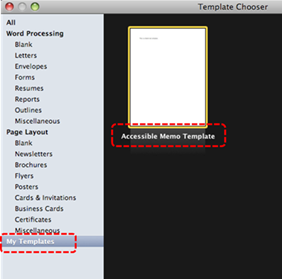
- Select your accessible template and click Choose.
Technique 2. Specify Document Language
In order for assistive technologies (e.g., screen readers) to be able to present your document accurately, it is important to indicate the natural language of the document. If a different natural language is used for a paragraph or selected text, this also needs to be clearly indicated.
To apply a language directly to selected text
- Highlight the text
Note: To change the language of the entire document, do a select all to select all the text in the document.
- Go to menu item: View > Show Inspector.
- In the Inspector dialog, select the Text button.
- In the Text section, click the More tab.
- In the Language section, select the language from the drop-down list.
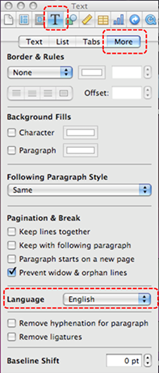
Editor’s note: In later versions of Pages, instructions for applying language to specific text is not specified. Users can, however, change a document’s formatting and language.
For detailed instructions, see how to format a document for another language in the Pages User Guide for Mac.
Technique 3. Provide Text Alternatives for Images and Graphical Objects
At this time, Pages ’09 does not offer a mechanism which enables the user to add alternative text descriptions to images or objects. [Tested: September 28, 2010]
Editor’s note: In later versions of Pages, users can add alternative text descriptions for images and objects:
- Click the image to select it, then, in the Format sidebar, click the Image tab.
- Click the Description text box, then enter your text.
For more details, see the section on how to add an image description in the Pages User Guide for Mac.
When using images or other graphical objects, such as charts and graphs, it is important to ensure that the information you intend to convey by the image is also conveyed to people who cannot see the image. This can be accomplished by adding concise alternative text to each image. If an image is too complicated to concisely describe in the alternative text alone (artwork, flowcharts, etc.), provide a short text alternative and a longer description as well.
Tips for writing alternative text
- Try to answer the question “what information is the image conveying?”
- If the image does not convey any useful information, leave the alternative text blank
- If the image contains meaningful text, ensure all of the text is replicated
- Alternative text should be fairly short, usually a sentence or less and rarely more than two sentences
- If more description is required (e.g., for a chart or graph), provide a short description in the alternative text (e.g., a summary of the trend) and more detail in the long description, see below
- Test by having others review the document with the images replaced by the alternative text
Tips for writing longer descriptions
- Long descriptions should be used when text alternatives (see above) are insufficient to answer the question “what information is the image conveying?”
- In some situations, the information being conveyed will be how an image looks (e.g., an artwork, architectural detail, etc.). In these cases, try to describe the image without making too many of your own assumptions.
- One approach is to imagine you are describing the image to a person over the phone
- Ensure that you still provide concise alternative text to help readers decide if they are interested in the longer description
Alternatively, you can include the same information conveyed by the image within the body of the document, providing the images as an alternate to the text. In that case, you do not have to provide alternate text within the image.
Technique 4. Avoid “Floating” Elements
Pages will default the position of an inserted image or object depending on the method that is used to insert it. If you use a method that requires you to simply drag-and-drop the image or object onto the document, it will automatically be positioned as “floating”.
A “floating” object keeps its position relative to the page, while text flows around it. As content moves up or down on the page, the object stays where it was placed. To ensure that images and objects remain with the text that references it, press the Command key and then drag the image onto the document or follow the steps below.
To import image as an inline object
- Place the insertion point wherever you want the image to appear.
- Go to menu item: Insert > Choose.
- Select the image file.
- Click Insert.
Note: You can always ensure your image or object is positioned with the text that references it. Select the image or object, then go to the Format bar and ensure that Inline button is selected.
Editor’s note: For later versions of Pages, the instructions for adding an image inline is slightly different:
- Click the Media button in the toolbar.
- Choose Photos, then drag an image from a photo library to the page or to a media placeholder.
For more details, see how to place objects inline with text in the Pages User Guide for Mac.
Technique 5. Use Headings
Any documents that are longer than a few paragraphs require structuring to make them more straightforward for readers to understand. One of the easiest ways to do this is to use “true headings” to create logical divisions between paragraphs. True headings are more than just bolded, enlarged, or centered text; they are structural elements that order and levels provide a meaningful sequence to users of assistive technologies.
Tips for headings
- Use the default headings styles provided (“Heading “, “Heading 2”, etc.)
- Nest headings properly (e.g., the sub-headings of a “Heading 1” are “Heading 2”, etc.)
- Do not skip heading levels
To apply headings to selected text
- Highlight selected text.
- Go to the Format Bar and select the Choose a paragraph style button.
- Select the style you would like to apply from the drop-down menu.
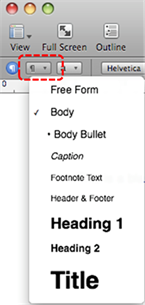
To create new heading styles
- Highlight text and format with the characteristics you would like to apply to a new heading.
- Go to menu item: Format > Create New Paragraph Style from Selection…
- In the New paragraph style dialog, enter a heading style name in the Name text box.
- Select OK.
Editor’s note: For later versions of Pages, after selecting text, follow these steps to create new heading styles:
- From the Format sidebar, click the paragraph style name at the top of the sidebar.
- Click the New Style button at the top of the Paragraph Styles menu. A new style with a placeholder name appears in the menu.
- The Paragraph Styles menu with a callout to the New Style button.
- Type a name for the new style, then click outside the menu to close it.
For more details, see how to create a paragraph style in the Pages User Guide for Mac.
Technique 6. Use Named Styles
As with “True Headings” (see Technique 5), you should attempt to make use of the named styles that are included with the office application (e.g., “emphasis”, “caption”, etc.) before creating your own styles or using the character formatting tools directly. Named styles help your readers understand why something was formatted in a given way, which is especially helpful when there are multiple reasons for the same formatting (e.g., it is common to use italics for emphasis, Latin terms and species names).
Note: While office application suites support headings in much the same way, the named styles often differ.
To use default named styles
- Default named styles can be applied the same way as headings (see Technique 5).
Technique 7. Use Built-In Document Structuring Features
7.1 Tables
When using tables, it is important to ensure that they are clear and appropriately structured. This helps all users to better understand the information in the table and allows assistive technologies (e.g., screen readers) to provide context so that the information within the table can be conveyed in a meaningful way.
Tips for tables
- Only use tables for tabular information, not for formatting, such as to position columns.
- Use “real tables” rather than text formatted to look like tables using the TAB key or space bar. These will not be recognized by assistive technology.
- Keep tables simple by avoiding merged cells and dividing complex data sets into separate smaller tables, where possible.
- If tables split across pages, set the header to show at the top of each page. Also set the table to break between rows instead of in the middle of rows.
- Create a text summary of the essential table contents. Any abbreviations used should be explained in the summary.
- Table captions or descriptions should answer the question “what is the table’s purpose and how is it organized?” (e.g., “A sample order form with separate columns for the item name, price and quantity”).
- Table cells should be marked as table headers when they serve as labels to help interpret the other cells in the table.
- Table header cell labels should be concise and clear.
- Ensure the table is not “floating” on the page (see Technique 4).
To add a table with headings
- Position the cursor at the location in the document you would like to add the table.
- Go to menu item: Insert > Table.
- Go to menu item: View > Show Inspector.
- In the Inspector dialog, select Table inspector.
- Select the Table tab.
- In the Headers & Footer section, click the Choose the number of header columns button or the Choose the number of header rows button.
- Select the number of header rows or columns you would like your table to have.
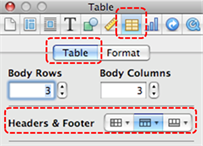
7.2. Lists
When you create lists, it is important to format them as “real lists”. Otherwise, assistive technologies will interpret your list as a series of short separate paragraphs instead of a coherent list of related items.
To create an ordered or unordered list
- Place the cursor where you would like to insert the list or highlight the text of a list you already entered into your document.
- In the Toolbar, click the Inspector button to show the inspector window.
- In the Inspector dialog, click the Text inspector button.
- Select the List tab.
- In the Bullets & Numbering section, format your list style using the drop-down menus.
Editor’s note: In later versions of Pages, follow these instructions to create an ordered or unordered list:
- Select the text you want to format.
- In the Format sidebar, click the Style button near the top.
Note: If the text is in a text box, table, or shape, first click the Text tab at the top of the sidebar, then click the Style button.
- Click the pop-up menu next to Bullets & Lists, then choose a list style.
For more details, see how to format a list in the Pages User Guide for Mac.
7.3 Columns
Use Columns feature for placing text in columns.
Note: Because columns can be a challenge for users of some assistive technologies, consider whether a column layout is really necessary.
7.4 Page Breaks
Start a new page by inserting a page break instead of repeated hard returns.
7.5 Use a Table of Contents
Creating an index or table of contents to outline office document content can provide a means of navigating the meaningful sequence of content.
The best way to generate a table of contents is after applying the predefined heading styles, such as “Heading 1” as described above, to the headings that you want to include in your table of contents. After you apply these styles, you can then create a table of contents.
To generate a Table of Contents
- In the Toolbar, click Inspector.
- In the Inspector dialog, click the Document button.
- Select the TOC tab.
- Select the checkboxes next to the paragraph styles whose text you want to appear in the table of contents.
- In the #’s column, select those paragraph styles for which you want page numbers to appear.
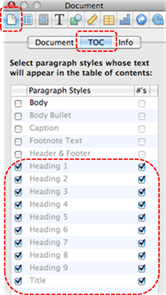
- Place the insertion point at the beginning of the line where you want the table of contents to appear
Note: Table of contents created in Pages list only the content that follows it, up until the next table of contents. To create a master table of all the contents in your document, it must be the only table of contents and must be placed at the beginning of the document.
- Go to menu item: Insert > Table of Contents.
Editor’s note: In later versions of Pages, follow these instructions to generate a table:
- If you haven’t already done so, apply paragraph styles to the text you want to appear in the table of contents.
- Click the View menu button in the toolbar, then choose Table of Contents.
- Click Edit at the top of the sidebar, then select the paragraph styles you want to include.
- Place the insertion point where you want the table of contents to appear, then do one of the following:
- Add a TOC for the whole document: Click the Insert Table of Contents button at the bottom of the Table of Contents sidebar. Entries are gathered from the entire document.
- Add a TOC for this section: Choose Insert > Table of Contents > Section. Entries are gathered from only the section where you’re inserting the table of contents.
- Add a TOC for content up to the next TOC: Choose Insert > Table of Contents > To Next Occurrence. Entries are gathered between this table of contents and the next table of contents.
- To format the text and add leader lines, click the table of contents to select it. When the table of contents is selected, a blue line appears around it and its text is highlighted in blue.
For more details, see how to insert a table of contents into a word-processing document in the Pages User Guide for Mac.
To update a Table of Contents
- In the Toolbar, click Inspector.
- In the Inspector dialog, click the Document button.
- Select the TOC tab.
- Click Update Now at the bottom of the dialog.
Note: You can also automatically update by clicking any entry in the table of contents.
7.6 Use Page Numbering
Numbering the pages of your document helps those reading and editing your document effectively navigate and reference its content.
To Insert Page Numbers
- Go to menu item: Insert > Auto Page Numbers…
- In the Insert Page Numbers dialog, format the page number using the available options.
- Select Insert.
7.7 Document Title
In case the document is ever converted into HTML, it should be given a descriptive and meaningful title.
To change the title of the current document
- In the Toolbar, select Inspector.
- In the Inspector dialog, select the Document inspector button.
- Click the Info tab.
- In the Title box, type a descriptive name for the document.
Note: The Title defined in the properties is different than the file name. It is also unrelated to the template name, discussed above.
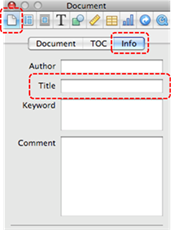
Technique 8. Create Accessible Charts
Charts can be used to make data more understandable for some audiences. However, it is important to ensure that your chart is as accessible as possible to all members of your audience. All basic accessibility considerations that are applied to the rest of your document must also be applied to your charts and the elements within your charts. For example, use shape and color, rather than color alone, to convey information. As well, some further steps should be taken to ensure that the contents are your chart are appropriate labeled to give users reference points that will help them to correctly interpret the information.
To create a chart
- Go to menu item: Insert > Chart.
- Select a chart type from the list.
- Update the Chart Data Editor with the data you would like to display in the chart.
- Close the Chart Data Editor.
To add titles and labels
- Select the chart.
- Go to menu item: View > Show Inspector.
- In the Chart Inspector, select Chart.
- Ensure the Show Title and Show Legend check boxes are selected.
- Select Axis.
- Under Value Axis (Y) and Category Axis (X), select Show Title and Show Value Labels from their respective drop-down menus.
To change to a different predefined Chart Type
- Select the chart.
- Go to menu item: View > Show Inspector.
- Select a chart type from the Choose a chart type drop-down menu.
Other Chart Considerations
- When creating line charts, use the formatting options to create different types of dotted lines to facilitate legibility for users who are color blind.
- When creating bar charts, it is helpful to apply texture instead of color to differentiate the bars.
- Change the default colors to a color safe or gray-scale palette.
- Use the formatting options to change predefined colors, ensuring that they align with sufficient contrast requirements (see Technique 9.2).
Technique 9. Make Content Easier to See
9.1 Format of Text
When formatting text, especially when the text is likely to printed, try to:
- Use font sizes between 12 and 18 points for body text.
- Use fonts of normal weight, rather than bold or light weight fonts. If you do choose to use bold fonts for emphasis, use them sparingly.
- Use standard fonts with clear spacing and easily recognized upper and lower case characters. Sans serif fonts (e.g., Arial, Verdana) may sometimes be easier to read than serif fonts (e.g., Times New Roman, Garamond).
- Avoid large amounts of text set all in caps, italic or underlined.
- Use normal or expanded character spacing, rather than condensed spacing.
- Avoid animated or scrolling text.
But can’t users just zoom in? Office applications do typically include accessibility features such as the ability to magnify documents and support for high contrast modes. However, because printing is an important aspect of many workflows and changing font sizes directly will change documents details such the pagination, the layout of tables, etc., it is best practice to always format text for a reasonable degree of accessibility.
9.2 Use Sufficient Contrast
The visual presentation of text and images of text should have a contrast ration of at least 4.5:1. To help you determine the contrast, here are some examples on a white background:
- Very good contrast (Foreground=black, Background=white, Ratio=21:1)
- Acceptable contrast (Foreground=#767676, Background=white, Ratio=4.54:1)
- Unacceptable contrast (Foreground=#AAAAAA, Background=white, Ratio=2.32:1)
Also, always use a single solid color for a text background rather than a pattern.
In order to determine whether the colors in your document have sufficient contrast, you can consult an online contrast checker, such as:
9.3 Avoid Using Color Alone
Color should not be used as the only visual means of conveying information, indicating an action, prompting a response, or distinguishing a visual element. In order to spot where color might be the only visual means of conveying information, you can create a screenshot of the document and then view it with online gray-scale converting tools, such as:
- GrayBit v2.0: Grayscale Conversion Contrast Accessibility Tool
Editor’s note: GrayBit v2.0 is no longer available. However, multiple tools can be found online: Google Search: gray-scale conversion tool.
9.4 Avoid Relying on Sensory Characteristics
The instructions provided for understanding and operating content should not rely solely on sensory characteristics such as the color or shape of content elements. Here are two examples:
- Do not track changes by simply changing the color of text you have edited and noting the color. Instead use Pages’ “Change Tracking” functionality to track changes.
- Do not distinguish between images by referring to their appearance (e.g., “the bigger one”). Instead, label each image with a figure number and use that for references.
9.5 Avoid Images of Text
Before you use an image to control the presentation of text (e.g., to ensure a certain font or color combination), consider whether you can achieve the same result by styling “real text”. If this is not possible, as with logos containing stylized text, make sure to provide alternative text for the image following the steps noted in Technique 3.
Technique 10. Make Content Easier to Understand
10.1 Write Clearly
By taking the time to design your content in a consistent way, it will be easier to access, navigate and interpret for all users:
- Whenever possible, write clearly with short sentences.
- Introduce acronyms and spell out abbreviations.
- Avoid making the document too “busy” by using lots of whitespace and by avoiding too many different colors, fonts and images.
- If content is repeated on multiple pages within a document or within a set of documents (e.g., headings, footings, etc.), it should occur consistently each time it is repeated.
10.2 Provide Context for Hyperlinks
Hyperlink text in your document should be meaningful when read out of context. To be an effective navigation aid, the link text should describe the destination of the link.
Consider the experience of screen reader users: Generally, screen readers generate a list of links, and screen reader users navigate this list alphabetically. Hyperlink text such as “click here” or “more” is meaningless in this context.
In order to be useful to someone using a screen reader, ensure that hyperlink text is self-describing and meaningful on its own. To make the address of hyperlink clear when printing, you may wish to include the address in brackets following the descriptive text of the hyperlink.
To add hyperlinks with meaningful text
- In the Toolbar, click Inspector.
- Click the Link inspector button.
- Select the Hyperlink tab.
- Select the Make all hyperlinks inactive checkbox.
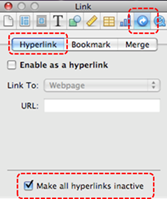
- Edit the hyperlink text
Note: While editing the hyperlink text, you have deactivated all hyperlinks in the document. To reactive the hyperlinks, deselect the Make all hyperlinks inactive checkbox.
Editor’s note: For more details on this topic, see how to link to a webpage, email, or page in the Pages User Guide for Mac.
Technique 11. Check Accessibility
At this time (December 2019), Pages does not offer a mechanism to check for potential accessibility errors in your document prior to publishing. As well, it is not currently possible to export Pages documents as HTML.
In order to get some indication of the accessibility of your document or template (see Technique 1), then you may consider saving the file into HTML or PDF in order to perform an accessibility check in one of those formats, as described below.
Editor’s note: For detailed instructions, see how to export to Word, PDF, or another file format in the Pages User Guide for Mac.
To evaluate HTML accessibility
Save the document into HTML format and use one of the web accessibility checkers available online, such as:
To evaluate PDF accessibility
If you saved your document in tagged PDF format, you can use the following tools and steps to evaluate the accessibility of the PDF document:
To evaluate PDF accessibility in Adobe Acrobat Professional
- Go to menu item: Advanced > Accessibility > Full Check…
- In the Full Check dialog, select all the checking option.
- Select the Start Checking button.
Editor’s note: For detailed instructions, see our section on how to check accessibility using Adobe Acrobat Professional.
Technique 12. Use Accessibility Features when Saving/Exporting to Other Formats
In some cases, additional steps must be taken in order to ensure accessibility information is preserved when exporting to formats other than the default.
At this time (December 2019), it is not possible to export Pages documents as HTML files.
PDF, Word, RTF, or plain text
PDF documents are not always accessible. Accessible PDF documents are often called “Tagged PDF” because they include “tags” that encode structural information required for accessibility. To evaluate the accessibility of your PDF document, see Technique 11.
- Go to menu item: File > Export.
- Select the type of format you would like to export, click Next.
- In the Save As box, type a name for the document.
- Choose where you want to save the document.
- Click Export.
Note: Exporting a plain text file removes all formatting. Pages documents may not export identically in Word, due to text layout differences.
Technique 13. Consider Using Accessibility Support Applications/Plugins
Disclaimer: This list is provided for information purposes only. It is not exhaustive and inclusion of an application or plug-in on the list does not constitute a recommendation or guarantee of results.
Accessibility Help
If you are interested in what features are provided to make using Pages more accessible to users, documentation is provided in the Help system:
- Go to menu item: Help
- Enter a search term into the Search box
References and Resources
- Pages User Guide for Mac
- GAWDS Writing Better Alt Text
Acknowledgments
This document was produced as part of the Accessible Digital Office Document (ADOD) Project.
This project has been developed by the Inclusive Design Research Centre, OCAD University as part of an EnAbling Change Partnership project with the Government of Ontario and UNESCO (United Nations Educational, Scientific and Cultural Organization).
Source: Authoring Techniques for Accessible Office Documents: iWork Pages ’09 by the Inclusive Design Research Centre (IDRC) used under CC-BY-SA 3.0.
OpenOffice Writer and LibreOffice Writer
10
Usage Notes
The techniques described in this document apply both to OpenOffice Writer 3.4.0 and LibreOffice 4.0.4.2. There are sometimes minor differences in the toolbars and dialogs between the two office suites, but these differences do not require different instructions.
At the time of testing (July 2013), Writer provides a set of accessibility features that is sufficient to enable the production of accessible digital office documents. An accessibility checking feature is available by installing the AccessODF extension.
Editor’s note: For later versions of OpenOffice Writer and LibreOffice, the accessibility checking features made available through AccessODF is no longer stable (tested on OpenOffice 4.1.7 and LibreOffice 6.3.1.2).
We recommended using other applications, such as current versions of Microsoft Word, which has a robust suite of tools available for creating accessible documents.
This guide is intended to be used for documents that are:
- Intended to be used by people (i.e., not computer code),
- Text-based (i.e., not simply images, although they may contain images),
- Fully printable (i.e., where dynamic features are limited to automatic page numbering, table of contents, etc. and do not include audio, video, or embedded interactivity),
- Self-contained (i.e., without hyperlinks to other documents, unlike web content), and
- Typical of office-style workflows (Reports, letters, memos, budgets, presentations, etc.).
If you are creating forms, web pages, applications, or other dynamic and/or interactive content, these techniques will still be useful to you, but you should also consult the W3C-WAI Web Content Accessibility Guidelines (WCAG 2.0) because these are specifically designed to provide guidance for highly dynamic and/or interactive content.
File Formats
The default file format for Writer is Open Document Text (ODT). In addition, Writer offers many other word processor and web format saving options. Most of these have not been checked for accessibility, but some information and/or instructions are available for the following formats in Technique 12.
Document Conventions
We have tried to formulate these techniques so that they are useful to all authors, regardless of whether they use a mouse. However, for clarity there are several instances where mouse-only language is used. Below are the mouse-only terms and their keyboard alternatives:
- *Right-click: To right-click with the keyboard, select the object using the Shift+Arrow keys and then press either (1) the “Right-Click” key (some keyboard have this to the right of the spacebar) or Shift+F10.
Several techniques refer to the Styles and Formatting dialog. By default, this is a floating dialog but it can also be docked, so it becomes a panel. When the dialog or panel is open, keyboard users can navigate to it using the key F6. The same applies to the Navigator, which can either float over the editing area or be docked next to it.
Disclaimer and Testing Details:
- Following these techniques will increase the accessibility of your documents, but it does not guarantee accessibility to any specific disability groups. In cases where more certainty is required, it is recommended that you test the office documents with end users with disabilities, including screen reader users.
- The application-specific steps and screenshots in this document were created using Writer (ver. 3.4.0, Windows 7, 32 bits, July 2013) while creating an ODT document.
- This document is provided for information purposes only and is neither a recommendation nor a guarantee of results. If errors are found, please report them to: adod-comments@idrc.ocad.ca.
Technique 1. Use Accessible Templates
All office documents start with a template, which can be as simple as a blank standard-sized page or as complex as a nearly complete document with text, graphics and other content. For example, a “Meeting Minutes” template might include headings for information relevant to a business meeting, such as “Actions” above a table with rows to denote time and columns for actions of the meeting. Because templates provide the starting-point for so many documents, accessibility is critical. If you are unsure whether a template is accessible, you should check a sample document produced when the template is used (see Technique 11).
Writer’s default template for new documents is a blank page. The basic installation also includes blank business card and blank label templates. These are all fairly accessible by virtue of being blank. However, you should make the default language of a template unambiguous (see Technique 2).
It is possible to create your own accessible templates from scratch in Writer. As well, you can edit and modify the existing prepackaged templates, ensuring their accessibility as you do so and saving them as a new template.
To create an accessible template
- Create a new document (either blank or from an existing template).
- Ensure that you follow the techniques in this document.
- When you are finished you should also check the accessibility of the document (See Accessibility Checking, below).
- Go to menu item: File > Properties.
- Use the Title and/or Comments to indicate the accessibility status of the template. Using Title (e.g., “Accessible Memo Template”) will increase the prominence of the accessibility status because this is used in place of the template’s file name. Comments can be used to add more information if necessary (e.g., “This memo template has been checked for accessibility.”).
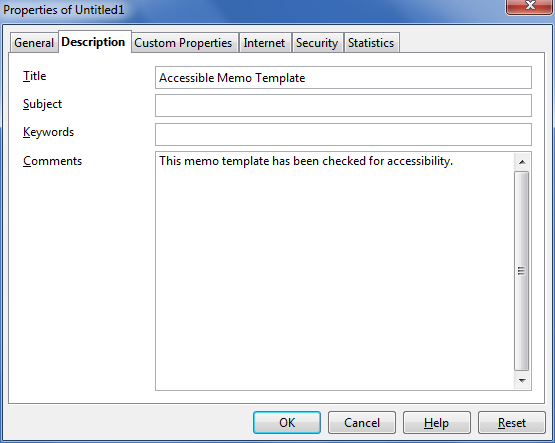
- Close the dialog with OK.
- Go to menu item: File > Templates > Save.
- In the New Template box, type a name for the template.
- Select the category you would like to save it in, under Categories.
Note: the category is simply the folder into which you are saving the template.
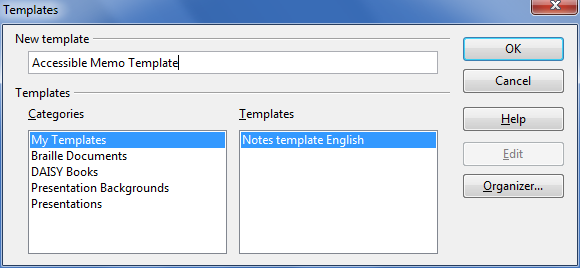
- Close the dialog with OK.
To select an accessible template
Only use these steps if you have an accessible template available (e.g. that you previously saved). Otherwise, simply open a new (blank) document.
- Go to menu item: File > New > Templates and Documents.
- Select the Templates icon.
- Select a template document from the list.
Note: A properties pane appears on the right side of the window, where you can read the document properties (Title, By, Date, Modified by, Modified on, Description, and Size). If you placed information about the accessibility of the template in the Title and/or Comments when you created the template (see above), this will be displayed in the Title and/or Description, respectively.
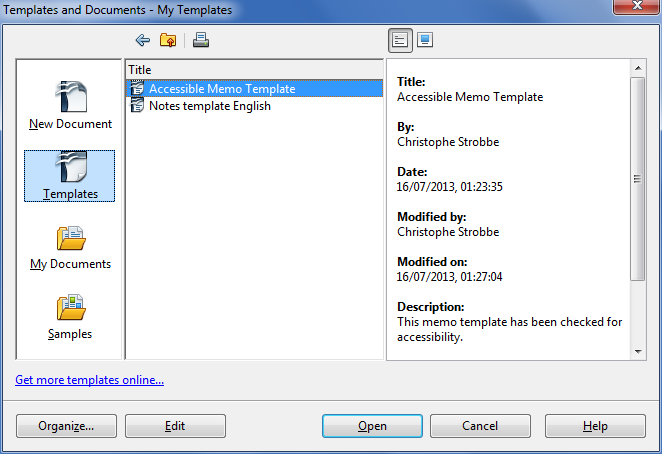
- Select Open.
- A new document based on the template will be displayed. If you have chosen an accessible template, the document will be accessible at this point. As you add your content (e.g., text, images, etc.), ensure that you consult the sections that follow to preserve accessibility.
Technique 2. Specify Document Language
In order for assistive technologies (e.g., screen readers) to be able to present your document accurately, it is important to indicate the natural language of the document. If a different natural language is used for a paragraph or selected text, this also needs to be clearly indicated.
To select a language for the whole document
- Go to menu item: Tools > Options.
- Select Language Settings > Languages.
- Under Default languages for documents, select the document language for all newly created documents.
Note: Writer uses three categories of languages: “Western languages”, “Asian languages” and CTL languages (complex text layout). For monolingual documents in a Western language, you should change the values for Asian languages and CTL languages from their defaults to “None”. Under default languages for documents, enable “Show UI elements for UI elements for East Asian languages” and “Show UI elements for Bi-Directional writing”. Then set the values for Asian and CTL to “None”. You can then again disable the UI elements for these languages again.
Tip: Do this for all your templates.
- Close the dialog with OK.
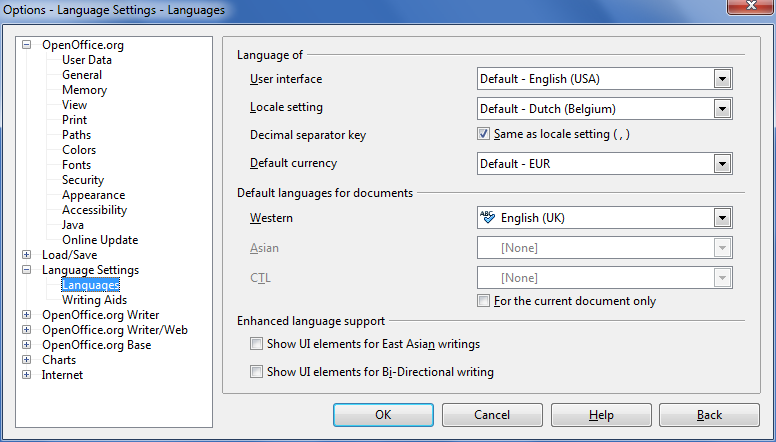
To select a language for a paragraph style
- Place the cursor in the paragraph using the paragraph style you want to edit.
- Right-click* and go to menu item: Edit Paragraph Style.
- Select the Font tab.
- Select the Language and select OK.
Note: All paragraphs formatted with the current paragraph style will have the selected language.
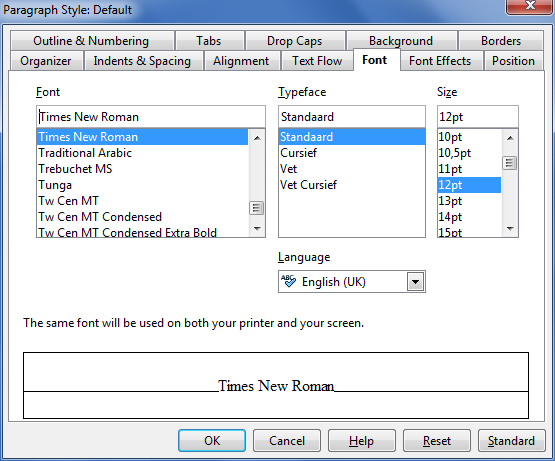
To select a language for hyperlinks
The default language of hyperlinks in Writer is “None”. If all or most hyperlinks in a document are in the same language, you should modify the style for hyperlinks.
- Go to menu item: Format > Styles and Formatting.
- In the Styles and Formatting dialog, select the Character Styles icon.
- Right-click* on the style Internet Link.
- Select Modify…
- Select the Font tab.
- Set the language to English (or the Western language that you use most). If the UI for non-Western languages is enabled, set the non-Western languages to “None”.
Tip: Set the language for the style Internet Link in all your templates.
To apply a language directly to selected text
- Select the text to which you want to apply a language.
- Go to menu item: Format > Character.
- Select the Font tab.
- Select the Language.
- If the UI for non-Western languages is enabled, set the non-Western languages to “None”.
- Select OK.
Technique 3. Provide Text Alternatives for Images and Graphical Objects
Some issues have been observed with Writer involving the loss of alternative text and longer descriptions (e.g., when images anchored to a paragraph are changed to anchor as characters, when a caption is added). We suggest that you guard against this data loss by keeping backups and by setting image anchoring and captions before adding the alternative text.
When using images or other graphical objects, such as charts and graphs, it is important to ensure that the information you intend to convey by the image is also conveyed to people who cannot see the image. This can be accomplished by adding concise alternative text to of each image. If an image is too complicated to concisely describe in the alternative text alone (artwork, flowcharts, etc.), provide a short text alternative and a longer description as well.
Tips for writing alternative text
- Try to answer the question “what information is the image conveying?”
- If the image does not convey any useful information, leave the alternative text blank.
- If the image contains meaningful text, ensure all of the text is replicated.
- Alternative text should be fairly short, usually a sentence or less and rarely more than two sentences.
- If more description is required (e.g., for a chart or graph), provide a short description in the alternative text (e.g., a summary of the trend) and more detail in the long description, see below.
- Test by having others review the document with the images replaced by the alternative text
Tips for writing longer descriptions
- Long descriptions should be used when text alternatives (see above) are insufficient to answer the question “what information is the image conveying?”
- In some situations, the information being conveyed will be how an image looks (e.g., an artwork, architectural detail, etc.). In these cases, try to describe the image without making too many of your own assumptions.
- One approach is to imagine you are describing the image to a person over the phone.
- Ensure that you still provide concise alternative text to help readers decide if they are interested in the longer description.
Alternatively, you can include the same information conveyed by the image within the body of the document, providing the images as an alternate to the text. In that case, you do not have to provide alternate text within the image.
Note: When inserting a new image or object in place of an existing image or object, the alternative text and description will remain the same. This is helpful if you are inserting an updated version of an image, whose meaning and context has not change. However, when inserting an entirely new image or object, you will be required to change the title and description fields accordingly.
Note: When inserting a picture or object that is too large for the height or width of the page, it is best to reduce the size before inserting it into the document. This results in a smaller file size and usually better image quality.
To add alternative text to images and graphical objects
- Right-click* the object.
- Go to menu item: Picture.
- Select the Options tab in Picture dialog.
- Fill in Alternative Text box.
Note: the Alternative Text is also the Title of the object.
To add long descriptions to images
- Right-click* on object.
- Select Description… option.
- Enter description in Description box.
Technique 4. Avoid “Floating” Elements
When images and objects are inserted into Writer documents they default to “floating” with an anchor “To Paragraph”. This makes them difficult to select with the keyboard, so “floating” should be prevented by anchoring them “As Character”.
A “floating” object keeps its position relative to the page, while text flows around it. As content moves up or down on the page, the object stays where it was placed. To ensure that images and objects remain with the text that references it, always position it has attached to a character at the end of the in-text reference.
Similarly, avoid placing drawing objects directly into the document (e.g., as borders, to create a diagram). Instead, create borders with page layout tools and insert complete graphical objects.
To prevent an image or object from “floating”
- Right-click* the object.
- Select Anchor > As Character option.
Technique 5. Use Headings
Any documents that are longer than a few paragraphs require structuring to make them more straightforward for readers to understand. One of the easiest ways to do this is to use “True Headings” to create logical divisions between paragraphs. True headings are more than just bolded, enlarged, or centered text; they are structural elements that order and levels provide a meaningful sequence to users of assistive technologies.
Tips for headings
- Use the default headings styles provided (“Heading “, “Heading 2”, etc.).
- Nest headings properly (e.g., the sub-headings of a “Heading 1” are “Heading 2”, etc.).
- Do not skip heading levels.
To apply headings from the Formatting Toolbar
- Highlight the text that you want to make into a navigational heading.
- Select the desired heading from the dropdown list in the Formatting Toolbar.

To apply headings using the Styles and Formatting panel
- Highlight the text that you want to make into a navigational heading.
- Go to menu item: Format > Styles and Formatting.
- Double-click* the desired heading style.
Note: If a heading style is modified in the Styles and Formatting panel, the modification will apply to every heading of that style.
To apply headings using keyboard shortcuts (up to Heading 5)
- Highlight the text that you want to make into a navigational heading.
- Select Ctrl+1 (for Heading 1), Ctrl+2 (for Heading 2), … Ctrl+5 (for Heading 5).
To modify heading styles
- Go to menu item: Format > Styles and Formatting (F11).
- Select the style to modify from the list.
- Right-click* and select: Modify…
- In the Paragraph Style dialog, select the Organizer tab.
- In the Name box, enter a unique style name.
- Format the heading style using the available formatting options in the various tabs. Make sure your selections align with the techniques in this document.
- Select OK.
Technique 6. Use Named Styles
As with “True Headings” (see Technique 5), you should attempt to make use of the named styles that are included with the office application (e.g., “emphasis”, “caption”, etc.) before creating your own styles or using the character formatting tools directly. Named styles help your readers understand why something was formatted in a given way, which is especially helpful when there are multiple reasons for the same formatting (e.g., it is common to use italics for emphasis, Latin terms and species names).
Note: While office application suites support headings in much the same way, the named styles often differ.
Writer provides named “paragraph styles” for “caption”, “endnote”, etc. Styles for strong emphasis, emphasis, source code and quotations are not paragraph styles but “character styles”. You can access character styles by selecting the Character Styles icon in the Styles and Formatting dialog.
To use default named styles
- Default named styles can be applied the same way as headings (see Technique 5).
Technique 7. Use Built-In Document Structuring Features
7.1 Tables
When using tables, it is important to ensure that they are clear and appropriately structured. This helps all users to better understand the information in the table and allows assistive technologies (e.g., screen readers) to provide context so that the information within the table can be conveyed in a meaningful way.
Tips for tables
- Only use tables for tabular information, not for formatting, such as to position columns.
- Use “real tables” rather than text formatted to look like tables using the TAB key or space bar. These will not be recognized by assistive technology.
- Keep tables simple by avoiding merged cells and dividing complex data sets into separate smaller tables, where possible.
- Always set the header to show at the top of each page. Also set the table to break between rows instead of in the middle of rows.
- Create a text summary of the essential table contents. Any abbreviations used should be explained in the summary.
- Table captions or descriptions should answer the question “what is the table’s purpose and how is it organized?” (e.g., “A sample order form with separate columns for the item name, price and quantity”).
- Table cells should be marked as table headers when they serve as labels to help interpret the other cells in the table.
- Table header cell labels should be concise and clear.
To add a table with headings
- Go to menu item: Insert > Table (Ctrl+F12).
- Enter a name for the table.
- Specify the number of columns and rows in the table.
- Select the Heading check box.
- Select the Repeat heading check box.
- Indicate the number of rows you want to use for the heading in The first…rows spinner box.
Note: Whenever possible, keep tables simple with just 1 row of headings.
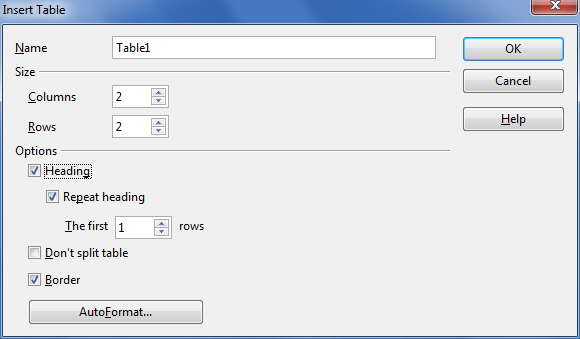
To add table headings manually
- Highlight the table cells that should be headers.
- Go to menu item: Format >Styles and Formatting (F11).
- Select the Heading check box and make sure that Repeat heading is checked.
To make tables break between rows instead of in the middle of rows
- Place the cursor inside the table.
- Go to menu item: Table > Table Properties.
- Select the Text Flow tab.
- Unselect the check box Allow row to break across pages and columns.
- Select OK.
7.2. Lists
When you create lists, it is important to format them as “real lists”. Otherwise, assistive technologies will interpret your list as a series of short separate paragraphs instead of a coherent list of related items.
To create an ordered or unordered list
This applies a paragraph style for lists that makes sure that assistive technology and other software can recognize the content as a list.
- Select text.
- Go to menu item: Format > Styles and Formatting.
- In the Styles and Formatting dialog, select a list style such as List 1 or Numbering 1.
Note: Do not select the style “List”: this style is reserved for modifying all list styles or numbering styles at once.
There are two methods for adding visual list formatting to this list: the first one modifies the applied paragraph style:
- Go to menu item: Format > Styles and Formatting.
- Right-click* the paragraph style you applied to the content (e.g., List 1 or Numbering 1).
- Select Modify…
- In the Paragraph Style dialog, select the Outline & Numbering tab.
- Select a Numbering Style (this drop-down list also contains styles for unordered lists).
- Select the Indents and Spacing tab.
- Set the indent values you would like to use for this list type.
- Select OK.
The second method changes the visual formatting of a list without changing all lists based on the same style:
- Select the list
- Go to menu item: Format > Bullets and Numbering.
- In the Bullets and Numbering dialog, select the Bullets tab for unordered lists or the Numbering type tab for ordered lists.
- Select a list style from the Selection gallery.
- Select OK.
To create sublists
This is the only way to create a true sublist (i.e. a list that is (internally) a child list of the list item above it) instead of a list that is merely indented more from the margin.
- Select the list items that should become a sublist.
- On the Bullets and Numbering toolbar, select the button Demote One Level or the button Demote One Level with Subpoints.

To create new list styles
- Go to menu item: Format > Styles and Formatting.
- In the Styles and Formatting dialog, select the List Styles icon.
- Right-click* a style from the list.
- Select New…
- In the Numbering Style dialog, enter a name for the list style in the Name box.
- Format the list using the available formatting options in the various tabs.
- Select OK.
Note: This does not create new paragraph styles but new formatting styles that you can apply to paragraph styles for lists. Even though the names for the formatting styles (List 1, Numbering 1 etc.) that appear when you select the List Styles icon are the same as some of the paragraph styles that appear when you select the Paragraph Styles icon, their purpose is different: the Paragraph Styles are for document structure and other paragraph features (e.g. indent), the List Styles are for the numbering or bullet style.
7.3 Columns
Use the Columns feature for placing text in columns.
Note: Because columns can be a challenge for users of some assistive technologies, consider whether a column layout is really necessary.
7.4 Page Breaks
Start a new page by inserting a page break instead of repeated hard returns.
To insert a page break, use the shortcut Ctrl + Enter or go to the menu item Format > Manual Break and select Page Break (the default option).
7.5. Use a Table of Contents
Creating an index or table of contents to outline office document content can provide a means of navigating the meaningful sequence of content.
The best way to generate a table of contents is after applying the predefined heading styles, such as “Heading 1” as described above, to the headings that you want to include in your table of contents. After you apply these styles, you can then create a table of contents.
To insert a Table of Contents
- Select in your document where you want to create the table of contents.
- Go to menu item: Insert > Indexes and Tables > Indexes and Tables.
- Select the Index/Table tab.
- Select Table of Contents in the Type dropdown.
- Select OK.
To use a different paragraph style as a Table of Contents entry
- Select in your document where you want to create the table of contents.
- Go to menu item: Insert > Indexes and Tables > Indexes and Tables.
- Select the Index/Table tab.
- Select Table of Contents in the Type box.
- In the Create from area, select the Additional Styles check box.
- Select the (…) button next to the check box.
- In the Assign Styles dialog, select the style in the list.
- Select the >> or the << button to define the outline level for the paragraph style.
To update a Table of Contents
- Select Tools > Update > All Indexes and Tables.
7.6 Use Page Numbering
Numbering the pages of your document helps those reading and editing your document effectively navigate and reference its content. For users of assistive technologies, it provides a valuable point of reference within the document.
To Insert Page Numbers
- Go to menu item: Insert > Footer.
- Select the page style that you want to add the footer to. If you have not created or applied any special page styles, “Default” will be the only option.
- Go to menu item: Insert > Fields > Page Number.
Technique 8. Create Accessible Charts
Charts can be used to make data more understandable for some audiences. However, it is important to ensure that your chart is as accessible as possible to all members of your audience.
- All basic accessibility considerations that are applied to the rest of your document must also be applied to your charts and the elements within your charts. For example, use shape and color, rather than color alone, to convey information.
- When creating line charts, use the formatting options to create different types of dotted lines to facilitate legibility for users who are color blind.
- When creating bar charts, it is helpful to apply textures rather than colors to differentiate the bars.
- Ensure that the contents are your chart are appropriate labeled to give users reference points that will help them to correctly interpret the information.
- Use the formatting options to change predefined colors, ensuring that they align with sufficient contrast requirements (see Technique 9.2).
- Consider providing the data that you used to create the chart in tabular form (e.g., as an appendix).
To create a chart
- Go to menu item: Insert > Object > Chart…
- Right-click* the chart and select Chart Data Table…
- Update the data table with the data you would like to display.
- Close the data table.
To add titles and labels
- Select the chart.
- Go to menu item: Insert > Titles.
- Update the relevant fields and select OK.
- Go to menu item: Insert > Data Labels.
- Configure your data label selections and select OK.
To apply textures to bar charts
- In the chart’s legend, right-click* on the Legend Key for one of the bars.
- Select Format Data Series…
- In the Fill area, select Hatching and choose one of the textures.
- Optionally, select the Background Color check box and choose a color.
- Select OK.
Repeat these steps for each legend key.
To change the line style in line charts
- In the line chart’s legend, right-click* on the Legend Key.
- Select Format Data Series…
- Select the Line tab.
- Choose a line style that will help distinguish the data series from the other lines in the chart.
- Select OK.
Repeat these steps for each legend key.
Technique 9. Make Content Easier to See
Here are some other things to keep in mind:
9.1 Format of Text
When formatting text, especially when the text is likely to printed, try to:
- Use font sizes between 12 and 18 points for body text.
- Use fonts of normal weight, rather than bold or light weight fonts. If you do choose to use bold fonts for emphasis, use them sparingly.
- Use standard fonts with clear spacing and easily recognized upper and lower case characters. Sans serif fonts (e.g., Verdana, Helvetica, Arial) may sometimes be easier to read than serif fonts (e.g., Times New Roman, Garamond).
Note: Some fonts were specifically designed for easier reading on screens (e.g. the sans-serif fonts Verdana, Trebuchet MS and Calibri, and the serif fonts Georgia, Cambria and Constantia). Unfortunately, many of these fonts are not available across operating systems.
- Avoid large amounts of text set all in caps, italic or underlined.
- Use normal or expanded character spacing, rather than condensed spacing.
- Avoid animated (e.g., blinking) text.
But can’t users just zoom in? Office applications do typically include accessibility features such as the ability to magnify documents and support for high contrast modes. However, because printing is an important aspect of many workflows and changing font sizes directly will change documents details such the pagination, the layout of tables, etc., it is best practice to always format text for a reasonable degree of accessibility.
To change the text size for a default named style
- Go to menu item: Format > Styles and Formatting (F11).
- Select the style to modify from the list.
- Right-click* and select: Modify…
- Select the Font tab.
- Select a font size under Size.
- Select OK.

9.2 Use Sufficient Contrast
The visual presentation of text and images of text should have a contrast ration of at least 4.5:1. To help you determine the contrast, here are some examples on a white background:
- Very good contrast (Foreground=black, Background=white, Ratio=21:1)
- Acceptable contrast (Foreground=#767676, Background=white, Ratio=4.54:1)
- Unacceptable contrast (Foreground=#AAAAAA, Background=white, Ratio=2.32:1)
Also, always use a single solid color for a text background rather than a pattern.
In order to determine whether the colors in your document have sufficient contrast, you can consult an online contrast checker, such as:
9.3 Avoid Relying on Color or Sensory Characteristics
The instructions provided for understanding and operating content should not rely solely on sensory characteristics such as the color or shape of content elements. Here are two examples:
- Do not track changes by simply changing the color of text you have edited and noting the color. Instead, use Writer’s “Changes” feature to track changes. You can find this feature in the Edit menu.
- Do not distinguish between images by referring to their appearance (e.g., “the bigger one”). Instead, label each image with a figure number and use that for references.
9.4 Avoid Using Images of Text
Before you use an image to control the presentation of text (e.g., to ensure a certain font or color combination), consider whether you can achieve the same result by styling “real text”. If this is not possible, as with logos containing stylized text, make sure to provide alternative text for the image following the techniques noted in Technique 3, above.
Technique 10. Make Content Easier to Understand
10.1 Write Clearly
By taking the time to design your content in a consistent way, it will be easier to access, navigate and interpret for all users:
- Whenever possible, write clearly with short sentences.
- Introduce acronyms and spell out abbreviations.
- Avoid making the document too “busy” by using lots of whitespace and by avoiding too many different colors, fonts and images.
- If content is repeated on multiple pages within a document or within a set of documents (e.g., headings, footings, etc.), it should occur consistently each time it is repeated.
10.2 Provide Context for Hyperlinks
Hyperlink text in your document should be meaningful when read out of context. To be an effective navigation aid, the link text should describe the destination of the link.
Consider the experience of screen reader users: Generally, screen readers generate a list of links, and screen reader users navigate this list alphabetically. Hyperlink text such as “click here” or “more” is meaningless in this context.
In order to be useful to someone using a screen reader, ensure that hyperlink text is self-describing and meaningful on its own.
To add hyperlinks with meaningful text
- Position the cursor where you would like to enter the link.
- Go to menu item: Insert > Hyperlinks.
- In the Hyperlink dialog, enter the link address in the Target box.
- In the Further settings section, enter the text to display in the Text box.
- Select Apply.
- Select Close.
Technique 11. Check Accessibility
If you wish to check the accessibility of your document or template (see Technique 1), download the AccessODF extension and install it using Writer’s Extension Manager (Tools > Extension Manager…). This extension offers an “Accessibility Evaluation” function to review your document against a set of possible issues that users with disabilities may experience in your file.
AccessODF classifies issues as either:
- Error: Content that makes a file very difficult or impossible for people with disabilities to understand.
- Warning: Content that in most, but not all, cases makes a file difficult for people with disabilities to understand.
To Use AccessODF
- Go to menu item: Tools > Accessibility Evaluation…
- An Accessibility Evaluation task panel will open.
- Select Check to start the evaluation.
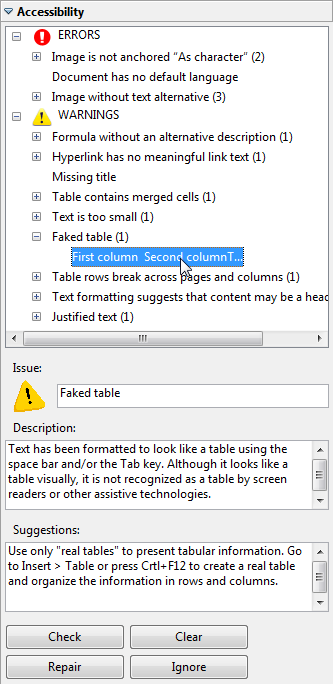
- Select a specific issue to see its description and repair suggestions. If the Repair button becomes active, selecting this button will either repair the issue automatically or open the dialog where you can repair the issue. (For example, adding a text alternative to an image cannot be done automatically, so AccessODF opens the dialog for text alternatives.) If the issue is a false alarm, select the Ignore button.
- When you have repaired all the issues, select the Check button again to find issues that may have gone undetected so far.
More complete instructions are available in the AccessODF User Guide.
Note: Currently, AccessODF 0.1.0 is not compatible with OpenOffice 4.0 (with the new
sidebar) and LibreOffice 4.1 (with or without the sidebar).
Editor’s note: AccessODF has not been updated recently, and it does not work with later versions of OpenOffice or LibreOffice.
Using HTML and PDF to Evaluate Accessibility
Since the AccessODF plugin may not work with current versions of OpenOffice or LibreOffice, consider saving the document as an HTML or PDF file and check those formats for accessibility. This will allow you to get some indication of the accessibility of your document or template.
To evaluate HTML accessibility
Save the document into HTML format and use one of the web accessibility checkers available online, such as:
To evaluate PDF accessibility
If you saved your document in tagged PDF format, you can use the following tools and steps to evaluate the accessibility of the PDF document:
To evaluate PDF accessibility in Adobe Acrobat Professional
- Go to menu item: Advanced > Accessibility > Full Check…
- In the Full Check dialog, select all the checking option.
- Select the Start Checking button.
Editor’s note: For detailed instructions, see our section on how to check accessibility using Adobe Acrobat Professional.
Technique 12. Use Accessibility Features when Saving/Exporting to Other Formats
In some cases, additional steps must be taken in order to ensure accessibility information is preserved when saving/exporting to formats other than the default.
PDF
PDF documents are not always accessible. Accessible PDF documents are often called “Tagged PDF” because they include “tags” that encode structural information required for accessibility. To evaluate the accessibility of your PDF document, see Technique 11.
- Go to menu item: File > Export as PDF.
Note: This option is different than the Adobe PDF option in the Print dialog.
- The PDF Options dialog window opens.
- Select the General tab.
- Select the check box labeled Tagged PDF
Note: You must ensure this option is selected in the PDF Options window dialog box before using PDF icon on menu bar. This option is not checked by default, but will remain checked once you have selected it.
- Select the check box labeled Export bookmarks.
Note: This creates a hierarchical list of bookmarks that link to the document’s headings. This list is displayed in the bookmarks panel of Adobe Acrobat and Adobe Reader and facilitates navigation (for sighted users) in large documents.
- Optionally, select the Initial View tab; in the Panes area, select the radio button Bookmarks and page.
- Select Export.
- Enter name and save location.
- Select Save.
Editor’s note: For detailed instructions, see our section on how to check accessibility using Adobe Acrobat Professional.
HTML (Single HTML File)
- Go to menu item: File > Save As…
- Enter a path and a name for the HTML document.
- In the Save as type box, select “HTML Document (OpenOffice.org Writer)” (in OpenOffice.org) or “HTML Document (Writer)” (in LibreOffice).
- Select Save.
- A dialog asking which format to choose will appear.
- Select Keep Current Format (in OpenOffice.org) or Use HTML Document (Writer) Format (in LibreOffice).
- Check the HTML files for accessibility (see Technique 11).
HTML (Multiple HTML Files)
- Apply one of the default heading paragraph styles to the paragraphs where you want to generate an HTML page.
- Go to menu item: File > Send > Create HTML Document.
- Enter a path and a name for the HTML document.
- Select Save.
- Check the HTML file for accessibility (see Technique 11).
To clean up your HTML file
You may wish to use HTML editors or utilities to help with this process.
- Remove unnecessary styles, line breaks, etc.
- Remove unnecessary id, class, and attributes.
- Remove font tags.
- Remove styles in the <head> tag.
- Ensure the <th> tags have a scope attribute.
- Remove <p> tags nested inside <th> and <td> tags.
- Check for accessibility (see Technique 11).
Technique 13. Consider Using Accessibility Support Applications/Plugins
Disclaimer: This list is provided for information purposes only. It is not exhaustive and inclusion of an application or plug-in on the list does not constitute a recommendation or guarantee of results.
- odt2daisy – an export as DAISY add-in for OpenOffice.org.
- odt2braille – a Braille extension to OpenOffice.org Writer that enables the printing of documents to a Braille embosser and the export of documents as Braille files.
- OOo2GD – an extension that allows you to export, update and import documents, spreadsheets and presentations between OpenOffice.org applications and Google docs.
Editor’s note: The plugins above have not been updated recently and may no longer work with current versions of OpenOffice and LibreOffice.
Other Application Features
Writer’s “Navigator” Feature
After you have populated your document with content and true headings have been applied, you may wish to rearrange the content. In order to maintain the integrity and accessibility of the altered sequence, you will need to ensure that structural information (e.g., heading levels) is adjusted accordingly.
Writer provides a “Navigator” mechanism which displays all parts of the document, such as headings, tables, frames, objects or hyperlinks. These elements are referred to as “categories”. If a plus sign appears next to any one of the categories, it means there is more than one object of its kind within the document.
The “Navigator” feature helps you navigate document content, as well as access and manipulate the content. This enables you to move headings or subordinate text up or down in a document, as well as promote or demote heading levels. Arranging objects and other elements of the document is possible as well, following the same principle as arranging headings and text. This allows you to apply a meaningful sequence that can be programmatically determined and therefore accessible to assistive technologies.
To open the “Navigator”
- Select the View tab from the menu bar (F5).
- Select the Navigator option.
To jump to a location in a document
- Double-click* an item listed in the Navigator window, or enter the respective page number in the spin box.
To open a category
- Select the plus sign beside the category.
To view only the entries in a certain category
- Select the category and select the Content View icon.
Note: Until you select the icon again, only the objects of this category will be displayed.
To move heading up or down in a document
- On the Standard Bar, select the Navigator icon to open the Navigator.
- On the Navigator, select the Content View icon.
- Do one of the following:
- Drag a heading to a new location in the Navigator list.
- Select a heading in the Navigator list, and then select the Promote Chapter or Demote Chapter icon.
- To move the heading without the subordinate text, hold down Ctrl while you drag or select the Promote Chapter or Demote Chapter icons.
To Promote or Demote the Level of a Heading
- Select the heading in the Navigator list
- Select the Promote Level or Demote Level icon
Accessibility Help
If you are interested in what features are provided to make Writer more accessible to users, consult one of the the following:
For OpenOffice Writer:
- Go to menu item: Help > OpenOffice.org Help (F1).
- Enter “accessibility” as the Search Term.
For LibreOffice Writer:
References and Resources
- Apache OpenOffice User Guide: Writer
- WebAim: OpenOffice.org and Accessibility
- GAWDS Writing Better Alt Text
- OpenOffice.org 3 Writer Guide (PDF)
Acknowledgments
Authors: Jan Richards (IDRC), Sabrina Ruplall (IDRC), and Christophe Strobbe (Stuttgart Media University)
This document was produced as part of the Accessible Digital Office Document (ADOD) Project.
This project has been developed by the Inclusive Design Research Centre, OCAD University as part of an EnAbling Change Partnership project with the Government of Ontario and UNESCO (United Nations Educational, Scientific and Cultural Organization).
Source: Authoring Techniques for Accessible Office Documents: OpenOffice Writer (v3.4) and LibreOffice Writer (v4.0.4.2) by the Inclusive Design Research Centre (IDRC) used under CC-BY-SA 3.0.
Authoring Techniques for Accessible Office Documents: Spreadsheet Applications
III
Usage Notes
At the time of testing (December 2019), Google Sheets lacks some features that enable accessible office document authoring, most notably: the ability to indicate changes in natural language, programmatically determined named styles, and a separate document title field.
No accessibility checking feature is built into Google Sheets; however, you can install a third-party add-on called Grackle Sheets. Grackle is a third-party plug-in that includes an accessibility checker along with other features that enhance accessibility (see Technique 11). Due to the nature of Google Sheets, some accessibility features, such as tables, are only fully accessible when exporting the document to another format, like an HTML file.
What’s an “Office Document”?
You should use these techniques when you are using Google Sheets to create documents that are:
- Intended to be used by people (i.e., not computer code),
- Text-based (i.e., not simply images, although they may contain images),
- Fully printable (i.e., where dynamic features are limited to automatic page numbering, table of contents, etc. and do not include audio, video, or embedded interactivity),
- Self-contained (i.e., without hyperlinks to other documents, unlike web content), and
- Typical of office-style workflows (Reports, letters, memos, budgets, presentations, etc.).
If you are creating forms, web pages, applications, or other dynamic and/or interactive content, these techniques will still be useful to you, but you should also consult the W3C-WAI Web Content Accessibility Guidelines (WCAG 2.0) because these are specifically designed to provide guidance for highly dynamic and/or interactive content.
File Formats
Google Sheets does not have a default file format, as it is a web-based authoring tool.
Google Sheets offers various spreadsheet processor and web format saving options. Most of these have not been checked for accessibility, but some information and/or instructions are available for the following formats in Technique 12:
- Microsoft Excel (.xlsx)
- OpenDocument Format (.ods)
- PDF Document (.pdf)
- HTML (.html, zipped)
- Comma-separated values (.csv, current sheet)
- Tab-separated values (.tsv, current sheet)
Document Conventions
We have tried to formulate these techniques so that they are useful to all authors, regardless of whether they use a mouse. However, for clarity there are several instances where mouse-only language is used. Below are the mouse-only terms and their keyboard alternatives:
- *Right-click: To right-click with the keyboard, select the object using the Shift+Arrow keys and then press either (1) the “Right-Click” key (some keyboard have this to the right of the spacebar) or Shift+F10.
Disclaimer and Testing Details:
Following these techniques will increase the accessibility of your documents, but it does not guarantee accessibility to any specific disability groups . In cases where more certainty is required, it is recommended that you test the office documents with end users with disabilities, including screen reader users. Files are also easily saved as other file formats (see Technique 12).
Editor’s note: Since the content of this page has been heavily updated from the original article (Authoring Techniques for Accessible Office Documents: Google docs: Spreadsheets), the usual editor’s notes that flag new content will be omitted. The application-specific steps and screenshots were updated in December 2019.
Technique 1. Use Accessible Templates
Google Sheets lacks support for some accessibility features, such as table headers that repeat. With this in mind, be cautious of templates available in the Google Sheets template gallery and be sure that they comply the techniques discussed here.
All office documents start with a template, which can be as simple as a blank standard-sized page or as complex as a nearly complete document with text, graphics and other content. For example, a “Meeting Minutes” template might include headings for information relevant to a business meeting, such as “Actions” above a table with rows to denote time and columns for actions of the meeting.
Because templates provide the starting-point for so many documents, accessibility is critical. If you are unsure whether a template is accessible, you should check a sample document produced when the template is used (see Technique 11).
Google Sheets’s default template for new documents is a blank spreadsheet. The basic installation also includes a wide variety of templates ranging from blank service invoices to blank project management schedules. These are all accessible by virtue of being blank.
It is possible to create your own templates from scratch in Google Sheets. As well, you can edit and modify the existing templates, ensuring their accessibility as you do so and saving them as a new template.
To select a template
- Go to Google Sheets.
- At the top right, click on Template Gallery.

- Select a template.
- A copy of the template will open.
To create an accessible template
- Create a new spreadsheet (from the default template or from an existing template).
Note: If creating a template from an existing document, go to File > Make a copy. Type a name and choose where to save it, then, click Ok.
- Rename your document. Be sure to indicate that the document is an accessible template by using terms such as “accessible” (e.g., “Accessible Memo Template”). This will improve its searchability and promote its use as an accessible template.
- Ensure that you follow techniques in this document. You may also check the accessibility (see Technique 11).
To share your accessible template as a new document
You can share your accessible template, but it may be more useful to share the file as copy that other users can add to their Google Drive.
- Go to the address bar change the end of the URL before sending it.
- Replace “edit” at the end of the URL with “copy”.
For example:
Before: http://docs.google.com/spreadsheet/d/12345678/edit
After: http://docs.google.com/spreadsheet/d/12345678/copy
- Send the modified copy link.
- When the recipient follows the modified copy link, they’re instructed to click on Make a copy.
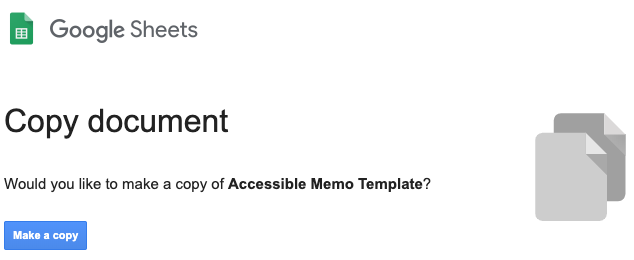
- They can then work on a copy of the accessible template.
For more information, see the resources below:
Technique 2. Set Document Language
At this time (December 2019), Google Sheets does not offer an explicit language selection mechanism to indicate the natural language of your spreadsheet or changes in natural language at any point within the content (e.g., a few cells containing text in a different language than the rest of the spreadsheet). Google Sheets defaults the natural language to the language selected for your Google Account (see Google: Change Your Typing Language).
When exporting to other document formats, there is no guarantee that the natural language of your Google Account will be indicated as the natural language of your document. In order for assistive technologies (e.g., screen readers) to be able to present your document accurately, it is important to indicate the natural language of the document. If a different natural language is used for a paragraph or selected text, this also needs to be clearly indicated.
Technique 3. Provide Text Alternatives for Images and Graphical Objects
Google Sheets offers a mechanism for adding alternative text or longer descriptions to images and objects where it can be readily accessed by screen reader users. While you can add alt text, you will need to ensure that you provide longer descriptions in the body of the document, near the images and objects. While this solution is not optimal for screen reader users and will complicate your own accessibility testing, it is necessary until long descriptions are supported.
When using images or other graphical objects, such as charts and graphs, it is important to ensure that the information you intend to convey by the image is also conveyed to people who cannot see the image. This can be accomplished by adding concise alternative text to each image. If an image is too complicated to concisely describe in the alternative text alone (artwork, flowcharts, etc.), provide a short text alternative and a longer description as well.
Tips for writing alternative text
- Try to answer the question “what information is the image conveying?”
- If the image does not convey any useful information, leave the alternative text blank
- If the image contains meaningful text, ensure all of the text is replicated
- Alternative text should be fairly short, usually a sentence or less and rarely more than two sentences
- If more description is required (e.g., for a chart or graph), provide a short description in the alternative text (e.g., a summary of the trend) and more detail in the long description, see below
- Test by having others review the document with the images replaced by the alternative text
Tips for writing longer descriptions
- Long descriptions should be used when text alternatives (see above) are insufficient to answer the question “what information is the image conveying?”
- In some situations, the information being conveyed will be how an image looks (e.g., an artwork, architectural detail, etc.). In these cases, try to describe the image without making too many of your own assumptions.
- One approach is to imagine you are describing the image to a person over the phone
- Ensure that you still provide concise alternative text to help readers decide if they are interested in the longer description
Alternatively, you can include the same information conveyed by the image within the body of the document, providing the images as an alternate to the text. In that case, you do not have to provide alternate text within the image.
To add alternative text to images and graphical objects
For images in a cell
- Right-click* on the image.
- Select Alt Text from the contextual menu.

- Add your alt text to the Description field.
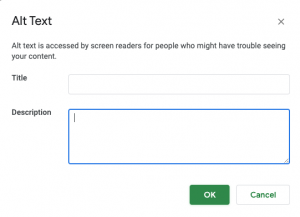
For images placed over cells
- In the top right corner of the image, click on the three dots.
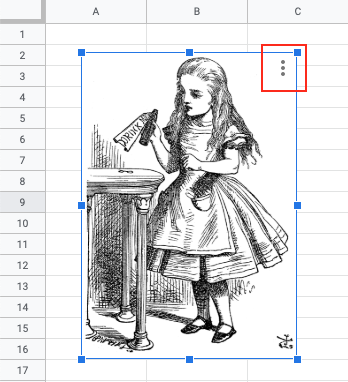
- From the drop-down menu, select Alt text.
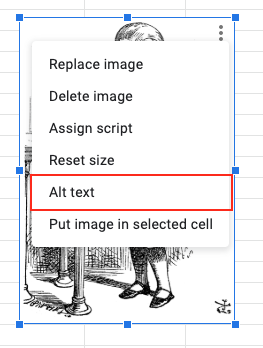
- In the Description field type or paste appropriate alt text.
Note: The image used in the alt text screenshots above are by John Tenniel from Alice’s Adventures in Wonderland from the original 1865 edition of the book.
Technique 4. Format Your Cells
As you begin adding content, your spreadsheet will require structuring to bring meaning to the data, make it easier to navigate, and help assistive technologies read it accurately. One of the easiest ways to do this is to ensure that you properly format the cells.
4.1 Named Styles
At this time (December 2019), Google Sheets does not offer named styles functionality.
You should make use of the named styles that are included with the office application (e.g., “Heading”, “Result”, etc.) before creating your own styles or using the character formatting tools directly. Named styles help your readers understand why something was formatted in a given way, which is especially helpful when there are multiple reasons for the same formatting (e.g., it is common to use italics for emphasis, Latin terms and species names).
For more information on formatting using named styles, see Technique 6.
Note: While office application suites support headings in much the same way, the named styles often differ.
Formatting header and result cells brings order to the spreadsheet and makes it easier for users to navigate effectively. For example, you can format header rows and columns using “Heading” styles to apply bolded, enlarged, and italicized text (among other characteristics). You may also want to format cells containing results of calculations to appear bold and underlined to help distinguish them from the rest of your data.
4.2 Other Cell Characteristics
Ensure your cells are formatted to properly represent your data, including number and text attributes.
To format cell characteristics
- Highlight the cells that you want to format
Note: to format a row or column, select the row or column indicator and follow the next steps
- Go to the menu icon bar
- Select the icon or drop-down list for the format you would like to apply (e.g., Format as currency, Format as percent, More formats)
Note: When formatting your spreadsheet, it is best to avoid merging cells. At times, it may seem easier to present your data by merging cells, but this can make it more difficult for users of assistive technologies and people navigating your spreadsheet using the keyboard.
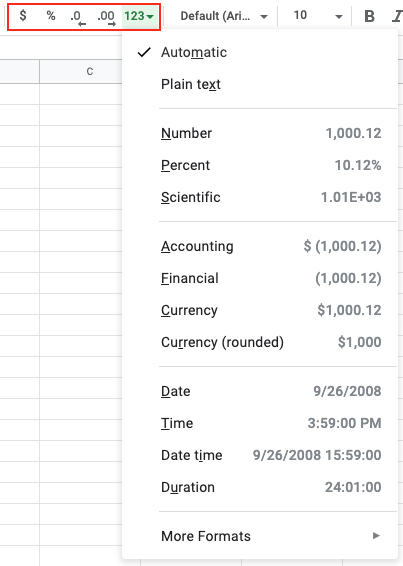
For more details, see the following articles from the Google Help Center:
Technique 5. Use Cell Addressing
5.1 Define Names
Naming the different data ranges within your spreadsheet makes it easier to navigate through the document and find specific information. By associating a meaningful name to a data range, you will be enhancing the readability of your document. These named ranges can be referenced in multiple locations of your document and within calculations and equations.
To define a name
- Select the cells you would like to name
- Go to menu item: Data > Named ranges. A menu will open on the right.
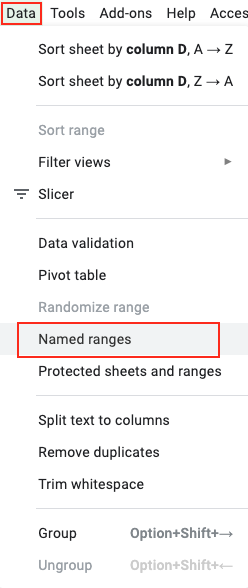
- Type the range name you want (see Range Names, below).
- To change the range, click the Spreadsheet Grid icon.

- Select a range in the spreadsheet or type the new range into the text box, then click Ok.
- Click Done.
Range names:
- Can contain only letters, numbers, and underscores.
- Can’t start with a number, or the words “true” or “false.”
- Can’t contain any spaces or punctuation.
- Must be 1–250 characters.
- Can’t be in either A1 or R1C1 syntax. For example, you might get an error if you give your range a name like “A1:B2” or “R1C1:R2C2.”
Edit or delete a named range
- Select Data, then Named ranges.
- On the named range you want to edit or delete, click Edit.
- To edit the range: Enter a new name or range, then click Done.
- To delete the named range: Next to the name, click Delete range. On the menu that opens, click Remove.
- Note: When you delete a named range, any formulas that reference it will no longer work. Protected ranges that reference a named range will use the cell values and continue to work.
Technique 6. Create Accessible Charts
Spreadsheet applications support various types of charts, which can be used to display your spreadsheet data in meaningful ways for your audience. It is important to ensure that your chart is as accessible as possible to all members of your audience. All basic accessibility considerations that are applied to the rest of your document must also be applied to your charts and the elements within your charts. For example, use shape and color, rather than color alone, to convey information. As well, some further steps should be taken to ensure that the contents are your chart are appropriate labeled to give users reference points that will help to correctly interpret the information.
To create an accessible chart
- Go to menu item: Insert > Chart
- In the Chart Editor , a data range has been pre-selected and will appear in the box labeled Data. (Note: If this range is incorrect, enter a new range in the box labeled Data . To update the data range by manually highlighting the cells, select the Select range… link. This opens the What data? dialog, which allows you to highlight the data range and select OK .)
- In the Chard Editor dialog, select the Use row 1 as headers check box if the first row of your data is a header row
- Select the chart type from the Recommended charts section
- Select the Customize tab
- In the Chart section , enter a title for the chart in the Chart title box
- Select the Name link and enter a name for the chart in the Chart name box
- In the Axis section, enter a title for the vertical axis in the Vertical name box
- Select the Horizontal link and enter a title for the horizontal axis in the Horizontal name box
- Define any other available options that may be associated with the chart
- Select Insert
To add titles and labels
- Double-click on the chart you want to change.
- At the right, click Customize.
- Select Series.
Optional: Next to “Apply to,” choose the data series you want to add a label to.
- Click Data labels.
Optional: Under “Position,” choose where you want the data labels to show.
Optional: Make changes to the label font.
To add alternative text to a chart
- In the top right corner of the chart, click on the three dots.
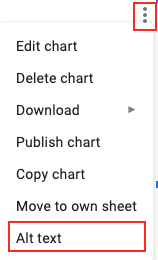
- From the drop-down menu, select Alt text.
- In the Description field type or paste appropriate alt text.
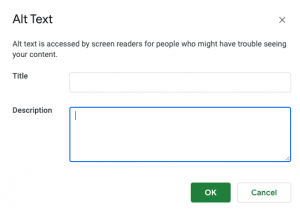
Other Chart Considerations
- When creating line charts, use the formatting options to create different types of dotted lines to facilitate legibility for users who are color blind
- Change the default colors to a color safe or gray-scale palette
- Use the formatting options to change predefined colors, ensuring that they align with sufficient contrast requirements (see Technique 9)
Technique 7. Provide Structure for Tables
At this time (December 2019), Google Sheets does not include an “Insert Table” feature.
If you use the Grackle Sheets add-on, tables can be given structure and table headings can be indicated. While these fixes won’t be useful for making tables more accessible in Google Sheets, it does allow you to export the document into another format with appropriate table tags intact. For more on Grackle Sheets, see Technique 11.
Technique 8. Use Other Content Structuring Features
While cell formatting is the most common method of structuring documents, other content structuring features should be used where appropriate:
8.1 Add a Document Title
At this time, Google Sheets makes use of a single document name. Within Google Sheets, this serves well as a title, but when exporting to ODT, the document name is used to form the file name and the ODT “Title” properties field is left blank.
In case the document is ever converted into another format (e.g., HTML or PDF), it should be given a descriptive and meaningful title.
To change the file name of the current document
- Go to menu item: File > Rename
- In the Rename Document dialog, enter a new document name
- Click OK
8.2 Avoid “Floating” Elements
Avoid “floating” elements (other than charts) such as floating images, objects, tables or text boxes. Similarly, avoid placing drawing objects directly into the document (e.g., as borders, to create a diagram). Instead, create borders with page layout tools and insert complete graphical objects.
To learn how to insert images and graphical object into Google Sheets, see Google: Add an image to a spreadsheet.
8.3 Use Descriptive Sheet Names
In Google Sheets, spreadsheets have the default name “Sheet1” and so on. To improve the accessibility and navigability of your spreadsheets, follow these recommendations:
- Name sheets with a sheet name that describes its content.
- Delete unused sheets to avoid unnecessary navigation.
To rename a spreadsheet
- At the bottom of your Google Sheet, click on the drop-down arrow beside the sheet name.
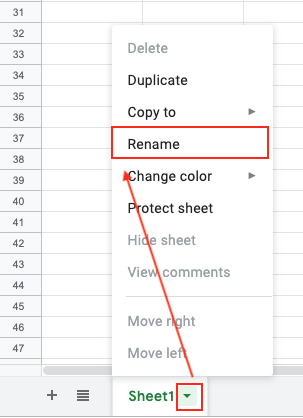
Note: Alternately, you can double click on the sheet name.
- Type a descriptive name for your sheet and hit Enter.
Technique 9. Make Content Easier to See
9.1 Format of Text
When formatting text, especially when the text is likely to be printed, try to:
- Use font sizes between 12 and 18 points for cell contents.
- Use fonts of normal weight, rather than bold or light weight fonts. If you do choose to use bold fonts for emphasis, use them sparingly.
- Use standard fonts with clear spacing and easily recognized upper and lower case characters. Sans serif fonts (e.g., Arial, Verdana) may sometimes be easier to read than serif fonts (e.g., Times New Roman, Garamond).
- Avoid large amounts of text set all in caps, italic or underlined.
- Use normal or expanded character spacing, rather than condensed spacing.
- Avoid animated or scrolling text.
But can’t users just zoom in? Office applications do typically include accessibility features such as the ability to magnify documents and support for high contrast modes. However, because printing is an important aspect of many workflows and changing font sizes directly will change document details such the pagination, the layout of tables, etc., it is best practice to always format text for a reasonable degree of accessibility.
9.2 Use Sufficient Contrast
The visual presentation of text and images of text should have a contrast ratio of at least 4.5:1. To help you determine the contrast, here are some examples on a white background:
- Very good contrast (Foreground=black, Background=white, Ratio=21:1)
- Acceptable contrast (Foreground=#767676, Background=white, Ratio=4.54:1)
- Unacceptable contrast (Foreground=#AAAAAA, Background=white, Ratio=2.32:1)
Also, always use a single solid color for a text background rather than a pattern.
In order to determine whether the colors in your document have sufficient contrast, you can consult an online contrast checker, such as:
9.3 Avoid Using Color Alone
Color should not be used as the only visual means of conveying information, indicating an action, prompting a response, or distinguishing a visual element. In order to spot where color might be the only visual means of conveying information, you can create a screenshot of the document and then view it with online gray-scale converting tools, such as:
- GrayBit v2.0: Grayscale Conversion Contrast Accessibility Tool
Editor’s note: GrayBit v2.0 is no longer available. However, multiple tools can be found online: Google Search: gray-scale conversion tool.
9.4 Avoid Relying on Sensory Characteristics
The instructions provided for understanding and operating content should not rely solely on sensory characteristics such as the color or shape of content elements. Here are two examples:
- Do not track changes by simply changing the color of text you have edited and noting the color. Instead use Google Sheets’s review functionality features to track changes, such as revision history.
- Do not distinguish between images by referring to their appearance (e.g. ,“the bigger one”). Instead, label each image with a figure number and use that for references.
9.5 Avoid Using Images of Text
Before you use an image to control the presentation of text (e.g., to ensure a certain font or color combination), consider whether you can achieve the same result by styling “real text”. If this is not possible, as with logos containing stylized text, make sure to provide alternative text for the image following the techniques noted above.
Technique 10. Make Content Easier to Understand
10.1 Write Clearly
By taking the time to design your content in a consistent way, it will be easier to access, navigate and interpret for all users:
- Whenever possible, write clearly with short sentences.
- Introduce acronyms and spell out abbreviations.
- Avoid making the document too “busy” by using lots of whitespace and by avoiding too many different colors, fonts and images.
- If content is repeated on multiple pages within a document or within a set of documents (e.g., headings, footings, etc.), it should occur consistently each time it is repeated.
10.2 Navigational Instructions
Provide a general description of the spreadsheet contents and instructions on how to navigate the data effectively. The best way to do this is to make a cell at the beginning of the data (e.g., A1) with this information. It will be the first cell accessed by assistive technologies. If you are using this cell for a label or data, you can attach a comment note to the cell containing navigational instructions.
10.3 Provide Context for Hyperlinks
Hyperlink text in your document should be meaningful when read out of context. To be an effective navigation aid, the link text should describe the destination of the link.
Consider the experience of screen reader users: Generally, screen readers generate a list of links, and screen reader users navigate this list alphabetically. Hyperlink text such as “click here” or “more” is meaningless in this context.
In order to be useful to someone using a screen reader, ensure that hyperlink text is self-describing and meaningful on its own.
To add hyperlinks with meaningful text
- Go to menu item: Insert > Link. Alternately, you can select the text you’d like to add a link to and press Ctrl+K (or Cmd+K on Macs).
- In the pop-up box, enter descriptive text in the Text display box.
- Enter the link address in the Link.
- Select Apply.
Technique 11. Check Accessibility
At this time (December 2019), Google Sheets does not offer a mechanism to check for potential accessibility errors in your document prior to publishing. However, a third-party add-on called Grackle Sheets can be used to check the accessibility of your workbook (see below).
In order to get some indication of the accessibility of your document or template (see Technique 1), then you may consider saving the file into HTML or PDF in order to perform an accessibility check in one of those formats (see Evaluating the Accessibility in Other Formats).
Grackle Sheets
What is Grackle Sheets? Grackle Sheets is a third-party add-on that runs on spreadsheets created in Google Sheets. It helps with checking and improving the digital accessibility of your document. Due to the nature of Google Sheets, some accessibility features, such as tables, are only fully accessible when exporting the document to another format, like an HTML file.
How does it work? After Grackle is launched, It scans the current spreadsheet for accessibility issues and identifies and locates errors. Feedback appears in a sidebar that is docked on right-side of the screen. By exploring the sidebar, you can immediately learn about accessibility issues and find and fix the detected errors by interacting with the Grackle sidebar.
Note: Grackle’s accessibility checker is free to use; however, the ability to export and produce accessible HTML spreadsheets, and so on, is only free for the first 30 days (as of December 2019).
At the time of testing, Grackle Sheets performs the following 13 accessibility checks:
- Sheets
- Sheets document needs a proper title
- Sheet names should be descriptive
- The number of sheets should be reasonable
- Avoid making sheets too large
- Sheets should not be empty
- Tables
- Tables should have headers
- Tables should not be too long
- The number of tables should be reasonable
- The use of merged cells is not recommended
- Avoid isolated cells
- Charts
- Charts should have alternate text
- Contents
- High color contrast should be used
- Fine print should be avoided
How to install Grackle Sheets
Grackle Sheets can be installed from the Add-ons menu of a Google Docs document.
- Open a Google document.
- Select Add-ons > Get Add-ons.
- Search for “Grackle” in the search field.
- Select the add-on and click Install.
- Note: A message will appear requesting access to data that the add-on needs to work. Review the message and click Allow.
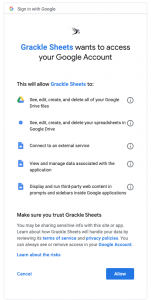
How to launch and use Grackle Sheets
Grackle Sheets is simple to launch and is accessed from the Add-ons menu.
- Open a Google document
- From the Add-ons menu, select Grackle Docs, then select Launch.
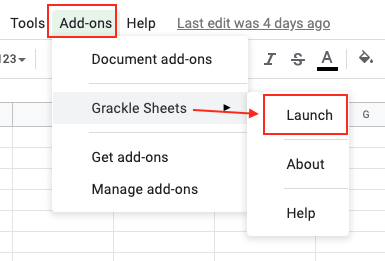
- A sidebar launches that identifies errors and warnings.
- Clicking on each error and warning will expand the selection and provide guidance on how to resolve each issue.
- Select the “Locate” button on any flagged item will take you to that line of the document to review.
- Continue to review and address each flagged item.
- Select the “Re-Check” button at the top of the sidebar to update the report.
- Continue to revise until all checks have passed.
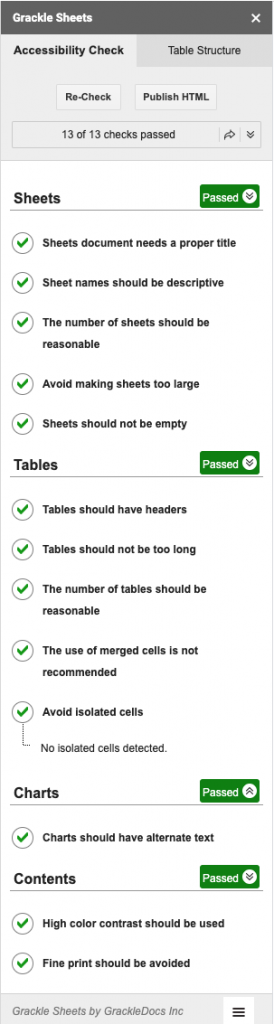
Note: During testing, we noticed that Grackle Sheets may flag a chart as needing alt text even though alt text has been provided.
Automated accessibility checkers cannot be trusted to check for all accessibility concerns, so be sure to review the recommended techniques in this document.
Evaluating Accessibility in Other Formats
To evaluate HTML accessibility
If you wish to check the accessibility of your document or template (see Technique 1), one option is to save it into HTML format and use one of the web accessibility checkers available online. Such as:
To evaluate PDF accessibility
If you saved your document in tagged PDF format, you can use the following tools and steps to evaluate the accessibility of the PDF document:
To evaluate PDF accessibility in Adobe Acrobat Professional
- Go to menu item: Advanced > Accessibility > Full Check…
- In the Full Check dialog, select all the checking option
- Select the Start Checking button
Editor’s note: For detailed instructions, see our section on how to check accessibility using Adobe Acrobat Professional.
Technique 12. Use Accessibility Features when Saving/Exporting to Other Formats
In some cases, additional steps must be taken in order to ensure accessibility information is preserved when saving/exporting to formats other than the default.
Share a presentation in HTML view
When using Google Slides’ HTML view, your whole presentation is displayed in a single, scrollable HTML page, instead of displaying the presentation one slide at a time. This is a helpful feature if your audience includes people who use screen readers.
To access a presentation in HTML view, use the keyboard shortcut Ctrl + Alt + Shift + p (Windows or Chrome OS) or ⌘ + Option + Shift + p (Mac).
Export to alternate formats
- Go to menu item: File > Download as
- Select the file type
PDF
PDF documents are not always accessible. Accessible PDF documents are often called “Tagged PDF” because they include “tags” that encode structural information required for accessibility. To evaluate the accessibility of your PDF document, see Technique 11.
To clean up your HTML file
- Remove unnecessary styles, line breaks, etc.
- Remove unnecessary id, class, and attributes
- Remove font tags
- Remove styles in the <head> tag
- Ensure the <th> tags have a scope attribute
- Remove <p> tags nested inside <th> and <td> tags
- Check for accessibility (see Technique 11)
Note: you may wish to use HTML editors or utilities to help with this process.
Technique 13. Consider Using Accessibility Support Applications/Plugins
Disclaimer: This list is provided for information purposes only. It is not exhaustive and inclusion of an application or plug-in on the list does not constitute a recommendation or guarantee of results.
Accessibility Help
If you are interested in what features are provided to make using Google Sheets more accessible to users, documentation is provided through online articles and Help forums:
- Go to menu item: Help > Google Docs Help Center
References and Resources
- Google Sheets Online Help Center
- GAWDS Writing Better Alt Text
- Google: Keyboard shortcuts for Google Sheets
- Google: Make your document or presentation more accessible
Acknowledgments
This document was produced as part of the Accessible Digital Office Document (ADOD) Project.
This project has been developed by the Inclusive Design Research Centre, OCAD University as part of an EnAbling Change Partnership project with the Government of Ontario and UNESCO (United Nations Educational, Scientific and Cultural Organization).
Source: Authoring Techniques for Accessible Office Documents: Google Sheets by the Inclusive Design Research Centre (IDRC) used under CC-BY-SA 3.0.
Microsoft Excel 2010, 2013, 2016, and 2019
12
Usage Notes
At the time of testing (December 2019), Excel 2010 and later versions provide a set of accessibility features that are sufficient to enable the production of accessible digital office documents. In addition, Excel includes an accessibility checking feature.
How to Create an Accessible Office Document
You should use these techniques when you are using Excel to create documents that are:
- Intended to be used by people (i.e., not computer code),
- Text-based (i.e., not simply images, although they may contain images),
- Fully printable (i.e., where dynamic features are limited to automatic page numbering, table of contents, etc. and do not include audio, video, or embedded interactivity),
- Self-contained (i.e., without hyperlinks to other documents, unlike web content), and
- Typical of office-style workflows (Reports, letters, memos, budgets, presentations, etc.).
If you are creating forms, web pages, applications, or other dynamic and/or interactive content, these techniques will still be useful to you, but you should also consult the W3C-WAI Web Content Accessibility Guidelines (WCAG 2.0) because these are specifically designed to provide guidance for highly dynamic and/or interactive content.
File Formats
The default file format for Excel is Office Open XML (XSLX). In addition, Excel offers many other spreadsheet processor and web format saving options. Most of these have not been checked for accessibility, but some information and/or instructions are available for the following formats in Technique 12 (below):
Document Conventions
We have tried to formulate these techniques so that they are useful to all authors, regardless of whether they use a mouse. However, for clarity there are several instances where mouse-only language is used. Below are the mouse-only terms and their keyboard alternatives:
- *Right-click: To right-click with the keyboard, select the object using the Shift+Arrow keys and then press either (1) the “Right-Click” key (some keyboard have this to the right of the spacebar) or Shift+F10.
Disclaimer and Testing Details:
Following these techniques will increase the accessibility of your documents, but it does not guarantee accessibility to any specific disability groups. In cases where more certainty is required, it is recommended that you test the office documents with end users with disabilities, including screen reader users.
The application-specific steps and screenshots in this document were created using Microsoft Excel 2010 (ver.14.0.4760.1000, Windows XP, Sept. 2010) and Microsoft Excel included with Office 365 while creating a XLSX document. Files are also easily saved as other file formats (see Technique 12, below).
Technique 1: Using Accessible Templates
All office documents start with a template, which can be as simple as a blank standard-sized page or as complex as a nearly complete document with text, graphics and other content. For example, a “Meeting Minutes” template might include headings for information relevant to a business meeting, such as “Actions” above a table with rows to denote time and columns for actions of the meeting. Because templates provide the starting-point for so many documents, accessibility is critical. If you are unsure whether a template is accessible, you should check a sample document produced when the template is used (see Technique 11, below).
Excel’s default template for new documents is a blank page. The basic installation also includes other blank office-related documents. These are all accessible by virtue of being blank.
It is possible to create your own accessible templates from scratch in Excel. You can also edit and modify the existing prepackaged templates, ensuring their accessibility as you do so and saving them as a new template.
How to Create an Accessible Template
- Create a new document.
- Ensure that you follow the techniques in this document.
- When you are finished you should also check the accessibility of the document (see Technique 11, below).
- Go to menu item: File > Save As
- In the Save as type list, select Excel Template
- In the File name box, type a name for the template. Using a descriptive File name (e.g., “Accessible Inventory Template”) will increase the prominence of the accessibility status. Also, filling in the text box labeled Tags with the term “accessibility” will improve its searchability as an accessible file.
- Select Save.
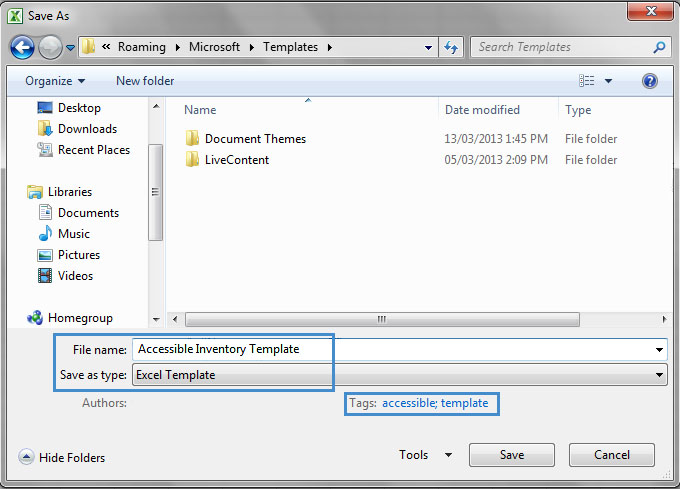
Selecting an Accessible Template
Only use these steps if you have an accessible template available (e.g. that you previously saved). Otherwise, simply open a new (blank) document.
- Go to menu item: File > New.
- Under Available Templates, select My Templates.
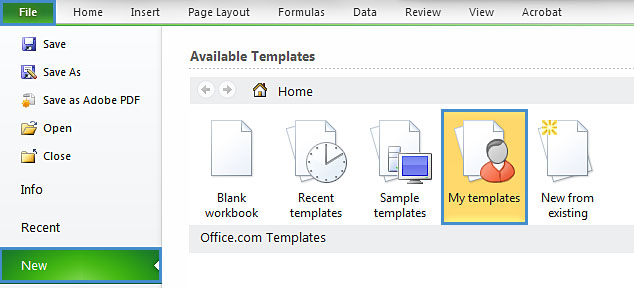
- In the New document dialog, select your accessible template from the list.
- Select OK.
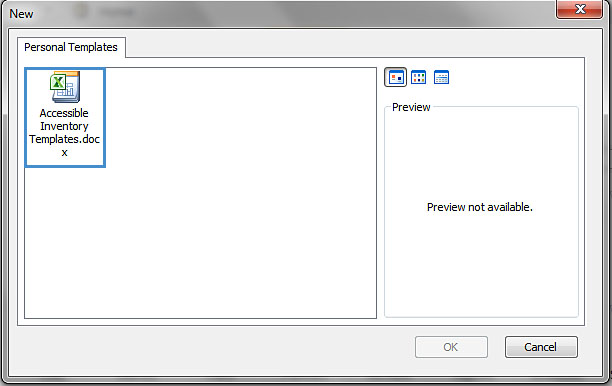
- A new document based on the template will be displayed. If you have chosen an accessible template, the document will be accessible at this point. As you add your content (e.g., text, images, etc.), ensure that you consult the sections that follow to preserve accessibility.
Technique 2: Setting the Document Language
At this time (December 2019), it is not possible to indicate the natural language of selected cells within an Excel workbook.
In order for assistive technologies (e.g., screen readers) to be able to present your document accurately, it is important to indicate the natural language of the document. If a different natural language is used for a paragraph or selected text, this also needs to be clearly indicated.
How to Change the Default Language for a Workbook
- Go to menu item: File.
- Select Options from the list in the left window pane.
- Select Language from the list in the left of the Options dialog.
- Under Chose Editing Languages, select the editing language you want to use.
Note: to add an editing language, select the language from the drop down list labeled. [Add additional editing languages]
- Select Set as Default.
- Close all Office programs and open them again for the changes to take effect.
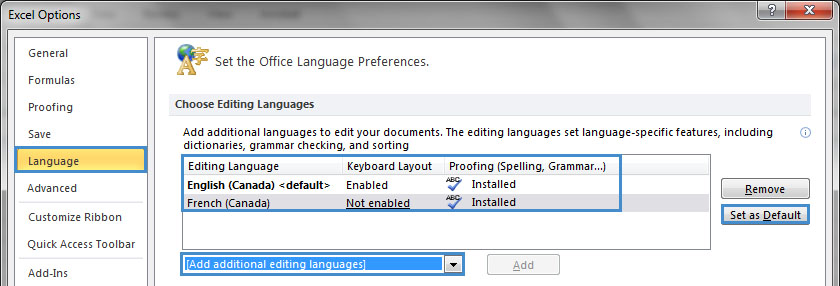
Technique 3: Providing Text Alternatives for Images and Graphical Objects
When using images or other graphical objects, such as charts and graphs, it is important to ensure that the information you intend to convey by the image is also conveyed to people who cannot see the image. This can be accomplished by adding concise alternative text to each image. If an image is too complicated to concisely describe in the alternative text alone (artwork, flowcharts, etc.), provide a short text alternative and a longer description as well.
Tips for writing alternative text (use “Description” in Excel)
- Try to answer the question “what information is the image conveying?”
- If the image does not convey any useful information, leave the alternative text blank.
- If the image contains meaningful text, ensure all of the text is replicated.
- Alternative text should be fairly short, usually a sentence or less and rarely more than two sentences
- If more description is required (e.g., for a chart or graph), provide a short description in the alternative text (e.g., a summary of the trend) and more detail in the long description, see below.
- Test by having others review the document with the images replaced by the alternative text.
Tips for writing longer descriptions (use “Description” in Excel)
- Long descriptions should be used when text alternatives (see above) are insufficient to answer the question “what information is the image conveying?”
- In some situations, the information being conveyed will be how an image looks (e.g., an artwork, architectural detail, etc.). In these cases, try to describe the image without making too many of your own assumptions.
- One approach is to imagine you are describing the image to a person over the phone.
- Ensure that you still provide concise alternative text to help readers decide if they are interested in the longer description.
Alternatively, you can include the same information conveyed by the image within the body of the document, providing the images as an alternate to the text. In that case, you do not have to provide alternate text within the image.
To add alternative text to images and graphical objects
- Right-click* the object.
- Select Format Picture…
- Select the Alt Text option from the list.
- Fill in the description.
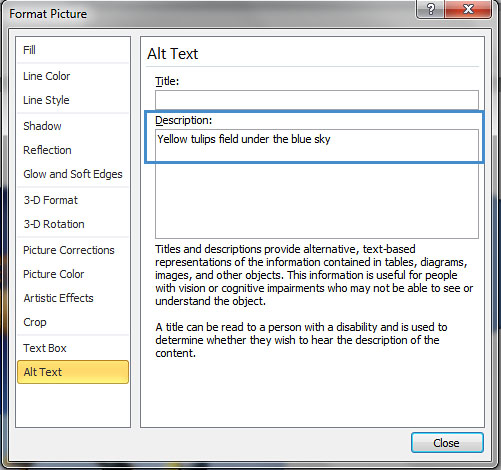
If an Excel document is saved to HTML, the Title and Description fields are combined into a single entry within the HTML <alt> tag.
Editor’s note: To add alt text to a picture in later versions of Excel, follow these instructions:
- Right-click* on the object.
- Select Edit Alt Text.
- Add a description in the Description field.
For more details, see how to add alt text to an image or graphical object.
Technique 4. Format Your Cells
As you begin adding content, your spreadsheet will require structuring to bring meaning to the data, make it easier to navigate, and help assistive technologies read it accurately. One of the easiest ways to do this is to ensure that you properly format the cells.
4.1 Named Styles
You should make use of the named styles that are included with the office application (e.g., “Heading”, “Result”, etc.) before creating your own styles or using the character formatting tools directly. Named styles help your readers understand why something was formatted in a given way, which is especially helpful when there are multiple reasons for the same formatting (e.g., it is common to use italics for emphasis, Latin terms and species names). For more information on formatting using named styles, see Technique 9.
Note: While office application suites support headings in much the same way, the named styles often differ.
Formatting header and result cells brings order to the spreadsheet and makes it easier for users to navigate effectively. For example, you can format header rows and columns using “Heading” styles to apply bolded, enlarged, and italicized text (among other characteristics). You may also want to format cells containing results of calculations to appear bold and underlined to help distinguish them from the rest of your data.
To format a cell with default named styles
- Highlight the cells that you want to format
Note: to apply a style to an entire row or column, select the row or column indicator and follow the next steps
- Go to menu item: Home.
- In the Styles section, select the Cell Styles icon.
- Select the desired formatting style from the drop-down menu.
Note: To modify a style, right-click* the desired formatting style from the drop-down menu and select Modify. Changes made to the style will affect all instances of the style within your workbook.
4.2 Other Cell Characteristics
Ensure your cells are formatted to properly represent your data, including number and text attributes.
To format cell characteristics
- Highlight the cells that you want to format
- Go to menu item: Home.
- In the relevant sections (e.g., Numbers, Font, etc.) make your adjustments.
Note: When formatting your spreadsheet, it is best to avoid merging cells. At times, it may seem easier to present your data by merging cells, but this can make it more difficult for users of assistive technologies and people navigating your spreadsheet using the keyboard.
Technique 5. Use Cell Addressing
5.1 Define Names
Naming the different data ranges within your spreadsheet makes it easier to navigate through the document and find specific information. It can also be use as a navigation. When using the shortcut Ctrl + G a dialog box will open and layout all the names define in the cells. When selected and the OK button is pressed it will navigate to the located place.
By associating a meaningful name to a data range, you will be enhancing the readability of your document. These named ranges can be referenced in multiple locations of your document and within calculations and equations.
To define a name
- Highlight the cells you would like to name.
- Go to menu item: Formulas.
- In the Defined Names section, select the Define Name button.
- In the Name text box, enter the name for the data range
- In the Scope drop-down list, select scope within which the name can be referenced
- Select OK
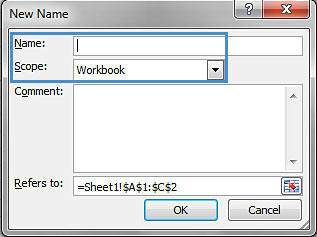
Technique 6. Create Accessible Charts
Charts can be used to make data more understandable for some audiences. However, it is important to ensure that your chart is as accessible as possible to all members of your audience. All basic accessibility considerations that are applied to the rest of your document must also be applied to your charts and the elements within your charts. For example, use shape and color, rather than color alone, to convey information. As well, some further steps should be taken to ensure that the contents are your chart are appropriate labeled to give users reference points that will help them to correctly interpret the information.
Editor’s note: For later versions of Excel, here’s a video on how to create accessible charts.
To create a chart
- Select the data that you want to include in the chart
- Go to menu item: Insert
- In the Charts section, select the icon of the type of chart you would like to insert
- Select a Chart Type from the Chart Gallery in the drop-down menu
To add titles and labels
- In the Chart Tools menu section, go to menu item: Layout
- In the Labels section, select the type of title or label you would like to define (e.g., Chart Title, Axis Titles, Data Labels)
Note: It is a good idea to use as many of the titles and labels available in this section as possible.
To apply a predefined Chart Layout
- In the Chart Tools menu section, go to menu item: Design
- In the Chart Layouts section, select a Quick Layout from the scrolling Chart Layouts gallery
To change to a different predefined Chart Type
- In the Chart Tools menu section, go to menu item: Design
- In the Type section, select the Change Chart Type icon
- In the Change Chart Type dialog, select a chart type from the left pane
- Select a Chart Design from the right pane
- Select OK
To apply alternative text to a chart
- Right-click* the chart
Note: Make sure you are right-clicking the whole chart, not just an element within the chart. It is possible to add descriptions to the many elements that make up a chart, but this is not recommended.
- In the Format Chart Area dialog, select Alt Text
- Enter a Title in the Title box
- Enter a longer description of the chart contents in the Description box
- Select Close
Other chart considerations
- When creating line charts, use the formatting options to create different types of dotted lines to facilitate legibility for users who are color blind
- Use the formatting options to change predefined colors, ensuring that they align with sufficient contrast requirements (see Technique 9, below)
Selecting charts with the keyboard:
You can select charts from selection pane.
This can be launched with keyboard sequence ALT+H,FD,P
- Press ALT+H and release the buttons

- Type press FD
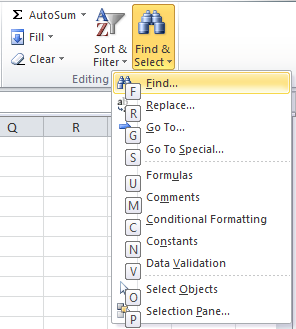
- Then Type P
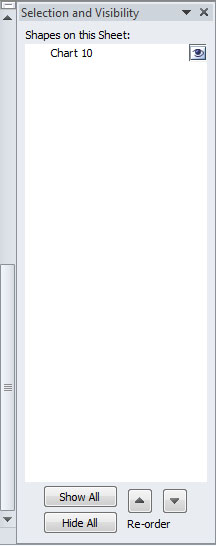
This is a toggle command, so if the selection pane is already visible, it gets hidden after this.
When the selection pane is active, by default the first object (chart or shape) will be highlighted. You can select it by pressing enter or tab to move to other options or use the arrow keys.
Technique 7. Provide Structure for Tables
Excel includes an “Insert Table” feature, but this works by applying cell formatting to spreadsheet cells. As such, it is not a structural feature in the same way that tables are in Word and PowerPoint.
Technique 8. Use Other Content Structuring Features
While cell formatting is the most common method of structuring documents, other content structuring features should be used where appropriate:
8.1 Document Title
In case the document is ever converted into HTML, it should be given a descriptive and meaningful title.
To change the title of the current document
- Go to menu item: File
- Select Info from the list in the left window pane
- In the right window pane, select the Title text box
- Enter the Title
Note: The Title defined in the properties is different than the file name. It is also unrelated to the template name, discussed above.
8.2 Avoid “Floating” Objects
Avoid placing drawing objects directly into the document (e.g., as borders, to create a diagram). Instead, create borders with page layout tools and insert complete graphical objects.
Technique 9. Make Content Easier to See
9.1 Format of Text
When formatting text, especially when the text is likely to printed, try to:
- Use font sizes between 12 and 18 points for cell contents.
- Use fonts of normal weight, rather than bold or light weight fonts. If you do choose to use bold fonts for emphasis, use them sparingly.
- Use standard fonts with clear spacing and easily recognized upper and lower case characters. Sans serif fonts (e.g., Arial, Verdana) may sometimes be easier to read than serif fonts (e.g., Times New Roman, Garamond).
- Avoid large amounts of text set all in caps, italic or underlined.
- Use normal or expanded character spacing, rather than condensed spacing.
- Avoid animated or scrolling text.
But can’t users just zoom in? Office applications do typically include accessibility features such as the ability to magnify documents and support for high contrast modes. However, because printing is an important aspect of many workflows and changing font sizes directly will change documents details such the pagination, the layout of tables, etc., it is best practice to always format text for a reasonable degree of accessibility.
To change the text size for a default named style
- Go to menu item: Home
- In the Styles section, select the Cell Styles icon
- Select the style to modify from the list
- Right-click* and select: Modify…
- In the Style dialog, select the Format button
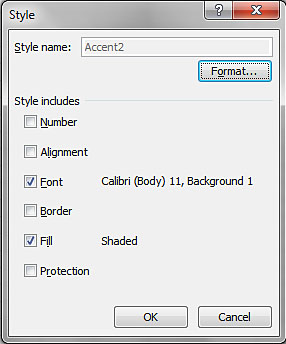
- In the Format Cells dialog, select the Font tab
- In the Size text box, type the desired size or select it from the list
- Select OK
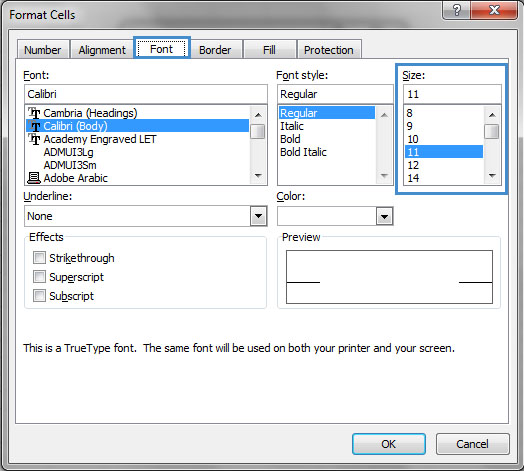
9.2 Use Sufficient Contrast
The visual presentation of text and images of text should have a contrast ration of at least 4.5:1. To help you determine the contrast, here are some examples on a white background:
- Very good contrast (Foreground=black, Background=white, Ratio=21:1)
- Acceptable contrast (Foreground=#767676, Background=white, Ratio=4.54:1)
- Unacceptable contrast (Foreground=#AAAAAA, Background=white, Ratio=2.32:1)
Also, always use a single solid color for a text background rather than a pattern. In order to determine whether the colors in your document have sufficient contrast, you can consult an online contrast checker, such as:
9.3 Avoid Using Color Alone
Color should not be used as the only visual means of conveying information, indicating an action, prompting a response, or distinguishing a visual element. In order to spot where color might be the only visual means of conveying information, you can create a screenshot of the document and then view it with online gray-scale converting tools, such as:
- GrayBit v2.0: Grayscale Conversion Contrast Accessibility Tool
Editor’s note: GrayBit v2.0 is no longer available. However, multiple tools can be found online: Google Search: gray-scale conversion tool.
9.4 Avoid Relying on Sensory Characteristics
The instructions provided for understanding and operating content should not rely solely on sensory characteristics such as the color or shape of content elements. Here are two examples:
- Do not track changes by simply changing the color of text you have edited and noting the color. Instead use Google docs: Spreadsheet’s review functionality features to track changes, such as revision history.
- Do not distinguish between images by referring to their appearance (e.g. “the bigger one”). Instead, label each image with a figure number and use that for references.
9.5 Avoid Using Images of Text
Before you use an image to control the presentation of text (e.g., to ensure a certain font or color combination), consider whether you can achieve the same result by styling “real text”. If this is not possible, as with logos containing stylized text, make sure to provide alternative text for the image following the techniques noted above.
Technique 10. Make Content Easier to Understand
10.1 Write Clearly
By taking the time to design your content in a consistent way, it will be easier to access, navigate and interpret for all users:
- Whenever possible, write clearly with short sentences.
- Introduce acronyms and spell out abbreviations.
- Avoid making the document too “busy” by using lots of whitespace and by avoiding too many different colors, fonts and images.
- If content is repeated on multiple pages within a document or within a set of documents (e.g., headings, footings, etc.), it should occur consistently each time it is repeated.
10.2 Navigational Instructions
Provide a general description of the spreadsheet contents and instructions on how to navigate the data effectively. The best way to do this is to make a cell at the beginning of the data (e.g., A1) with this information. It will be the first cell accessed by assistive technologies. For example, the first cell might read: “This worksheet includes two data tables. The first begins at cell A1 and lists travel expenses. The second begins at cell A50 and lists moving expenses.”
Technique 11. Check Accessibility
If you wish to check the accessibility of your document or template (see Technique 1, above), Excel offers an “Accessibility Checker” to review your document against a set of possible issues that users with disabilities may experience in your file.
The “Accessibility Checker” classifies issues as
- Error – content that makes a file very difficult or impossible for people with disabilities to understand
- Warning – content that in most, but not all, cases makes a file difficult for people with disabilities to understand
- Tip – content that people with disabilities can understand, but that might be better organized or presented in a way that would maximize their experience
To learn more about the Accessibility Checker and the rules it uses to identify and classify accessibility issues in your document, visit the Excel help section (see Accessibility Help, below). Use the search term “accessibility checker rules” in the help search box.
To use the “Accessibility Checker”
- Go to menu item: File
- Select Info in the left window pane
- Under Prepare for Sharing, an alert will appear if a potential accessibility issue has been detected
- To view and repair the issues, select Check for Issues and then Check Accessibility
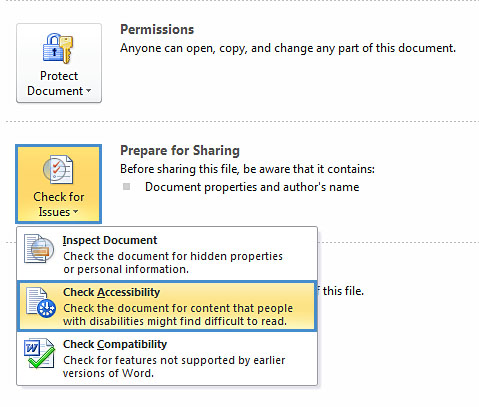
- An Accessibility Checker task pane will open, showing the inspection results
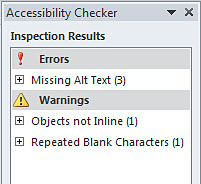
- Select a specific issue to see Additional Information
- Follow the steps provided to fix or revise the content
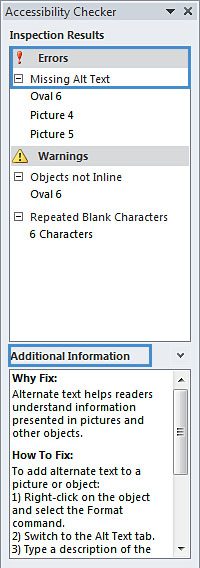
In order to get further indication of the accessibility of your document or template (see Technique 1), then you may consider saving the file into HTML or PDF in order to perform an accessibility check in one of those formats, as described below.
To evaluate HTML accessibility
Another option is to save the document into HTML format and use one of the web accessibility checkers available online. Such as:
To evaluate PDF accessibility
If you saved your document in tagged PDF format, you can use the following tools and steps to evaluate the accessibility of the PDF document:
To evaluate PDF accessibility in Adobe Acrobat Professional
- Go to menu item: Advanced > Accessibility > Full Check…
- In the Full Check dialog, select all the checking option
- Select the Start Checking button
Editor’s note: For detailed instructions, see our section on how to check accessibility using Adobe Acrobat Professional.
Technique 12. Use Accessibility Features when Saving/Exporting to Other Formats
In some cases, additional steps must be taken in order to ensure accessibility information is preserved when saving/exporting to formats other than the default.
PDF
PDF documents are not always accessible. Accessible PDF documents are often called “Tagged PDF” because they include “tags” that encode structural information required for accessibility. To evaluate the accessibility of your PDF document, see Technique 11 (above).
- Go to menu item: File
- Select Save As
- In the File name box, type a name for the file
- In the Save as type list, select PDF or XPS Document
- Select the Options button
- Under Include non-printing information in the Options dialog, ensure that the Document structure tags for accessibility check box is selected
- Select OK and Save
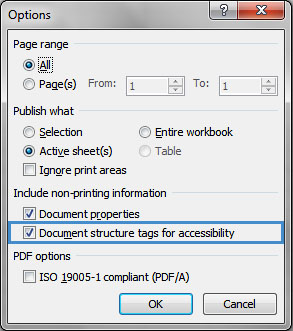
HTML
- Go to menu item: File
- Select Save As
- In the File name box, type a name for the file
- In the Save as type box, select Web Page
- Select Save
- Check the HTML file for accessibility (see Technique 11, above)
To clean up your HTML file
- Remove unnecessary styles, line breaks, etc.
- Remove unnecessary id, class, and attributes
- Remove font tags
- Remove styles in the <head> tag
- Ensure the <th> tags have a scope attribute
- Remove <p> tags nested inside <th> and <td> tags
- Check for accessibility (see Technique 11, above)
Note: you may wish to use HTML editors or utilities to help with this process.
Technique 13. Consider Using Accessibility Support Applications/Plugins
Disclaimer: This list is provided for information purposes only. It is not exhaustive and inclusion of an application or plug-in on the list does not constitute a recommendation or guarantee of results.
Accessibility Help
If you are interested in what features are provided to make using Excel more accessible to users, documentation is provided in the Help system:
- Go to menu item: File
- Select Help from the list on the left
- Under the Support section, select the Help icon
- Enter “Accessibility” as your search term in the Help dialog box
Editor’s note: For later versions of Excel, here are resources to help you create accessible workbooks.
References and Resources
- Microsoft Excel Help
- GAWDS Writing Better Alt Text
- Microsoft: Create Accessible Workbooks
- Ryerson University: Microsoft Excel Accessibility Tipsheet (PDF)
- Microsoft Excel: Video Tutorials
Acknowledgments
This document was produced as part of theAccessible Digital Office Document (ADOD) Project).
This project has been developed by the Inclusive Design Research Centre, OCAD University as part of an EnAbling Change Partnership project with the Government of Ontario and UNESCO (United Nations Educational, Scientific and Cultural Organization).
Source: Authoring Techniques for Accessible Office Documents: Microsoft Excel 2010 by the Inclusive Design Research Centre (IDRC) used under CC-BY-SA 3.0.
Microsoft Excel for Mac 2008, 2011, 2016, and 2019
13
Usage Notes
At the time of testing (December 2019), as long as images and graphical objects are avoided, Excel for Mac provides a set of accessibility features that is sufficient to enable the production of accessible digital office documents. However, Excel 2008 for Mac does not include an accessibility checking feature.
Editor’s note: In the later versions of Excel for Mac, users can add alt text for images and graphical objects and check accessibility. For more information, see Excel for Mac Help.
What’s an “Office Document”?
You should use these techniques when you are using Excel for Mac to create documents that are:
- Intended to be used by people (i.e., not computer code),
- Text-based (i.e., not simply images, although they may contain images),
- Fully printable (i.e., where dynamic features are limited to automatic page numbering, table of contents, etc. and do not include audio, video, or embedded interactivity),
- Self-contained (i.e., without hyperlinks to other documents, unlike web content), and
- Typical of office-style workflows (Reports, letters, memos, budgets, presentations, etc.).
If you are creating forms, web pages, applications, or other dynamic and/or interactive content, these techniques will still be useful to you, but you should also consult the W3C-WAI Web Content Accessibility Guidelines (WCAG 2.0) because these are specifically designed to provide guidance for highly dynamic and/or interactive content.
File Formats
The default file format for Excel for Mac is Office Open XML (XLSX).
In addition, Excel for Mac offers many other spreadsheet processor and web format saving options. Most of these have not been checked for accessibility, but some information and/or instructions are available for the following formats in Technique 12 (below):
- XLS (MS Excel 97 – 2004)
- HTML
Document Conventions
We have tried to formulate these techniques so that they are useful to all authors, regardless of whether they use a mouse. However, for clarity there are several instances where mouse-only language is used. Below are the mouse-only terms and their keyboard alternatives:
*Right-click: To right-click with the keyboard, select the object using the Shift+Arrow keys and then press either (1) the “Right-Click” key (some keyboard have this to the right of the spacebar) or Shift+F10.
Disclaimer and Testing Details:
Following these techniques will increase the accessibility of your documents, but it does not guarantee accessibility to any specific disability groups. In cases where more certainty is required, it is recommended that you test the office documents with end users with disabilities, including screen reader users.
The application-specific steps and screenshots in this document were created using Microsoft Excel 2008 for Mac (ver. 12.0 (071130), Mac OS X, Jan. 2011) and Microsoft Excel (version 16.16.16) while creating a XLSX document. Files are also easily saved as other file formats (see Technique 12, below).
This document is provided for information purposes only and is neither a recommendation nor a guarantee of results. If errors are found, please report them to: adod-comments@idrc.ocad.ca.
Technique 1. Use Accessible Templates
All office documents start with a template, which can be as simple as a blank standard-sized page or as complex as a nearly complete document with text, graphics and other content. For example, a “Meeting Minutes” template might include headings for information relevant to a business meeting, such as “Actions” above a table with rows to denote time and columns for actions of the meeting.
Because templates provide the starting-point for so many documents, accessibility is critical. If you are unsure whether a template is accessible, you should check a sample document produced when the template is used (see Accessibility Checking, below).
Excel for Mac’s default template for new documents is a blank page. The basic installation also includes other blank office-related documents. These are all accessible by virtue of being blank.
It is possible to create your own accessible templates from scratch in Excel for Mac. As well, you can edit and modify the existing prepackaged templates, ensuring their accessibility as you do so and saving them as a new template.
To create an accessible template
- Create a new document
- Ensure that you follow the techniques in this document
- When you are finished you should also check the accessibility of the document (see Technique 10, below)
- Go to menu item: File > Save As
- In the Save As box, type a name for the template. Using a descriptive file name (e.g., “Accessible Inventory Template”) will increase the prominence of the accessibility status.
- In the Format list, select Excel 97–2004 Template (.xlt)
- Select Save
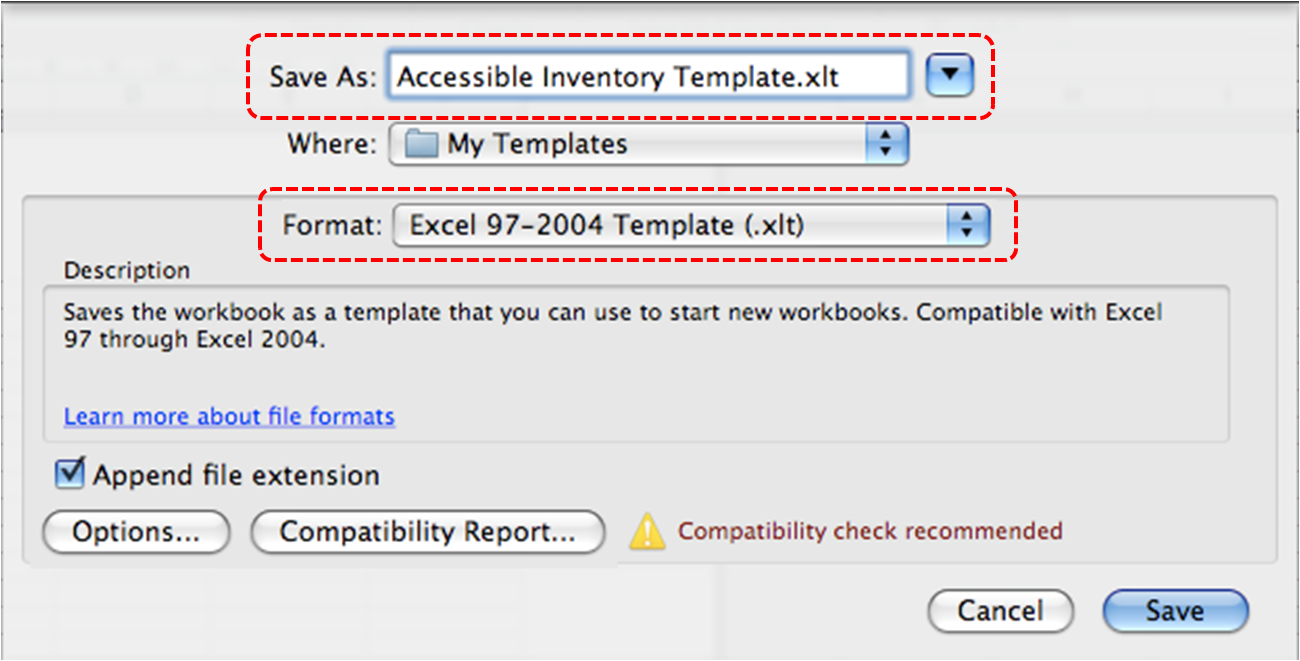
To select an accessible template
Note: Only use these steps if you have an accessible template available (e.g., that you previously saved). Otherwise, simply open a new (blank) document.
- Go to menu item: File > Project Gallery…
- In the Category section, select My Templates (or select where you saved your accessible template)
- Select your accessible template from the template gallery
- Select Open
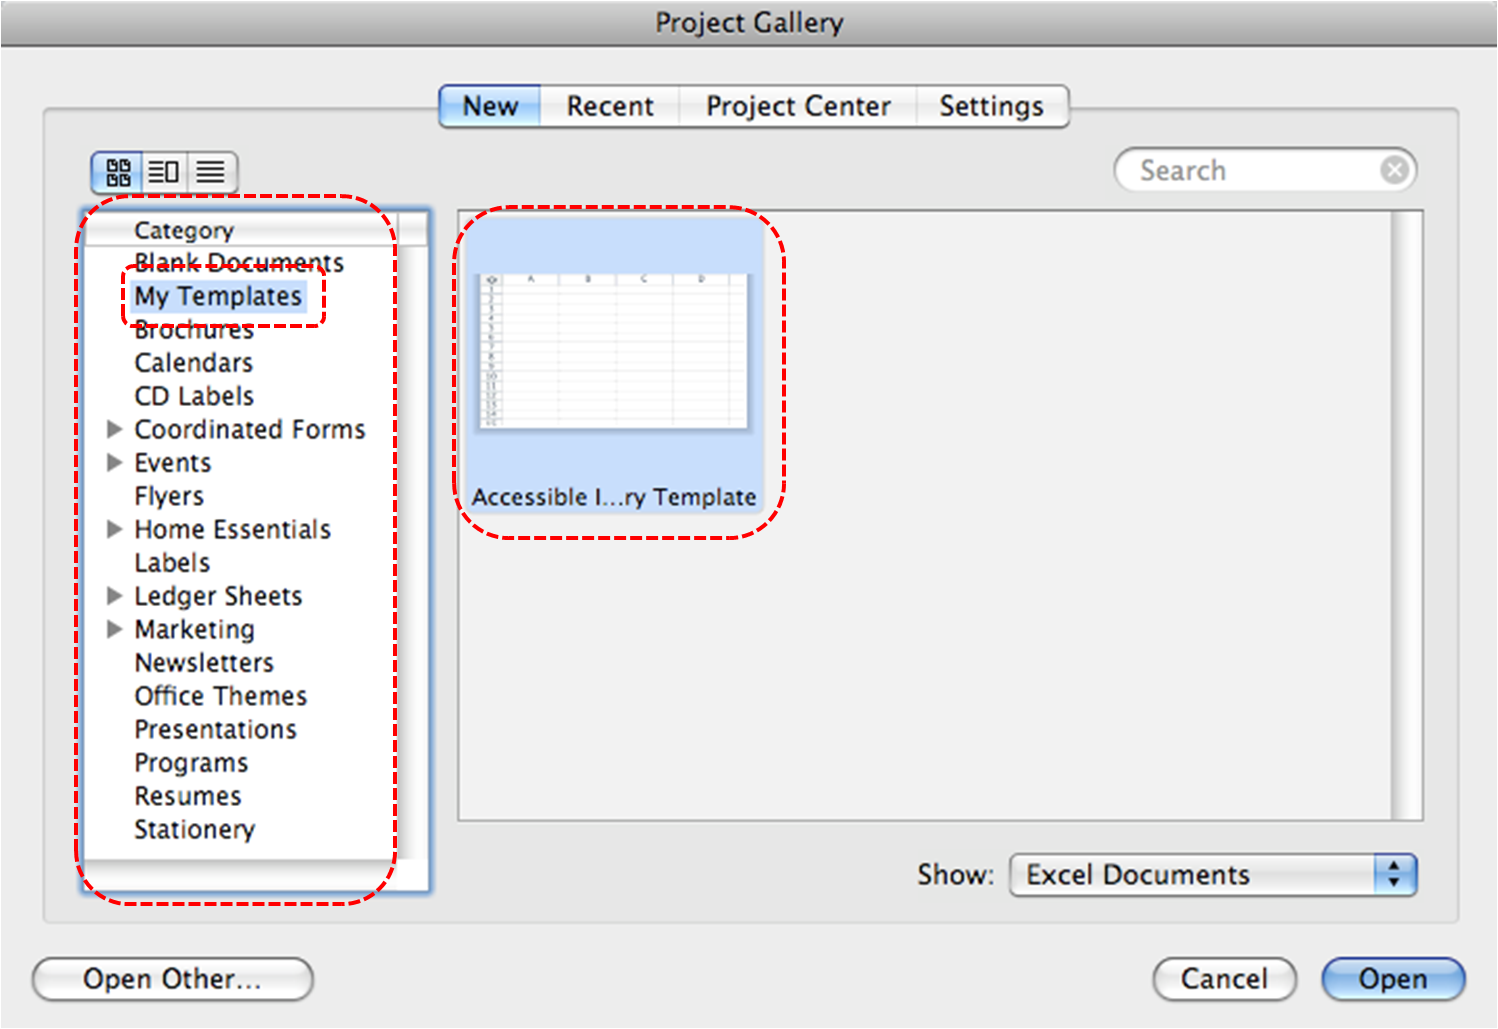
- A new document based on the template will be displayed. If you have chosen an accessible template, the document will be accessible at this point. As you add your content (e.g., text, images, etc.), ensure that you consult the sections that follow to preserve accessibility.
Technique 2. Set Document Language
At this time, it is not possible to indicate the natural language of selected cells within an Excel for Mac workbook. As well, it is not possible to change the default language of an Excel for Mac workbook.
In order for assistive technologies (e.g., screen readers) to be able to present your document accurately, it is important to indicate the natural language of the document. If a different natural language is used for a paragraph or selected text, this also needs to be clearly indicated.
Technique 3. Provide Text Alternatives for Images and Graphical Objects
At this time, Excel 2008 for Mac does not offer the functionality of adding alternative text to images or graphical objects.
Editor’s note: For later versions of Excel for Mac, users can add alt text. For more information, see how to add alt text for images and graphical objects.
When using images or other graphical objects, such as charts and graphs, it is important to ensure that the information you intend to convey by the image is also conveyed to people who cannot see the image. This can be accomplished by adding concise alternative text to of each image. If an image is too complicated to concisely describe in the alternative text alone (artwork, flowcharts, etc.), provide a short text alternative and a longer description as well.
Tips for writing alternative text
- Try to answer the question “what information is the image conveying?”
- If the image does not convey any useful information, leave the alternative text blank
- If the image contains meaningful text, ensure all of the text is replicated
- Alternative text should be fairly short, usually a sentence or less and rarely more than two sentences
- If more description is required (e.g., for a chart or graph), provide a short description in the alternative text (e.g., a summary of the trend) and more detail in the long description, see below
- Test by having others review the document with the images replaced by the alternative text
Tips for writing longer descriptions
- Long descriptions should be used when text alternatives (see above) are insufficient to answer the question “what information is the image conveying?”
- In some situations, the information being conveyed will be how an image looks (e.g., an artwork, architectural detail, etc.). In these cases, try to describe the image without making too many of your own assumptions.
- One approach is to imagine you are describing the image to a person over the phone
- Ensure that you still provide concise alternative text to help readers decide if they are interested in the longer description
Alternatively, you can include the same information conveyed by the image within the body of the document, providing the images as an alternate to the text. In that case, you do not have to provide alternate text within the image.
To add alternative text to images and graphical objects
- Select the object, then choose one of the options below:
- Right-click the object and select Edit Alt Text…. The Alt Text pane opens.
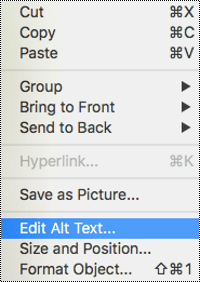
- Note: If the Edit Alt Text… option is not visible, select Format Object/Picture.
- Alternately, select an object. In the menu, select the object’s Format tab. Then, select Alt Text.
- In the Alt Text pane, add the alternative text to the Description field.
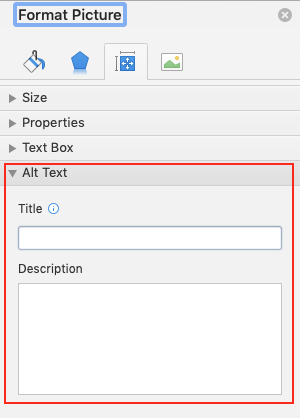
Technique 4. Format Your Cells
As you begin adding content, your spreadsheet will require structuring to bring meaning to the data, make it easier to navigate, and help assistive technologies read it accurately. One of the easiest ways to do this is to ensure that you properly format the cells.
4.1 Named Styles
At this time, Excel for Mac does not offer a Named Styles feature.
You should make use of the named styles that are included with the office application (e.g., “Heading”, “Result”, etc.) before creating your own styles or using the character formatting tools directly. Named styles help your readers understand why something was formatted in a given way, which is especially helpful when there are multiple reasons for the same formatting (e.g., it is common to use italics for emphasis, Latin terms and species names).
For more information on formatting using named styles, see Technique 9.
Note: While office application suites support headings in much the same way, the named styles often differ.
Formatting header and result cells brings order to the spreadsheet and makes it easier for users to navigate effectively. For example, you can format header rows and columns using “Heading” styles to apply bolded, enlarged, and italicized text (among other characteristics). You may also want to format cells containing results of calculations to appear bold and underlined to help distinguish them from the rest of your data.
4.2 Other Cell Characteristics
Ensure your cells are formatted to properly represent your data, including number and text attributes.
To format cell characteristics
- Highlight the cells that you want to format
- Go to menu item: Format > Cells…
- In the relevant sections (e.g., Numbers, Alignment, etc.) make your adjustments
Note: When formatting your spreadsheet, it is best to avoid merging cells. At times, it may seem easier to present your data by merging cells, but this can make it more difficult for users of assistive technologies and people navigating your spreadsheet using the keyboard.
Technique 5. Use Cell Addressing
5.1 Define Names
Naming the different data ranges within your spreadsheet makes it easier to navigate through the document and find specific information. By associating a meaningful name to a data range, you will be enhancing the readability of your document. These named ranges can be referenced in multiple locations of your document and within calculations and equations.
To define a name
- Highlight the cells you would like to name
- Go to menu item: Insert > Name > Define…
- In the Define Name dialog, enter the name for the data range in the Names in workbook text box
- Select Add
- Select OK
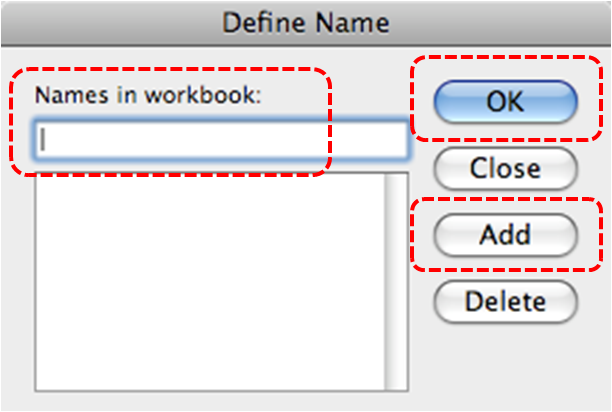
Technique 6. Create Accessible Charts
Charts can be used to make data more understandable for some audiences. However, it is important to ensure that your chart is as accessible as possible to all members of your audience. All basic accessibility considerations that are applied to the rest of your document must also be applied to your charts and the elements within your charts. For example, use shape and color, rather than color alone, to convey information. As well, some further steps should be taken to ensure that the contents are your chart are appropriate labeled to give users reference points that will help them to correctly interpret the information.
To create a chart
- Select the data that you want to include in the chart
- Go to menu item: Insert > Chart…
- Select your chart type from the Charts section that opens above the document pane
Note: This applies a predefined Chart Layout, which can be changed at any time simply by selecting the chart and following Steps 2 and 3 above.
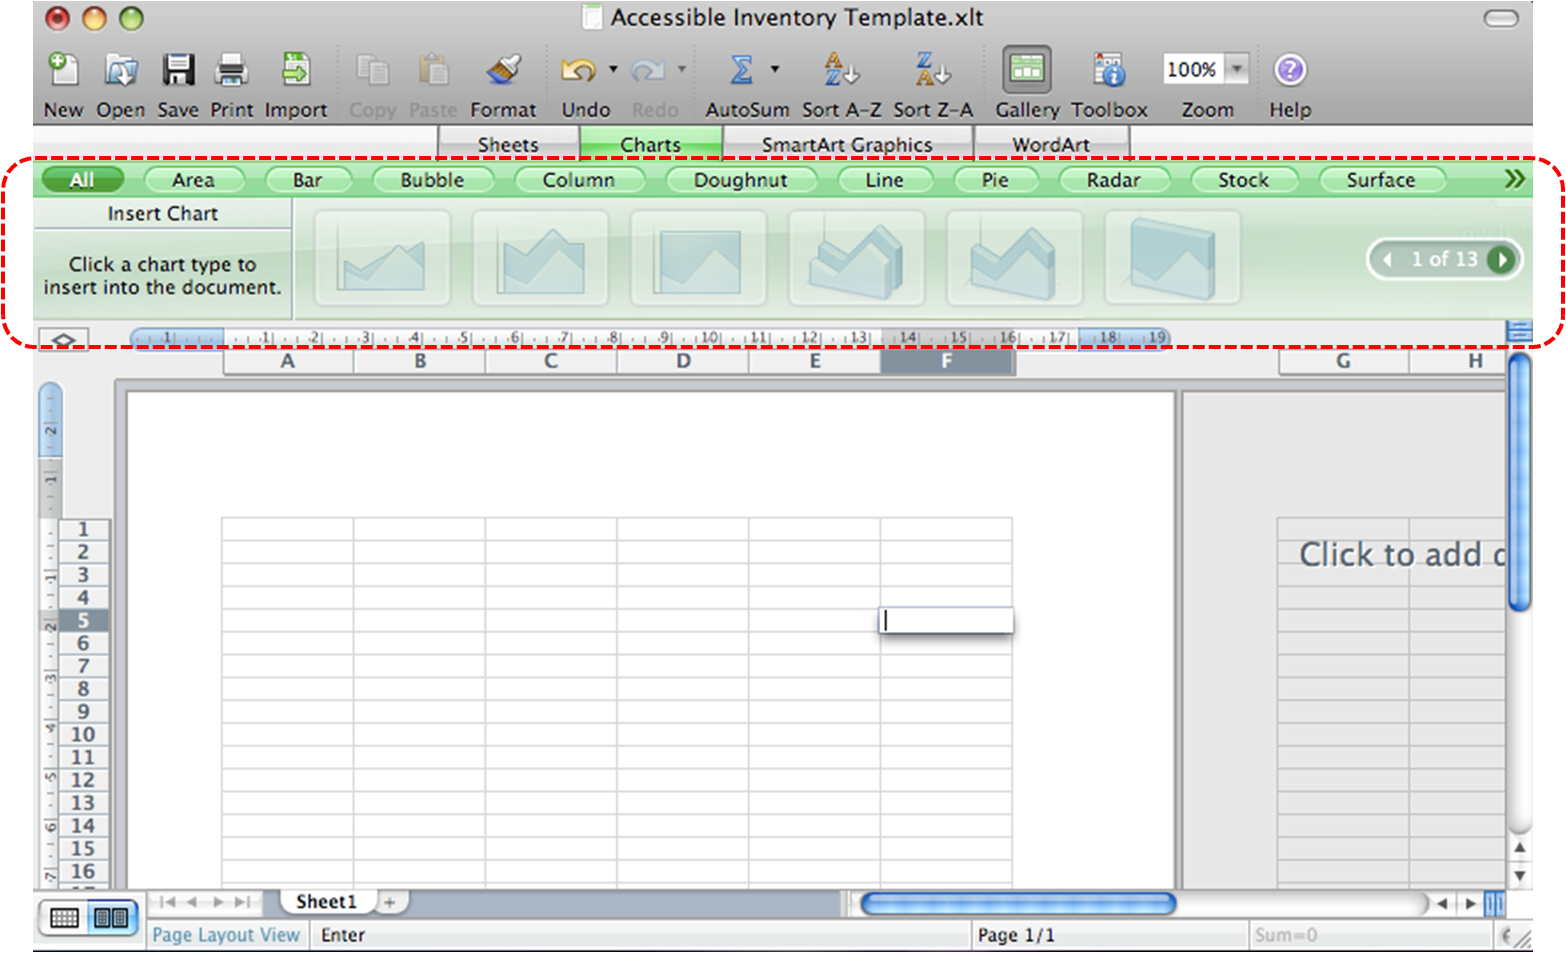
To add titles and labels
- Select the chart
- If the Formatting Palette is not open, go to menu item: View > Toolbox, Formatting Palette
- Select Chart Options to open the Chart Options section, if it is not already open
- Under Titles, select the title from the Chart Title drop-down list or enter a title in the text box below the drop-down list
- Under Other options, select the Labels and Legends you would like to include from their respective drop-down lists
- Under Chart Data, select Data Table with Legend Keys from the Data Table drop-down list to include a data table to help further support the chart
Note: It is a good idea to use as many of the titles and labels as possible.
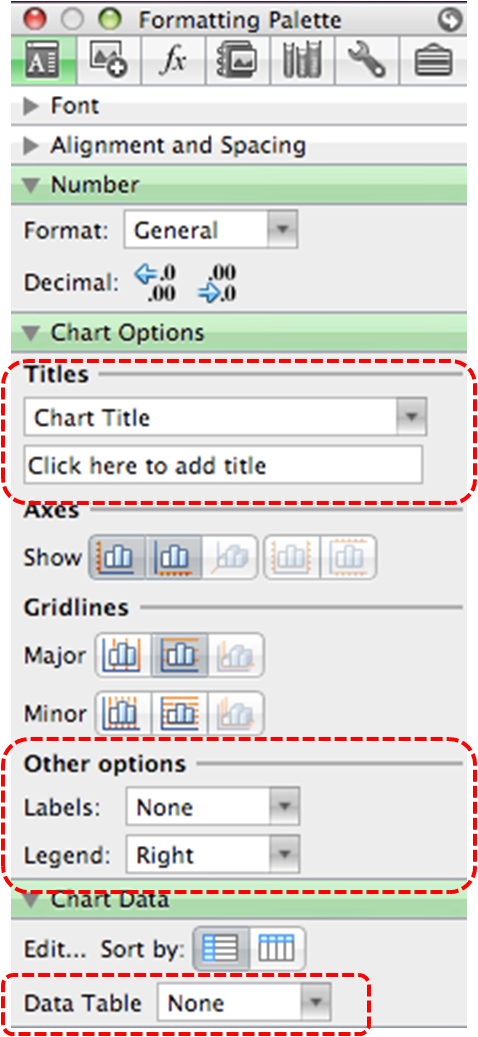
Other Chart Considerations
- When creating line charts, use the formatting options to create different types of dotted lines to facilitate legibility for users who are color blind
- Change the default colors to a color safe or gray-scale palette
- Use the formatting options to change predefined colors, ensuring that they align with sufficient contrast requirements (see Technique 9, below)
Technique 7. Provide Structure for Tables
Excel for Mac includes a “Data Table” feature, but this meant for analyzing data by applying preformatted formulas within the data table. As such, it is not a structural feature in the same way that tables are in Word.
Technique 8. Use Other Content Structuring Features
While cell formatting is the most common method of structuring documents, other content structuring features should be used where appropriate:
8.1 Document Title
In case the document is ever converted into HTML, it should be given a descriptive and meaningful title.
To change the title of the current document
- Go to menu item: File > Properties…
- Select Summary
- In the Title text box and enter the Title
Note: The Title defined in the properties is different than the file name. It is also unrelated to the template name, discussed above.
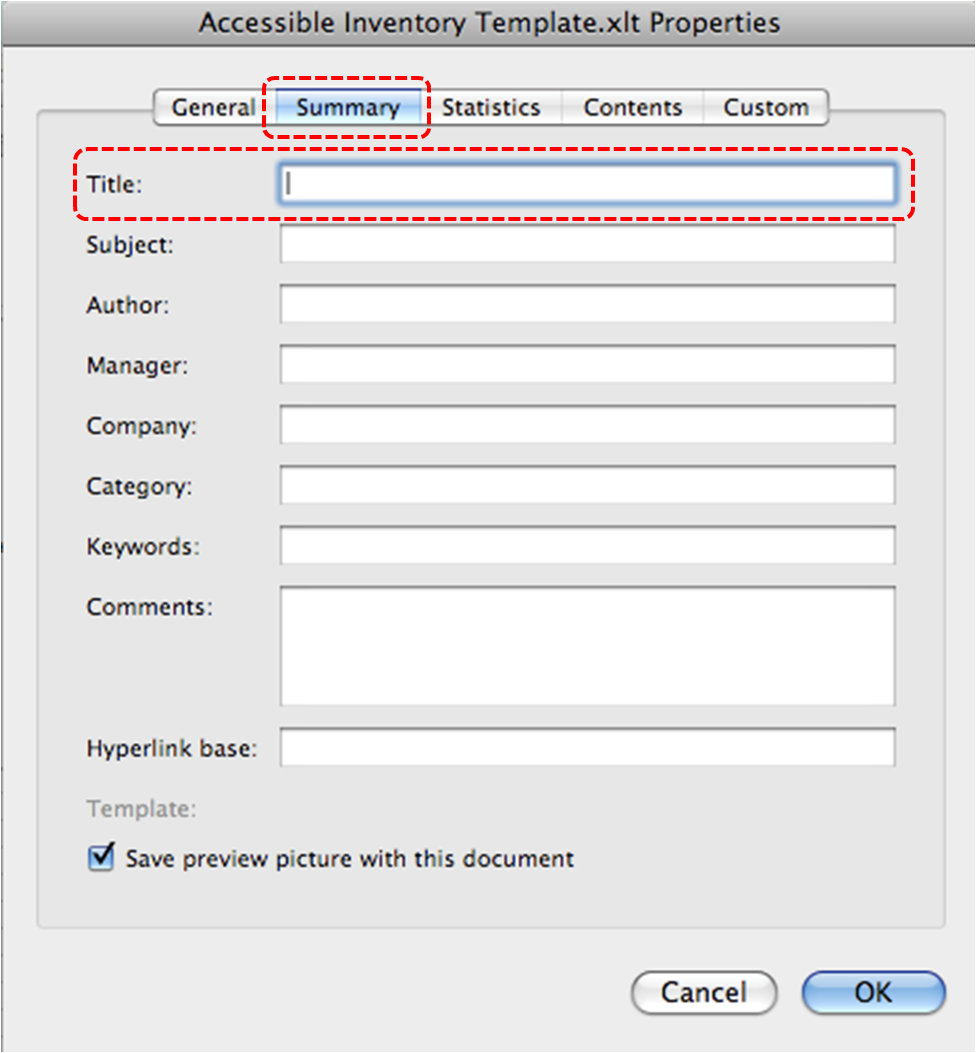
8.2 Avoid “Floating” Elements
Avoid “floating” elements (other than charts) such as floating images, objects, tables or text boxes.
Similarly, avoid placing drawing objects directly into the document (e.g., as borders, to create a diagram). Instead, create borders with page layout tools and insert complete graphical objects.
Technique 9. Make Content Easier to See
9.1 Format of Text
When formatting text, especially when the text is likely to printed, try to:
- Use font sizes between 12 and 18 points for cell contents.
- Use fonts of normal weight, rather than bold or light weight fonts. If you do choose to use bold fonts for emphasis, use them sparingly.
- Use standard fonts with clear spacing and easily recognized upper and lower case characters. Sans serif fonts (e.g., Arial, Verdana) may sometimes be easier to read than serif fonts (e.g., Times New Roman, Garamond).
- Avoid large amounts of text set all in caps, italic or underlined.
- Use normal or expanded character spacing, rather than condensed spacing.
- Avoid animated or scrolling text.
But can’t users just zoom in? Office applications do typically include accessibility features such as the ability to magnify documents and support for high contrast modes. However, because printing is an important aspect of many workflows and changing font sizes directly will change documents details such the pagination, the layout of tables, etc., it is best practice to always format text for a reasonable degree of accessibility.
9.2 Use Sufficient Contrast
The visual presentation of text and images of text should have a contrast ration of at least 4.5:1. To help you determine the contrast, here are some examples on a white background:
- Very good contrast (Foreground=black, Background=white, Ratio=21:1)
- Acceptable contrast (Foreground=#767676, Background=white, Ratio=4.54:1)
- Unacceptable contrast (Foreground=#AAAAAA, Background=white, Ratio=2.32:1)
Also, always use a single solid color for a text background rather than a pattern.
In order to determine whether the colors in your document have sufficient contrast, you can consult an online contrast checker, such as:
9.3 Avoid Using Color Alone
Color should not be used as the only visual means of conveying information, indicating an action, prompting a response, or distinguishing a visual element. In order to spot where color might be the only visual means of conveying information, you can create a screenshot of the document and then view it with online gray-scale converting tools, such as:
- GrayBit v2.0: Grayscale Conversion Contrast Accessibility Tool
Editor’s note: GrayBit v2.0 is no longer available. However, multiple tools can be found online: Google Search: gray-scale conversion tool.
9.4 Avoid Relying on Sensory Characteristics
The instructions provided for understanding and operating content should not rely solely on sensory characteristics such as the color or shape of content elements. Here are two examples:
- Do not track changes by simply changing the color of text you have edited and noting the color. Instead use Excel for Mac’s “Track Changes” features to track changes.
- Do not distinguish between images by referring to their appearance (e.g., “the bigger one”). Instead, label each image with a figure number and use that for references.
9.5 Avoid Using Images of Text
Before you use an image to control the presentation of text (e.g., to ensure a certain font or color combination), consider whether you can achieve the same result by styling “real text”. If this is not possible, as with logos containing stylized text, make sure to provide alternative text for the image following the techniques noted above.
Technique 10. Make Content Easier to Understand
10.1 Write Clearly
By taking the time to design your content in a consistent way, it will be easier to access, navigate and interpret for all users:
- Whenever possible, write clearly with short sentences.
- Introduce acronyms and spell out abbreviations.
- Avoid making the document too “busy” by using lots of white space and by avoiding too many different colors, fonts and images.
- If content is repeated on multiple pages within a document or within a set of documents (e.g., headings, footings, etc.), it should occur consistently each time it is repeated.
10.2 Navigational Instructions
Provide a general description of the spreadsheet contents and instructions on how to navigate the data effectively. The best way to do this is to make a cell at the beginning of the data (e.g., A1) with this information. It will be the first cell accessed by assistive technologies. If you are using this cell for a label or data, you can attach a comment note to the cell containing navigational instructions.
Technique 11. Check Accessibility
At this time, Excel 2008 for Mac does not offer a mechanism to check for potential accessibility errors in your document prior to publishing.
Editor’s note: Later versions of Excel for Mac include an accessibility checker. For detailed instructions about how to use the accessibility checker, see how to make your Excel documents accessible to people with disabilities.
In order to get some indication of the accessibility of your document or template (see Technique 1), then you may consider saving the file into HTML in order to perform an accessibility check in one of those formats, as described below.
To evaluate HTML accessibility
Another option is to save the document into HTML format and use one of the web accessibility checkers available online. Such as:
To evaluate PDF accessibility
If you saved your document in tagged PDF format, you can use the following tools and steps to evaluate the accessibility of the PDF document:
To evaluate PDF accessibility in Adobe Acrobat Professional
- Go to menu item: Advanced > Accessibility > Full Check…
- In the Full Check dialog, select all the checking option.
- Select the Start Checking button.
Editor’s note: For detailed instructions, see our section on how to check accessibility using Adobe Acrobat Professional.
Technique 12. Use Accessibility Features when Saving/Exporting to Other Formats
In some cases, additional steps must be taken in order to ensure accessibility information is preserved when saving/exporting to formats other than the default.
Note: Before saving in other formats, you may want to run the Compatibility Report feature by selecting Compatibility Report… from the Save As dialog. This checks the compatibility of your existing document with the format you have selected save your document as. The results of this check are revealed in the Compatibility Report dialog, where you have explanations of errors and options to fix them. To run this check at any time, go to menu item: View > Toolbox, Compatibility Report.
XLS
- Go to menu item: File > Save As…
- In the Save As box, type a name for the file
- In the Format drop-down list, select Excel 97 – 2004 Workbook (.xls)
- Select Save
HTML
- Go to menu item: File > Save as Web Page…
- In the Save As box, type a name for the file
- Select Save
- Check the HTML file for accessibility (see Technique 11, above)
To clean up your HTML file
- Remove unnecessary styles, line breaks, etc.
- Remove unnecessary id, class, and attributes
- Remove font tags
- Remove styles in the <head> tag
- Ensure the <th> tags have a scope attribute
- Remove <p> tags nested inside <th> and <td> tags
- Check for accessibility (see Technique 11, above)
Note: you may wish to use HTML editors or utilities to help with this process.
Technique 13. Consider Using Accessibility Support Applications/Plugins
Disclaimer: This list is provided for information purposes only. It is not exhaustive and inclusion of an application or plug-in on the list does not constitute a recommendation or guarantee of results by the IDRC.
Accessibility Help
If you are interested in what features are provided to make using Excel for Mac more accessible to users, documentation is provided in the Help system:
- Go to menu item: Help > Microsoft Excel Help
- Enter “Accessibility” as your search term in the Help dialog box
To use the accessibility checker in Word for Mac
- Select Review > Check Accessibility.

- Review the results in the Accessibility Checker pane.
- Select a specific issue to see why and how to address the items flagged in the Accessibility Checker results.
For more information, see the following resources from Microsoft:
References and Resources
- Microsoft Excel 2008 for Mac Help — Note: Excel 2008 for Mac is no longer supported, but you still have access to offline help by going to Help > Excel Help.
- GAWDS Writing Better Alt Text
- Microsoft Excel 2016 for Mac Help
- Ryerson University: Microsoft Excel Accessibility Tipsheet (PDF)
- Microsoft Excel: Video Tutorials
Acknowledgments
Authors: Jan Richards, Sabrina Ruplall
This document was produced as part of the Accessible Digital Office Document (ADOD) Project.
This project has been developed by the Inclusive Design Research Centre, OCAD University as part of an EnAbling Change Partnership project with the Government of Ontario and UNESCO (United Nations Educational, Scientific and Cultural Organization).
Source: Authoring Techniques for Accessible Office Documents: Excel 2008 for Mac by the Inclusive Design Research Centre (IDRC) used under CC-BY-SA 3.0.
Usage Notes
At the time of testing (January 10, 2011), Excel 2007 provides a set of accessibility features that is sufficient to enable the production of accessible digital office documents. However, Excel 2007 does not include an accessibility checking feature.
What’s an “Office Document”?
You should use these techniques when you are using Excel 2007 to create documents that are:
- Intended to be used by people(i.e., not computer code),
- Text-based (i.e., not simply images, although they may contain images),
- Fully printable (i.e., where dynamic features are limited to automatic page numbering, table of contents, etc. and do not include audio, video, or embedded interactivity),
- Self-contained (i.e., without hyperlinks to other documents, unlike web content), and
- Typical of office-style workflows (Reports, letters, memos, budgets, presentations, etc.).
If you are creating forms, web pages, applications, or other dynamic and/or interactive content, these techniques will still be useful to you, but you should also consult the W3C-WAI Web Content Accessibility Guidelines (WCAG 2.0) because these are specifically designed to provide guidance for highly dynamic and/or interactive content.
File Formats
The default file format for Excel 2007 is Office Open XML (XLSX).
In addition, Excel 2007 offers many other spreadsheet processor and web format saving options. Most of these have not been checked for accessibility, but some information and/or instructions are available for the following formats in Technique 12 (below):
Document Conventions
We have tried to formulate these techniques so that they are useful to all authors, regardless of whether they use a mouse. However, for clarity there are several instances where mouse-only language is used. Below are the mouse-only terms and their keyboard alternatives:
- *Right-click: To right-click with the keyboard, select the object using the Shift+Arrow keys and then press either (1) the “Right-Click” key (some keyboard have this to the right of the spacebar) or Shift+F10.
Disclaimer and Testing Details:
Following these techniques will increase the accessibility of your documents, but it does not guarantee accessibility to any specific disability groups. In cases where more certainty is required, it is recommended that you test the office documents with end users with disabilities, including screen reader users. The application-specific steps and screenshots in this document were created using Microsoft Excel 2007 (ver.12.0.6545.5000, Windows 7, Jan. 2011) while creating a XLSX document. Files are also easily saved as other file formats (see Technique 12, below).
This document is provided for information purposes only and is neither a recommendation nor a guarantee of results. If errors are found, please report them to: adod-comments@idrc.ocad.ca.
Technique 1. Use Accessible Templates
All office documents start with a template, which can be as simple as a blank standard-sized page or as complex as a nearly complete document with text, graphics and other content. For example, a “Meeting Minutes” template might include headings for information relevant to a business meeting, such as “Actions” above a table with rows to denote time and columns for actions of the meeting.
Because templates provide the starting-point for so many documents, accessibility is critical. If you are unsure whether a template is accessible, you should check a sample document produced when the template is used (see Technique 11, below).
Excel 2007’s default template for new documents is a blank page. The basic installation also includes other blank office-related documents. These are all accessible by virtue of being blank.
It is possible to create your own accessible templates from scratch in Excel 2007. As well, you can edit and modify the existing prepackaged templates, ensuring their accessibility as you do so and saving them as a new template.
To create an accessible template
- Create a new document
- Ensure that you follow the techniques in this document
- When you are finished you should also check the accessibility of the document (see Technique 11, below)
- Go to menu item: Office > Save As > Other Formats
- In the Save as type list, select Excel Template
- In the File name box, type a name for the template. Using a descriptive File name (e.g., “Accessible Inventory Template”) will increase the prominence of the accessibility status. As well, filling in the text box labeled Tags with the term “accessibility” will improve its searchability as an accessible file.
- Select Save
To select an accessible template
Note: Only use these steps if you have an accessible template available (e.g. that you previously saved). Otherwise, simply open a new (blank) document.
- Go to menu item: Office > New
- Under Templates, select My templates…
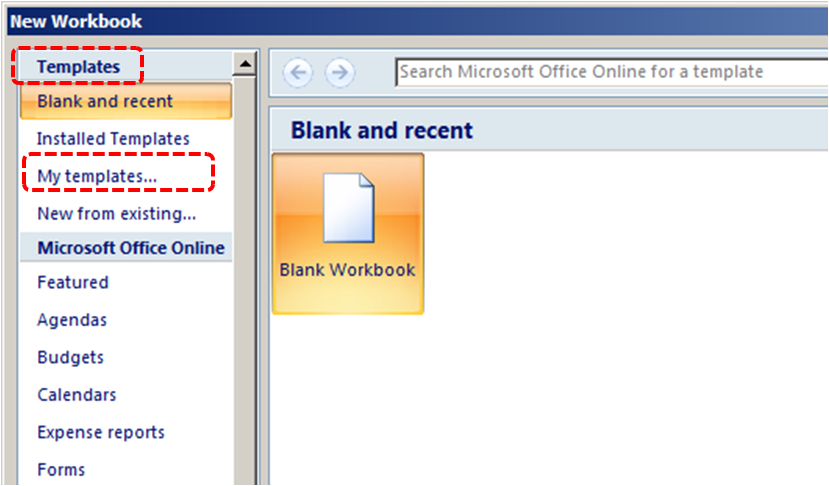
- In the New document dialog, select your accessible template from the list
- Select OK
- A new document based on the template will be displayed. If you have chosen an accessible template, the document will be accessible at this point. As you add your content (e.g., text, images, etc.), ensure that you consult the sections that follow to preserve accessibility.
Technique 2. Set Document Language
In order for assistive technologies (e.g., screen readers) to be able to present your document accurately, it is important to indicate the natural language of the document. If a different natural language is used for a paragraph or selected text, this also needs to be clearly indicated.
At this time, it is not possible to indicate the natural language of selected cells within an Excel 2007 workbook. [Tested: Jan 10, 2011]
To change the default language for a workbook
- In the operating system, activate the keyboard layout for the language in which you want to create and edit text
Technique 3. Provide Text Alternatives for Images and Graphical Objects
When using images or other graphical objects, such as charts and graphs, it is important to ensure that the information you intend to convey by the image is also conveyed to people who cannot see the image. This can be accomplished by adding concise alternative text to of each image. If an image is too complicated to concisely describe in the alternative text alone (artwork, flowcharts, etc.), provide a short text alternative and a longer description as well.
Tips for writing alternative text
- Try to answer the question “what information is the image conveying?”
- If the image does not convey any useful information, leave the alternative text blank
- If the image contains meaningful text, ensure all of the text is replicated
- Alternative text should be fairly short, usually a sentence or less and rarely more than two sentences
- If more description is required (e.g., for a chart or graph), provide a short description in the alternative text (e.g., a summary of the trend) and more detail in the long description, see below
- Test by having others review the document with the images replaced by the alternative text
Tips for writing longer descriptions
- Long descriptions should be used when text alternatives (see above) are insufficient to answer the question “what information is the image conveying?”
- In some situations, the information being conveyed will be how an image looks (e.g., an artwork, architectural detail, etc.). In these cases, try to describe the image without making too many of your own assumptions.
- One approach is to imagine you are describing the image to a person over the phone
- Ensure that you still provide concise alternative text to help readers decide if they are interested in the longer description
Alternatively, you can include the same information conveyed by the image within the body of the document, providing the images as an alternate to the text. In that case, you do not have to provide alternate text within the image.
To add alternative text to images and graphical objects
- Right-click* the object
- Select Size…
- Select the Alt Text tab
- Fill in the Alternative text box
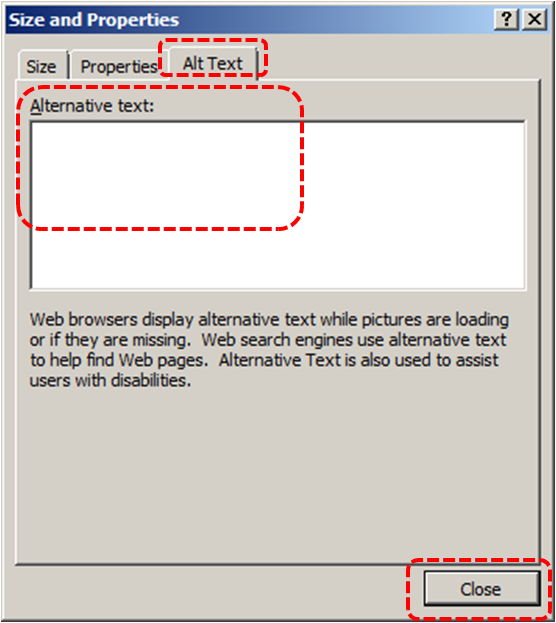
Technique 4. Format Your Cells
As you begin adding content, your spreadsheet will require structuring to bring meaning to the data, make it easier to navigate, and help assistive technologies read it accurately. One of the easiest ways to do this is to ensure that you properly format the cells.
4.1 Named Styles
You should make use of the named styles that are included with the office application (e.g., “Heading”, “Result”, etc.) before creating your own styles or using the character formatting tools directly. Named styles help your readers understand why something was formatted in a given way, which is especially helpful when there are multiple reasons for the same formatting (e.g., it is common to use italics for emphasis, Latin terms and species names). For more information on formatting using named styles, see Technique 9.
Note: While office application suites support headings in much the same way, the named styles often differ.
Formatting header and result cells brings order to the spreadsheet and makes it easier for users to navigate effectively. For example, you can format header rows and columns using “Heading” styles to apply bolded, enlarged, and italicized text (among other characteristics). You may also want to format cells containing results of calculations to appear bold and underlined to help distinguish them from the rest of your data.
To format a cell with default named styles
- Highlight the cells that you want to format
Note: to apply a style to an entire row or column, select the row or column indicator and follow the next steps
- Go to menu item: Home
- In the Styles section, select the Cell Styles icon
- Select the desired formatting style from the drop-down menu
Note: To modify a style, right-click* the desired formatting style from the drop-down menu and select Modify. Changes made to the style will affect all instances of the style within your workbook.
4.2 Other Cell Characteristics
Ensure your cells are formatted to properly represent your data, including number and text attributes.
To format cell characteristics
- Highlight the cells that you want to format
- Go to menu item: Home
- In the relevant sections (e.g. Numbers, Font, etc.) make your adjustments
Note: When formatting your spreadsheet, it is best to avoid merging cells. At times, it may seem easier to present your data by merging cells, but this can make it more difficult for users of assistive technologies and people navigating your spreadsheet using the keyboard.
Technique 5. Use Cell Addressing
5.1 Define Names
Naming the different data ranges within your spreadsheet makes it easier to navigate through the document and find specific information. By associating a meaningful name to a data range, you will be enhancing the readability of your document. These named ranges can be referenced in multiple locations of your document and within calculations and equations.
To define a name
- Highlight the cells you would like to name
- Go to menu item: Formulas
- In the Defined Names section, select the Define Name button
- In the Name text box, enter the name for the data range
- In the Scope drop-down list, select scope within which the name can be referenced
- Select OK
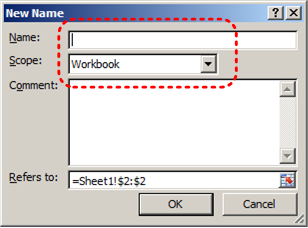
Technique 6. Create Accessible Charts
Spreadsheet applications support various types of charts, which can be used to display your spreadsheet data in meaningful ways for your audience. It is important to ensure that your chart is as accessible as possible to all members of your audience. All basic accessibility considerations that are applied to the rest of your document must also be applied to your charts and the elements within your charts. For example, use shape and color, rather than color alone, to convey information. As well, some further steps should be taken to ensure that the contents are your chart are appropriate labeled to give users reference points that will help to correctly interpret the information.
To create a chart
- Select the data that you want to include in the chart
- Go to menu item: Insert
- In the Charts section, select the icon of the type of chart you would like to insert
- Select a Chart Type from the Chart Gallery in the drop-down menu
To add titles and labels
- In the Chart Tools menu section, go to menu item: Layout
- In the Labels section, select the type of title or label you would like to define (e.g., Chart Title, Axis Titles, Data Labels)
Note: It is a good idea to use as many of the titles and labels available in this section as possible.
To apply a predefined chart layout
- In the Chart Tools menu section, go to menu item: Design
- In the Chart Layouts section, select a Quick Layout from the scrolling Chart Layouts gallery
To change to a different predefined chart type
- In the Chart Tools menu section, go to menu item: Design
- In the Type section, select the Change Chart Type icon
- In the Change Chart Type dialog, select a chart type from the left pane
- Select a Chart Design from the right pane
- Select OK
Other Chart Considerations
- When creating line charts, use the formatting options to create different types of dotted lines to facilitate legibility for users who are color blind
- Change the default colors to a color safe or gray-scale palette
- Use the formatting options to change predefined colors, ensuring that they align with sufficient contrast requirements (see Other Considerations, below)
Technique 7. Provide Structure for Tables
Excel 2007 includes an “Insert Table” feature but this works by applying cell formatting to spreadsheet cells. As such, it is not a structural feature in the same way that tables are in Word 2010 and PowerPoint 2010.
Technique 8. Use Other Content Structuring Features
While cell formatting is the most common method of structuring documents, other content structuring features should be used where appropriate:
8.1 Document Title
In case the document is ever converted into HTML, it should be given a descriptive and meaningful title.
To change the title of the current document
- Go to menu item: Office > Prepare > Properties
- In the Document Properties section that appears, select the Title text box
- Enter the Title
Note: The Title defined in the properties is different than the file name. It is also unrelated to the template name, discussed above.
8.2 Avoid “Floating” Elements
Avoid “floating” elements such as floating images, objects, tables or text boxes.
Similarly, avoid placing drawing objects directly into the document (e.g., as borders, to create a diagram). Instead, create borders with page layout tools and insert complete graphical objects.
Technique 9. Make Content Easier to See
9.1 Format of Text
When formatting text, especially when the text is likely to printed, try to:
- Use font sizes between 12 and 18 points for cell contents.
- Use fonts of normal weight, rather than bold or light weight fonts. If you do choose to use bold fonts for emphasis, use them sparingly.
- Use standard fonts with clear spacing and easily recognized upper and lower case characters. Sans serif fonts (e.g., Arial, Verdana) may sometimes be easier to read than serif fonts (e.g., Times New Roman, Garamond).
- Avoid large amounts of text set all in caps, italic or underlined.
- Use normal or expanded character spacing, rather than condensed spacing.
- Avoid animated or scrolling text.
But can’t users just zoom in? Office applications do typically include accessibility features such as the ability to magnify documents and support for high contrast modes. However, because printing is an important aspect of many workflows and changing font sizes directly will change documents details such the pagination, the layout of tables, etc., it is best practice to always format text for a reasonable degree of accessibility.
To change the text size for a default named style
- Go to menu item: Home
- In the Styles section, select the Cell Styles icon
- Select the style to modify from the list
- Right-click* and select: Modify…
- In the Style dialog, select the Format button
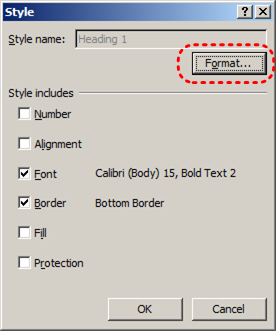
- In the Format Cells dialog, select the Font tab
- In the Size text box, type the desired size or select it from the list
- Select OK
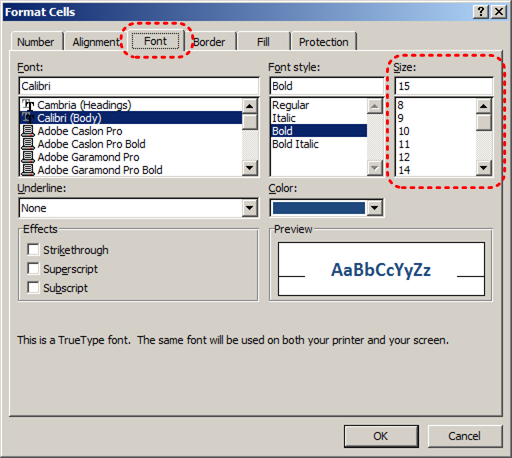
9.2 Use Sufficient Contrast
The visual presentation of text and images of text should have a contrast ration of at least 4.5:1. To help you determine the contrast, here are some examples on a white background:
- Very good contrast (Foreground=black, Background=white, Ratio=21:1)
- Acceptable contrast (Foreground=#767676, Background=white, Ratio=4.54:1)
- Unacceptable contrast (Foreground=#AAAAAA, Background=white, Ratio=2.32:1)
Also, always use a single solid color for a text background rather than a pattern.
In order to determine whether the colors in your document have sufficient contrast, you can consult an online contrast checker, such as:
9.3 Avoid Using Color Alone
Color should not be used as the only visual means of conveying information, indicating an action, prompting a response, or distinguishing a visual element. In order to spot where color might be the only visual means of conveying information, you can create a screenshot of the document and then view it with online gray-scale converting tools, such as:
- GrayBit v2.0: Grayscale Conversion Contrast Accessibility Tool
Editor’s note: GrayBit v2.0 is no longer available. However, multiple tools can be found online: Google Search: gray-scale conversion tool.
9.4 Avoid Relying on Sensory Characteristics
The instructions provided for understanding and operating content should not rely solely on sensory characteristics such as the color or shape of content elements. Here are two examples:
- Do not track changes by simply changing the color of text you have edited and noting the color. Instead use Google docs: Spreadsheet’s review functionality features to track changes, such as revision history.
- Do not distinguish between images by referring to their appearance (e.g., “the bigger one”). Instead, label each image with a figure number and use that for references.
9.5 Avoid Using Images of Text
Before you use an image to control the presentation of text (e.g., to ensure a certain font or color combination), consider whether you can achieve the same result by styling “real text”. If this is not possible, as with logos containing stylized text, make sure to provide alternative text for the image following the techniques noted above.
Technique 10. Make Content Easier to Understand
10.1 Write Clearly
By taking the time to design your content in a consistent way, it will be easier to access, navigate and interpret for all users:
- Whenever possible, write clearly with short sentences.
- Introduce acronyms and spell out abbreviations.
- Avoid making the document too “busy” by using lots of whitespace and by avoiding too many different colors, fonts and images.
- If content is repeated on multiple pages within a document or within a set of documents (e.g., headings, footings, etc.), it should occur consistently each time it is repeated.
10.2 Navigational Instructions
Provide a general description of the spreadsheet contents and instructions on how to navigate the data effectively. The best way to do this is to make a cell at the beginning of the data (e.g., A1) with this information. It will be the first cell accessed by assistive technologies. If you are using this cell for a label or data, you can attach a comment note to the cell containing navigational instructions.
Technique 11. Check Accessibility
At this time, Excel 2007 does not offer a mechanism to check for potential accessibility errors in your document prior to publishing. [Tested: January 10th, 2011]
In order to get some indication of the accessibility of your document or template (see Technique 1), then you may consider saving the file into HTML or PDF in order to perform an accessibility check in one of those formats, as described below.
To evaluate HTML accessibility
Another option is to save the document into HTML format and use one of the web accessibility checkers available online. Such as:
To evaluate PDF accessibility
If you saved your document in tagged PDF format, you can use the following tools and steps to evaluate the accessibility of the PDF document:
To evaluate PDF accessibility in Adobe Acrobat Professional
- Go to menu item: Advanced > Accessibility > Full Check…
- In the Full Check dialog, select all the checking option
- Select the Start Checking button
Editor’s note: For detailed instructions, see our section on how to check accessibility using Adobe Acrobat Professional.
Technique 12. Use Accessibility Features when Saving/Exporting to Other Formats
In some cases, additional steps must be taken in order to ensure accessibility information is preserved when saving/exporting to formats other than the default.
PDF
PDF documents are not always accessible. Accessible PDF documents are often called “Tagged PDF” because they include “tags” that encode structural information required for accessibility. To evaluate the accessibility of your PDF document, see Technique 11 (above).
- Go to menu item: Office > Save As > PDF or XPS
- In the File name box, type a name for the file
- Select the Options button
- Under Include non-printing information in the Options dialog, ensure that the Document structure tags for accessibility check box is selected
- Under PDF options, ensure that Bitmap text when fonts may not be embedded check box is de-selected
- Select OK and Save
HTML
- Go to menu item: Office > Save As > Other Formats
- In the File name box, type a name for the file
- In the Save as type box, select Web Page
- Select Save
- Check the HTML file for accessibility (see Technique 11, above)
To clean up your HTML file
- Remove unnecessary styles, line breaks, etc.
- Remove unnecessary id, class, and attributes
- Remove font tags
- Remove styles in the <head> tag
- Ensure the <th> tags have a scope attribute
- Remove <p> tags nested inside <th> and <td> tags
- Check for accessibility (see Technique 11, above)
Note: you may wish to use HTML editors or utilities to help with this process.
Technique 13. Consider Using Accessibility Support Applications/Plugins
Disclaimer: This list is provided for information purposes only. It is not exhaustive and inclusion of an application or plug-in on the list does not constitute a recommendation or guarantee of results.
Accessibility Help
If you are interested in what features are provided to make using Excel 2007 more accessible to users, documentation is provided in the Help system:
- Select Help icon in the right corner of the application window or select F1
- Enter “Accessibility” as your search term in the Help dialog box
References and Resources
- Microsoft Excel Help
- GAWDS Writing Better Alt Text
- Ryerson University: Microsoft Excel Accessibility Tipsheet (PDF)
- Microsoft Excel: Video Tutorials
Acknowledgments
Authors: Jan Richards, Sabrina Ruplall
This document was produced as part of the Accessible Digital Office Document (ADOD) Project.
This project has been developed by the Inclusive Design Research Centre, OCAD University as part of an EnAbling Change Partnership project with the Government of Ontario and UNESCO (United Nations Educational, Scientific and Cultural Organization).
Source: Authoring Techniques for Accessible Office Documents: Excel 2007 by the Inclusive Design Research Centre (IDRC) used under CC-BY-SA 3.0.
Usage Notes
At the time of testing (September 30, 2010), Numbers ‘09 lacks several features that enable accessible office document authoring, most notably: the ability to add alternative text to images and objects, the ability to indicate nature language, and programmatically determined named styles, cell naming, image and object anchoring, or change tracking features. As a result, some of the other features that might otherwise support accessibility, such as its extensive templates are not as effective. In addition, Numbers ‘09 does not include an accessibility checking feature, which is a more advanced accessibility feature.
Editor’s note: In later versions of Numbers, Apple added some updates to improve accessibility, including the ability to add alt text to images and graphical objects. To learn more about accessibility tips in Numbers, see how to create accessible spreadsheets with Numbers.
What’s an “Office Document”?
You should use these techniques when you are using Numbers to create documents that are:
- Intended to be used by people (i.e., not computer code),
- Text-based (i.e., not simply images, although they may contain images),
- Fully printable (i.e., where dynamic features are limited to automatic page numbering, table of contents, etc. and do not include audio, video, or embedded interactivity),
- Self-contained (i.e., without hyperlinks to other documents, unlike web content), and
- Typical of office-style workflows (Reports, letters, memos, budgets, presentations, etc.).
If you are creating forms, web pages, applications, or other dynamic and/or interactive content, these techniques will still be useful to you, but you should also consult the W3C-WAI Web Content Accessibility Guidelines (WCAG 2.0) because these are specifically designed to provide guidance for highly dynamic and/or interactive content.
File Formats
The default file format for Numbers is the native iWork format.
In addition, Numbers ‘09 offers many other spreadsheet processor and web format saving options. Most of these have not been checked for accessibility, but some information and/or instructions are available for the following formats in Technique 13:
Document Conventions
We have tried to formulate these techniques so that they are useful to all authors, regardless of whether they use a mouse. However, for clarity there are several instances where mouse-only language is used. Below are the mouse-only terms and their keyboard alternatives:
- *Right-click: To right-click with the keyboard, select the object using the Shift+Arrow keys and then press either (1) the “Right-Click” key (some keyboard have this to the right of the spacebar) or Shift+F10.
Disclaimer and Testing Details:
Following these techniques will increase the accessibility of your documents, but it does not guarantee accessibility to any specific disability groups. In cases where more certainty is required, it is recommended that you test the office documents with end users with disabilities, including screen reader users.
The application-specific steps and screenshots in this document were created using iWork Numbers ‘09 (ver.2.0.3 (332), Mac OS X, Sept. 2010) and Numbers 6.1 (December 2019) while producing a document in the proprietary file format. Files are also easily saved as other file formats (see Technique 13).
Technique 1. Use Accessible Templates
All office documents start with a template, which can be as simple as a blank standard-sized page or as complex as a nearly complete document with text, graphics and other content. For example, a “Meeting Minutes” template might include headings for information relevant to a business meeting, such as “Actions” above a table with rows to denote time and columns for actions of the meeting.
Because templates provide the starting-point for so many documents, accessibility is critical. If you are unsure whether a template is accessible, you should check a sample document produced when the template is used (see Technique 12).
The default template for new documents in Numbers is a blank spreadsheet, which is accessible by virtue of being blank.
To create an accessible template
- Go to menu item: File > New or File > New from Template Chooser… (Shift+Apple+N)
- In the Template Chooser dialog, select the Blank template or select one of the other existing template designs
- A new document in your selected template style will open
- Ensure that you follow the techniques in this document
- When you are finished you should also check the accessibility of the document (see Technique 12)
- Go to menu item: File > Save as Template…
- In the Export As box, type a name for the template. Using a descriptive template name (e.g. “Accessible Memo Template”) will increase the prominence of the accessibility status.
- In the Where drop-down list, specify a folder in which to save your template.
Note: By default, your template will be saved in the home folder in Library/Application Support/iWork/Numbers/Templates/My Templates pane of the Template Chooser. To save the template in a different location than the default, create a new folder in the Templates folder. The folder name is then used as a template category in the Template Chooser.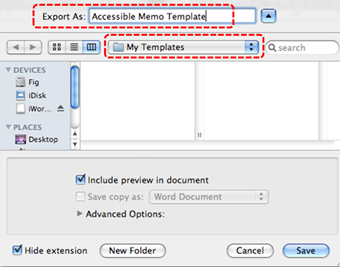
- Click Save
To select an accessible template
Note: Only use these steps if you have an accessible template available (e.g. that you previously saved). Otherwise, simply open a new (blank) document.
- Go to menu item: File > New from Template Chooser… (Shift+Apple+N)
- In the Template Chooser dialog, select My Templates from the left pane
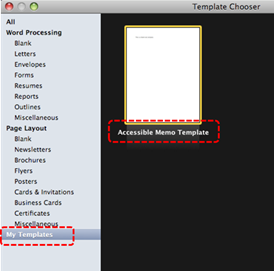
- Select your accessible template and click Choose
Technique 2. Set Document Language
At this time, it is not possible to manually indicate the natural language for specific cells or blocks of cells in Numbers ‘09. As well, it is not possible to change the natural language of the document itself from the default language. [Tested: September 29th, 2010]
Editor’s note: In later versions of Numbers, users can set the document language for a spreadsheet within a workbook. For detailed instructions, see how to format a spreadsheet for another language in Numbers on Mac.
In order for assistive technologies (e.g., screen readers) to be able to present your document accurately, it is important to indicate the natural language of the document. If a different natural language is used for a paragraph or selected text, this also needs to be clearly indicated.
Technique 3. Provide Text Alternatives for Images and Graphical Objects
At this time, Numbers ’09 does not offer a mechanism which enables the user to add alternative text descriptions to images or objects. [Tested: September 28, 2010]
Editor’s note: In later versions of Numbers, users can add alt text for images and graphical objects. To add alt text descriptions, follow these steps:
- Click the object to select it, click the Format button in the toolbar, then click image in the inspector.
- Click in the Description text box, then enter your description.
For detailed instructions, see how to add an image description on the Numbers User Guide for Mac.
When using images or other graphical objects, such as charts and graphs, it is important to ensure that the information you intend to convey by the image is also conveyed to people who cannot see the image. This can be accomplished by adding concise alternative text to each image. If an image is too complicated to concisely describe in the alternative text alone (artwork, flowcharts, etc.), provide a short text alternative and a longer description as well.
Tips for writing alternative text
- Try to answer the question “what information is the image conveying?”
- If the image does not convey any useful information, leave the alternative text blank
- If the image contains meaningful text, ensure all of the text is replicated
- Alternative text should be fairly short, usually a sentence or less and rarely more than two sentences
- If more description is required (e.g., for a chart or graph), provide a short description in the alternative text (e.g., a summary of the trend) and more detail in the long description, see below
- Test by having others review the document with the images replaced by the alternative text
Tips for writing longer descriptions
- Long descriptions should be used when text alternatives (see above) are insufficient to answer the question “what information is the image conveying?”
- In some situations, the information being conveyed will be how an image looks (e.g., an artwork, architectural detail, etc.). In these cases, try to describe the image without making too many of your own assumptions.
- One approach is to imagine you are describing the image to a person over the phone
- Ensure that you still provide concise alternative text to help readers decide if they are interested in the longer description
Alternatively, you can include the same information conveyed by the image within the body of the document, providing the images as an alternate to the text. In that case, you do not have to provide alternate text within the image.
Technique 4. Format Your Cells
As you begin adding content, your spreadsheet will require structuring to bring meaning to the data, make it easier to navigate, and help assistive technologies read it accurately. One of the easiest ways to do this is to ensure that you properly format the cells.
4.1 Named Styles
At this time (December 2019), Numbers does not offer named styles that can be applied to format and distinguish specific cells from the rest of your data.
You should make use of the named styles that are included with the office application (e.g., “Heading”, “Result”, etc.) before creating your own styles or using the character formatting tools directly. Named styles help your readers understand why something was formatted in a given way, which is especially helpful when there are multiple reasons for the same formatting (e.g., it is common to use italics for emphasis, Latin terms and species names).
Note: While office application suites support headings in much the same way, the named styles often differ.
Formatting header and result cells brings order to the spreadsheet and makes it easier for users to navigate effectively. For example, you can format header rows and columns using “Heading” styles to apply bolded, enlarged, and italicized text (among other characteristics). You may also want to format cells containing results of calculations to appear bold and underlined to help distinguish them from the rest of your data.
4.2 Table Styles
Table styles are useful for applying consistent formatting to tables. In Numbers, each template has one or more table style that formats various characteristics of your tables. A table style predefines the table background, the characteristics of cell borders, header rows and columns, footer rows, and the background and text attributes of cells. Table styles are useful for distinguishing different types of information in your spreadsheet.
Note: While the visual characteristics may not necessarily be helpful for accessibility, identifying the header rows and columns and pre-formatting text characteristics for these columns is helpful.
To apply a table style
- In the left pane, go to the Styles section
- Select the style of table from the list
Note: You can modify any attribute of the table style and your modifications will remain even if you decide to change to a different table style.
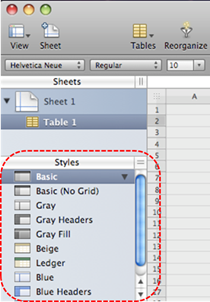
4.3 Other Cell Characteristics
Ensure your cells are formatted to properly represent your data, including number and text attributes.
To format cell characteristics
- Highlight the cells that you want to format
Note: to format a row or column, select the row or column indicator and follow the next steps
- In the Toolbar, select Inspector
- In the Inspector dialog, select Cells inspector
- Select the Cell Format drop-down list and choose the format
- Customize the format options
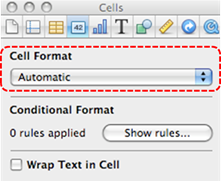
Note: When formatting your spreadsheet, it is best to avoid merging cells. At times, it may seem easier to present your data by merging cells, but this can make it more difficult for users of assistive technologies and people navigating your spreadsheet using the keyboard.
Technique 5. Use Cell Addressing
5.1 Define Names
At this time (December 2019), Numbers does not provide a mechanism for applying names to specific data ranges. Rather, it advises authors that they can use existing header row and column names to address cells within a table. While this may be useful when defining formulas, it does not provide the necessary support for accessibility.
Editor’s note: To see header names more clearly, be sure to make the following change under preferences:
- Go to Numbers > Preferences.
- Under Cell References, ensure that the check box is checked off for the option “Use header names as labels.”
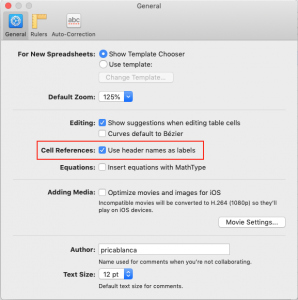
Naming the different data ranges within your spreadsheet makes it easier to navigate through the document and find specific information. By associating a meaningful name to a data range, you will be enhancing the readability of your document. These named ranges can be referenced in multiple locations of your document and within calculations and equations.
Technique 6. Create Accessible Charts
Spreadsheet applications support various types of charts, which can be used to display your spreadsheet data in meaningful ways for your audience. It is important to ensure that your chart is as accessible as possible to all members of your audience. All basic accessibility considerations that are applied to the rest of your document must also be applied to your charts and the elements within your charts. For example, use shape and color, rather than color alone, to convey information. As well, some further steps should be taken to ensure that the contents are your chart are appropriate labeled to give users reference points that will help to correctly interpret the information.
To create a chart
- In the Toolbar, select Charts or go to menu item: Insert > Chart
- Select the chart type
- In the Toolbar, select Inspector
- In the Inspector dialog, select the Chart inspector
- Format the chart type and chart colors by selecting Choose a chart type and Chart Colors… options
- Select Chart
- In the Chart section, select the Show Title and Show Legend check boxes
- Select Axis
- In the Axis section, select Choose Axis Options for both Value Axis (Y) and Category Axis (X)
Note: It is a good idea to “show” as many title and labeling elements as possible (e.g. Show Axis, Show Title, Show Categories, Show Series Names, etc.)
Other Chart Considerations
- When creating line charts, use the formatting options to create different types of dotted lines to facilitate legibility for users who are color blind
- Change the default colors to a color safe or gray-scale palette
- Use the formatting options to change predefined colors, ensuring that they align with sufficient contrast requirements (see Technique 10)
Technique 7. Provide Structure for Tables
To add a table with headers
- Go to menu item: Insert > Table
- Select table style
- In the Toolbar, select Inspector
- In the Inspector dialog, select the Table inspector
- In the Name box, enter a name for the table
- In the Headers & Footer section, select the number of header rows and columns using the drop-down menus (Note: It is recommended to keep your tables simple by using only one header row and column).
Technique 8. Use Other Content Structuring Features
While cell formatting is the most common method of structuring documents, other content structuring features should be used where appropriate:
8.1 Document Title
In case the document is ever converted into HTML, it should be given a descriptive and meaningful title.
To change the title of the current document
- In the Toolbar, select Inspector
- In the Inspector dialog, select the Document inspector button
- In the Spotlight section, type a descriptive name for the document in the Title box
Note: The Title defined in the properties is different than the file name. It is also unrelated to the template name, discussed above.
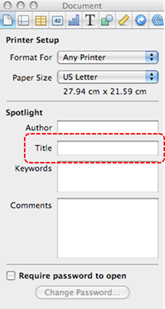
8.2 Avoid “Floating” Elements
Avoid “floating” elements (other than charts) such as floating images, objects, tables or text boxes.
Similarly, avoid placing drawing objects directly into the document (e.g., as borders, to create a diagram). Instead, create borders with page layout tools and insert complete graphical objects.
Technique 9. Make Content Easier to See
9.1 Format of Text
When formatting text, especially when the text is likely to be printed, try to:
- Use font sizes between 12 and 18 points for cell contents.
- Use fonts of normal weight, rather than bold or light weight fonts. If you do choose to use bold fonts for emphasis, use them sparingly.
- Use standard fonts with clear spacing and easily recognized upper and lower case characters. Sans serif fonts (e.g., Arial, Verdana) may sometimes be easier to read than serif fonts (e.g., Times New Roman, Garamond).
- Avoid large amounts of text set all in caps, italic or underlined.
- Use normal or expanded character spacing, rather than condensed spacing.
- Avoid animated or scrolling text.
But can’t users just zoom in? Office applications do typically include accessibility features such as the ability to magnify documents and support for high contrast modes. However, because printing is an important aspect of many workflows and changing font sizes directly will change documents details such the pagination, the layout of tables, etc., it is best practice to always format text for a reasonable degree of accessibility.
9.2 Use Sufficient Contrast
The visual presentation of text and images of text should have a contrast ration of at least 4.5:1. To help you determine the contrast, here are some examples on a white background:
- Very good contrast (Foreground=black, Background=white, Ratio=21:1)
- Acceptable contrast (Foreground=#767676, Background=white, Ratio=4.54:1)
- Unacceptable contrast (Foreground=#AAAAAA, Background=white, Ratio=2.32:1)
Also, always use a single solid color for a text background rather than a pattern.
In order to determine whether the colors in your document have sufficient contrast, you can consult an online contrast checker, such as:
9.3 Avoid Using Color Alone
Color should not be used as the only visual means of conveying information, indicating an action, prompting a response, or distinguishing a visual element. In order to spot where color might be the only visual means of conveying information, you can create a screenshot of the document and then view it with online gray-scale converting tools, such as:
- GrayBit v2.0: Grayscale Conversion Contrast Accessibility Tool
Editor’s note: GrayBit v2.0 is no longer available. However, multiple tools can be found online: Google Search: gray-scale conversion tool.
9.4 Avoid Relying on Sensory Characteristics
The instructions provided for understanding and operating content should not rely solely on sensory characteristics such as the color or shape of content elements. Here are two examples:
-
- Do not track changes by simply changing the color of text you have edited and noting the color. Instead use the applications revision tracking feature to track changes.
At this time (December 2019), Numbers does not offer a mechanism to track changes in its documents.
- Do not distinguish between images by referring to their appearance (e.g., “the bigger one”). Instead, label each image with a figure number and use that for references.
9.5 Avoid Using Images of Text
Before you use an image to control the presentation of text (e.g., to ensure a certain font or color combination), consider whether you can achieve the same result by styling “real text”. If this is not possible, as with logos containing stylized text, make sure to provide alternative text for the image following the steps noted in Technique 3.
Technique 10. Make Content Easier to Understand
10.1 Write Clearly
By taking the time to design your content in a consistent way, it will be easier to access, navigate and interpret for all users:
- Whenever possible, write clearly with short sentences.
- Introduce acronyms and spell out abbreviations.
- Avoid making the document too “busy” by using lots of whitespace and by avoiding too many different colors, fonts and images.
- If content is repeated on multiple pages within a document or within a set of documents (e.g., headings, footings, etc.), it should occur consistently each time it is repeated.
10.2 Navigational Instructions
Provide a general description of the spreadsheet contents and instructions on how to navigate the data effectively. The best way to do this is to make a cell at the beginning of the data (e.g., A1) with this information. It will be the first cell accessed by assistive technologies. If you are using this cell for a label or data, you can attach a comment note to the cell containing navigational instructions.
Technique 11. Check Accessibility
At this time (December 2019), Numbers does not offer an accessibility checking mechanism to identify potential accessibility errors prior to publishing.
In order to get some indication of the accessibility of your document or template (see Technique 1), then you may consider saving the file into HTML or PDF in order to perform an accessibility check in one of those formats, as described below.
To evaluate HTML accessibility
If you wish to check the accessibility of your document or template (see Technique 1), one option is to save it into HTML format and use one of the web accessibility checkers available online. Such as:
To evaluate PDF accessibility
If you saved your document in tagged PDF format, you can use the following tools and steps to evaluate the accessibility of the PDF document:
To evaluate PDF accessibility in Adobe Acrobat Professional
- Go to menu item: Advanced > Accessibility > Full Check…
- In the Full Check dialog, select all the checking option
- Select the Start Checking button
Editor’s note: For detailed instructions, see our section on how to check accessibility using Adobe Acrobat Professional.
Technique 12. Use Accessibility Features when Saving/Exporting to Other Formats
In some cases, additional steps must be taken in order to ensure accessibility information is preserved when saving/exporting to formats other than the default.
Alternate formats
- Go to menu item: Share > Export…
- In the dialog, select the type of file format you would like to export
- Customize the export options for that file format
- Click Next
- In the Save As box, enter a file name for your document
- In the Where drop-down menu, select the location you would like to save your document
- Click Export
PDF
PDF documents are not always accessible. Accessible PDF documents are often called “Tagged PDF” because they include “tags” that encode structural information required for accessibility. To evaluate the accessibility of your PDF document, see Technique 1.
To clean up your HTML file
- Remove unnecessary styles, line breaks, etc.
- Remove unnecessary id, class, and attributes
- Remove font tags
- Remove styles in the <head> tag
- Ensure the <th> tags have a scope attribute
- Remove <p> tags nested inside <th> and <td> tags
- Check for accessibility (see Technique 11)
Note: you may wish to use HTML editors or utilities to help with this process.
Technique 13. Consider Using Accessibility Support Applications/Plugins
Disclaimer: This list is provided for information purposes only. It is not exhaustive and inclusion of an application or plug-in on the list does not constitute a recommendation or guarantee of results.
Accessibility Help
If you are interested in what features are provided to make using Numbers more accessible to users, documentation is provided in the Help system:
- Go to menu item: Help
- Enter your search terms in the Search box
References and Resources
- Numbers User Guide for Mac
- Numbers Support
- Apple: Create accessible spreadsheets with Numbers
- GAWDS Writing Better Alt Text
Acknowledgments
This document was produced as part of the Accessible Digital Office Document (ADOD) Project.
This project has been developed by the Inclusive Design Research Centre, OCAD University as part of an EnAbling Change Partnership project with the Government of Ontario and UNESCO (United Nations Educational, Scientific and Cultural Organization).
Source: Authoring Techniques for Accessible Office Documents: iWork Numbers ’09 by the Inclusive Design Research Centre (IDRC) used under CC-BY-SA 3.0.
Usage Notes
At the time of testing (December 2019), Calc provides a set of accessibility features that is sufficient to enable the production of accessible digital office documents. However, Calc does not include an accessibility checking feature, which is a more advanced accessibility feature.
What’s an “Office Document”?
You should use these techniques when you are using Calc to create documents that are:
- Intended to be used by people (i.e., not computer code),
- Text-based (i.e., not simply images, although they may contain images),
- Fully printable (i.e., where dynamic features are limited to automatic page numbering, table of contents, etc. and do not include audio, video, or embedded interactivity),
- Self-contained (i.e., without hyperlinks to other documents, unlike web content), and
- Typical of office-style workflows (Reports, letters, memos, budgets, presentations, etc.).
If you are creating forms, web pages, applications, or other dynamic and/or interactive content, these techniques will still be useful to you, but you should also consult the W3C-WAI Web Content Accessibility Guidelines (WCAG 2.0) because these are specifically designed to provide guidance for highly dynamic and/or interactive content.
File Formats
The default file format for Calc is ODF Spreadsheet (ODS). In addition, Calc offers many other spreadsheet processor and web format saving options. Most of these have not been checked for accessibility, but some information and/or instructions are available for the following formats in Technique 12:
Document Conventions
We have tried to formulate these techniques so that they are useful to all authors, regardless of whether they use a mouse. However, for clarity there are several instances where mouse-only language is used. Below are the mouse-only terms and their keyboard alternatives:
- *Right-click: To right-click with the keyboard, select the object using the Shift+Arrow keys and then press either (1) the “Right-Click” key (some keyboard have this to the right of the spacebar) or Shift+F10.
Disclaimer and Testing Details:
Following these techniques will increase the accessibility of your documents, but it does not guarantee accessibility to any specific disability groups. In cases where more certainty is required, it is recommended that you test the office documents with end users with disabilities, including screen reader users. The application-specific steps and screenshots in this document were created using Calc (ver. 3.2.1, Windows XP, Aug. 2010 and Apache OpenOffice 4.1.7) while creating an ODT document. Files are also easily saved as other file formats (see Technique 12).
Technique 1. Use Accessible Templates
All office documents start with a template, which can be as simple as a blank standard-sized page or as complex as a nearly complete document with text, graphics and other content. For example, a “Meeting Minutes” template might include headings for information relevant to a business meeting, such as “Actions” above a table with rows to denote time and columns for actions of the meeting. Because templates provide the starting-point for so many documents, accessibility is critical. If you are unsure whether a template is accessible, you should check a sample document produced when the template is used (see Technique 11). Calc’s default template for new documents is a blank spreadsheet, which is accessible by virtue of being blank. It is possible to create your own accessible templates from scratch in Calc. As well, you can edit and modify the existing prepackaged templates, ensuring their accessibility as you do so and saving them as a new template.
To create an accessible template
- Create a new document
- Ensure that you follow the techniques in this document
- When you are finished you should also check the accessibility of the document (see Technique 11)
- Go to menu item: File > Properties
- Use the Title and/or Comments to indicate the accessibility status of the template. Using Title (e.g., “Accessible Memo Template”) will increase the prominence of the accessibility status because this is used in place of the template’s file name. Comments can be used to add more information if necessary (e.g., “This memo template has been checked for accessibility.”).
- Close the dialog with OK

- Go to menu item: File > Templates > Save (Shift+F11)
- In the New Template box, type a name for the template. Again, using a descriptive template name (e.g. “Accessible Memo Template”) will increase the prominence of the accessibility status of the template.
- Select the category you would like to save it in, under Categories Note: the category is simply the folder into which you are saving the template
- Close the dialog with OK
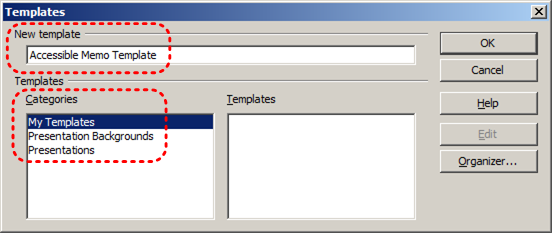
To select an accessible template
Note: Only use these steps if you have an accessible template available (e.g. that you previously saved). Otherwise, simply open a new (blank) document.
- Go to menu item: File > New > Templates and Documents
- Select the Templates icon
- Select a template from the list Note: A properties pane appears on the right side of the window, where you can read the document properties (Title, By, Date, Modified by, Modified on, Description, Size). If you placed information about the accessibility of the template in the Title and/or Comments when you created the template (see above), this will be displayed in the Title and/or Description, respectively.
- Select Open
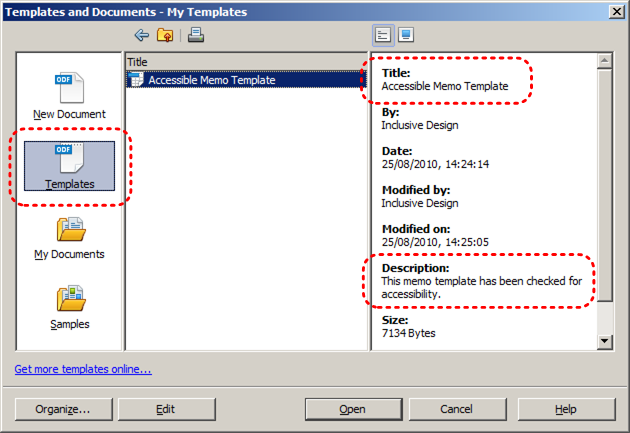
- A new document based on the template will be displayed. If you have chosen an accessible template, the document will be accessible at this point. As you add your content (e.g., text, images, etc.), ensure that you consult the sections that follow to preserve accessibility.
Technique 2. Set Document Language
In order for assistive technologies (e.g., screen readers) to be able to present your document accurately, it is important to indicate the natural language of the document. If a different natural language is used for a paragraph or selected text, this also needs to be clearly indicated.
To select a language for the whole document
- Go to menu item: Tools > Options
- Select Language Settings > Languages
- Under Default languages for documents, select the document language for all newly created documents Note: If you mark For the current document only, your choice will only apply to the current document.
- Close the dialog with OK

To format the language for a block of cells
- Select the cells to which you want to apply a language
- Go to menu item: Format > Cells… (Ctrl+1)
- Select the Font tab
- Select the Language and click OK
To apply a language directly to selected text
- Select the text to which you want to apply a language
- Go to menu item: Format > Character
- Select the Font tab
- Select the Language and click OK
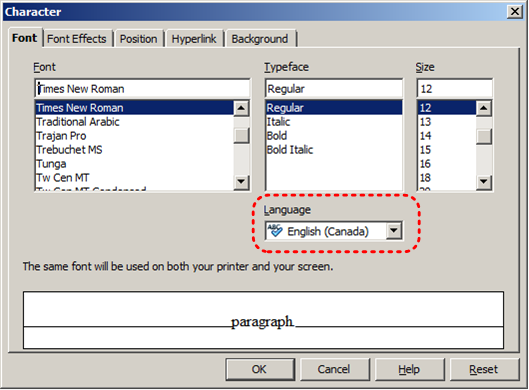
Technique 3. Provide Text Alternatives for Images and Graphical Objects
When using images or other graphical objects, such as charts and graphs, it is important to ensure that the information you intend to convey by the image is also conveyed to people who cannot see the image. This can be accomplished by adding concise alternative text to each image. If an image is too complicated to concisely describe in the alternative text alone (artwork, flowcharts, etc.), provide a short text alternative and a longer description as well.
Tips for writing alternative text
- Try to answer the question “what information is the image conveying?”
- If the image does not convey any useful information, leave the alternative text blank
- If the image contains meaningful text, ensure all of the text is replicated
- Alternative text should be fairly short, usually a sentence or less and rarely more than two sentences
- If more description is required (e.g., for a chart or graph), provide a short description in the alternative text (e.g., a summary of the trend) and more detail in the long description, see below
- Test by having others review the document with the images replaced by the alternative text
Tips for writing longer descriptions
- Long descriptions should be used when text alternatives (see above) are insufficient to answer the question “what information is the image conveying?”
- In some situations, the information being conveyed will be how an image looks (e.g., an artwork, architectural detail, etc.). In these cases, try to describe the image without making too many of your own assumptions.
- One approach is to imagine you are describing the image to a person over the phone
- Ensure that you still provide concise alternative text to help readers decide if they are interested in the longer description
Alternatively, you can include the same information conveyed by the image within the body of the document, providing the images as an alternate to the text. In that case, you do not have to provide alternate text within the image.
To add alternative text to images and graphical objects
- Right-click on object
- Select Description… option
- Enter alternative text in the Title box
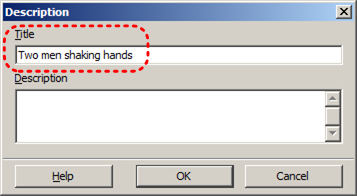
To add long descriptions to images and graphical objects
- Right-click on object
- Select Description… option
- Enter description in Description box
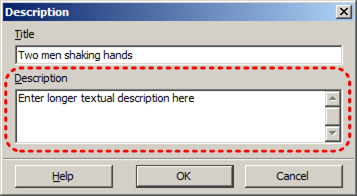
Technique 4. Format Your Cells
As you begin adding content, your spreadsheet will require structuring to bring meaning to the data, make it easier to navigate, and help assistive technologies read it accurately. One of the easiest ways to do this is to ensure that you properly format the cells.
4.1 Named Styles
You should make use of the named styles that are included with the office application (e.g., “Heading”, “Result”, etc.) before creating your own styles or using the character formatting tools directly. Named styles help your readers understand why something was formatted in a given way, which is especially helpful when there are multiple reasons for the same formatting (e.g., it is common to use italics for emphasis, Latin terms and species names). For more information on formatting using named styles, see Technique 9.
Note: While office application suites support headings in much the same way, the named styles often differ. Formatting header and result cells brings order to the spreadsheet and makes it easier for users to navigate effectively. For example, you can format header rows and columns using “Heading” styles to apply bolded, enlarged, and italicized text (among other characteristics). You may also want to format cells containing results of calculations to appear bold and underlined to help distinguish them from the rest of your data.
To format a cell with default named styles
- Highlight the cells that you want to format Note: to apply a style to an entire row or column, select the row or column indicator and follow the next steps
- Go to menu item: Format > Styles and Formatting (F11)
- Double click on the desired formatting style Note: If a style is modified in the Styles and Formatting panel, the modification will apply to every application of that style
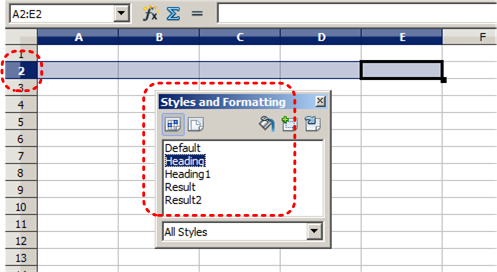
4.2 Other Cell Characteristics
Ensure your cells are formatted to properly represent your data, including number and text attributes.
To format cell characteristics
- Highlight the cells that you want to formatNote: to format a row or column, select the row or column indicator and follow the next steps
- Go to menu item: Format > Cell… (Ctrl+1)
- Select the relevant tabs (e.g. Numbers, Font, etc.) and make your adjustments
- Click OK
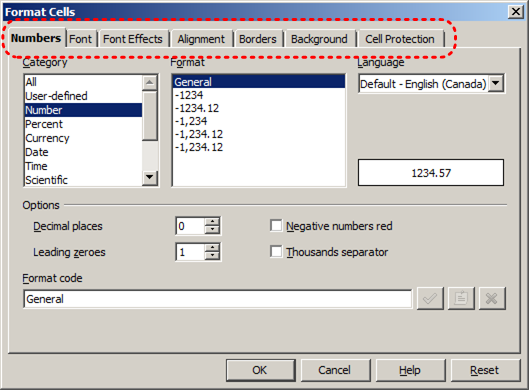
Note: When formatting your spreadsheet, it is best to avoid merging cells. At times, it may seem easier to present your data by merging cells, but this can make it more difficult for users of assistive technologies and people navigating your spreadsheet using the keyboard.
Technique 5. Use Cell Addressing
5.1 Define Label Range
Label ranges help to logically define the contents of specific cells as either labels or data. This is useful for navigational purposes, allowing users to jump between ranges of data and navigate within each range. This is also useful for calculations, as you may reference an entire label range within an equation.
To define a label range
- Select the header cells
- Go to menu item: Insert > Names > Labels…
- Select the Minimize button beside the For data range box
- Highlight the data cells within the label range
- Select the Maximize button to view the dialog
- Click OK
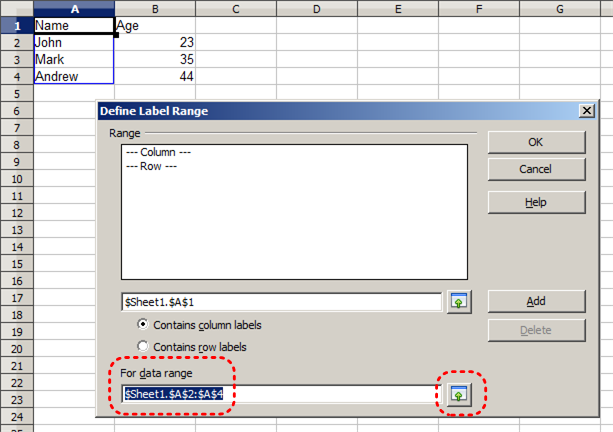
5.2 Define Names
Naming the different data ranges within your spreadsheet makes it easier to navigate through the document and find specific information. By associating a meaningful name to a data range, you will be enhancing the readability of your document. These named ranges can be referenced in multiple locations of your document and within calculations and equations.
To define a name
- Go to menu item: Insert > Names > Define… (Ctrl+F3)
- Enter the name in the Name text box
- Select the Minimize button next to the Assigned to text box
- Highlight the cells you would like to assign the name to
- Select the Maximize button next to the text box to view the dialog
- Click OK
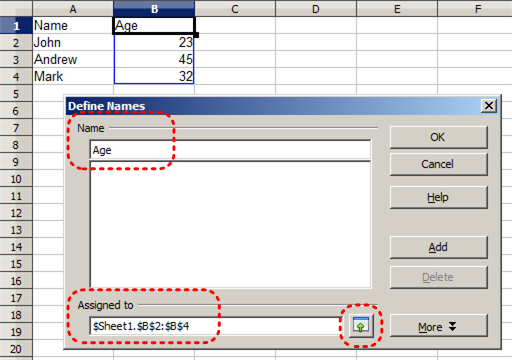
Technique 6. Create Accessible Charts
Charts can be used to make data more understandable for some audiences. However, it is important to ensure that your chart is as accessible as possible to all members of your audience. All basic accessibility considerations that are applied to the rest of your document must also be applied to your charts and the elements within your charts. For example, use shape and color, rather than color alone, to convey information. As well, some further steps should be taken to ensure that the contents are your chart are appropriate labeled to give users reference points that will help them to correctly interpret the information.
To create a chart
- Go to menu item: Insert > Chart…
- In the Chart Wizard dialog, follow steps 1 to 4 to format your chart Note: When you are selecting your formatting options in each step, ensure that your selections align with the accessibility techniques in this document.
- In Step 4, make sure to define all chart elements (e.g. title, subtitle, legend, etc.)
To name a chart
- Right-click* the chart
- Select Name…
- In the Name dialog, enter a unique chart name in the Name text box
- Select OK
To provide alternative text for the chart
- Right-click* the chart
- Select Description…
- In the Description dialog, enter alternative text in the Title box
- Enter a longer description of the chart contents in the Description box
- Select OK
Other Chart Considerations
- When creating line charts, use the formatting options to create different types of dotted lines to facilitate legibility for users who are color blind
- Change the default colors to a color safe or gray-scale palette
- Use the formatting options to change predefined colors, ensuring that they align with sufficient contrast requirements (see Technique 9)
Technique 7. Provide Structure for Tables
Calc has an “Insert table” feature.
To insert a new table
- Place the cursor where you would like the table to appear.
- To insert a table, you have two options:
- From the main menu, select Table > Insert > Table (keyboard shortcut: Ctrl+F12).
- Alternately, from the toolbar, click on the Table icon (
 )
)
- In the Insert Table dialog box, specify the properties for the new table.
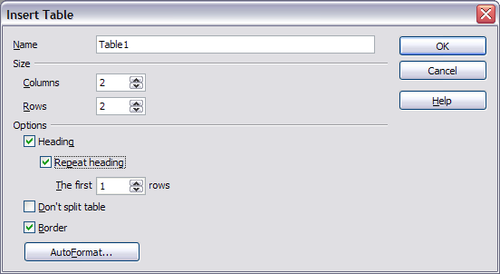
Technique 8. Use Other Content Structuring Features
While cell formatting is the most common method of structuring documents, other content structuring features should be used where appropriate:
8.1 Document Title
In case the document is ever converted into HTML, it should be given a descriptive and meaningful title.
To change the title of the current document
- Go to menu item: File > Properties
- Select the Description tab
- Type the new title in the Title box and click OK
Note: The title defined in the properties is different than the file name. It is also unrelated to the template name, discussed above.
8.2 Avoid “Floating” Elements
Avoid “floating” elements (other than charts) such as floating images, objects, tables or text boxes. Similarly, avoid placing drawing objects directly into the document (e.g., as borders, to create a diagram). Instead, create borders with page layout tools and insert complete graphical objects.
Technique 9. Make Content Easier to See
9.1 Format of Text
- Use font sizes between 12 and 18 points for cell contents.
- Use fonts of normal weight, rather than bold or light weight fonts. If you do choose to use bold fonts for emphasis, use them sparingly.
- Use standard fonts with clear spacing and easily recognized upper and lower case characters. Sans serif fonts (e.g., Arial, Verdana) may sometimes be easier to read than serif fonts (e.g., Times New Roman, Garamond).
- Avoid large amounts of text set all in caps, italic or underlined.
- Use normal or expanded character spacing, rather than condensed spacing.
- Avoid animated or scrolling text.
But can’t users just zoom in? Office applications do typically include accessibility features such as the ability to magnify documents and support for high contrast modes. However, because printing is an important aspect of many workflows and changing font sizes directly will change documents details such the pagination, the layout of tables, etc., it is best practice to always format text for a reasonable degree of accessibility.
To change the text size for a default named style
- Go to menu item: Format > Styles and Formatting (F11)
- Select the style to modify from the list
- Right click and select: Modify…
- Select the Font tab
- Select a font size under Size
- Exit with OK
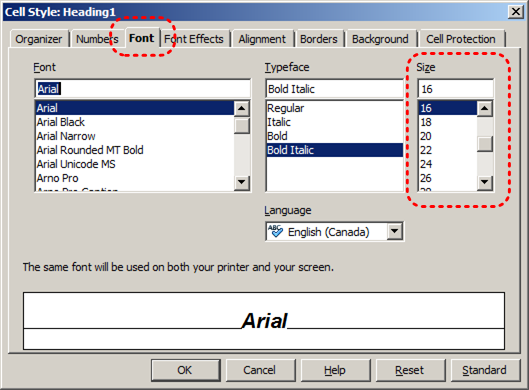
9.2 Use Sufficient Contrast
The visual presentation of text and images of text should have a contrast ratio of at least 4.5:1. To help you determine the contrast, here are some examples on a white background:
- Very good contrast (Foreground=black, Background=white, Ratio=21:1)
- Acceptable contrast (Foreground=#767676, Background=white, Ratio=4.54:1)
- Unacceptable contrast (Foreground=#AAAAAA, Background=white, Ratio=2.32:1)
Also, always use a single solid color for a text background rather than a pattern. In order to determine whether the colors in your document have sufficient contrast, you can consult an online contrast checker, such as:
9.3 Avoid Using Color Alone
Color should not be used as the only visual means of conveying information, indicating an action, prompting a response, or distinguishing a visual element. In order to spot where color might be the only visual means of conveying information, you can create a screenshot of the document and then view it with online gray-scale converting tools, such as:
- GrayBit v2.0: Grayscale Conversion Contrast Accessibility Tool
Editor’s note: GrayBit v2.0 is no longer available. However, multiple tools can be found online: Google Search: gray-scale conversion tool.
9.4 Avoid Relying on Sensory Characteristics
The instructions provided for understanding and operating content should not rely solely on sensory characteristics such as the color or shape of content elements. Here are two examples:
- Do not track changes by simply changing the color of text you have edited and noting the color. Instead use OpenOffice Calc’s review functionality features to track changes, such as revision history.
- Do not distinguish between images by referring to their appearance (e.g., “the bigger one”). Instead, label each image with a figure number and use that for references.
9.5 Avoid Using Images of Text
Before you use an image to control the presentation of text (e.g., to ensure a certain font or color combination), consider whether you can achieve the same result by styling “real text”. If this is not possible, as with logos containing stylized text, make sure to provide alternative text for the image following the techniques noted above.
Technique 10. Make Content Easier to Understand
10.1 Write Clearly
By taking the time to design your content in a consistent way, it will be easier to access, navigate and interpret for all users:
- Whenever possible, write clearly with short sentences.
- Introduce acronyms and spell out abbreviations.
- Avoid making the document too “busy” by using lots of whitespace and by avoiding too many different colors, fonts and images.
- If content is repeated on multiple pages within a document or within a set of documents (e.g., headings, footings, etc.), it should occur consistently each time it is repeated.
10.2 Navigational Instructions
Provide a general description of the spreadsheet contents and instructions on how to navigate the data effectively. The best way to do this is to make a cell at the beginning of the data (e.g., A1) with this information. It will be the first cell accessed by assistive technologies. If you are using this cell for a label or data, you can attach a comment note to the cell containing navigational instructions.
Technique 11. Check Accessibility
At this time, Calc does not offer a mechanism to check for potential accessibility errors in your document prior to publishing. [Tested: September 30th, 2010]
In order to get some indication of the accessibility of your document or template (see Technique 1), then you may consider saving the file into HTML or PDF in order to perform an accessibility check in one of those formats, as described below.
To evaluate HTML accessibility
If you wish to check the accessibility of your document or template (see Technique 1), one option is to save it into HTML format and use one of the web accessibility checkers available online. Such as:
To evaluate PDF accessibility
If you saved your document in tagged PDF format, you can use the following tools and steps to evaluate the accessibility of the PDF document:
To evaluate PDF accessibility in Adobe Acrobat Professional
- Go to menu item: Advanced > Accessibility > Full Check…
- In the Full Check dialog, select all the checking option
- Select the Start Checking button
Editor’s note: For detailed instructions, see our section on how to check accessibility using Adobe Acrobat Professional.
Technique 12. Use Accessibility Features when Saving/Exporting to Other Formats
In some cases, additional steps must be taken in order to ensure accessibility information is preserved when saving/exporting to formats other than the default.
PDF
PDF documents are not always accessible. Accessible PDF documents are often called “Tagged PDF” because they include “tags” that encode structural information required for accessibility. To evaluate the accessibility of your PDF document, see Technique 11.
HTML
- Apply one of the default heading paragraph styles to the paragraphs where you want to generate an HTML page
- Go to menu item: File > Send > Create HTML Document
- In the Styles box, select the paragraph style that you want to use to generate a new HTML page
- Enter a path and a name for the HTML document
- Click Save
- Check the HTML file for accessibility (see Technique 11)
To clean up your HTML file
- Remove unnecessary styles, line breaks, etc.
- Remove unnecessary id, class, and attributes
- Remove font tags
- Remove styles in the <head> tag
- Ensure the <th> tags have a scope attribute
- Remove <p> tags nested inside <th> and <td> tags
- Check for accessibility (see Technique 11) Note: you may wish to use HTML editors or utilities to help with this process.
Technique 13. Consider Using Accessibility Support Applications/Plugins
Disclaimer: This list is provided for information purposes only. It is not exhaustive and inclusion of an application or plug-in on the list does not constitute a recommendation or guarantee of results.
- Read Text – an extension that reads text from Calc
- OOo2GD – an extension that allows you to export, update and import all documents, spreadsheets and presentations between OpenOffice.org applications and Google docs.
Accessibility Help
If you are interested in what features are provided to make using Calc accessible, documentation is provided in Calc’s Help system:
- Go to menu item: Help > OpenOffice.org Help (F1)
- Enter “accessibility” as the Search Term
References and Resources
- OpenOffice.org 3.x Calc Guide (PDF)
- OpenOffice.org Calc Help
- OpenOffice.org Accessibility Help
- GAWDS Writing Better Alt Text
Acknowledgments
This document was produced as part of the Accessible Digital Office Document (ADOD) Project.
This project has been developed by the Inclusive Design Research Centre, OCAD University as part of an EnAbling Change Partnership project with the Government of Ontario and UNESCO (United Nations Educational, Scientific and Cultural Organization).
Source: Authoring Techniques for Accessible Office Documents: OpenOffice Calc (v3.2) by the Inclusive Design Research Centre (IDRC) used under CC-BY-SA 3.0.
Authoring Techniques for Accessible Office Documents: Presentation Applications
IV
Usage Notes
At the time of testing (December 2019), Google Slides lacks several features that enable accessible office document authoring, most notably: a separate document title field and the ability to indicate headings for rows and columns. With this in mind, be cautious of templates available in the Google Slides template gallery and be sure that they comply the techniques discussed here.
While there is no accessibility checking feature built into Google Slides, you can install a third-party add-on called Grackle Slides. Grackle is a third-party plug-in that includes an accessibility checker along with other features that enhance accessibility on Grackle Slides (see Technique 11). Due to the nature of Google Slides, some accessibility features, such as tables, are only fully accessible when exporting the document to another format, like a HTML or PDF file.
What’s an “Office Document”?
You should use these techniques when you are using Google Slides to create documents that are:
- Intended to be used by people (i.e., not computer code),
- Text-based (i.e., not simply images, although they may contain images),
- Fully printable (i.e., where dynamic features are limited to automatic page numbering, table of contents, etc. and do not include audio, video, or embedded interactivity),
- Self-contained (i.e., without hyperlinks to other documents, unlike web content), and
- Typical of office-style workflows (Reports, letters, memos, budgets, presentations, etc.).
If you are creating forms, web pages, applications, or other dynamic and/or interactive content, these techniques will still be useful to you, but you should also consult the W3C-WAI Web Content Accessibility Guidelines (WCAG 2.0) because these are specifically designed to provide guidance for highly dynamic and/or interactive content.
File Formats
Google Slides does not have a default file format, as it is a web-based authoring tool.
Google Slides offers a number of presentation processor and web format saving options. Most of these have not been checked for accessibility, but some information and/or instructions are available for the following formats in Technique 12.
- Microsoft PowerPoint (.pptx)
- ODP Document (.odp)
- PDF Document (.pdf)
- Plain Text (.txt)
- JPEG image (.jpg, current slide)
- PNG image (.png, current slide)
- Scalable Vector Graphics (.svg, current slide)
Document Conventions
We have tried to formulate these techniques so that they are useful to all authors, regardless of whether they use a mouse. However, for clarity there are several instances where mouse-only language is used. Below are the mouse-only terms and their keyboard alternatives:
- *Right-click: To right-click with the keyboard, select the object using the Shift+Arrow keys and then press either (1) the “Right-Click” key (some keyboard have this to the right of the spacebar) or Shift+F10.
Disclaimer and Testing Details
Following these techniques will increase the accessibility of your documents, but it does not guarantee accessibility to any specific disability groups. In cases where more certainty is required, it is recommended that you test the office documents with end users with disabilities, including screen reader users. Files are easily saved as various file formats (see Technique 12).
Editor’s note: Since the content of this page has been heavily updated from the original article (Authoring Techniques for Accessible Office Documents: Google docs: Presentations), the usual editor’s notes that flag new content will be omitted. The application-specific steps and screenshots were updated in December 2019.
Technique 1. Use Accessible Templates
At this time (December 2019), Google Slides lacks support for accessibility features such as table headings.
All office documents start with a template, which can be as simple as a blank standard-sized page or as complex as a nearly complete document with text, graphics and other content. For example, a “Meeting Minutes” template might include headings for information relevant to a business meeting, such as “Actions” above a table with rows to denote time and columns for actions of the meeting.
Because templates provide the starting-point for so many documents, accessibility is critical. If you are unsure whether a template is accessible, you should check a sample document produced when the template is used (see Technique 11).
Google Slides’s default template for new documents is a blank presentation. The basic installation also includes a wide variety of templates for business presentations. These are all accessible by virtue of being blank.
It is possible to create your own templates from scratch in Google Slides. As well, you can edit and modify the existing templates, ensuring their accessibility as you do so and saving them as a new template.
To select a template
- Go to Google Sheets.
- At the top right, click on Template Gallery.
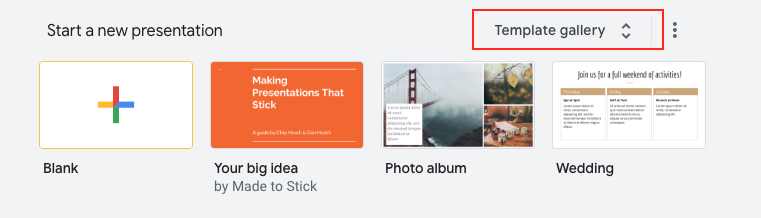
- Select a template.
- A copy of the template will open.
To create an accessible template
- Create a new document (from the default template or from an existing template).
Note: If creating a template from an existing document, go to File > Make a copy. Type a name and choose where to save it, then, click Ok.
- Rename your document. Be sure to indicate that the document is an accessible template by using terms such as “accessible” (e.g., “Accessible Memo Template”). This will improve its searchability and promote its use as an accessible template.
- Ensure that you follow techniques in this document. You may also check the accessibility (see Technique 11).
To share your accessible template as a new document
You can share your accessible template, but it may be more useful to share the file as copy that other users can add to their Google Drive.
- Go to the address bar change the end of the URL before sending it.
- Replace “edit” at the end of the URL with “copy”.
For example:
Before: http://docs.google.com/document/d/12345678/edit
After: http://docs.google.com/document/d/12345678/copy
- Send the modified copy link.
- When the recipient follows the modified copy link, they’re instructed to click on Make a copy.
- They can then work on a copy of the accessible template.
For more information, see the resources below:
Technique 2. Set Document Language
At this time, Google Slides does not offer an explicit language selection mechanism to indicate the natural language of your document or changes in natural language at any point within the content. Google Slides defaults the natural language to the language selected for your Google Account. When exporting to other document formats, there is no guarantee that the natural language of your Google Account will be indicated as the natural language of your document.
In order for assistive technologies (e.g., screen readers) to be able to present your document accurately, it is important to indicate the natural language of the document. If a different natural language is used for a paragraph or selected text, this also needs to be clearly indicated.
Technique 3. Use Built-In Layout and Styling Features
Google Slides does not offer “True Headings” or “Named Styles”.
3.1 Use Built-In Slide Layouts
Instead of creating each slide in your presentation by starting from a blank slide, check whether there is a suitable built-in layout.
Note: The built-in layouts can be more accessible to users of assistive technologies because they technologies sometimes read the floating items on the slide in the order that they were placed on the slide. The built-in layouts have usually taken this into account (e.g., “Title” first followed by other items, left to right and from top to bottom). If you create slide layouts from scratch, it is sometimes difficult to keep track of the order elements were placed.
To apply “true layout” to a slide
- Go to menu item: Slide > New Slide… (Ctrl+M).
- In the Layout drop-down on the toolbar, select a slide layout from the options.

- A new slide will be inserted into the presentation with the layout you selected
3.2 Customize Using Master Slides
Google Slides is packaged with master slides available for your use. If a layout must be customized, it is recommended that Master Slides be used.
Every slide layout in a presentation is defined by its master slide. A master slide determines the formatting style for various elements of the slide layout. This includes font styles, character formatting, and the positioning of elements. Essentially, each master slide acts as a design template for the slide layout.
If you edit any aspect of the slide layout in the master slide, the change will affect all slides that were created based on it. For this reason, it is good practice to edit the master slide and use the slide layouts before building individual slides. It is essential that you create and use master slides that meet the accessibility requirements outlined in this document.
One way around this is to format a slide, ensuring its accessibility, and then create duplicates of that slide within your presentation. You can then edit the content of the duplicate slides, while ensuring that its layout meets accessibility requirements. In this way, the original slide acts as design template for the slides derived from it.
To duplicate a slide
- Go to menu item: Slide > Duplicate slide.
- Edit the content of your duplicate slide, ensuring your changes do not negatively affect accessibility of the slide.
To change a theme
- Go to the menu item Slide, then select Change theme.
- On the right sidebar, select the theme you want.
Note: If you would like to include a unique slide layout for a single slide, see Google: Learn how to apply a theme to only one slide.
To customize a master slide
- Go to the menu item Slide > Edit master.
Optional: Before editing the master, you can first select a theme that is similar to the design you want before editing the master (select Theme, then select a theme from the right).
- In the master template editor, select the Master slide at the top.
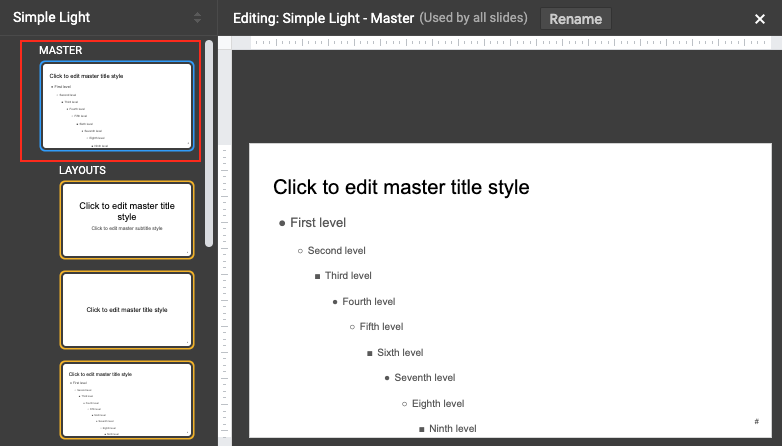
- Make your edits to the master slide.
- When finished, select the “x” at the top-righthand side of the menu to close.
- Your presentation should be updated with the changes.
For more details on how to customize your presentation, see Google: Change the theme, background, or layout in Google Slides.
Technique 4. Set a Logical Tab Order
Many presentation applications create content composed almost exclusively of “floating” objects. This means that they avoid the transitions between in-line content and secondary “floating” objects (text boxes, images, etc.) that can cause accessibility issues in word processors.
However, when you are working with “floating” objects, it is important to remember that the way objects are positioned in two dimensions on the screen may be completely different from how the objects will be read by a screen reader or navigated using a keyboard. The order that content is navigated sequentially is called the “Tab Order” because often the “Tab” key is used to navigate from one “floating” object to the next.
Tips for setting a logical “tab order” for “floating” objects
- The tab order of floating objects is usually from the “lowest” object on the slide to the “highest”.
- Because objects automatically appear “on top” when they are inserted, the default tab order is from the first object inserted to the last. However, this will change if you use features such as “bring to front” and “send to back”.
- The slide’s main heading should be first in the tab order.
- Headings should be placed in the tab order immediately before the items (text, diagrams, etc.) for which they are acting as a heading.
- Labels should be in the reading order placed immediately before the objects that they label.
- For simple slide layouts, it may be possible to simply insert objects in a logical tab order.
- For more complex layouts, it may be easier to simply to create the slide as usual and then set the tab order (see below).
To set the tab order
- Select the object.
- Go to menu item Arrange > Order > Bring to front, Bring forward, Send backward, or Send to back.
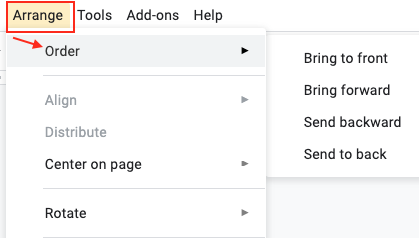
Technique 5. Use Slide Notes
A useful aspect of presentation applications is the facility to add notes to slides, which can then be read by assistive technologies. You can use these slide notes to explain and expand on the contents of your slides in text format. Slide notes can be created as you build your presentation.
To add notes to your slides
- Go to menu item: View > Show Speaker Notes
Note: Once you have selected this option, the Speaker notes pane will appear on the right side of the window for each slide. If you close the Speaker notes pane, you will have to perform the above step to access it again.
- In the Speaker notes pane on the right, enter notes to accompany each slide.
Technique 6. Provide Text Alternatives for Images and Graphical Objects
Google Slides offers a mechanism for adding alternative text to images and objects where it can be readily accessed by screen reader users. While you can add alt text, you will need to ensure that you provide the longer descriptions in the body of the document, near the images and objects. While this solution is not optimal for screen reader users and will complicate your own accessibility testing, it is necessary until long descriptions are supported.
When using images or other graphical objects, such as charts and graphs, it is important to ensure that the information you intend to convey by the image is also conveyed to people who cannot see the image. This can be accomplished by adding concise alternative text of each image. If an image is too complicated to concisely describe in the alternative text alone (artwork, flowcharts, etc.), provide a short text alternative and a longer description as well.
Tips for writing alternative text
- Try to answer the question “what information is the image conveying?”
- If the image does not convey any useful information, leave the alternative text blank
- If the image contains meaningful text, ensure all of the text is replicated
- Alternative text should be fairly short, usually a sentence or less and rarely more than two sentences
- If more description is required (e.g., for a chart or graph), provide a short description in the alternative text (e.g., a summary of the trend) and more detail in the long description, see below
- Test by having others review the document with the images replaced by the alternative text
Tips for writing longer descriptions
- Long descriptions should be used when text alternatives (see above) are insufficient to answer the question “what information is the image conveying?”
- In some situations, the information being conveyed will be how an image looks (e.g., an artwork, architectural detail, etc.). In these cases, try to describe the image without making too many of your own assumptions.
- One approach is to imagine you are describing the image to a person over the phone
- Ensure that you still provide concise alternative text to help readers decide if they are interested in the longer description
Alternatively, you can include the same information conveyed by the image within the body of the document, providing the images as an alternate to the text. In that case, you do not have to provide alternate text within the image.
To add alternative text to images and graphical objects
- Right-click* on the image.
- Select Alt Text from the contextual menu.
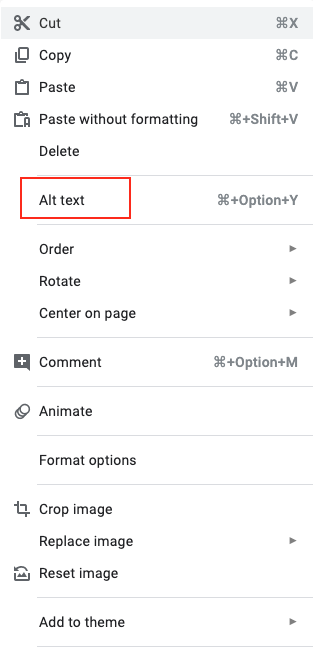
- Add your alt text to the Description field.
- Press OK to saveNote: Enter a description in the Title field will show a pop-up tooltip when users hover over the image with their mouse. However, it is recommended to put the image description in the Description field.
Technique 7. Use Built-In Structuring Features
7.1 Tables
At this time (December 2019), Google Slides does not offer a mechanism that allows you to select and indicate headings for rows and columns. Since it is not possible to create complex tables in Google Slides that are accessible, avoid creating complex tables since table headers cannot be designated.
If you use the Grackle Slides add-on, tables can be given structure and table headings can be indicated. While these fixes won’t be useful for making tables more accessible in Google Slides, it does allow you to export the document into another format with appropriate table tags intact. For more on Grackle Slides, see Technique 11.
When using tables, it is important to ensure that they are clear and appropriately structured. This helps all users to better understand the information in the table and allows assistive technologies (e.g., screen readers) to provide context so that the information within the table can be conveyed in a meaningful way.
Tips for tables
- Only use tables for tabular information, not for formatting.
- Use “real tables” rather than text formatted to look like tables using the TAB key or space bar. These will not be recognized by assistive technology.
- Keep tables simple by avoiding merged cells and dividing complex data sets into separate smaller tables, where possible.
- If tables split across pages, set the header to show at the top of each page. Also set the table to break between rows instead of in the middle of rows.
- Create a text summary of the essential table contents. Any abbreviations used should be explained in the summary.
- Table captions or descriptions should answer the question “what is the table’s purpose and how is it organized?” (e.g., “A sample order form with separate columns for the item name, price and quantity”).
- Table cells should be marked as table headers when they serve as labels to help interpret the other cells in the table.
- Table header cells labels should be concise and clear.
- Ensure the table is not “floating” on the page (see Technique 4).
7.2 Lists
When you create lists, it is important to format them as “real lists”. Otherwise, assistive technologies will interpret your list as a series of short separate paragraphs instead of a coherent list of related items.
To create an ordered or unordered list
- Select the text box or highlight the text
- Go to the menu bar
- Click the Numbered list or Bullet list button
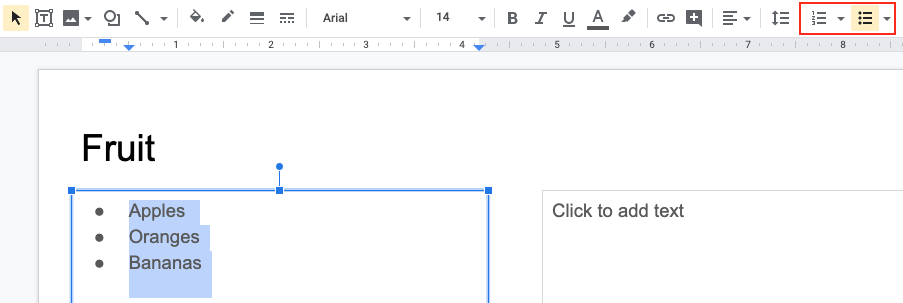
7.3 Columns
Use Columns feature for placing text in columns.
Note: Because columns can be a challenge for users of some assistive technologies, consider whether a column layout is really necessary.
7.4 Document Title
At this time (December 2019), Google Slides makes use of a single document name. Within Google Slides, this serves well as a title, but when exporting to ODT, the document name is used to form the file name, and the ODT “Title” properties field is left blank, or it lists the title used in the first slide of the presentation.
In case the document is ever converted into HTML, it should be given a descriptive and meaningful title.
To change the file name of the current document
- Go to menu item: File > Rename
- In the Rename Document dialog, enter a new document name
- Click OK
Technique 8. Create Accessible Charts
In Google Slides, you can insert data charts linked to an existing Google Sheet file (see Google Help: Link a chart or table to Google Slides for instructions).
Charts can be used to display data in meaningful ways for your audience. It is important to ensure that your chart is as accessible as possible to all members of your audience. All basic accessibility considerations that are applied to the rest of your document must also be applied to your charts and the elements within your charts. For example, use shape and color, rather than color alone, to convey information. As well, some further steps should be taken to ensure that the contents are your chart are appropriate labeled to give users reference points that will help to correctly interpret the information.
To add a new chart to a presentation
- Go to Insert > Chart.
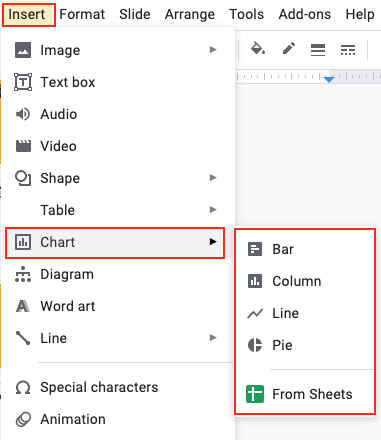
- Select the type of chart you want to add.
Note: To edit a chart, see Google Help: Edit or Update Chart Data.
Note: To learn more about how to customize the chart you created, see BrightCarbon: Google Slides: The ULTIMATE guide (blog post).
Other Chart Considerations
- When creating line charts, use the formatting options to create different types of dotted lines to facilitate legibility for users who are color blind
- When creating bar charts, it is helpful to apply textures instead of colors to differentiate the bars
- Change the default colors to a color safe or gray-scale palette
- Use the formatting options to change predefined colors, ensuring that they align with sufficient contrast requirements (see Technique 9.2)
Technique 9. Make Content Easier to See
9.1 Format of Text
When formatting text, especially when the text is likely to be printed, try to:
- Use font sizes between 12 and 18 points for body text.
- Use fonts of normal weight, rather than bold or light weight fonts. If you do choose to use bold fonts for emphasis, use them sparingly.
- Use standard fonts with clear spacing and easily recognized upper and lower case characters. Sans serif fonts (e.g., Arial, Verdana) may sometimes be easier to read than serif fonts (e.g., Times New Roman, Garamond).
- Avoid large amounts of text set all in caps, italic or underlined.
- Use normal or expanded character spacing, rather than condensed spacing.
- Avoid animated or scrolling text.
But can’t users just zoom in? Office applications do typically include accessibility features such as the ability to magnify documents and support for high contrast modes. However, because printing is an important aspect of many workflows and changing font sizes directly will change documents details such the pagination, the layout of tables, etc., it is best practice to always format text for a reasonable degree of accessibility.
9.2 Use Sufficient Contrast
The visual presentation of text and images of text should have a contrast ratio of at least 4.5:1. To help you determine the contrast, here are some examples on a white background:
- Very good contrast (Foreground=black, Background=white, Ratio=21:1)
- Acceptable contrast (Foreground=#767676, Background=white, Ratio=4.54:1)
- Unacceptable contrast (Foreground=#AAAAAA, Background=white, Ratio=2.32:1)
Also, always use a single solid color for a text background rather than a pattern.
In order to determine whether the colors in your document have sufficient contrast, you can consult an online contrast checker, such as:
9.3 Avoid Using Color Alone
Color should not be used as the only visual means of conveying information, indicating an action, prompting a response, or distinguishing a visual element. In order to spot where color might be the only visual means of conveying information, you can create a screenshot of the document and then view it with online gray-scale converting tools, such as:
- GrayBit v2.0: Grayscale Conversion Contrast Accessibility Tool
Editor’s note: GrayBit v2.0 is no longer available. However, multiple tools can be found online: Google Search: gray-scale conversion tool.
9.4 Avoid Relying on Sensory Characteristics
The instructions provided for understanding and operating content should not rely solely on sensory characteristics such as the color or shape of content elements. Here are two examples:
- Do not track changes by simply changing the color of text you have edited and noting the color. Instead use Google Slides’s change tracking features to track changes, such as revision history.
- Do not distinguish between images by referring to their appearance (e.g. “the bigger one”). Instead, label each image with a figure number and use that for references.
9.5 Avoid Using Images of Text
Before you use an image to control the presentation of text (e.g., to ensure a certain font or color combination), consider whether you can achieve the same result by styling “real text”. If this is not possible, as with logos containing stylized text, make sure to provide alternative text for the image following the techniques noted above.
9.6 Avoid Transitions
Transitions between slides and elements in each slide (e.g., bullets in a list flying onto the screen) can be distracting to users with disabilities. It can also cause assistive technologies to read the slide incorrectly. For these reasons, it is best to avoid transitions altogether.
Technique 10. Make Content Easier to Understand
10.1 Write Clearly
By taking the time to design your content in a consistent way, it will be easier to access, navigate and interpret for all users:
- Whenever possible, write clearly with short sentences.
- Introduce acronyms and spell out abbreviations.
- Avoid making the document too “busy” by using lots of whitespace and by avoiding too many different colors, fonts and images.
- If content is repeated on multiple pages within a document or within a set of documents (e.g., headings, footings, etc.), it should occur consistently each time it is repeated.
10.2 Provide Context for Hyperlinks
Hyperlink text in your document should be meaningful when read out of context. To be an effective navigation aid, the link text should describe the destination of the link.
Consider the experience of screen reader users: Generally, screen readers generate a list of links, and screen reader users navigate this list alphabetically. Hyperlink text such as “click here” or “more” is meaningless in this context.
In order to be useful to someone using a screen reader, ensure that hyperlink text is self-describing and meaningful on its own.
To add hyperlinks with meaningful text
- Go to menu item: Insert > Link. Alternately, you can select the text you’d like to add a link to and press Ctrl+K (or Cmd+K on Macs).
- In the pop-up box, enter descriptive text in the Text display box.
- Enter the link address in the Link.
- Select Apply.
10.3 Accessible Presentations
It is important to consider accessibility before, during, and after presentations. Below is a helpful link with guidance on how to make presentations accessible to all:
Enable live automatic captions when presenting
In Google Slides, you can present slides with automatic captions that displays the speaker’s words in real time at the bottom of the screen.
Note: This feature is only available on Chrome devices in U.S. English. Also, captions are not stored.
Step 1: Set up your microphone
- Google Slides requires your computer’s microphone or an external microphone paired with your computer to be turned on and working.
- Devices and microphones vary, so be sure to check your computer’s settings. Typically, these settings are found under System Preferences on a Mac or in the Control Panel on a PC.
Step 2: Present with captions
- Connect to the internet.
- Open your presentation.
- To start presenting, click Present.
- To turn on captions, click CC.
As you speak, the captions (without punctuation) appear at the bottom of the screen.
- To turn off captions, click CC again.
For more details on enabling live automatic captions when presenting, see Google: Present slides with captions.
Technique 11. Check Accessibility
At this time (December 2019), Google Slides does not offer a mechanism to check for potential accessibility errors in your document prior to publishing. However, a third-party add-on called Grackle Sheets can be used to check the accessibility of your workbook (see below).
In order to get some indication of the accessibility of your document or template (see Technique 1), then you may consider saving the file into HTML or PDF in order to perform an accessibility check in one of those formats, as described below.
To evaluate HTML accessibility
If you wish to check the accessibility of your document or template (see Technique 1), one option is to save it into HTML format and use one of the web accessibility checkers available online. Such as:
To evaluate PDF accessibility
If you saved your document in tagged PDF format, you can use the following tools and steps to evaluate the accessibility of the PDF document:
To evaluate PDF accessibility in Adobe Acrobat Professional
- Go to menu item: Advanced > Accessibility > Full Check…
- In the Full Check dialog, select all the checking option
- Select the Start Checking button
Editor’s note: For detailed instructions, see our section on how to check accessibility using Adobe Acrobat Professional.
Grackle Slides
Warning: Automated accessibility checkers cannot be trusted to check for all accessibility concerns, so be sure to review the recommended techniques in this document.
What is Grackle Slides? Grackle Slides is a third-party add-on that runs on spreadsheets created in Google Sheets. It helps with checking and improving the digital accessibility of your document. Due to the nature of Google Sheets, some accessibility features, such as tables, are only fully accessible when exporting the document to another format, like an HTML file.
How does it work? After Grackle is launched, It scans the current spreadsheet for accessibility issues and identifies and locates errors. Feedback appears in a sidebar that is docked on right-side of the screen. By exploring the sidebar, you can immediately learn about accessibility issues and find and fix the detected errors by interacting with the Grackle sidebar. Due to the nature of Google Slides, some accessibility features, such as tables, are only fully accessible when exporting the document to another format, like a HTML or PDF file.
Note: Grackle’s accessibility checker is free to use; however, the ability to export and produce accessible HTML spreadsheets, and so on, is only free for the first 30 days (as of December 2019).
At the time of testing, creating tagged PDFs in Grackle Slides is still in beta testing. While there are some export limitations, Grackle Slides performs accessibility checks that are valuable.
Grackle Slides performs the following 16 accessibility checks:
- Presentation
- Presentation title is required
- Document language should be specified
- Slides
- A slide should have a title
- Slide title should be unique
- A slide should not be empty
- Tables
- Tables should be tagged and described
- The use of merged cells is not recommended
- The use of empty cells is not recommended
- Elements
- Images should have alternative text
- Elements should have alternative text
- Text boxes should not be empty
- Lists should not be broken apart
- Content
- Fine print should be avoided
- High color contrast should be used
- In-line style changes may lack clear meaning
- Empty trailing lines should be removed
How to install Grackle Slides
Grackle Slides can be installed from the Add-ons menu of a Google Slides document.
- Open a Google presentation document.
- Select Add-ons > Get Add-ons.
- Search for “Grackle” in the search field.
- Select the add-on and click Install.
- Note: A message will appear requesting access to data that the add-on needs to work. Review the message and click Allow.
How to launch and use Grackle Sheet
Grackle Sheets is simple to launch and is accessed from the Add-ons menu.
- Open a Google Slide document.
- From the Add-ons menu, select Grackle Slides, then select Launch.
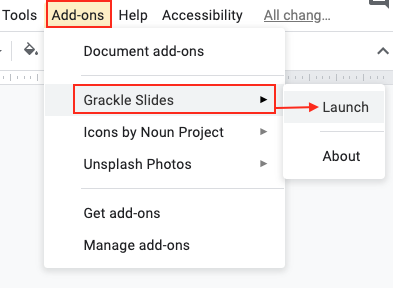
- A sidebar launches that identifies errors and warnings.
- Clicking on each error and warning will expand the selection and provide guidance on how to resolve each issue.
- Select the “Locate” button on any flagged item will take you to that line of the document to review.
- Continue to review and address each flagged item.
- Select the “Re-Check” button at the top of the sidebar to update the report.
- Continue to revise until all checks have passed.
Troubleshooting Grackle Slides
When testing the Grackle Slides, we found that the plugin would sometimes error out. Grackle Slides would indicate that the checks are complete, but the remediation functionality in the Grackle sidebar is not responsive.
Steps you can take when the Grackle Slide plugin does not function correctly:
- Export as a Microsoft PowerPoint file
- Open a new presentation file.
- Go to File > Import slides
- Run Grackle again
Note: After exporting to PowerPoint, you can run Microsoft’s built-in accessibility checker.
Technique 12. Use Accessibility Features when Saving/Exporting to Other Formats
In some cases, additional steps must be taken in order to ensure accessibility information is preserved when saving/exporting to formats other than the default.
To save in a different format
- Go to menu item: File > Download as
- Select format
PDF
PDF documents are not always accessible. Accessible PDF documents are often called “Tagged PDF” because they include “tags” that encode structural information required for accessibility. To evaluate the accessibility of your PDF document, see Technique 11.
To clean up your HTML file
- Remove unnecessary styles, line breaks, etc.
- Remove unnecessary id, class, and attributes
- Remove font tags
- Remove styles in the <head> tag
- Ensure the <th> tags have a scope attribute
- Remove <p> tags nested inside <th> and <td> tags
- Check for accessibility (see Technique 11)
Note: you may wish to use HTML editors or utilities to help with this process.
Technique 13. Consider Using Accessibility Support Applications/Plugins
Disclaimer: This list is provided for information purposes only. It is not exhaustive and inclusion of an application or plug-in on the list does not constitute a recommendation or guarantee of results.
The following accessibility related plug-ins and support are available for Google Slides:
Accessibility Help
If you are interested in what features are provided to make using Google Slides more accessible to users, documentation is provided in online articles and Help forums:
- Go to menu item: Help > Google Docs Help Center
References and Resources
- Google Slides Help Center (a list of help topics)
- Google Slides Learning Center (list of tutorials and guides)
- Grackle Slides (plugin that checks for accessibility)
- Google: Make your document or presentation more accessible
- GAWDS Writing Better Alt Text
Acknowledgments
This document was produced as part of the Accessible Digital Office Document (ADOD) Project.
This project has been developed by the Inclusive Design Research Centre, OCAD University as part of an EnAbling Change Partnership project with the Government of Ontario and UNESCO (United Nations Educational, Scientific and Cultural Organization).
Source: Authoring Techniques for Accessible Office Documents: Google docs: Presentation by the Inclusive Design Research Centre (IDRC) used under CC-BY-SA 3.0.
Microsoft PowerPoint 2010, 2013, 2016, and 2019
18
Usage Notes
At the time of testing (December 2019), PowerPoint provides a set of accessibility features that is sufficient to enable the production of accessible digital office documents. In addition, PowerPoint includes an accessibility checking feature.
What’s an “Office Document”?
You should use these techniques when you are using PowerPoint to create documents that are:
- Intended to be used by people (i.e., not computer code),
- Text-based (i.e., not simply images, although they may contain images),
- Fully printable (i.e., where dynamic features are limited to automatic page numbering, table of contents, etc., and do not include audio, video, or embedded interactivity),
- Self-contained (i.e., without hyperlinks to other documents, unlike web content), and
- Typical of office-style workflows (Reports, letters, memos, budgets, presentations, etc.).
If you are creating forms, web pages, applications, or other dynamic and/or interactive content, these techniques will still be useful to you, but you should also consult the W3C-WAI Web Content Accessibility Guidelines (WCAG 2.0) because these are specifically designed to provide guidance for highly dynamic and/or interactive content.
File Formats
The default file format for PowerPoint is Office Open XML (PPTX).
In addition, PowerPoint offers many other presentation processor and web format saving options. Most of these have not been checked for accessibility, but some information and/or instructions are available for the following formats in Technique 12 (below):
- MS PowerPoint (PPT)
- PDF
- HTML
Document Conventions
We have tried to formulate these techniques so that they are useful to all authors, regardless of whether they use a mouse. However, for clarity there are several instances where mouse-only language is used. Below are the mouse-only terms and their keyboard alternatives:
- *Right-click: To right-click with the keyboard, select the object using the Shift+Arrow keys and then press either (1) the “Right-Click” key (some keyboard have this to the right of the spacebar) or Shift+F10.
Disclaimer and Testing Details:
Following these techniques will increase the accessibility of your documents, but it does not guarantee accessibility to any specific disability groups. In cases where more certainty is required, it is recommended that you test the office documents with end users with disabilities, including screen reader users. The application-specific steps and screenshots in this document were created using Microsoft PowerPoint 2010 (ver. 14.0.4760.1000, Windows XP, Sept. 2010) while creating a PPTX document. Files are also easily saved as other file formats (see Technique 12, below).
Technique 1. Use Accessible Templates
All office documents start with a template, which can be as simple as a blank standard-sized page or as complex as a nearly complete document with text, graphics and other content. For example, a “Meeting Minutes” template might include headings for information relevant to a business meeting, such as “Actions” above a table with rows to denote time and columns for actions of the meeting. Because templates provide the starting-point for so many documents, accessibility is critical. If you are unsure whether a template is accessible, you should check a sample document produced when the template is used (see Technique 11, below).
PowerPoint’s default template for new documents is a blank presentation. If you are connected to the internet, you can access a variety of blank business presentation templates through Office.com. These are all accessible by virtue of being blank.
It is possible to create your own accessible templates from scratch in PowerPoint. As well, you can edit and modify the existing prepackaged templates, ensuring their accessibility as you do so and saving them as a new template.
To create an accessible template
- Create a new document
- Ensure that you follow the techniques in this document
- When you are finished you should also check the accessibility of the document (see Technique 11, below)
- Go to menu item: File > Save As
- In the Save as type list, select PowerPoint Template
- In the File name box, type a name for the template. Using a descriptive File name (e.g., “Accessible Sales Template”) will increase the prominence of the accessibility status. As well, filling in the text box labeled Tags with the term “accessibility” will improve its searchability as an accessible file.
- Select Save
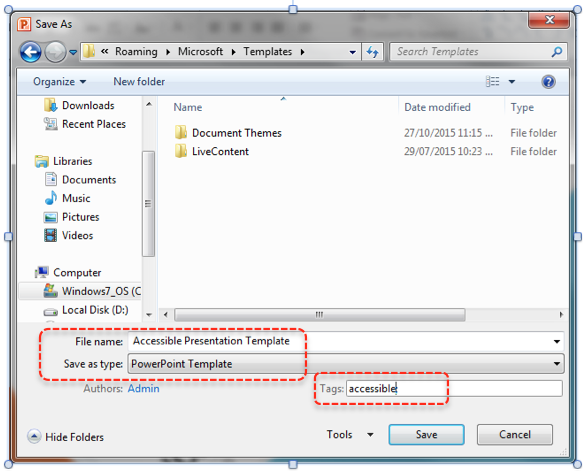
To select an accessible template
Only use these steps if you have an accessible template available (e.g., that you previously saved). Otherwise, simply open a new (blank) document.
- Go to menu item: File > New
- Under Available Templates, select My Templates
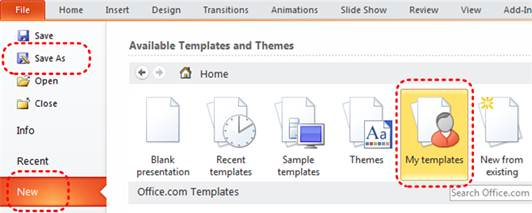
- In the New document dialog, select your accessible template from the list
- Select OK
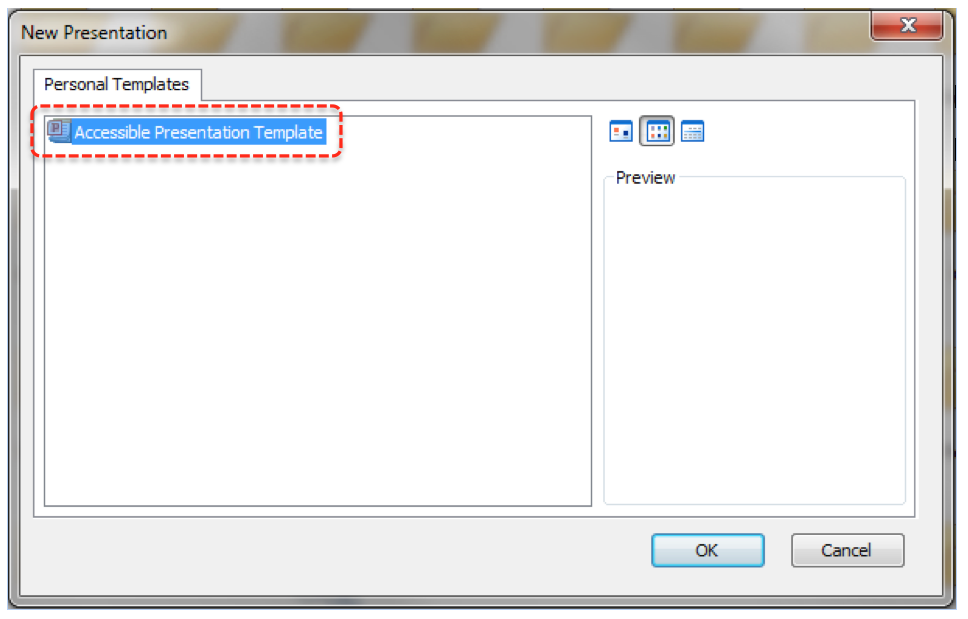
- A new document based on the template will be displayed. If you have chosen an accessible template, the document will be accessible at this point. As you add your content (e.g., text, images, etc.), ensure that you consult the sections that follow to preserve accessibility.
Technique 2. Set Document Language
In order for assistive technologies (e.g., screen readers) to be able to present your document accurately, it is important to indicate the natural language of the document. If a different natural language is used for a paragraph or selected text, this also needs to be clearly indicated.
To change the default language
- Go to menu item: File
- Select Options from the list in the left window pane
- Select Language from the list in the left of the Options dialog
- Under Chose Editing Languages, select the editing language you want to use
Note: to add an editing language, select the language from the drop down list labeled [Add additional editing languages]
- Select Set as Default
- Close all Office programs and open them again for the changes to take effect
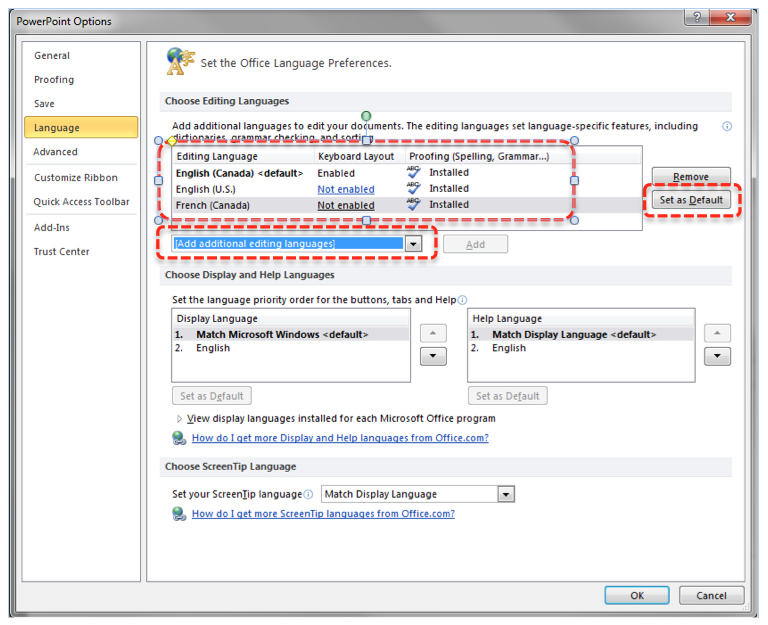
To apply a language directly to selected text
- Select the text
- Go to menu item: Review
- In the Language section, select the Language button
- Select Set Proofing Language
- In the Mark selected text as box, select the language from the list
- Select OK
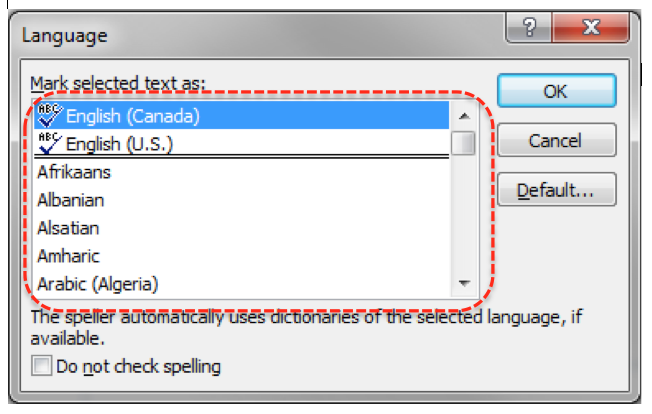
Technique 3. Use Built-In Layout and Styling Features
PowerPoint does not provide “True Headings” or “Named Styles” as does Word.
3.1 Use Built-In Slide Layouts
Instead of creating each slide in your presentation by starting from a blank slide, check whether there is a suitable built-in layout.
Note: The built-in layouts can be more accessible to users of assistive technologies because these technologies sometimes read the floating items on the slide in the order that they were placed on the slide. The built-in layouts have usually taken this into account (e.g., “Title” first followed by other items, left to right and from top to bottom). If you create slide layouts from scratch, it is sometimes difficult to keep track of the order in which elements were placed.
To apply “true layout” to a slide
- Go to menu item: Home
- In the Slides section, select the Layout button
- Select the layout you would like to use from the drop down menu
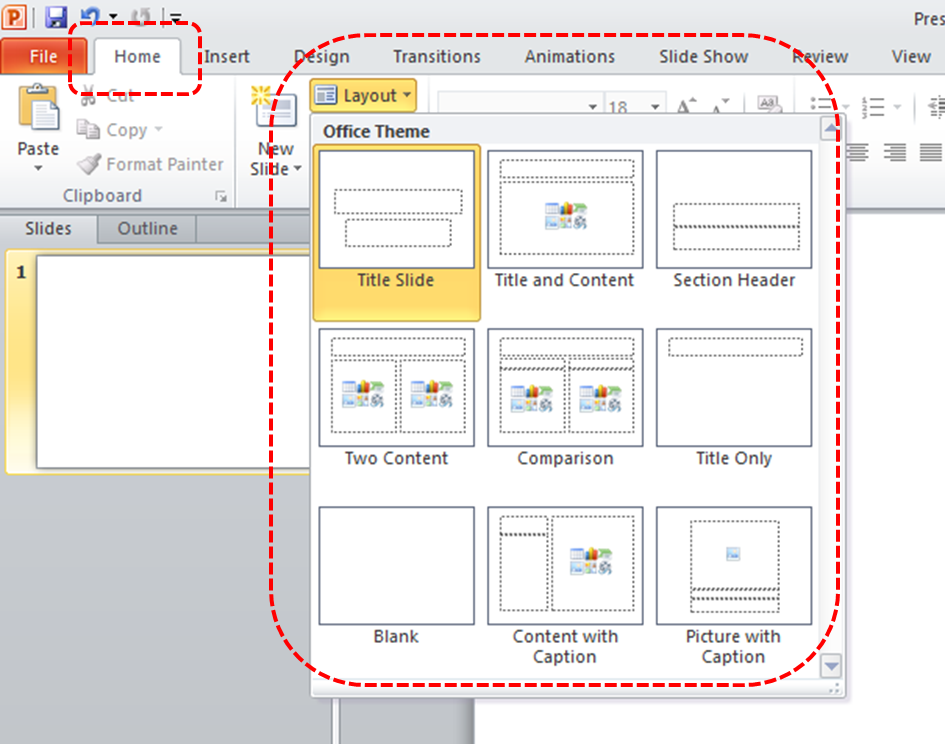
3.2 Customize Using Master Slides
If a layout must be customized, it is recommended that Master Slides be used.
Every slide layout in a presentation is defined by its master slide. A master slide determines the formatting style for various elements of the slide layout. This includes font styles, character formatting, and the positioning of elements. Essentially, each master slide acts as a design template for the slide layout.
If you edit any aspect of the slide layout in the master slide, the change will affect all slides that were created based on it. For this reason, it is good practice to edit the master slide and use the slide layouts before building individual slides. It is essential that you create and use master slides that meet the accessibility requirements outlined in this document.
To create or customize a master slide
- Go to menu item: View
- In the Master Views section, select the Slide Master icon
- The current slide master with its associate layouts appears
Note: If you have the Normal view open, the slide master is the larger slide image in the slide thumbnail pane. The associated layouts are positioned beneath the slide master.
- Customize the existing master slide and its associated layouts to suit your needs (e.g., apply a design, theme-based colours, fonts, effects, backgrounds) ensuring that your changes meet accessibility requirements
- Go to menu item: File > Save As
- In the File name box, type a file name
- In the Save as type list, select PowerPoint template
- Select Save
- On the Slide Master tab, in the Close section, select Close Master View
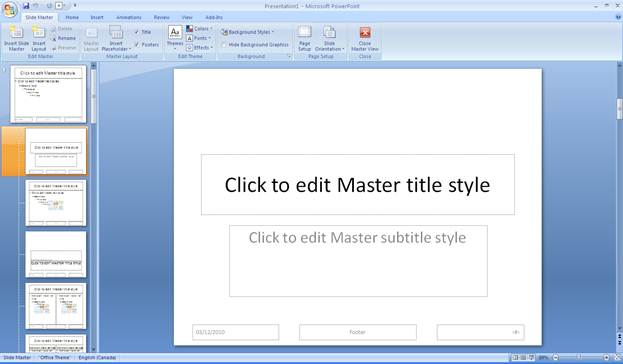
Technique 4. Set a Logical Tab Order
Many presentation applications create content composed almost exclusively of “floating” objects. This means that they avoid the transitions between in-line content and secondary “floating” objects (text boxes, images, etc.) that can cause accessibility issues in word processors.
However, when you are working with “floating” objects, it is important to remember that the way objects are positioned in two dimensions on the screen may be completely different from how the objects will be read by a screen reader or navigated using a keyboard. The order that content is navigated sequentially is called the “Tab Order” because often the “Tab” key is used to navigate from one “floating” object to the next.
Tips for setting a logical “tab order” for “floating” objects
- The tab order of floating objects is usually from the “lowest” object on the slide to the “highest”.
- Because objects automatically appear “on top” when they are inserted, the default tab order is from the first object inserted to the last. However, this will change if you use features such as “bring to front” and “send to back”.
- The slide’s main heading should be first in the tab order.
- Headings should be placed in the tab order immediately before the items (text, diagrams, etc.) for which they are acting as a heading.
- Labels should be in the reading order placed immediately before the objects that they label.
- For simple slide layouts, it may be possible to simply insert objects in a logical tab order.
- For more complex layouts, it may be easier to simply create the slide as usual and then set the tab order (see below).
To set the tab order using the ‘Selection Pane’
- Go to menu item: Home
- In the Drawing section, select Arrange > Selection Pane…
- In the Selection and Visibility pane, all the elements on the slide are listed in reverse chronological order under Shapes on this Slide
- Elements can be re-ordered using the Re-order buttons located at the bottom of the Selection and Visibility pane
Note: The tab order of elements begins at the bottom of the list and tabs upwards.
Technique 5. Use Slide Notes
A useful aspect of presentation applications is the facility to add notes to slides, which can then be read by assistive technologies. You can use these slide notes to explain and expand on the contents of your slides in text format. Slide notes can be created as you build your presentation.
To add notes to your slides
- Go to menu item: View
- In the Presentation Views section, select Normal to ensure that the notes panel is in view
Note: You can then select menu item Home, to access text formatting options
- The Notes Pane can be found at the bottom of the window, below the slide
- Type and format your notes within the Notes Pane below each slide
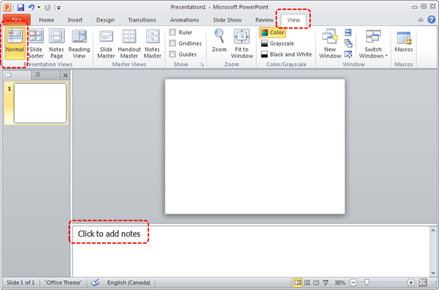
Technique 6. Provide Text Alternatives for Images and Graphical Objects
When using images or other graphical objects, such as charts and graphs, it is important to ensure that the information you intend to convey by the image is also conveyed to people who cannot see the image. This can be accomplished by adding concise alternative text to of each image. If an image is too complicated to concisely describe in the alternative text alone (artwork, flowcharts, etc.), provide a short text alternative and a longer description as well.
Tips for writing alternative text (“Title” in PowerPoint)
- Try to answer the question “what information is the image conveying?”
- If the image does not convey any useful information, leave the alternative text blank
- If the image contains meaningful text, ensure all of the text is replicated
- Alternative text should be fairly short, usually a sentence or less and rarely more than two sentences
- If more description is required (e.g., for a chart or graph), provide a short description in the title text (e.g., a summary of the trend) and more detail in the long description, see below
- Test by having others review the document with the images replaced by the alternative text
Tips for writing longer descriptions (“Description” in PowerPoint)
- Long descriptions should be used when text alternatives (see above) are insufficient to answer the question “what information is the image conveying?”
- In some situations, the information being conveyed will be how an image looks (e.g., an artwork, architectural detail, etc.). In these cases, try to describe the image without making too many of your own assumptions.
- One approach is to imagine you are describing the image to a person over the phone
- Ensure that you still provide concise alternative text to help readers decide if they are interested in the longer description
Alternatively, you can include the same information conveyed by the image within the body of the document, providing the images as an alternate to the text. In that case, you do not have to provide alternate text within the image.
To add alternative text to images and graphical objects
- Right-click* the object
- Select Format Picture…
- Select the Alt Text option from the list
- Fill in the Title. If more description is required (e.g., for a chart or graph), provide a short description in the Title (e.g., a summary of the trend) and more detail in the Description.
Note: If the document is ever saved to HTML, the Title and Description fields are combined into a single HTML <alt> tag.
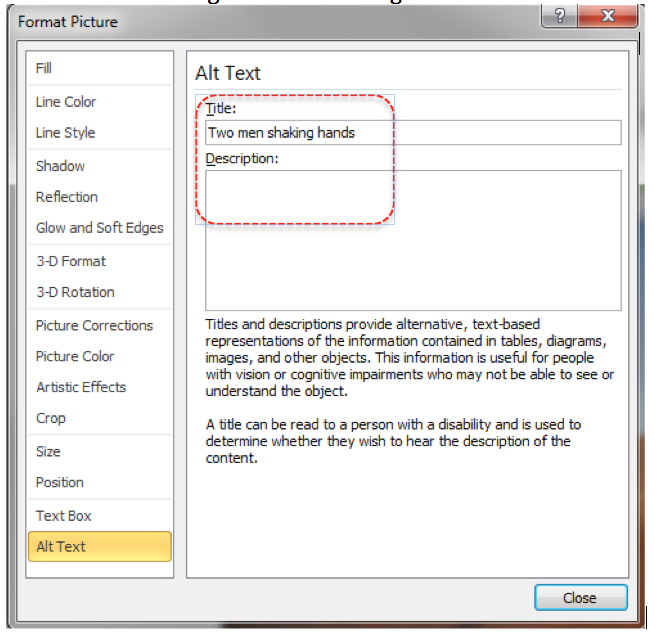
Editor’s note: For more details about adding alternative text to your PowerPoint slides, including how to toggle automatic alt text, see how to add alt text.
Technique 7. Use Built-In Structuring Features
7.1 Tables
When using tables, it is important to ensure that they are clear and appropriately structured. This helps all users to better understand the information in the table and allows assistive technologies (e.g., screen readers) to provide context so that the information within the table can be conveyed in a meaningful way.
Tips for tables
- Only use tables for tabular information, not for formatting.
- Use “real tables” rather than text formatted to look like tables using the TAB key or space bar. These will not be recognized by assistive technology.
- Keep tables simple by avoiding merged cells and dividing complex data sets into separate smaller tables, where possible.
- If tables are split across pages, set the header to show at the top of each page. Also, set the table to break between rows instead of in the middle of rows.
- Create a text summary of the essential table contents. Any abbreviations used should be explained in the summary.
- Table captions or descriptions should answer the question “what is the table’s purpose and how is it organized?” (e.g., “A sample order form with separate columns for the item name, price and quantity”).
- Table cells should be marked as table headers when they serve as labels to help interpret the other cells in the table.
- Table header cells labels should be concise and clear.
- Ensure the table is not “floating” on the page (see Technique 4).
To add a table with headings
- Go to menu item: Insert
- In the Tables section, select the Tables icon
- Select the number of rows and columns you would like your table to have
- Select the table and a Table Tools menu item should appear
- Go to menu item: Table Tools > Design
- In the Table Style Options section, select the Header Row check box
Note: Whenever possible, keep tables simple with just 1 row of headings.
7.2 Lists
When you create lists, it is important to format them as “real lists”. Otherwise, assistive technologies will interpret your list as a series of short separate paragraphs instead of a coherent list of related items.
To create an ordered or unordered list
- Go to menu item: Home
- In the Paragraph section, select the Bullets icon for unordered lists or select the Numbering icon for ordered lists
- To select a different list format, select the arrow beside the icon
- Select a format from the format Library that appears in the drop-down menu
To modify list styles
- Go to menu item: Home
- In the Paragraph section, select the arrow beside the Bullets icon for unordered lists or select the arrow beside the Numbering icon for ordered lists
- Select Define New Bullet… to create a new unordered list format
- Select Define New Number Format… to create a new ordered list format
- In the New Bullet dialog or the New Number Format dialog, select the list characteristics
- Select OK
7.3 Columns
Use Columns feature for placing text in columns.
Note: Because columns can be a challenge for users of some assistive technologies, consider whether a column layout is really necessary.
7.4 Document Title
In case the document is ever converted into HTML, it should be given a descriptive and meaningful title.
To change the title of the current document
- Go to menu item: File
- Select Info from the list in the left window pane
- In the right window pane, select the Title text box
- Enter the Title
Note: The Title defined in the properties is different than the file name. It is also unrelated to the template name, discussed above.
7.5 Slide Titles
Unique slide titles aid navigation for non-visual users.
To add a visible title to a slide
- Go to menu item: Home.
- Select Reset in the Slides section.
- Enter a title at the top of the slide.
Note:Slide titles should be unique for clarity and ease of navigation.
To add an invisible title to a slide
- Enter your title at the top of the slide.
- Go to menu item: Home.
- From the Drawing menu, select Arrange > Selection Pane. This will open the Selection and Visibility pane.
- In the Selection and Visibility pane, click on the eyeball icon next to the slide title to change visibility settings.
Technique 8. Create Accessible Charts
Charts can be used to make data more understandable for some audiences. However, it is important to ensure that your chart is as accessible as possible to all members of your audience. All basic accessibility considerations that are applied to the rest of your document must also be applied to your charts and the elements within your charts. For example, use shape and colour, rather than colour alone, to convey information. As well, some further steps should be taken to ensure that the contents are your chart are appropriately labeled to give users reference points that will help them to correctly interpret the information.
To create a chart
- Select a Slide Layout that contains a placeholder for a chart (see Technique 3.1, above)
- Select the Insert Chart icon from the center of the placeholder
- Select a Chart Type from the Insert Chart dialog
- Select OK
Note: This will open the Excel document titled “Chart in Microsoft Office PowerPoint”, where you can input the data you would like to include in the chart. When you have done this, simply close the Excel window and the data will appear on the chart in the PowerPoint presentation.
To add titles and labels
- In the Chart Tools menu section, go to menu item: Layout
- In the Labels section, select the type of title or label you would like to define (e.g., Chart Title, Axis Titles, Data Labels)
To apply a predefined Chart Layout
- In the Chart Tools menu section, go to menu item: Design
- In the Chart Layouts section, select a Quick Layout from the scrolling Chart Layouts gallery
To change to a different predefined Chart Type
- In the Chart Tools menu section, go to menu item: Design
- In the Type section, select the Change Chart Type icon
- In the Change Chart Type dialog, select a chart type from the left pane
- Select a Chart Design from the right pane
- Select OK
Other Chart Considerations
- When creating line charts, use the formatting options to create different types of dotted lines to facilitate legibility for users who are colour blind
- When creating bar charts, go to menu item: Chart Tools > Format and in the Shape Styles section select Shape Fill to apply a texture to help distinguish the bars
- Change the default colours to a colour safe or gray-scale palette
- Use the formatting options to change predefined colours, ensuring that they align with sufficient contrast requirements (see Technique 9.2, below)
Technique 9. Make Content Easier to See
9.1 Format of Text
When formatting text, especially when the text is likely to be printed, try to:
- Use font sizes between 12 and 18 points for body text.
- Use fonts of normal weight, rather than bold or light weight fonts. If you do choose to use bold fonts for emphasis, use them sparingly.
- Use standard fonts with clear spacing and easily recognized upper and lower case characters. Sans serif fonts (e.g., Arial, Verdana) may sometimes be easier to read than serif fonts (e.g., Times New Roman, Garamond).
- Avoid large amounts of text set all in caps, italic or underlined.
- Use normal or expanded character spacing, rather than condensed spacing.
- Avoid animated or scrolling text.
But can’t users just zoom in? Office applications do typically include accessibility features such as the ability to magnify documents and support for high contrast modes. However, because printing is an important aspect of many workflows and changing font sizes directly will change document details such the pagination, the layout of tables, etc., it is best practice to always format text for a reasonable degree of accessibility.
9.2 Use Sufficient Contrast
The visual presentation of text and images of text should have a contrast ratio of at least 4.5:1. To help you determine the contrast, here are some examples on a white background:
- Very good contrast (Foreground=black, Background=white, Ratio=21:1)
- Acceptable contrast (Foreground=#767676, Background=white, Ratio=4.54:1)
- Unacceptable contrast (Foreground=#AAAAAA, Background=white, Ratio=2.32:1)
Also, always use a single solid colour for a text background rather than a pattern.
In order to determine whether the colours in your document have sufficient contrast, you can consult an online contrast checker, such as:
9.3 Avoid Using Colour Alone
Colour should not be used as the only visual means of conveying information, indicating an action, prompting a response, or distinguishing a visual element. In order to spot where colour might be the only visual means of conveying information, you can create a screenshot of the document and then view it with online gray-scale converting tools, such as:
- GrayBit v2.0: Grayscale Conversion Contrast Accessibility Tool
Editor’s note: GrayBit v2.0 is no longer available. However, multiple tools can be found online: Google Search: gray-scale conversion tool.
9.4 Avoid Relying on Sensory Characteristics
The instructions provided for understanding and operating content should not rely solely on sensory characteristics such as the colour or shape of content elements. Here are two examples:
- Do not track changes by simply changing the colour of text you have edited and noting the colour. Instead use PowerPoint’s “Track Changes” feature to track changes.
- Do not distinguish between images by referring to their appearance (e.g., “the bigger one”). Instead, label each image with a figure number and use that for references.
9.5 Avoid Using Images of Text
Before you use an image to control the presentation of text (e.g., to ensure a certain font or colour combination), consider whether you can achieve the same result by styling “real text”. If this is not possible, as with logos containing stylized text, make sure to provide alternative text for the image following the techniques noted above.
9.6 Avoid Transitions
Transitions between slides and elements in each slide (e.g., bullets in a list flying onto the screen) can be distracting to users with disabilities. It can also cause assistive technologies to read the slide incorrectly. For these reasons, it is best to avoid transitions altogether.
Technique 10. Make Content Easier to Understand
10.1 Write Clearly
By taking the time to design your content in a consistent way, it will be easier to access, navigate and interpret for all users:
- Whenever possible, write clearly with short sentences.
- Introduce acronyms and spell out abbreviations.
- Avoid making the document too “busy” by using lots of whitespace and by avoiding too many different colours, fonts and images.
- If content is repeated on multiple pages within a document or within a set of documents (e.g., headings, footings, etc.), it should occur consistently each time it is repeated.
10.2 Provide Context for Hyperlinks
Hyperlink text in your document should be meaningful when read out of context. To be an effective navigation aid, the link text should describe the destination of the link.
Consider the experience of screen reader users: Generally, screen readers generate a list of links, and screen reader users navigate this list alphabetically. Hyperlink text such as “click here” or “more” is meaningless in this context.
In order to be useful to someone using a screen reader, ensure that hyperlink text is self-describing and meaningful on its own. To make the address of hyperlink clear when printing, you may wish to include the address in brackets following the descriptive text of the hyperlink.
To change link text
- Highlight the link and right-click*
- Select Edit Hyperlink (Ctrl + K)
- Change the text in the Text to display box to something descriptive
10.3 Accessible Presentations
It is important to consider accessibility before, during, and after presentations. Below is a helpful link with guidance on how to make presentations accessible to all:
Technique 11. Check Accessibility
If you wish to check the accessibility of your document or template (see Technique 1, above), PowerPoint offers an “Accessibility Checker” to review your document against a set of possible issues that users with disabilities may experience in your file.
The “Accessibility Checker” classifies issues as:
- Error – content that makes a file very difficult or impossible for people with disabilities to understand
- Warning – content that in most, but not all, cases makes a file difficult for people with disabilities to understand
- Tip – content that people with disabilities can understand, but that might be better organized or presented in a way that would maximize their experience
To learn more about the Accessibility Checker and the rules it uses to identify and classify accessibility issues in your document, visit the PowerPoint help section (see Accessibility Help, below). Use the search term “accessibility checker rules” in the help search box.
To use the “Accessibility Checker”
- Go to menu item: File
- Select Info in the left window pane
- Under Prepare for Sharing, an alert will appear if a potential accessibility issue has been detected
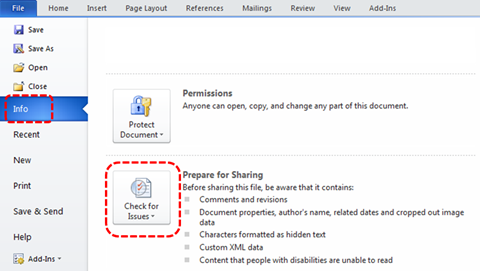
- To view and repair the issues, select Check for Issues and then Check Accessibility

- An Accessibility Checker task pane will open, showing the inspection results
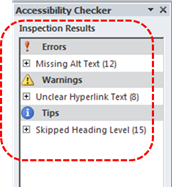
- Select a specific issue to see Additional Information
- Follow the steps provided to fix or revise the content
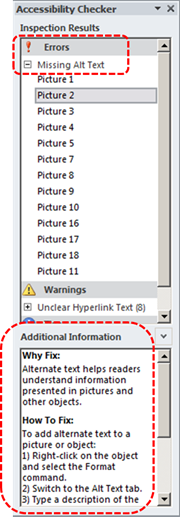
In order to get further indication of the accessibility of your document or template (see Technique 1), then you may consider saving the file into HTML or PDF in order to perform an accessibility check in one of those formats, as described below.
To evaluate HTML accessibility
Another option is to save the document into HTML format and use one of the web accessibility checkers available online. Such as:
To evaluate PDF accessibility
If you saved your document in tagged PDF format, you can use the following tools and steps to evaluate the accessibility of the PDF document:
To evaluate PDF accessibility in Adobe Acrobat Professional
- Go to menu item: Advanced > Accessibility > Full Check…
- In the Full Check dialog, select all the checking options
- Select the Start Checking button
Editor’s note: For detailed instructions, see our section on how to check accessibility using Adobe Acrobat Professional.
Technique 12. Use Accessibility Features when Saving/Exporting to Other Formats
In some cases, additional steps must be taken in order to ensure accessibility information is preserved when saving/exporting to formats other than the default.
PDF
PDF documents are not always accessible. Accessible PDF documents are often called “Tagged PDF” because they include “tags” that encode structural information required for accessibility. To evaluate the accessibility of your PDF document, see Technique 11 (above).
- Go to menu item: File
- Select Save As
- In the File name box, type a name for the file
- In the Save as type list, select PDF or XPS Document
- Select the Options button
- Under Include non-printing information in the Options dialog, ensure that the Document structure tags for accessibility check box is selected
- Select OK and Save
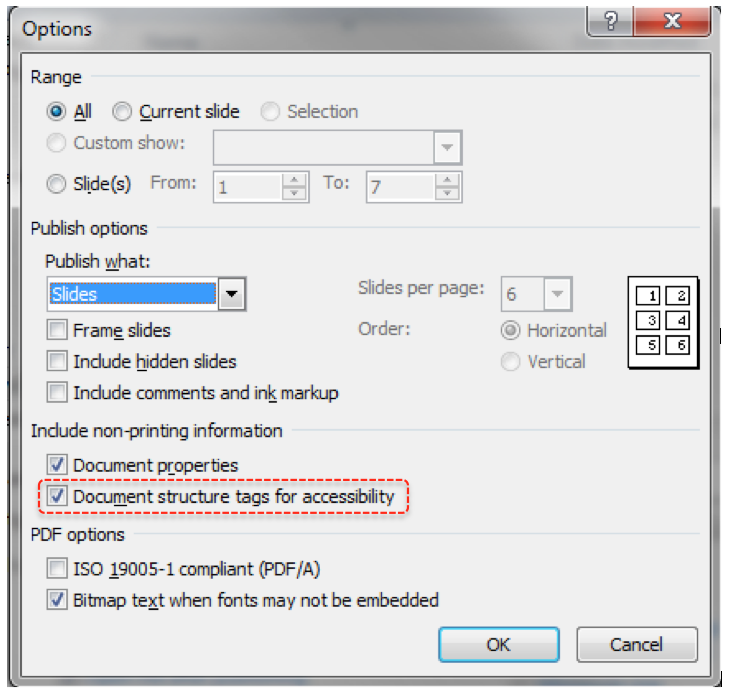
HTML
- Go to menu item: File
- Select Save As
- In the File name box, type a name for the file
- In the Save as type box, select Web Page
- Select Save
- Check the HTML file for accessibility (see Technique 11, above)
To clean up your HTML file
- Remove unnecessary styles, line breaks, etc.
- Remove unnecessary id, class, and attributes
- Remove font tags
- Remove styles in the <head> tag
- Ensure the <th> tags have a scope attribute
- Remove <p> tags nested inside <th> and <td> tags
- Check for accessibility (see Technique 11, above)
Note: you may wish to use HTML editors or utilities to help with this process.
Technique 13. Consider Using Accessibility Support Applications/Plugins
Disclaimer: This list is provided for information purposes only. It is not exhaustive and inclusion of an application or plug-in on the list does not constitute a recommendation or guarantee of results.
The following accessibility related plug-ins and support are available for PowerPoint 2007:
- PPT2HTML – offers an accessibility tool bar for adding alt-text to charts.
- PowerTalk – an accessibility tool that provides a good approximation of how presentations will sound with a screen reader. [Editor’s note: Tool no longer available.]
- HiSoftware – desktop add-ins that will create a Section 508 or WAI Fully Compliant Web pages from PowerPoint presentations (some knowledge of HTML code is required).
- Keyboard shortcuts in PowerPoint
- Accessibility Tutorials for Office
Accessibility Help
If you are interested in what features are provided to make using PowerPoint more accessible to users, documentation is provided in the Help system:
- Go to menu item: File
- Select Help from the list on the left
- Under the Support section, select the Help icon
- Enter “Accessibility” as your search term in the Help dialog box
References and Resources
- Microsoft PowerPoint Help
- GAWDS Writing Better Alt Text
- Microsoft PowerPoint Online Accessibility Center
- Ryerson University: Microsoft PowerPoint Accessibility Tipsheet (PDF)
- Microsoft PowerPoint: Video Tutorials
Acknowledgments
Authors: Jan Richards, Sabrina Ruplall
This document was produced as part of the Accessible Digital Office Document (ADOD) Project. This project has been developed by the Inclusive Design Research Centre, OCAD University as part of an EnAbling Change Partnership project with the Government of Ontario and UNESCO (United Nations Educational, Scientific and Cultural Organization).
Source: Authoring Techniques for Accessible Office Documents: Microsoft PowerPoint 2010 by the Inclusive Design Research Centre (IDRC) used under CC-BY-SA 3.0.
Microsoft PowerPoint for Mac 2008, 2011, 2016, and 2019
19
Usage Notes
Overview
At the time of testing (January 17, 2011), as long as images are avoided, PowerPoint for Mac provides a set of accessibility features that is sufficient to enable the production of accessible digital office documents. However, PowerPoint 2008 for Mac does not include an accessibility checking feature.
Editor’s note: Later versions of PowerPoint for Mac include an accessibility checking feature. For more information, please see the following:
What’s an “Office Document”?
You should use these techniques when you are using PowerPoint for Mac to create documents that are:
- Intended to be used by people (i.e., not computer code),
- Text-based (i.e., not simply images, although they may contain images),
- Fully printable (i.e., where dynamic features are limited to automatic page numbering, table of contents, etc. and do not include audio, video, or embedded interactivity),
- Self-contained (i.e., without hyperlinks to other documents, unlike web content), and
- Typical of office-style workflows (Reports, letters, memos, budgets, presentations, etc.).
If you are creating forms, web pages, applications, or other dynamic and/or interactive content, these techniques will still be useful to you, but you should also consult the W3C-WAI Web Content Accessibility Guidelines (WCAG 2.0) because these are specifically designed to provide guidance for highly dynamic and/or interactive content.
File Formats
The default file format for PowerPoint for Mac is Office Open XML (PPTX).
In addition, PowerPoint for Mac offers many other presentation processor and web format saving options. Most of these have not been checked for accessibility, but some information and/or instructions are available for the following formats in Technique 12 (below):
- PPT (MS PowerPoint 97–2004)
- POTX (PowerPoint Template)
- PDF
- ODP (OpenDocument Presentation)
- HTML
Document Conventions
We have tried to formulate these techniques so that they are useful to all authors, regardless of whether they use a mouse. However, for clarity there are several instances where mouse-only language is used. Below are the mouse-only terms and their keyboard alternatives:
*Right-click: To right-click with the keyboard, select the object using the Shift+Arrow keys and then press either (1) the “Right-Click” key (some keyboard have this to the right of the spacebar) or Shift+F10.
Disclaimer and Testing Details:
Following these techniques will increase the accessibility of your documents, but it does not guarantee accessibility to any specific disability groups. In cases where more certainty is required, it is recommended that you test the office documents with end users with disabilities, including screen reader users.
The application-specific steps and screenshots in this document were created using Microsoft PowerPoint 2008 for Mac (ver. 12.0 (071130), Mac OS X, Jan. 2011) and Microsoft PowerPoint for Mac (version 16.16.17) while creating a PPTX document. Files are also easily saved as other file formats (see Technique 12, below).
This document is provided for information purposes only and is neither a recommendation nor a guarantee of results. If errors are found, please report them to: adod-comments@idrc.ocad.ca.
Technique 1. Use Accessible Templates
All office documents start with a template, which can be as simple as a blank standard-sized page or as complex as a nearly complete document with text, graphics and other content. For example, a “Meeting Minutes” template might include headings for information relevant to a business meeting, such as “Actions” above a table with rows to denote time and columns for actions of the meeting.
Because templates provide the starting-point for so many documents, accessibility is critical. If you are unsure whether a template is accessible, you should check a sample document produced when the template is used (see Technique 11, below).
PowerPoint for Mac’s default template for new documents is a blank presentation. If you are connected to the internet, you can access a variety of blank business presentation templates through Office.com. These are all accessible by virtue of being blank.
It is possible to create your own accessible templates from scratch in PowerPoint for Mac. As well, you can edit and modify the existing prepackaged templates, ensuring their accessibility as you do so and saving them as a new template.
To create an accessible template
- Create a new document
- Ensure that you follow the techniques in this document
- When you are finished you should also check the accessibility of the document (see Technique 11, below)
- Go to menu item: File > Save As
- In the Save As box, type a name for the template. Using a descriptive File name (e.g., “Accessible Sales Template”) will increase the prominence of the accessibility status.
- In the Format list, select PowerPoint 97–2004 (.pot)
- Select Save
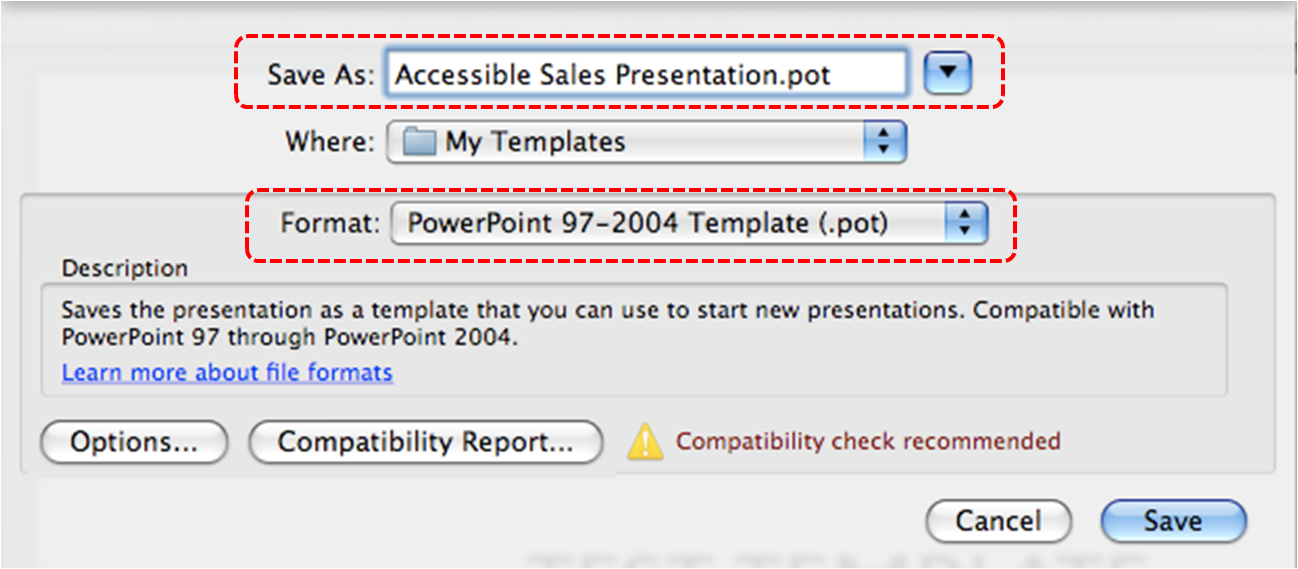
To select an accessible template
Note: Only use these steps if you have an accessible template available (e.g. that you previously saved). Otherwise, simply open a new (blank) document.
- Go to menu item: File > Project Gallery…
- Under Category, select My Templates (or select where you saved the template)
- Select your accessible template from the template gallery
- Select Open
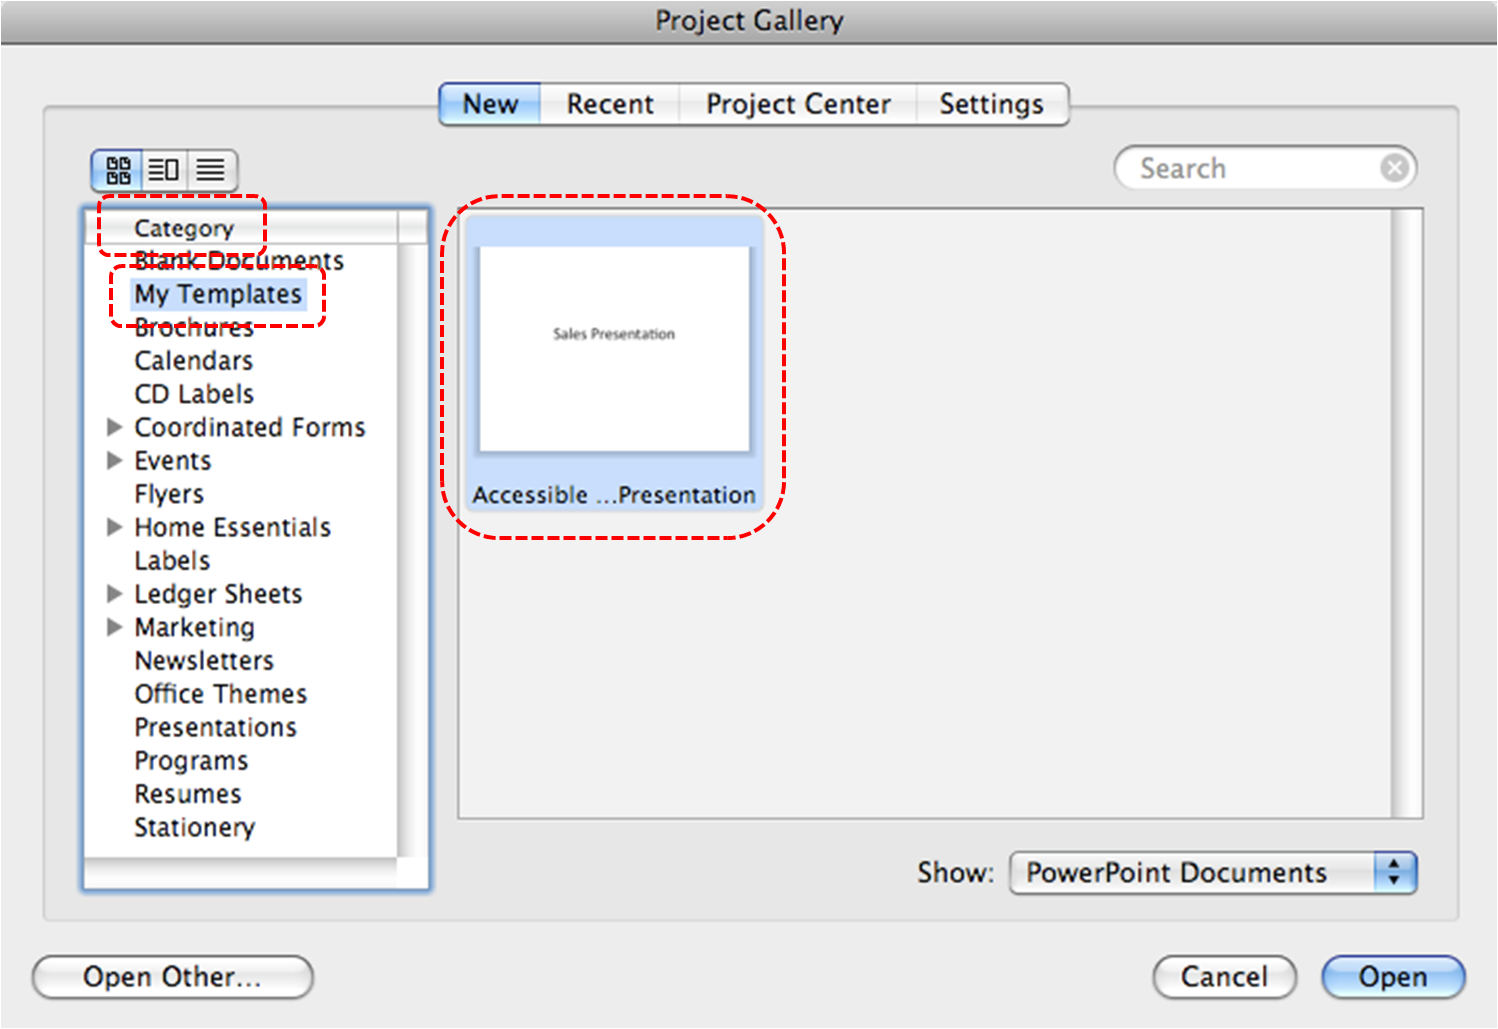
- A new document based on the template will be displayed. If you have chosen an accessible template, the document will be accessible at this point. As you add your content (e.g., text, images, etc.), ensure that you consult the sections that follow to preserve accessibility.
Technique 2. Set Document Language
In order for assistive technologies (e.g., screen readers) to be able to present your document accurately, it is important to indicate the natural language of the document. If a different natural language is used for a paragraph or selected text, this also needs to be clearly indicated.
To change the default language
- Go to menu item: Tools > Language
- In the Mark select text as box, select the language from the list
- Select Default…
- Select OK
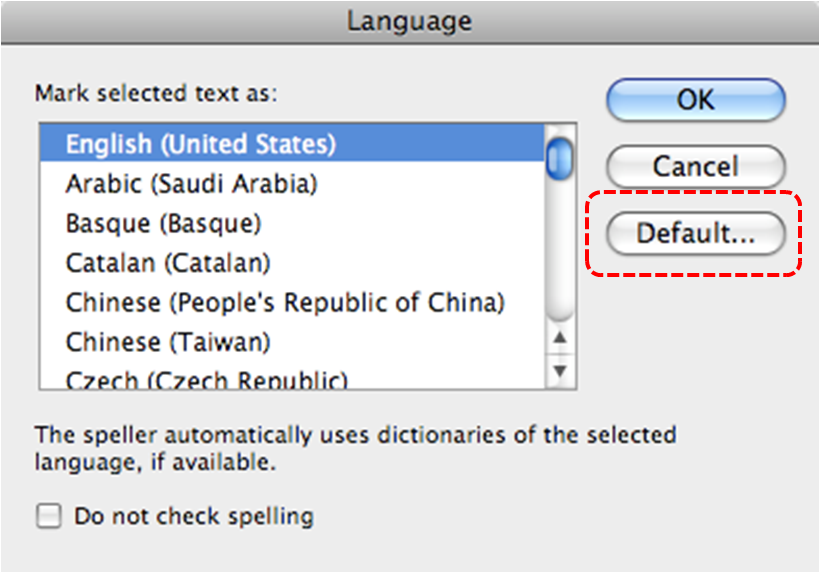
To apply a language directly to selected text
- Select the text
- Go to menu item: Tools > Language…
- In the Mark selected text as box, select the language from the list
- Select OK
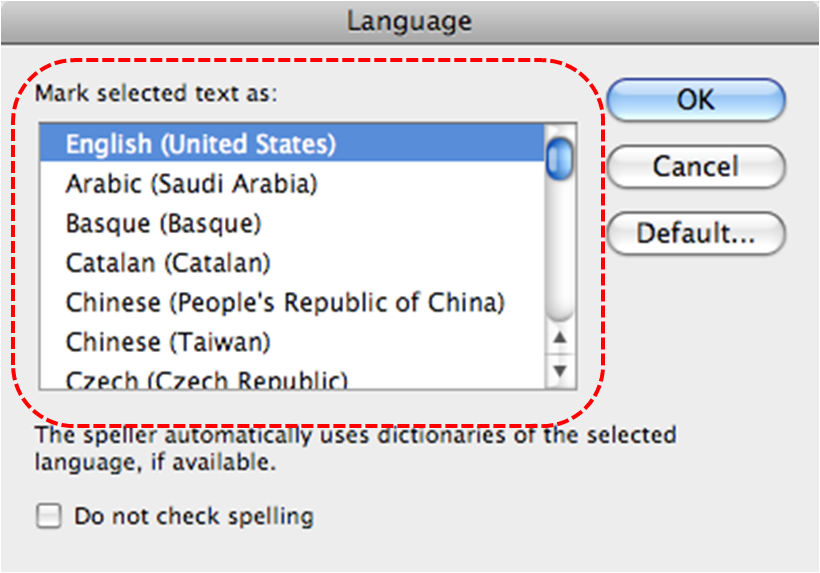
Technique 3. Use Built-In Layout and Styling Features
PowerPoint does not provide “True Headings” or “Named Styles” as does Word.
3.1 Use Built-In Slide Layouts
Instead of creating each slide in your presentation by starting from a blank slide, check whether there is a suitable built-in layout.
Note: The built-in layouts can be more accessible to users of assistive technologies because these technologies sometimes read the floating items on the slide in the order that they were placed on the slide. The built-in layouts have usually taken this into account (e.g., “Title” first followed by other items, left to right and from top to bottom). If you create slide layouts from scratch, it is sometimes difficult to keep track of the order elements were placed.
To apply “true layout” to a slide
- Go to menu item: Format > Slide Layout
- In the Slide Layout section that opens, select the layout you would like to use
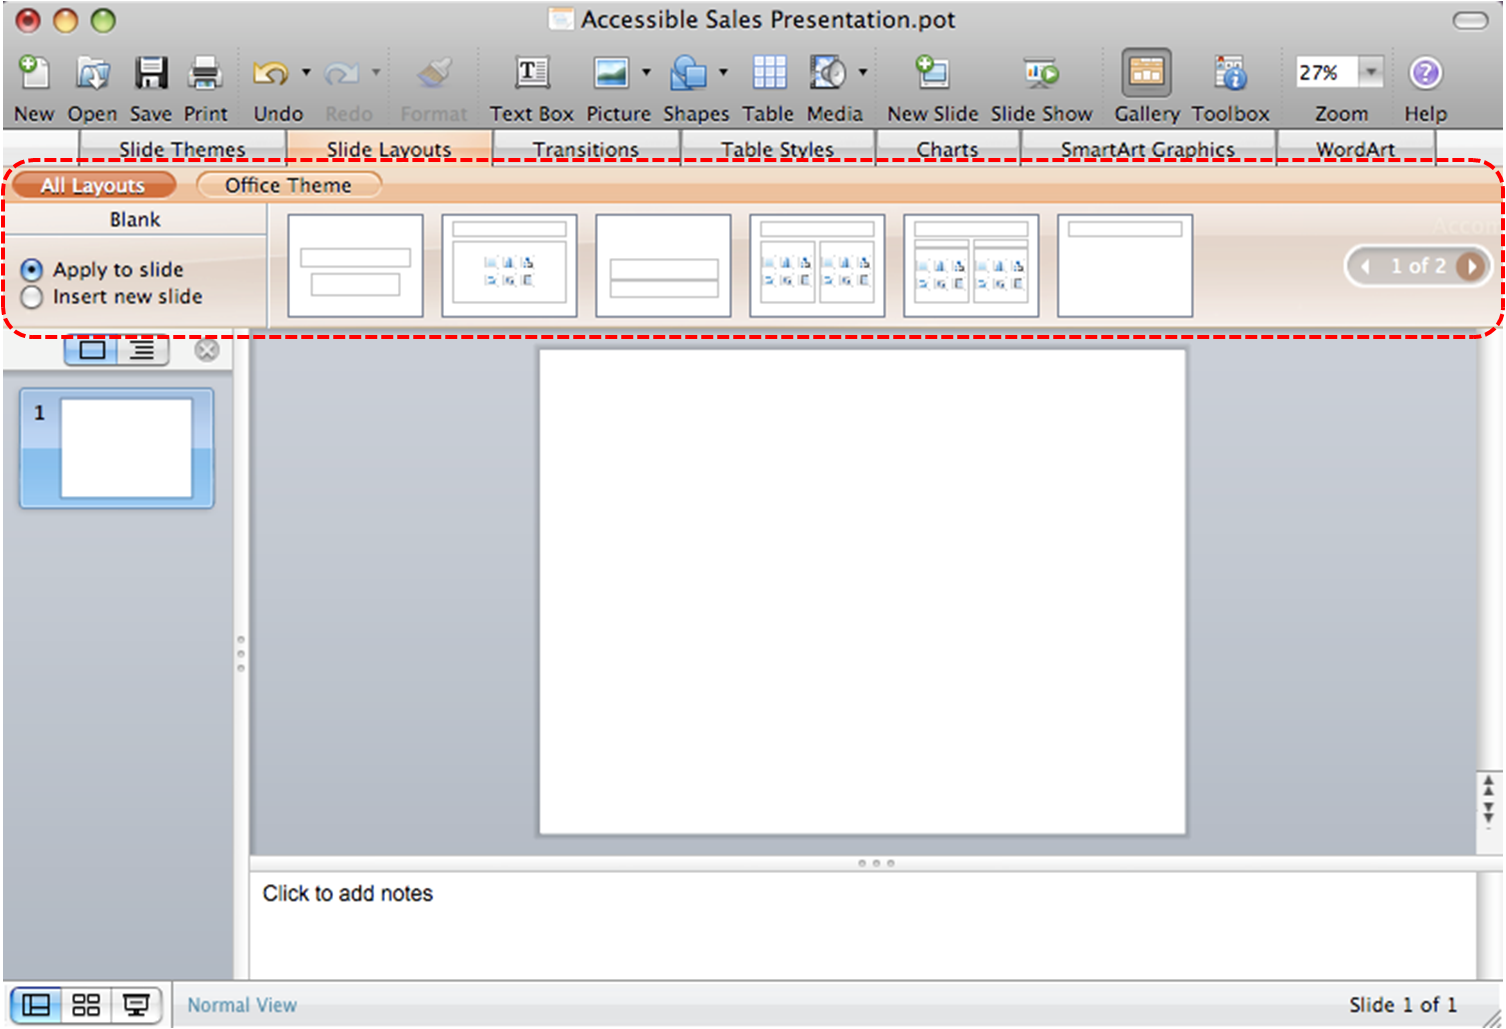
3.2 Customize Using Master Slides
If a layout must be customized, it is recommended that Master Slides be used.
Every slide layout in a presentation is defined by its master slide. A master slide determines the formatting style for various elements of the slide layout. This includes font styles, character formatting, and the positioning of elements. Essentially, each master slide acts as a design template for the slide layout.
If you edit any aspect of the slide layout in the master slide, the change will affect all slides that were created based on it. For this reason, it is good practice to edit the master slide and use the slide layouts before building individual slides. It is essential that you create and use master slides that meet the accessibility requirements outlined in this document.
To create or customize a master slide
- Go to menu item: View > Master > Slide Master
- The current slide master with its associate layouts appears
Note: If you have the Normal view open, the slide master is the larger slide image in the slide thumbnail pane. The associated layouts are positioned beneath the slide master.
- Customize the existing master slide and its associated layouts to suit your needs (e.g., apply a design, theme-based colors, fonts, effects, backgrounds) ensuring that your changes meet accessibility requirements
- To create a new master slide, select the Insert New Master icon
- On the Slide Master toolbar, select Close Master
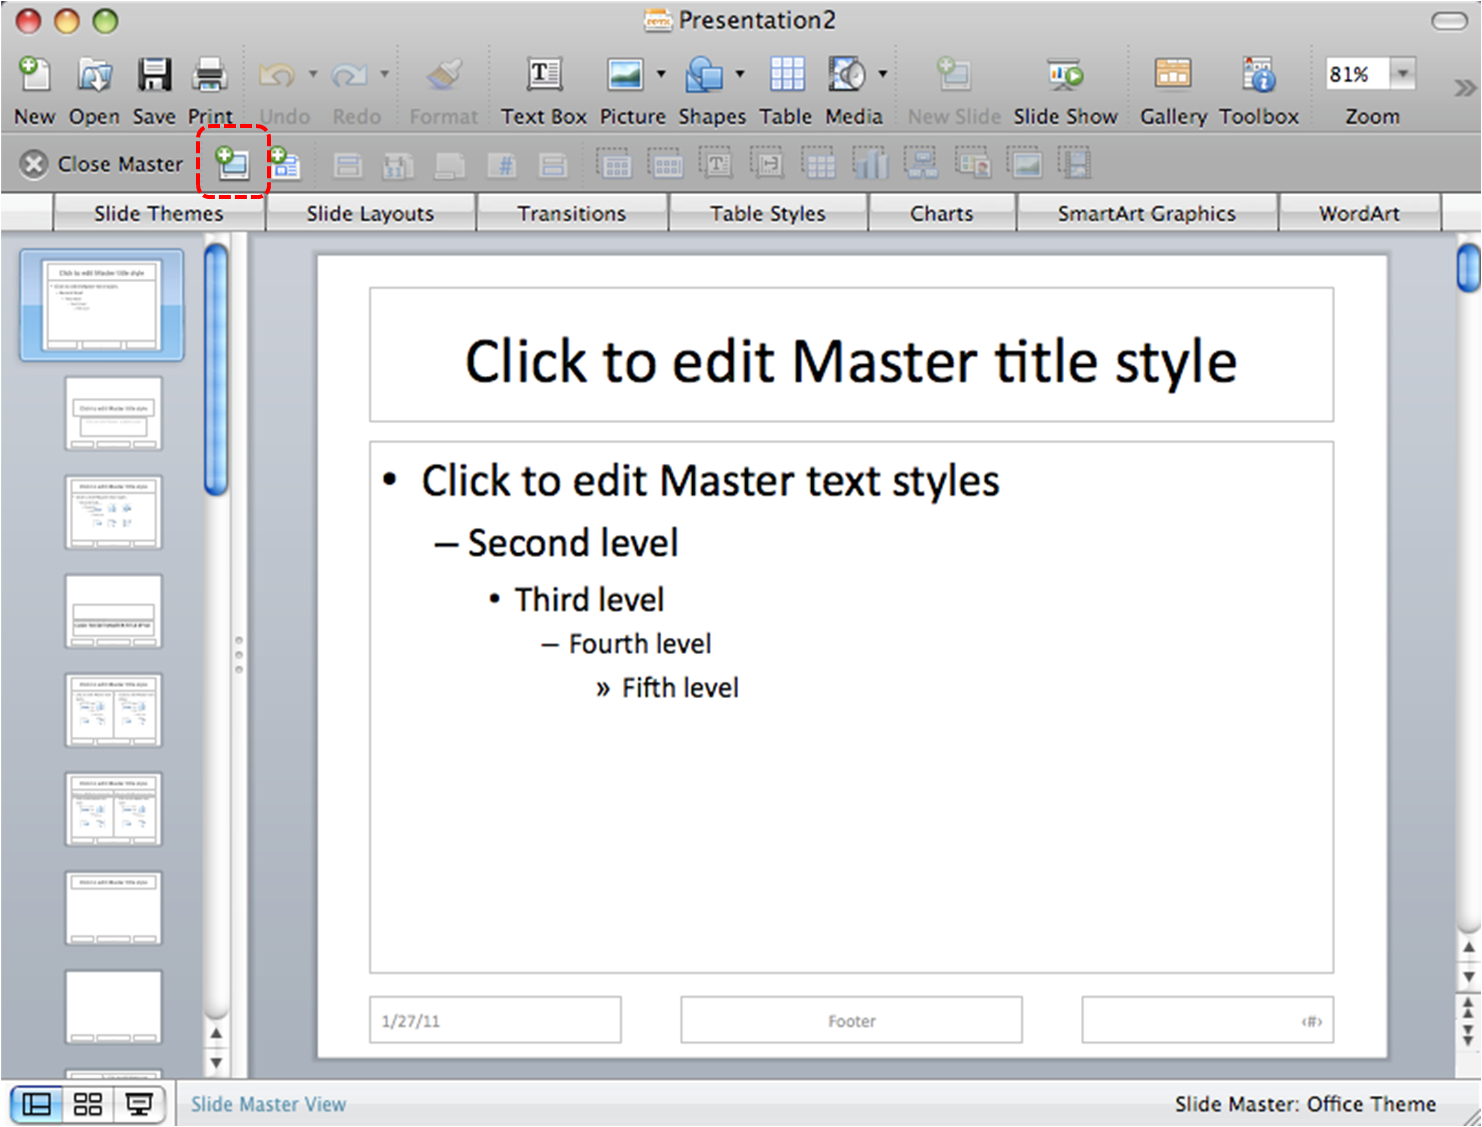
Technique 4. Set a Logical Tab Order
Many presentation applications create content composed almost exclusively of “floating” objects. This means that they avoid the transitions between in-line content and secondary “floating” objects (text boxes, images, etc.) that can cause accessibility issues in word processors.
However, when you are working with “floating” objects, it is important to remember that the way objects are positioned in two dimensions on the screen may be completely different from how the objects will be read by a screen reader or navigated using a keyboard. The order that content is navigated sequentially is called the “Tab Order” because often the “Tab” key is used to navigate from one “floating” object to the next.
Tips for setting a logical “tab order” for “floating” objects
- The tab order of floating objects is usually from the “lowest” object on the slide to the “highest”.
- Because objects automatically appear “on top” when they are inserted, the default tab order is from the first object inserted to the last. However, this will change if you use features such as “bring to front” and “send to back”.
- The slide’s main heading should be first in the tab order.
- Headings should be placed in the tab order immediately before the items (text, diagrams, etc.) for which they are acting as a heading.
- Labels should be in the reading order placed immediately before the objects that they label.
- For simple slide layouts, it may be possible to simply insert objects in a logical tab order.
- For more complex layouts, it may be easier to simply to create the slide as usual and then set the tab order (see below).
To set the tab order
- Right-click* the image or object
- Select Order > Bring to Front, Send to back, Bring Forward or Send Backward
Technique 5. Use Slide Notes
A useful aspect of presentation applications is the facility to add notes to slides, which can then be read by assistive technologies. You can use these slide notes to explain and expand on the contents of your slides in text format. Slide notes can be created as you build your presentation.
To add notes to your slides
- To ensure the notes panel is in view, go to menu item: View > Normal
- The Notes Pane can be found at the bottom of the window, below the slide
- Type and format your notes within the Notes Pane below each slide
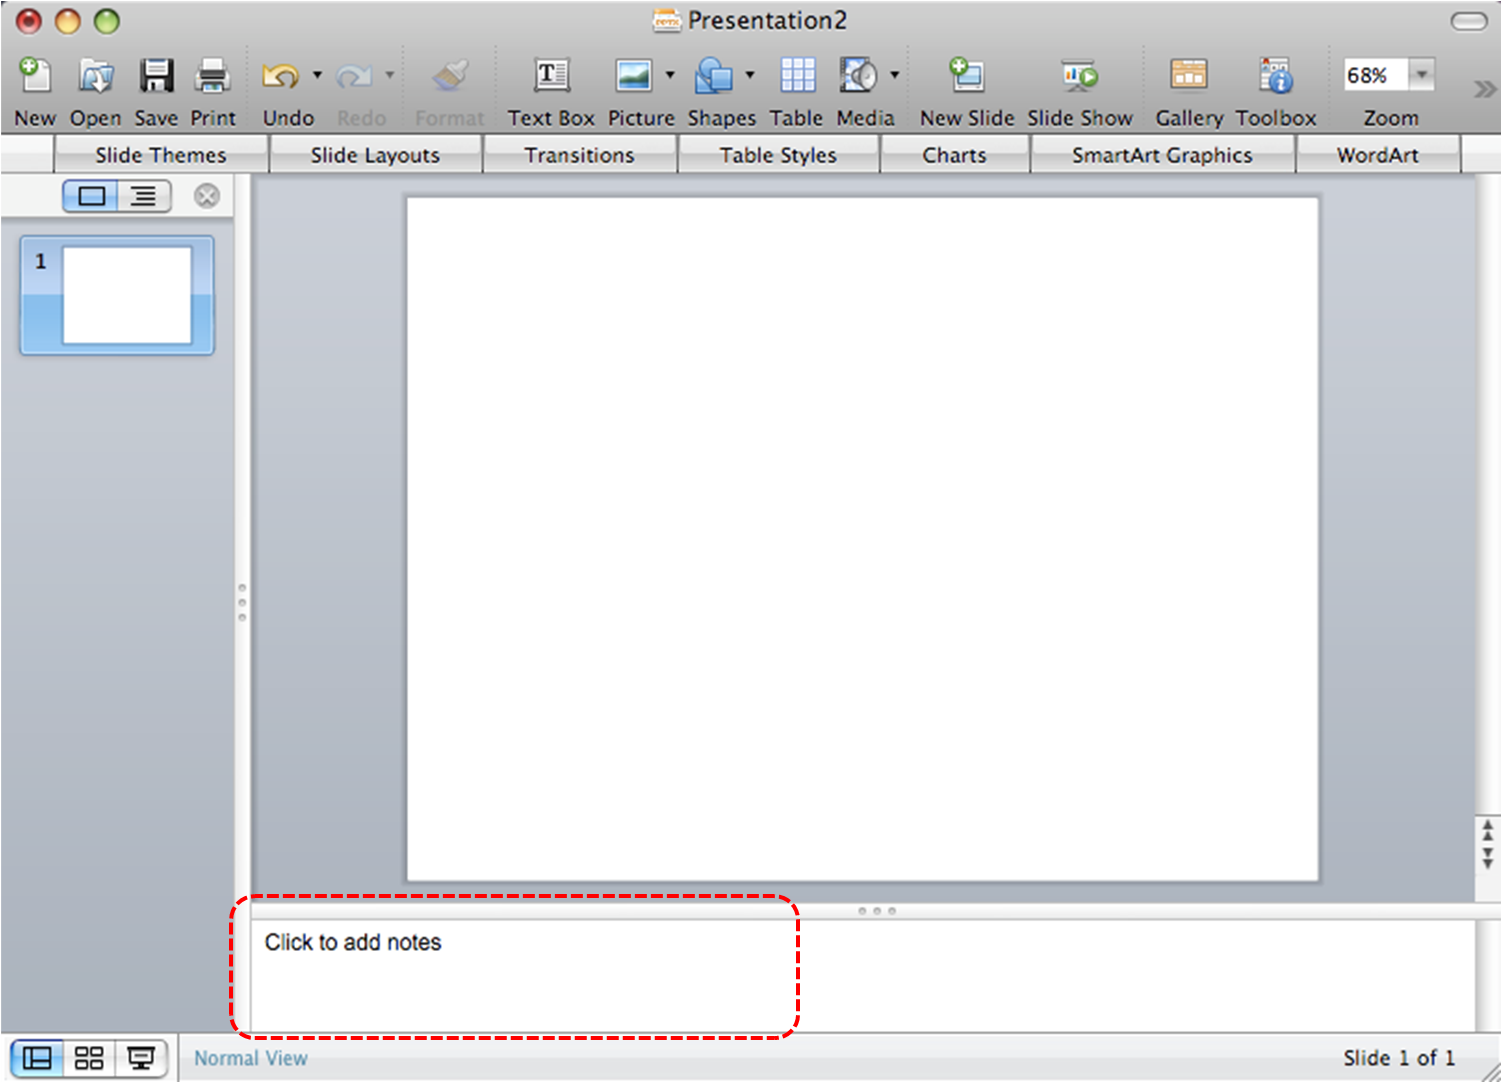
Technique 6. Provide Text Alternatives for Images and Graphical Objects
When using images or other graphical objects, such as charts and graphs, it is important to ensure that the information you intend to convey by the image is also conveyed to people who cannot see the image. This can be accomplished by adding concise alternative text to of each image. If an image is too complicated to concisely describe in the alternative text alone (artwork, flowcharts, etc.), provide a short text alternative and a longer description as well.
Tips for writing alternative text
- Try to answer the question “what information is the image conveying?”
- If the image does not convey any useful information, leave the alternative text blank
- If the image contains meaningful text, ensure all of the text is replicated
- Alternative text should be fairly short, usually a sentence or less and rarely more than two sentences
- If more description is required (e.g., for a chart or graph), provide a short description in the alternative text (e.g., a summary of the trend) and more detail in the long description, see below
- Test by having others review the document with the images replaced by the alternative text
Tips for writing longer descriptions
- Long descriptions should be used when text alternatives (see above) are insufficient to answer the question “what information is the image conveying?”
- In some situations, the information being conveyed will be how an image looks (e.g., an artwork, architectural detail, etc.). In these cases, try to describe the image without making too many of your own assumptions.
- One approach is to imagine you are describing the image to a person over the phone
- Ensure that you still provide concise alternative text to help readers decide if they are interested in the longer description
Alternatively, you can include the same information conveyed by the image within the body of the document, providing the images as an alternate to the text. In that case, you do not have to provide alternate text within the image.
To add alternative text to images and graphical objects
- Select the object, then choose one of the options below:
- Right-click the object and select Edit Alt Text…. The Alt Text pane opens.
- Note: If the Edit Alt Text… option is not visible, select Format Object/Picture.
- Alternately, select an object. In the menu, select the object’s Format tab. Then, select Alt Text.
- In the Alt Text pane, add the alternative text to the Description field.
Technique 7. Use Built-In Structuring Features
7.1 Tables
When using tables, it is important to ensure that they are clear and appropriately structured. This helps all users to better understand the information in the table and allows assistive technologies (e.g., screen readers) to provide context so that the information within the table can be conveyed in a meaningful way.
Tips for tables
- Only use tables for tabular information, not for formatting.
- Use “real tables” rather than text formatted to look like tables using the TAB key or space bar. These will not be recognized by assistive technology.
- Keep tables simple by avoiding merged cells and dividing complex data sets into separate smaller tables, where possible. Whenever possible, use just one row of headings.
- If tables split across pages, set the header to show at the top of each page. Also set the table to break between rows instead of in the middle of rows.
- Create a text summary of the essential table contents. Any abbreviations used should be explained in the summary.
- Table captions or descriptions should answer the question “what is the table’s purpose and how is it organized?” (e.g., “A sample order form with separate columns for the item name, price and quantity”).
- Table cells should be marked as table headers when they serve as labels to help interpret the other cells in the table.
- Table header cells labels should be concise and clear.
- Ensure the table is not “floating” on the page (see Technique 4).
To insert a table with header rows:
- Go to menu item: Insert > Table…
- Select the number of columns and rows
- Select OK
- In the Table Styles section that opens above the document pane, select the Options drop-down menu
- Select Header Row
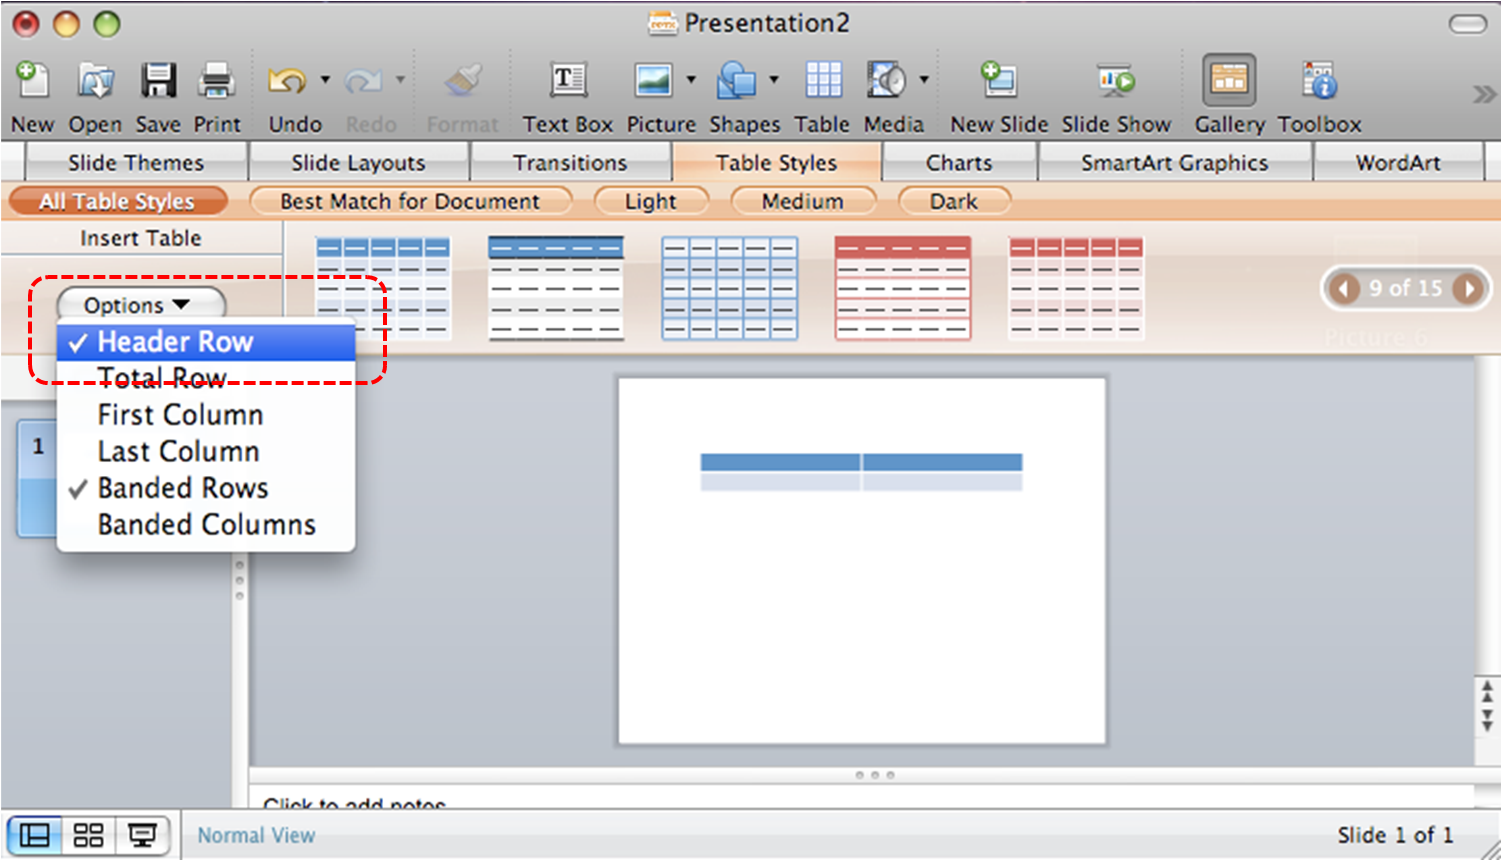
7.2 Lists
When you create lists, it is important to format them as “real lists”. Otherwise, assistive technologies will interpret your list as a series of short separate paragraphs instead of a coherent list of related items.
To create an ordered or unordered list
- Select the text
- If the Formatting Palette is not in view, go to menu item: View > Toolbox, Formatting Palette
- In the Formatting Palette, select Bullets and Numbering if it is not already open
- In the Bullets and Numbering section, select Type, Bullets for bulleted lists or Type, Numbering for numbered lists
- To change the style, select a list style from the Style drop-down list
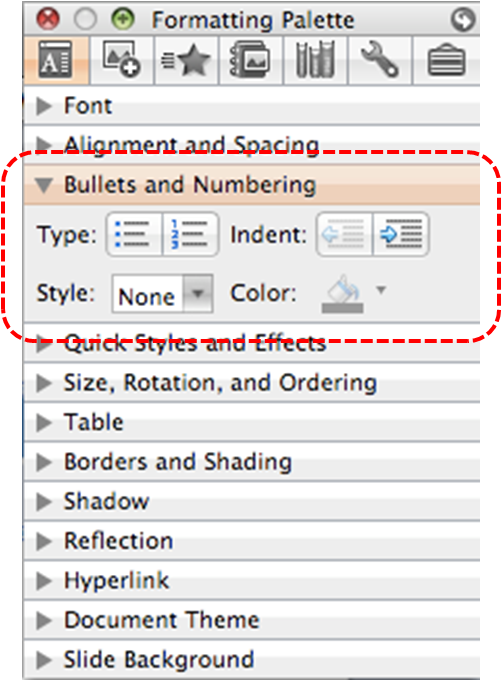
At this time, it is not possible to modify pre-formatted list styles or to create your own list styles. [Tested: January 26, 2011]
7.3 Columns
Use Columns feature for placing text in columns. However, because columns can be a challenge for users of some assistive technologies, consider whether a column layout is really necessary.
7.4 Document Title
In case the document is ever converted into HTML, it should be given a descriptive and meaningful title.
To change the title of the current document
- Go to menu item: File > Properties
- Enter the Title in the Title text box
- Select OK
Note: The title defined in the properties is different than the file name. It is also unrelated to the template name, discussed above.
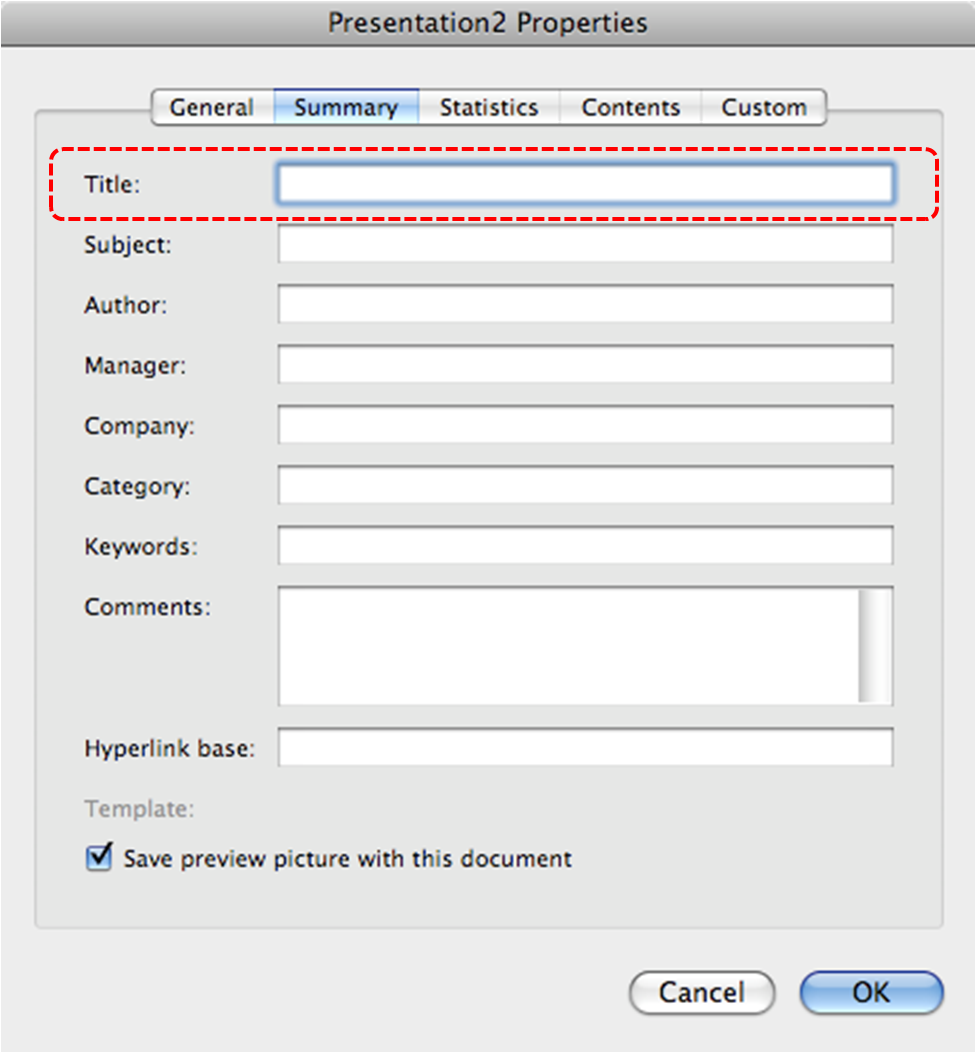
Technique 8. Create Accessible Charts
Charts can be used to make data more understandable for some audiences. However, it is important to ensure that your chart is as accessible as possible to all members of your audience. All basic accessibility considerations that are applied to the rest of your document must also be applied to your charts and the elements within your charts. For example, use shape and color, rather than color alone, to convey information. As well, some further steps should be taken to ensure that the contents are your chart are appropriate labeled to give users reference points that will help them to correctly interpret the information.
To create a chart
- Select a Slide Layout that contains a placeholder for a chart (see Technique 3.1, above)
- Select the Insert Chart icon from the center of the placeholder
- Select a Chart Type from the Charts section above the document pane
Note: This will open the Excel document titled “Chart in Microsoft Office PowerPoint”, where you can input the data you would like to include in the chart. When you have done this, simply close the Excel window and the data will appear on the chart in the PowerPoint presentation.
Note: This applies a predefined Chart Layout, which can be changed at any time simply by selecting the chart and following Steps 2 and 3 above.
To add titles and labels
- Select the chart
- If the Formatting Palette is not open, go to menu item: View > Toolbox, Formatting Palette
- Select Chart Options to open the Chart Options section, if it is not already open
- Under Titles, select the title from the Chart Title drop-down list or enter a title in the text box below the drop-down list
- Under Other options, select the Labels and Legends you would like to include from their respective drop-down lists
- Under Chart Data, select Data Table with Legend Keys from the Data Table drop-down list to include a data table to help further support the chart
Other Chart Considerations
- When creating line charts, use the formatting options to create different types of dotted lines to facilitate legibility for users who are color blind
- When creating bar charts, go to menu item: Chart Tools > Format and in the Shape Styles section select Shape Fill to apply a texture to help distinguish the bars
- Change the default colors to a color safe or gray-scale palette
- Use the formatting options to change predefined colors, ensuring that they align with sufficient contrast requirements (see Technique 9.2, below)
Technique 9. Make Content Easier to See
9.1 Format of Text
When formatting text, especially when the text is likely to printed, try to:
- Use font sizes between 12 and 18 points for body text.
- Use fonts of normal weight, rather than bold or light weight fonts. If you do choose to use bold fonts for emphasis, use them sparingly.
- Use standard fonts with clear spacing and easily recognized upper and lower case characters. Sans serif fonts (e.g., Arial, Verdana) may sometimes be easier to read than serif fonts (e.g., Times New Roman, Garamond).
- Avoid large amounts of text set all in caps, italic or underlined.
- Use normal or expanded character spacing, rather than condensed spacing.
- Avoid animated or scrolling text.
But can’t users just zoom in? Office applications do typically include accessibility features such as the ability to magnify documents and support for high contrast modes. However, because printing is an important aspect of many workflows and changing font sizes directly will change documents details such the pagination, the layout of tables, etc., it is best practice to always format text for a reasonable degree of accessibility.
9.2 Use Sufficient Contrast
The visual presentation of text and images of text should have a contrast ration of at least 4.5:1. To help you determine the contrast, here are some examples on a white background:
- Very good contrast (Foreground=black, Background=white, Ratio=21:1)
- Acceptable contrast (Foreground=#767676, Background=white, Ratio=4.54:1)
- Unacceptable contrast (Foreground=#AAAAAA, Background=white, Ratio=2.32:1)
Also, always use a single solid color for a text background rather than a pattern.
In order to determine whether the colors in your document have sufficient contrast, you can consult an online contrast checker, such as:
9.3 Avoid Using Color Alone
Color should not be used as the only visual means of conveying information, indicating an action, prompting a response, or distinguishing a visual element. In order to spot where color might be the only visual means of conveying information, you can create a screenshot of the document and then view it with online gray-scale converting tools, such as:
- GrayBit v2.0: Grayscale Conversion Contrast Accessibility Tool
Editor’s note: GrayBit v2.0 is no longer available. However, multiple tools can be found online: Google Search: gray-scale conversion tool.
9.4 Avoid Relying on Sensory Characteristics
The instructions provided for understanding and operating content should not rely solely on sensory characteristics such as the color or shape of content elements. Here are two examples:
- Do not track changes by simply changing the color of text you have edited and noting the color. Instead use PowerPoint for Mac’s “Track Changes” feature to track changes.
- Do not distinguish between images by referring to their appearance (e.g. “the bigger one”). Instead, label each image with a figure number and use that for references.
9.5 Avoid Using Images of Text
Before you use an image to control the presentation of text (e.g., to ensure a certain font or color combination), consider whether you can achieve the same result by styling “real text”. If this is not possible, as with logos containing stylized text, make sure to provide alternative text for the image following the techniques noted above.
9.6 Avoid Transitions
Transitions between slides and elements in each slide (e.g., bullets in a list flying onto the screen) can be distracting to users with disabilities. It can also cause assistive technologies to read the slide incorrectly. For these reasons, it is best to avoid transitions altogether.
Technique 10. Make Content Easier to Understand
10.1 Write Clearly
By taking the time to design your content in a consistent way, it will be easier to access, navigate and interpret for all users:
- Whenever possible, write clearly with short sentences.
- Introduce acronyms and spell out abbreviations.
- Avoid making the document too “busy” by using lots of whitespace and by avoiding too many different colors, fonts and images.
- If content is repeated on multiple pages within a document or within a set of documents (e.g., headings, footings, etc.), it should occur consistently each time it is repeated.
10.2 Provide Context for Hyperlinks
Hyperlink text in your document should be meaningful when read out of context. To be an effective navigation aid, the link text should describe the destination of the link.
Consider the experience of screen reader users: Generally, screen readers generate a list of links, and screen reader users navigate this list alphabetically. Hyperlink text such as “click here” or “more” is meaningless in this context.
In order to be useful to someone using a screen reader, ensure that hyperlink text is self-describing and meaningful on its own. To make the address of hyperlink clear when printing, you may wish to include the address in brackets following the descriptive text of the hyperlink.
To change link text
- Type (or paste in) a web address and press spacebar or “Enter” to convert into a hyperlink
- Highlight the link
- Go to menu item: Insert > Hyperlink…
- Edit the text in the Display box
- Select OK
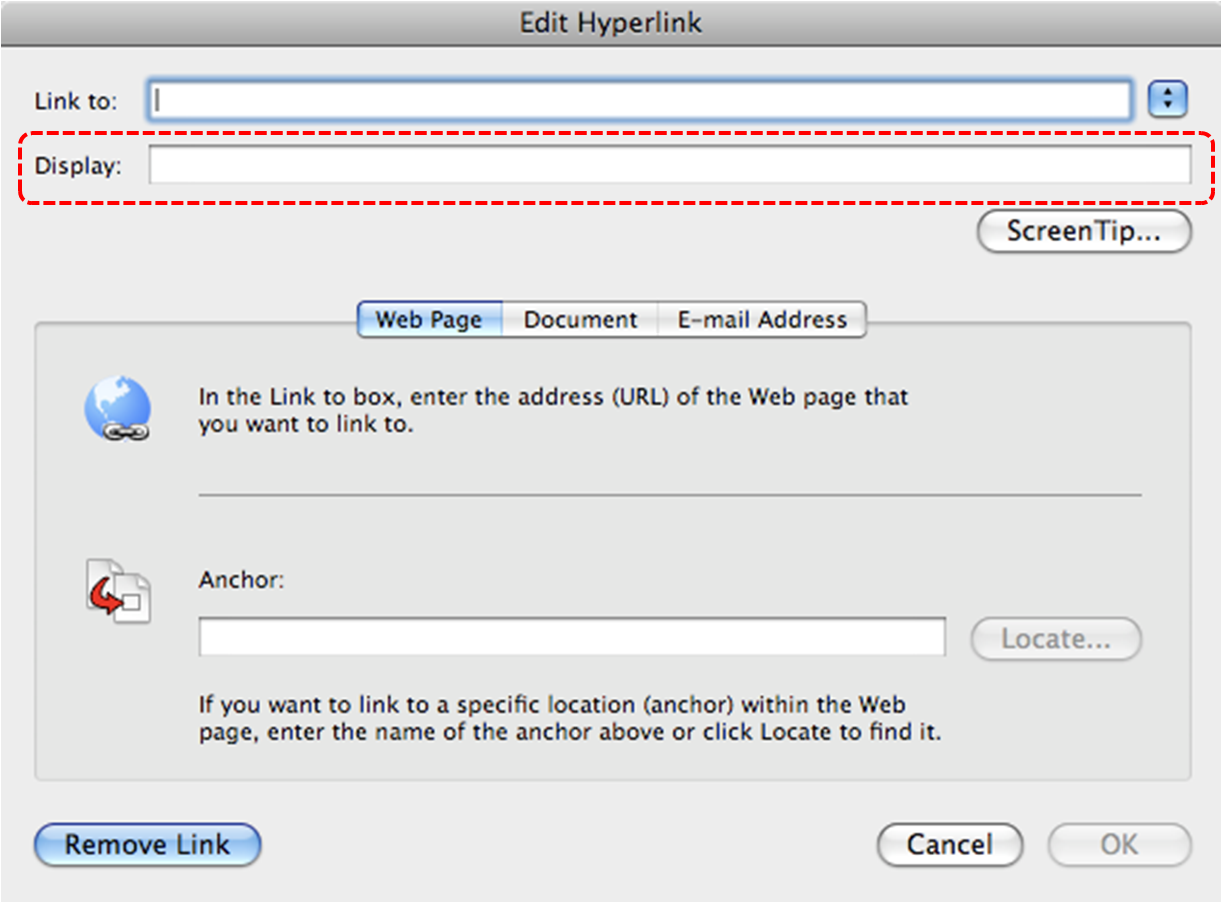
10.3 Accessible Presentations
It is important to consider accessibility before, during, and after presentations. Below is a helpful link with guidance on how to make presentations accessible to all:
Technique 11. Check Accessibility
At this time, PowerPoint 2008 for Mac does not offer a mechanism to check for potential accessibility errors in your document prior to publishing. [Tested: January 17, 2011]
In order to get some indication of your document or template (see Technique 1), then you may consider saving the file into HTML in order to perform an accessibility check in one of those formats, as described below.
Editor’s note: In later versions of PowerPoint for Mac, users can check the accessibility of their presentations. For more information, see how to use the accessibility checker in PowerPoint.
To evaluate HTML accessibility
Another option is to save the document into HTML format and use one of the web accessibility checkers available online. Such as:
To evaluate PDF accessibility
If you saved your document in tagged PDF format, you can use the following tools and steps to evaluate the accessibility of the PDF document:
To evaluate PDF accessibility in Adobe Acrobat Professional
- Go to menu item: Advanced > Accessibility > Full Check…
- In the Full Check dialog, select all the checking option.
- Select the Start Checking button.
Editor’s note: For detailed instructions, see our section on how to check accessibility using Adobe Acrobat Professional.
Technique 12. Use Accessibility Features when Saving/Exporting to Other Formats
In some cases, additional steps must be taken in order to ensure accessibility information is preserved when saving/exporting to formats other than the default.
In some cases, additional steps must be taken in order to ensure accessibility information is preserved when saving/exporting to formats other than the default.
Note: Before saving in other formats, you may want to run the Compatibility Report feature by selecting Compatibility Report… from the Save As dialog. This checks the compatibility of your existing document with the format you have selected save your document as. The results of this check are revealed in the Compatibility Report dialog, where you have explanations of errors and options to fix them. To run this check at any time, go to menu item: View > Toolbox, Compatibility Report.
PPT
- Go to menu item: File > Save As…
- In the Save As box, type a name for the file
- In the Format box, select PowerPoint 97-2004 Presentation (.ppt)
- Select Save
HTML
- Go to menu item: File > Save as Web Page…
- In the Save As box, type a name for the file
- Select Save
- Check the HTML file for accessibility (see Technique 11, above)
To clean up your HTML file
- Remove unnecessary styles, line breaks, etc.
- Remove unnecessary id, class, and attributes
- Remove font tags
- Remove styles in the <head> tag
- Ensure the <th> tags have a scope attribute
- Remove <p> tags nested inside <th> and <td> tags
- Check for accessibility (see Technique 11, above)
Note: you may wish to use HTML editors or utilities to help with this process.
Technique 13. Consider Using Accessibility Support Applications/Plugins
Disclaimer: This list is provided for information purposes only. It is not exhaustive and inclusion of an application or plug-in on the list does not constitute a recommendation or guarantee of results by the IDRC.
The following accessibility related plug-ins and support are available for PowerPoint for Mac:
- PPT2HTML – offers an accessibility tool bar for adding alt-text to charts.
- PowerTalk – an accessibility tool that provides a good approximation of how presentations will sound with a screen reader. [Editor’s note: Tool no longer available.]
Accessibility Help
If you are interested in what features are provided to make using PowerPoint for Mac more accessible to users, documentation is provided in the Help system:
- Go to menu item: Help
- Enter “Accessibility” as your search term in the Search box
References and Resources
- Microsoft PowerPoint for Mac Help
- GAWDS Writing Better Alt Text
- Ryerson University: Microsoft PowerPoint Accessibility Tipsheet (PDF)
- Microsoft PowerPoint: Video Tutorials
Acknowledgments
This document was produced as part of the Accessible Digital Office Document (ADOD) Project.
This project has been developed by the Inclusive Design Research Centre, OCAD University as part of an EnAbling Change Partnership project with the Government of Ontario and UNESCO (United Nations Educational, Scientific and Cultural Organization).
Date of Version on the ADOD source page: 10 Feb 2011
Copyright © 2011 Inclusive Design Research Centre, OCAD University
This material may be reproduced and distributed in print or electronic format only as long as:
(a) the reproduction is offered at no cost to the recipients; and
(b) the reproduction must preserve the “Version” section; and
(c) the reproduction must preserve the “Acknowledgments” section; and
(d) the reproduction must preserve this copyright notice.
Source: Accessible Digital Office Document (ADOD) Project: PowerPoint 2008 for Mac by the Inclusive Design Research Centre (IDRC) used under CC-BY-SA 3.0.
Microsoft PowerPoint 2007
20
Usage Notes
At the time of testing (January 10, 2011), PowerPoint 2007 provides a set of accessibility features that is sufficient to enable the production of accessible digital office documents. However, PowerPoint 2007 does not include an accessibility checking feature.
What’s an “Office Document”?
You should use these techniques when you are using PowerPoint 2007 to create documents that are:
- Intended to be used by people (i.e., not computer code),
- Text-based (i.e., not simply images, although they may contain images),
- Fully printable (i.e., where dynamic features are limited to automatic page numbering, table of contents, etc. and do not include audio, video, or embedded interactivity),
- Self-contained (i.e., without hyperlinks to other documents, unlike web content), and
- Typical of office-style workflows (Reports, letters, memos, budgets, presentations, etc.).
If you are creating forms, web pages, applications, or other dynamic and/or interactive content, these techniques will still be useful to you, but you should also consult the W3C-WAI Web Content Accessibility Guidelines (WCAG 2.0) because these are specifically designed to provide guidance for highly dynamic and/or interactive content.
File Formats
The default file format for PowerPoint 2007 is Office Open XML (PPTX).
In addition, PowerPoint 2007 offers many other presentation processor and web format saving options. Most of these have not been checked for accessibility, but some information and/or instructions are available for the following formats in Technique 12 (below):
- MS PowerPoint (PPT)
- PDF
- HTML
Document Conventions
We have tried to formulate these techniques so that they are useful to all authors, regardless of whether they use a mouse. However, for clarity there are several instances where mouse-only language is used. Below are the mouse-only terms and their keyboard alternatives:
- *Right-click: To right-click with the keyboard, select the object using the Shift+Arrow keys and then press either (1) the “Right-Click” key (some keyboard have this to the right of the spacebar) or Shift+F10.
Disclaimer and Testing Details:
Following these techniques will increase the accessibility of your documents, but it does not guarantee accessibility to any specific disability groups. In cases where more certainty is required, it is recommended that you test the office documents with end users with disabilities, including screen reader users.
The application-specific steps and screenshots in this document were created using Microsoft PowerPoint 2007 (ver. 12.0.6535.5002, Windows 7, Jan. 2011) while creating a PPTX document. Files are also easily saved as other file formats (see Technique 12, below).
This document is provided for information purposes only and is neither a recommendation nor a guarantee of results. If errors are found, please report them to: adod-comments@idrc.ocad.ca.
Technique 1. Use Accessible Templates
All office documents start with a template, which can be as simple as a blank standard-sized page or as complex as a nearly complete document with text, graphics and other content. For example, a “Meeting Minutes” template might include headings for information relevant to a business meeting, such as “Actions” above a table with rows to denote time and columns for actions of the meeting.
Because templates provide the starting-point for so many documents, accessibility is critical. If you are unsure whether a template is accessible, you should check a sample document produced when the template is used (see Technique 11, below).
PowerPoint 2007’s default template for new documents is a blank presentation. If you are connected to the internet, you can access a variety of blank business presentation templates through Office.com. These are all accessible by virtue of being blank.
It is possible to create your own accessible templates from scratch in PowerPoint 2007. As well, you can edit and modify the existing prepackaged templates, ensuring their accessibility as you do so and saving them as a new template.
To create an accessible template
- Create a new document
- Ensure that you follow the techniques in this document
- When you are finished you should also check the accessibility of the document (see Technique 11, below)
- Go to menu item: Office > Save As > Other Formats
- In the Save as type list, select PowerPoint Template
- In the File name box, type a name for the template. Using a descriptive File name (e.g., “Accessible Sales Template”) will increase the prominence of the accessibility status. As well, filling in the text box labeled Tags with the term “accessibility” will improve its searchability as an accessible file.
- Select Save
To select an accessible template
Only use these steps if you have an accessible template available (e.g., that you previously saved). Otherwise, simply open a new (blank) document.
- Go to menu item: Office > New
- Under Templates, select My templates…
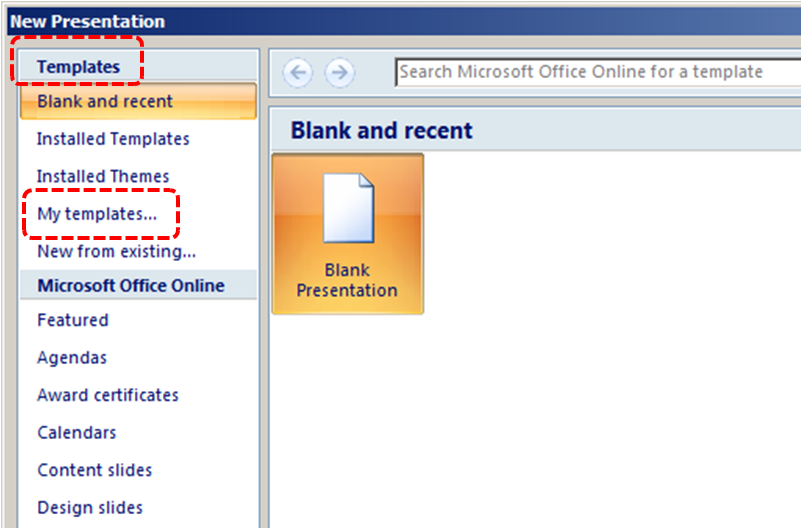
- In the New Presentation dialog, select your accessible template from the list
- Select OK
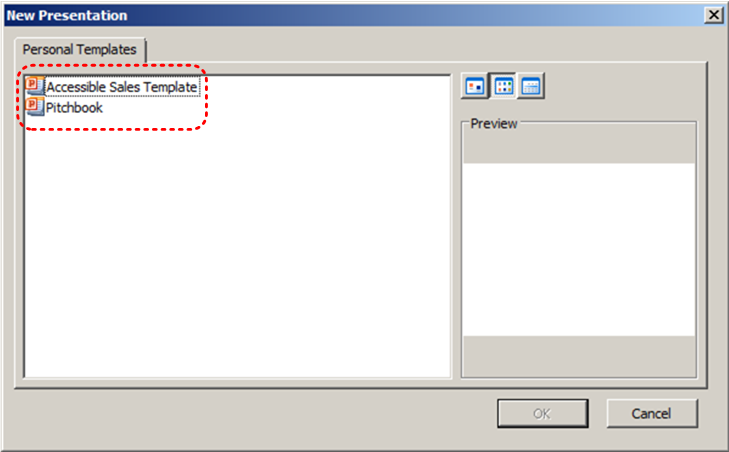
- A new document based on the template will be displayed. If you have chosen an accessible template, the document will be accessible at this point. As you add your content (e.g., text, images, etc.), ensure that you consult the sections that follow to preserve accessibility.
Technique 2. Set Document Language
In order for assistive technologies (e.g., screen readers) to be able to present your document accurately, it is important to indicate the natural language of the document. If a different natural language is used for a paragraph or selected text, this also needs to be clearly indicated.
To change the default language
- In the operating system, activate the keyboard layout for the language in which you want to create and edit text
- Right-click* the status bar at the bottom of the window, ensure that Language is selected, this displays a reminder of the active keyboard layout in the status bar
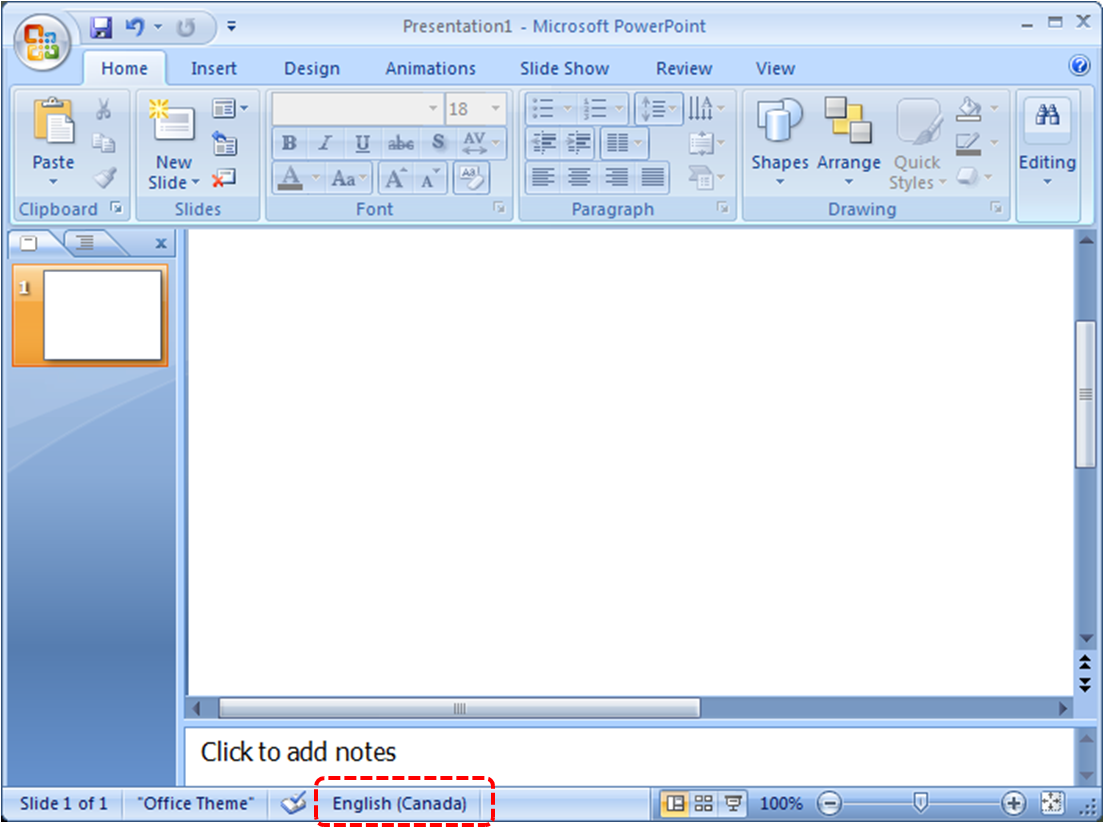
To apply a language directly to selected text
- Select the text
- Go to menu item: Review
- In the Proofing section, select the Language button
- In the Mark selected text as box, select the language from the list
- Select OK
Technique 3. Use Built-In Layout and Styling Features
PowerPoint 2007 does not provide “True Headings” or “Named Styles” as does Word 2007.
3.1 Use Built-In Slide Layouts
Instead of creating each slide in your presentation by starting from a blank slide, check whether there is a suitable built-in layout.
Note: The built-in layouts can be more accessible to users of assistive technologies because technologies sometimes read the floating items on the slide in the order that they were placed on the slide. The built-in layouts have usually taken this into account (e.g., “Title” first followed by other items, left to right and from top to bottom). If you create slide layouts from scratch, it is sometimes difficult to keep track of the order elements were placed.
To apply “true layout” to a slide
- Go to menu item: Home
- In the Slides section, select the Layout button
- Select the layout you would like to use from the drop down menu
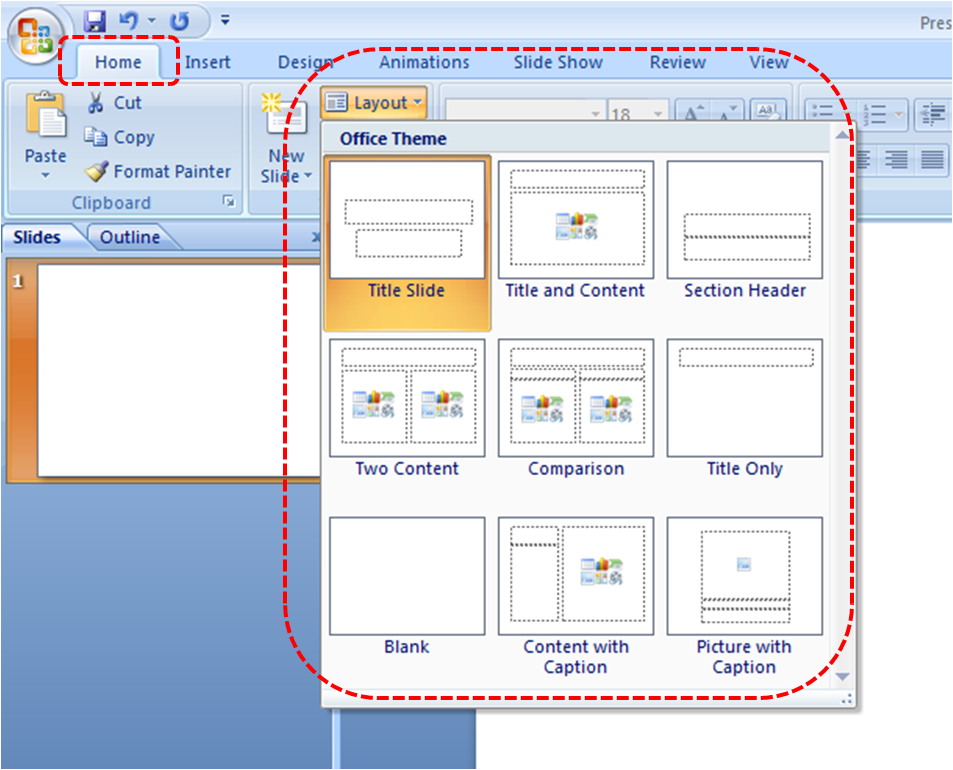
3.2 Customize Using Master Slides
If a layout must be customized, it is recommended that Master Slides be used.
Every slide layout in a presentation is defined by its master slide. A master slide determines the formatting style for various elements of the slide layout. This includes font styles, character formatting, and the positioning of elements. Essentially, each master slide acts as a design template for the slide layout.
If you edit any aspect of the slide layout in the master slide, the change will affect all slides that were created based on it. For this reason, it is good practice to edit the master slide and use the slide layouts before building individual slides. It is essential that you create and use master slides that meet the accessibility requirements outlined in this document.
To create or customize a master slide
- Go to menu item: View
- In the Presentation Views section, select the Slide Master icon
- The current slide master with its associate layouts appears
Note: If you have the Normal view open, the slide master is the larger slide image in the slide thumbnail pane. The associated layouts are positioned beneath the slide master.
- Customize the existing master slide and its associated layouts to suit your needs (e.g., apply a design, theme-based colors, fonts, effects, backgrounds) ensuring that your changes meet accessibility requirements
- Go to menu item: Office > Save As > Other Formats
- In the Filename box, type a file name
- In the Save as type list, select PowerPoint template
- Select Save
- On the Slide Master tab, in the Close section, select Close Master View
Technique 4. Set a Logical Tab Order
Many presentation applications create content composed almost exclusively of “floating” objects. This means that they avoid the transitions between in-line content and secondary “floating” objects (text boxes, images, etc.) that can cause accessibility issues in word processors.
However, when you are working with “floating” objects, it is important to remember that the way objects are positioned in two dimensions on the screen may be completely different from how the objects will be read by a screen reader or navigated using a keyboard. The order that content is navigated sequentially is called the “Tab Order” because often the “Tab” key is used to navigate from one “floating” object to the next.
Tips for setting a logical “tab order” for “floating” objects
- The tab order of floating objects is usually from the “lowest” object on the slide to the “highest”.
- Because objects automatically appear “on top” when they are inserted, the default tab order is from the first object inserted to the last. However, this will change if you use features such as “bring to front” and “send to back”.
- The slide’s main heading should be first in the tab order.
- Headings should be placed in the tab order immediately before the items (text, diagrams, etc.) for which they are acting as a heading.
- Labels should be in the reading order placed immediately before the objects that they label.
- For simple slide layouts, it may be possible to simply insert objects in a logical tab order.
- For more complex layouts, it may be easier to simply to create the slide as usual and then set the tab order (see below).
To set the tab order using the ‘Selection Pane’
- Go to menu item: Home
- In the Drawing section, select Arrange > Selection Pane…
- In the Selection and Visibility pane, all the elements on the slide are listed in reverse chronological order under Shapes on this Slide
- Elements can be re-ordered using the Re-order buttons located at the bottom of the Selection and Visibility pane
Note: The tab order of elements begins at the bottom of the list and tabs upwards.
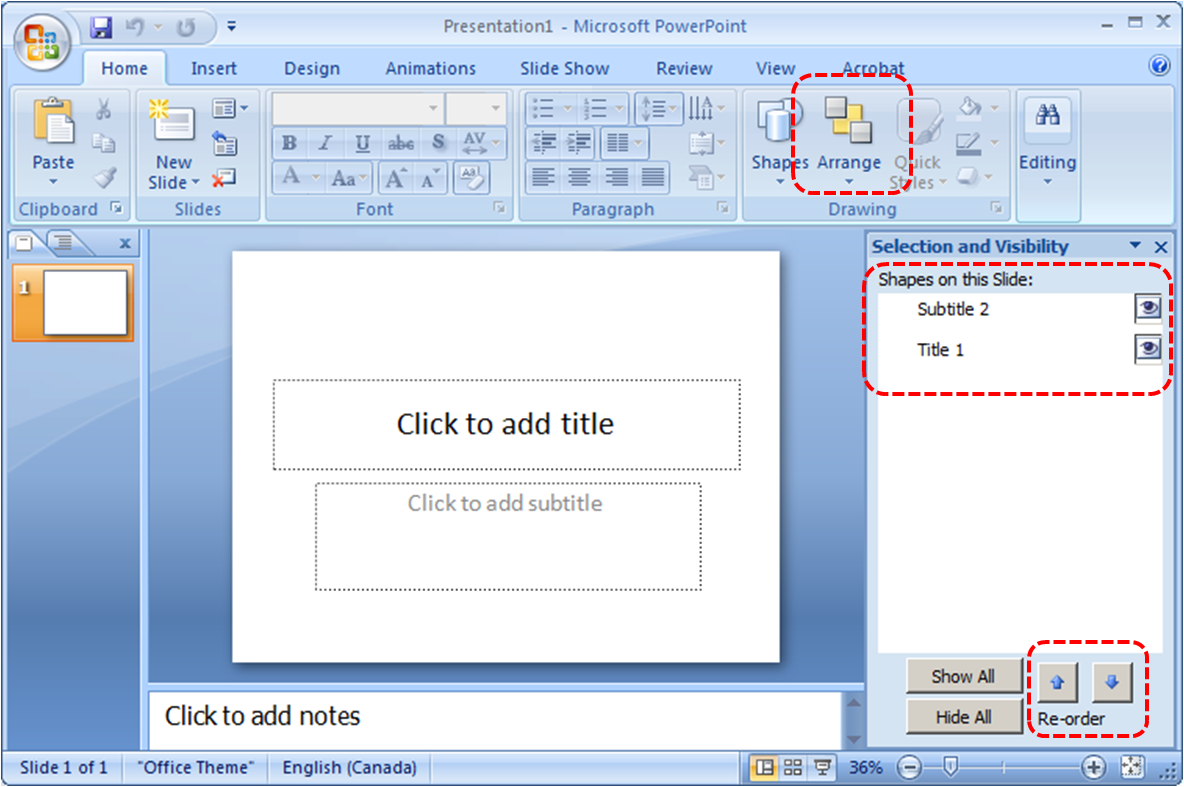
Technique 5. Use Slide Notes
A useful aspect of presentation applications is the facility to add notes to slides, which can then be read by assistive technologies. You can use these slide notes to explain and expand on the contents of your slides in text format. Slide notes can be created as you build your presentation.
To add notes to your slides
- Go to menu item: View
- In the Presentation Views section, select Normal to ensure that the notes panel is in view
Note: You can then select menu item Home, to access text formatting options
- The Notes Pane can be found at the bottom of the window, below the slide
- Type and format your notes within the Notes Pane below each slide
Technique 6. Provide Text Alternatives for Images and Graphical Objects
When using images or other graphical objects, such as charts and graphs, it is important to ensure that the information you intend to convey by the image is also conveyed to people who cannot see the image. This can be accomplished by adding concise alternative text to of each image. If an image is too complicated to concisely describe in the alternative text alone (artwork, flowcharts, etc.), provide a short text alternative and a longer description as well.
Tips for writing alternative text
- Try to answer the question “what information is the image conveying?”
- If the image does not convey any useful information, leave the alternative text blank
- If the image contains meaningful text, ensure all of the text is replicated
- Alternative text should be fairly short, usually a sentence or less and rarely more than two sentences
- If more description is required (e.g., for a chart or graph), provide a short description in the alternative text (e.g., a summary of the trend) and more detail in the long description, see below
- Test by having others review the document with the images replaced by the alternative text
Tips for writing longer descriptions
- Long descriptions should be used when text alternatives (see above) are insufficient to answer the question “what information is the image conveying?”
- In some situations, the information being conveyed will be how an image looks (e.g., an artwork, architectural detail, etc.). In these cases, try to describe the image without making too many of your own assumptions.
- One approach is to imagine you are describing the image to a person over the phone
- Ensure that you still provide concise alternative text to help readers decide if they are interested in the longer description
Alternatively, you can include the same information conveyed by the image within the body of the document, providing the images as an alternate to the text. In that case, you do not have to provide alternate text within the image.
To add alternative text to images and graphical objects
- Right-click* the object
- Select Size and Position…
- Select the Alt Text tab
- Fill in the Alternative text box

Technique 7. Use Built-In Structuring Features
7.1 Tables
When using tables, it is important to ensure that they are clear and appropriately structured. This helps all users to better understand the information in the table and allows assistive technologies (e.g., screen readers) to provide context so that the information within the table can be conveyed in a meaningful way.
Tips for tables
- Only use tables for tabular information, not for formatting.
- Use “real tables” rather than text formatted to look like tables using the TAB key or space bar. These will not be recognized by assistive technology.
- Keep tables simple by avoiding merged cells and dividing complex data sets into separate smaller tables, where possible. Whenever possible, use just one row of headings.
- If tables split across pages, set the header to show at the top of each page. Also set the table to break between rows instead of in the middle of rows.
- Create a text summary of the essential table contents. Any abbreviations used should be explained in the summary.
- Table captions or descriptions should answer the question “what is the table’s purpose and how is it organized?” (e.g., “A sample order form with separate columns for the item name, price and quantity”).
- Table cells should be marked as table headers when they serve as labels to help interpret the other cells in the table.
- Table header cells labels should be concise and clear.
- Ensure the table is not “floating” on the page (see Technique 5).
To add a table with headings
- Go to menu item: Insert
- In the Tables section, select the Tables icon
- Select the number of rows and columns you would like your table to have
- Select the table and a Table Tools menu item should appear
- Go to menu item: Table Tools > Design
- In the Table Style Options section, select the Header Row check box
7.2 Lists
When you create lists, it is important to format them as “real lists”. Otherwise, assistive technologies will interpret your list as a series of short separate paragraphs instead of a coherent list of related items.
To create an ordered or unordered list
- Go to menu item: Home
- In the Paragraph section, select the Bullets icon for unordered lists or select the Numbering icon for ordered lists
- To select a different list format, select the arrow beside the icon
- Select a format from the format Library that appears in the drop-down menu
To modify list styles
- Go to menu item: Home
- In the Paragraph section, select the arrow beside the Bullets icon for unordered lists or select the arrow beside the Numbering icon for ordered lists
- Select Define New Bullet… to create a new unordered list format
- Select Define New Number Format… to create a new ordered list format
- In the New Bullet dialog or the New Number Format dialog, select the list characteristics
- Select OK
7.3 Columns
Use Columns feature for placing text in columns. However, because columns can be a challenge for users of some assistive technologies, you should consider whether a column layout is really necessary.
7.4 Document Title
In case the document is ever converted into HTML, it should be given a descriptive and meaningful title.
To change the title of the current document
- Go to menu item: Office > Prepare > Properties
- In the Document Properties section that appears, select the Title text box
- Enter the Title
Note: The Title defined in the properties is different than the file name. It is also unrelated to the template name, discussed above.
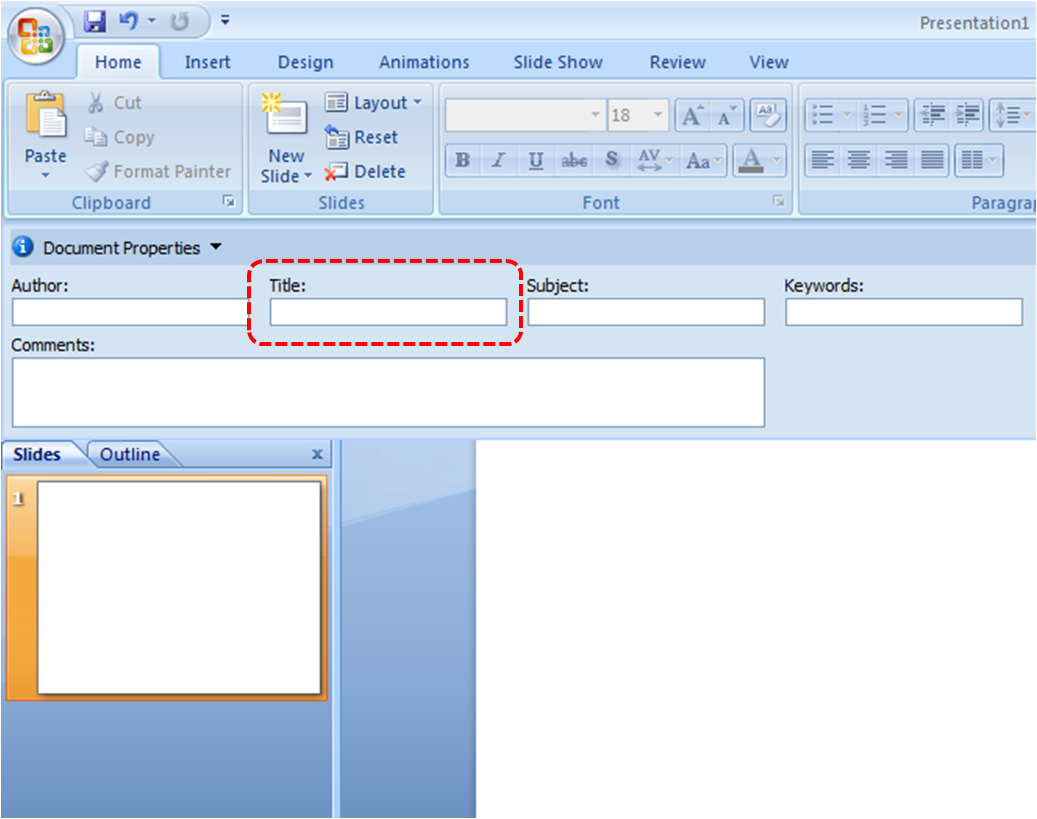
Technique 8. Create Accessible Charts
Charts can be used to display data in meaningful ways for your audience. It is important to ensure that your chart is as accessible as possible to all members of your audience. All basic accessibility considerations that are applied to the rest of your document must also be applied to your charts and the elements within your charts. For example, use shape and color, rather than color alone, to convey information. As well, some further steps should be taken to ensure that the contents are your chart are appropriate labeled to give users reference points that will help to correctly interpret the information.
To create a chart
- Select a Slide Layout that contains a placeholder for a chart (see Technique 3.1, above)
- Select the Insert Chart icon from the center of the placeholder
- Select a Chart Type from the Chart Gallery
- Select OK
Note: This will open the Excel document titled “Chart in Microsoft Office PowerPoint”, where you can input the data you would like to include in the chart. When you have done this, simply close the Excel window and the data will appear on the chart in the PowerPoint presentation.
To add titles and labels
- In the Chart Tools menu section, go to menu item: Layout
- In the Labels section, select the type of title or label you would like to define (e.g., Chart Title, Axis Titles, Data Labels)
To apply a predefined Chart Layout
- In the Chart Tools menu section, go to menu item: Design
- In the Chart Layouts section, select a Quick Layout from the scrolling Chart Layouts gallery
To change to a different predefined Chart Type
- In the Chart Tools menu section, go to menu item: Design
- In the Type section, select the Change Chart Type icon
- In the Change Chart Type dialog, select a chart type from the left pane
- Select a Chart Design from the right pane
- Select OK
Other Chart Considerations
- When creating line charts, use the formatting options to create different types of dotted lines to facilitate legibility for users who are color blind
- When creating bar charts, go to menu item: Chart Tools > Format and in the Shape Styles section select Shape Fill to apply a texture to help distinguish the bars
- Change the default colors to a color safe or gray-scale palette
- Use the formatting options to change predefined colors, ensuring that they align with sufficient contrast requirements (see Technique 9.2, below)
Technique 9. Make Content Easier to See
9.1 Format of Text
When formatting text, especially when the text is likely to printed, try to:
- Use font sizes between 12 and 18 points for body text.
- Use fonts of normal weight, rather than bold or light weight fonts. If you do choose to use bold fonts for emphasis, use them sparingly.
- Use standard fonts with clear spacing and easily recognized upper and lower case characters. Sans serif fonts (e.g., Arial, Verdana) may sometimes be easier to read than serif fonts (e.g., Times New Roman, Garamond).
- Avoid large amounts of text set all in caps, italic or underlined.
- Use normal or expanded character spacing, rather than condensed spacing.
- Avoid animated or scrolling text.
But can’t users just zoom in? Office applications do typically include accessibility features such as the ability to magnify documents and support for high contrast modes. However, because printing is an important aspect of many workflows and changing font sizes directly will change documents details such the pagination, the layout of tables, etc., it is best practice to always format text for a reasonable degree of accessibility.
9.2 Use Sufficient Contrast
The visual presentation of text and images of text should have a contrast ration of at least 4.5:1. To help you determine the contrast, here are some examples on a white background:
- Very good contrast (Foreground=black, Background=white, Ratio=21:1)
- Acceptable contrast (Foreground=#767676, Background=white, Ratio=4.54:1)
- Unacceptable contrast (Foreground=#AAAAAA, Background=white, Ratio=2.32:1)
Also, always use a single solid color for a text background rather than a pattern.
In order to determine whether the colors in your document have sufficient contrast, you can consult an online contrast checker, such as:
9.3 Avoid Using Color Alone
Color should not be used as the only visual means of conveying information, indicating an action, prompting a response, or distinguishing a visual element. In order to spot where color might be the only visual means of conveying information, you can create a screenshot of the document and then view it with online gray-scale converting tools, such as:
- GrayBit v2.0: Grayscale Conversion Contrast Accessibility Tool
Editor’s note: GrayBit v2.0 is no longer available. However, multiple tools can be found online: Google Search: gray-scale conversion tool.
9.4 Avoid Relying on Sensory Characteristics
The instructions provided for understanding and operating content should not rely solely on sensory characteristics such as the color or shape of content elements. Here are two examples:
- Do not track changes by simply changing the color of text you have edited and noting the color. Instead use PowerPoint 2007’s “Track Changes” feature to track changes.
- Do not distinguish between images by referring to their appearance (e.g., “the bigger one”). Instead, label each image with a figure number and use that for references.
9.5 Avoid Using Images of Text
Before you use an image to control the presentation of text (e.g., to ensure a certain font or color combination), consider whether you can achieve the same result by styling “real text”. If this is not possible, as with logos containing stylized text, make sure to provide alternative text for the image following the techniques noted above.
9.6 Avoid Transitions
Transitions between slides and elements in each slide (e.g., bullets in a list flying onto the screen) can be distracting to users with disabilities. It can also cause assistive technologies to read the slide incorrectly. For these reasons, it is best to avoid transitions altogether.
Technique 10. Make Content Easier to Understand
10.1 Write Clearly
By taking the time to design your content in a consistent way, it will be easier to access, navigate and interpret for all users:
- Whenever possible, write clearly with short sentences.
- Introduce acronyms and spell out abbreviations.
- Avoid making the document too “busy” by using lots of whitespace and by avoiding too many different colors, fonts and images.
- If content is repeated on multiple pages within a document or within a set of documents (e.g., headings, footings, etc.), it should occur consistently each time it is repeated.
10.2 Provide Context for Hyperlinks
Hyperlink text in your document should be meaningful when read out of context. To be an effective navigation aid, the link text should describe the destination of the link.
Consider the experience of screen reader users: Generally, screen readers generate a list of links, and screen reader users navigate this list alphabetically. Hyperlink text such as “click here” or “more” is meaningless in this context.
In order to be useful to someone using a screen reader, ensure that hyperlink text is self-describing and meaningful on its own. To make the address of hyperlink clear when printing, you may wish to include the address in brackets following the descriptive text of the hyperlink.
To change link text
- Highlight the link and right-click*
- Select Edit Hyperlink (Ctrl + K)
- Change the text in the Text to display box to something descriptive
10.3 Accessible Presentations
It is important to consider accessibility before, during, and after presentations. Below is a helpful link with guidance on how to make presentations accessible to all:
Technique 11. Check Accessibility
At this time, Powerpoint 2007 does not offer a mechanism to check for potential accessibility errors in your document prior to publishing. [Tested: January 10th, 2011]
In order to get some indication of the accessibility of your document or template (see Technique 1), then you may consider saving the file into HTML or PDF in order to perform an accessibility check in one of those formats, as described below.
To evaluate HTML accessibility
Another option is to save the document into HTML format and use one of the web accessibility checkers available online. Such as:
To evaluate PDF accessibility
If you saved your document in tagged PDF format, you can use the following tools and steps to evaluate the accessibility of the PDF document:
To evaluate PDF accessibility in Adobe Acrobat Professional
- Go to menu item: Advanced > Accessibility > Full Check…
- In the Full Check dialog, select all the checking option
- Select the Start Checking button
Editor’s note: For detailed instructions, see our section on how to check accessibility using Adobe Acrobat Professional.
Technique 12. Use Accessibility Features when Saving/Exporting to Other Formats
In some cases, additional steps must be taken in order to ensure accessibility information is preserved when saving/exporting to formats other than the default.
PDF
PDF documents are not always accessible. Accessible PDF documents are often called “Tagged PDF” because they include “tags” that encode structural information required for accessibility. To evaluate the accessibility of your PDF document, see Technique 11 (above).
- Go to menu item: Office > Save As > PDF or XPS
- In the File name box, type a name for the file
- Select the Options button
- Under Include non-printing information in the Options dialog, ensure that the Document structure tags for accessibility check box is selected
- Under PDF options, ensure that Bitmap text when fonts may not be embedded check box is de-selected
- Select OK and Save
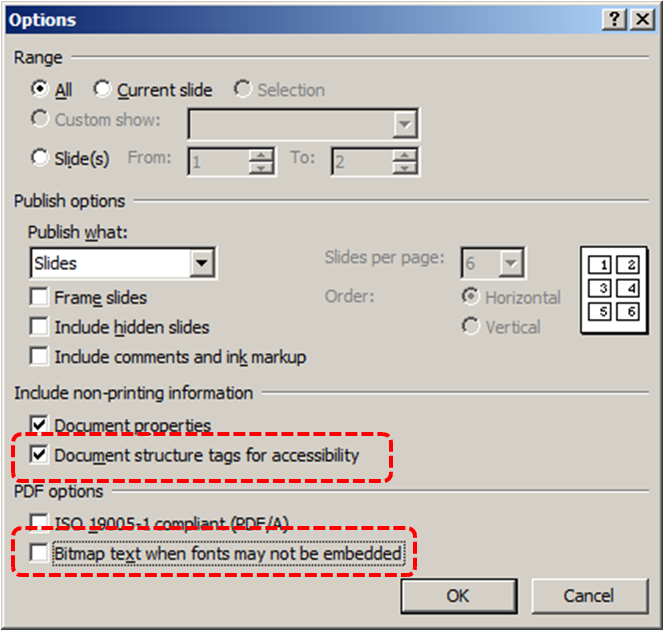
HTML
- Go to menu item: Office > Save As > Other Formats
- In the File name box, type a name for the file
- In the Save as type box, select Web Page
- Select Save
- Check the HTML file for accessibility (see Technique 11, above)
To clean up your HTML file
- Remove unnecessary styles, line breaks, etc.
- Remove unnecessary id, class, and attributes
- Remove font tags
- Remove styles in the <head> tag
- Ensure the <th> tags have a scope attribute
- Remove <p> tags nested inside <th> and <td> tags
- Check for accessibility (see Technique 11, above)
Note: you may wish to use HTML editors or utilities to help with this process.
Technique 13. Consider Using Accessibility Support Applications/Plugins
Disclaimer: This list is provided for information purposes only. It is not exhaustive and inclusion of an application or plug-in on the list does not constitute a recommendation or guarantee of results.
The following accessibility related plug-ins and support are available for PowerPoint 2007:
- PPT2HTML – offers an accessibility tool bar for adding alt-text to charts.
- PowerTalk – an accessibility tool that provides a good approximation of how presentations will sound with a screen reader. [Editor’s note: Tool no longer available.]
- HiSoftware – desktop add-ins that will create a Section 508 or WAI Fully Compliant Web pages from PowerPoint presentations (some knowledge of HTML code is required).
Accessibility Help
If you are interested in what features are provided to make using PowerPoint 2007 more accessible to users, documentation is provided in the Help system:
- Select Help icon in the right corner of the application window or select F1
- Enter “Accessibility” as your search term in the Help dialog box
References and Resources
- Microsoft PowerPoint: Video Tutorials
- Ryerson University: Microsoft PowerPoint Accessibility Tipsheet (PDF)
- Microsoft PowerPoint 2007 Help — Note: PowerPoint 2007 is no longer supported, but you still have access to offline help by going to Help > PowerPoint Help.
- GAWDS Writing Better Alt Text
Acknowledgments
This document was produced as part of the Accessible Digital Office Document (ADOD) Project.
This project has been developed by the Inclusive Design Research Centre, OCAD University as part of an EnAbling Change Partnership project with the Government of Ontario and UNESCO (United Nations Educational, Scientific and Cultural Organization).
Source: Authoring Techniques for Accessible Office Documents: PowerPoint 2007 by the Inclusive Design Research Centre (IDRC) used under CC-BY-SA 3.0.
Usage Notes
At the time of testing (September 30, 2010), Keynote ’09 lacks several features that enable accessible office document authoring, most notably: the ability to add alternative text to images and objects, indicating natural language, quick styles or named styles, and change tracking. As a result, some of the other features that might otherwise support accessibility, such as its extensive templates are not as effective. In addition, Keynote ‘09 does not include an accessibility checking feature, which is a more advanced accessibility feature.
Editor’s note: In later versions of Keynote, users can add alt text to images and objects. Apple has added significant accessibility improvements to its iWork applications, but an accessibility checker is not a feature yet.
What’s an “Office Document”?
You should use these techniques when you are using Keynote ’09 to create documents that are:
- Intended to be used by people (i.e., not computer code),
- Text-based (i.e., not simply images, although they may contain images),
- Fully printable (i.e., where dynamic features are limited to automatic page numbering, table of contents, etc. and do not include audio, video, or embedded interactivity),
- Self-contained (i.e., without hyperlinks to other documents, unlike web content), and
- Typical of office-style workflows (Reports, letters, memos, budgets, presentations, etc.).
If you are creating forms, web pages, applications, or other dynamic and/or interactive content, these techniques will still be useful to you, but you should also consult the W3C-WAI Web Content Accessibility Guidelines (WCAG 2.0) because these are specifically designed to provide guidance for highly dynamic and/or interactive content.
File Formats
The default file format for Keynote ‘09 is the native iWork format. In addition, Keynote ‘09 offers many other presentation processor and web format saving options. Most of these have not been checked for accessibility, but some information and/or instructions are available for the following formats in Technique 12:
- MS PowerPoint (PPT)
- PDF
- HTML
Document Conventions
We have tried to formulate these techniques so that they are useful to all authors, regardless of whether they use a mouse. However, for clarity there are several instances where mouse-only language is used. Below are the mouse-only terms and their keyboard alternatives:
- *Right-click: To right-click with the keyboard, select the object using the Shift+Arrow keys and then press either (1) the “Right-Click” key (some keyboard have this to the right of the spacebar) or Shift+F10.
Disclaimer and Testing Details:
Following these techniques will increase the accessibility of your documents, but it does not guarantee accessibility to any specific disability groups. In cases where more certainty is required, it is recommended that you test the office documents with end users with disabilities, including screen reader users. The application-specific steps and screenshots in this document were created using iWork Keynote ‘09 (ver.5.0.3(791), Mac OS X, Sept. 2010) and Keynote, version 9.1 (December 2019) while producing a document in the proprietary file format. Files are also easily saved as other file formats (see Technique 12).
Technique 1. Use Accessible Templates
All office documents start with a template, which can be as simple as a blank standard-sized page or as complex as a nearly complete document with text, graphics and other content. For example, a “Meeting Minutes” template might include headings for information relevant to a business meeting, such as “Actions” above a table with rows to denote time and columns for actions of the meeting. Because templates provide the starting-point for so many documents, accessibility is critical. If you are unsure whether a template is accessible, you should check a sample document produced when the template is used (see Technique 11). The default template for new documents in Keynote ‘09 is a blank presentation. If you are connected to the internet, you can access a variety of blank business presentation templates. These are all accessible by virtue of being blank. As well, you may create your own templates.
To create an accessible template
- Go to menu item: File > New or File > New from Theme Chooser…
- In the Theme Chooser dialog, select the White theme or select one of the other existing template designs
- A new document in your selected template style will open
- Ensure that you follow the techniques in this document
- When you are finished you should also check the accessibility of the document (see Technique 11)
- Go to menu item: File > Save Theme…
- In the Save As box, type a name for the template. Using a descriptive template name (e.g. “Accessible Memo Template”) will increase the prominence of the accessibility status.
- Specify a folder in which to save your template. Note: By default, it will be saved in your home folder in Library/Application Support/iWork/Keynote/Templates/My Templates pane of the Template Chooser. To save the template in a different location than the default, create a new folder in the Templates folder. The folder name is then used as a template category in the Template Chooser.
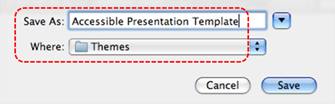
- Click Save
To select an accessible template
Note: Only use these steps if you have an accessible template available (e.g. that you previously saved). Otherwise, simply open a new (blank) document.
- Go to menu item: File > New from Theme Chooser…
- In the Template Chooser dialog, select My Templates from the left pane
- Select your accessible template and click Choose
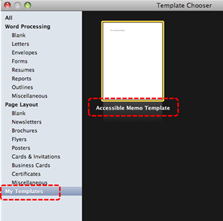
Technique 2. Set Document Language
At this time, it is not possible to manually indicate the natural language for specific slides or sections of text in Keynote ‘09. As well, it is not possible to change the natural language of the document itself from the default language. [Tested: September 30th, 2010]
Editor’s note: In later versions of Keynote, users are able to set a presentation’s language.
- Choose File > Advanced > Language & Region (from the File menu at the top of your screen).
- In the dialog that appears, click the pop-up menus and choose a language and a region.
Note: You can’t change this setting for a shared presentation.
- Click OK.
For more details, see how to change a presentation’s language and formatting.
In order for assistive technologies (e.g., screen readers) to be able to present your document accurately, it is important to indicate the natural language of the document. If a different natural language is used for a paragraph or selected text, this also needs to be clearly indicated.
Technique 3. Use Built-In Layout and Styling Features
3.1 Use Built-In Slide Layouts
Instead of creating each slide in your presentation by starting from a blank slide, check whether there is a suitable built-in layout. Note: The built-in layouts can be more accessible to users of assistive technologies because they technologies sometimes read the floating items on the slide in the order that they were placed on the slide. The built-in layouts have usually taken this into account (e.g., “Title” first followed by other items, left to right and from top to bottom). If you create slide layouts from scratch, it is sometimes difficult to keep track of the order elements were placed. Note: Each slide in Keynote ’09 is derived from a Master Slide (Technique 3.2) applying “true layouts” requires that you use Master Slides that are accessible and appropriately designed for your purposes.
3.2 Customize Using Master Slides
If a layout must be customized, it is recommended that Master Slides be used. Every slide layout in a presentation is defined by its master slide. A master slide determines the formatting style for various elements of the slide layout. This includes font styles, character formatting, and the positioning of elements. Essentially, each master slide acts as a design template for the slide layout. If you edit any aspect of the slide layout in the master slide, the change will affect all slides that were created based on it. For this reason, it is good practice to edit the master slide and use the slide layouts before building individual slides. It is essential that you create and use master slides that meet the accessibility requirements outlined in this document.
To create or customize a master slide
- Select the slide Note: To design a master slide from scratch, select a blank slide to start with. Otherwise, select a slide that resembles how you would like your slide to look and be sure to modify the slide characteristics to align with accessibility guidelines in this document.
- Go to menu item: View > Show Master Slides
- In the Master Slide Navigator in the left pane, select the Master Slide Layout you would like to modify
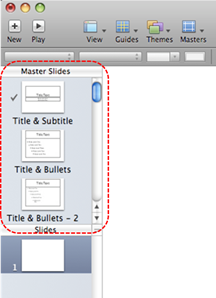
- Customize the master slide to suit your needs (e.g., define placeholders for text, change background elements, add alignment guides, and more) ensuring that your changes meet accessibility requirements
To define default attributes of text and objects
- Select the slide Note: To design a master slide from scratch, select a blank slide to start with. Otherwise, select a slide that resembles how you would like your slide to look and be sure to modify the slide characteristics to align with accessibility guidelines in this document.
- Go to menu item: View > Show Master Slides
- In the Master Slide Navigator in the left pane, select the Master Slide Layout you would like to define default attributes for

- In the Toolbar, click the element type (e.g., text box, shapes, table, charts)

- In the Formatting bar, format the element ensuring that it meets accessibility guidelines outlined in this document
- To make the element a default for your current master slide, go to menu item: Format > Advanced > Define (element type) for Current Master Note: To make the element a default for all master slides, go to menu item: Format > Advanced > Define (element type) for All Masters
Technique 4. Set a Logical Tab Order
Many presentation applications create content composed almost exclusively of “floating” objects. This means that they avoid the transitions between in-line content and secondary “floating” objects (text boxes, images, etc.) that can cause accessibility issues in word processors. However, when you are working with “floating” objects, it is important to remember that the way objects are positioned in two dimensions on the screen may be completely different from how the objects will be read by a screen reader or navigated using a keyboard. The order that content is navigated sequentially is called the “Tab Order” because often the “Tab” key is used to navigate from one “floating” object to the next.
Tips for setting a logical “tab order” for “floating” objects
- The tab order of floating objects is usually from the “lowest” object on the slide to the “highest”.
- Because objects automatically appear “on top” when they are inserted, the default tab order is from the first object inserted to the last. However, this will change if you use features such as “bring to front” and “send to back”.
- The slide’s main heading should be first in the tab order.
- Headings should be placed in the tab order immediately before the items (text, diagrams, etc.) for which they are acting as a heading.
- Labels should be in the reading order placed immediately before the objects that they label.
- For simple slide layouts, it may be possible to simply insert objects in a logical tab order.
- For more complex layouts, it may be easier to simply to create the slide as usual and then set the tab order (see below).
To set the tab order
- Select the object
- Go to menu item: Arrange > Bring Forward, Bring to Front, Send Backward or Send to Back
Technique 5. Use Slide Notes
A useful aspect of presentation applications is the facility to add notes to slides, which can then be read by assistive technologies. You can use these slide notes to explain and expand on the contents of your slides in text format. Slide notes can be created as you build your presentation.
To add notes to your slides
- Go to menu item: View > Show Presenter Notes
- In the pane at the bottom of the window (below the slide), enter notes to accompany each slide
Technique 6. Provide Text Alternatives for Images and Graphical Objects
At this time, Keynote ’09 does not offer a mechanism which enables the user to add alternative text descriptions to images or objects. [Tested: September 28, 2010]
Editor’s note: For later versions of Keynote, users can add alternative text descriptions for images and objects.
- Select the image and go to the Format side bar. Click on the image tab.
- Click the Description text box, then enter your text.
For more details, see the section on how to add an image description on the Keynote User Guide for Mac.
When using images or other graphical objects, such as charts and graphs, it is important to ensure that the information you intend to convey by the image is also conveyed to people who cannot see the image. This can be accomplished by adding concise alternative text of each image. If an image is too complicated to concisely describe in the alternative text alone (artwork, flowcharts, etc.), provide a short text alternative and a longer description as well.
Tips for writing alternative text
- Try to answer the question “what information is the image conveying?”
- If the image does not convey any useful information, leave the alternative text blank
- If the image contains meaningful text, ensure all of the text is replicated
- Alternative text should be fairly short, usually a sentence or less and rarely more than two sentences
- If more description is required (e.g., for a chart or graph), provide a short description in the alternative text (e.g., a summary of the trend) and more detail in the long description, see below
- Test by having others review the document with the images replaced by the alternative text
Tips for writing longer descriptions
- Long descriptions should be used when text alternatives (see above) are insufficient to answer the question “what information is the image conveying?”
- In some situations, the information being conveyed will be how an image looks (e.g., an artwork, architectural detail, etc.). In these cases, try to describe the image without making too many of your own assumptions.
- One approach is to imagine you are describing the image to a person over the phone
- Ensure that you still provide concise alternative text to help readers decide if they are interested in the longer description
Alternatively, you can include the same information conveyed by the image within the body of the document, providing the images as an alternate to the text. In that case, you do not have to provide alternate text within the image.
Technique 7. Use Built-In Structuring Features
7.1 Tables
When using tables, it is important to ensure that they are clear and appropriately structured. This helps all users to better understand the information in the table and allows assistive technologies (e.g., screen readers) to provide context so that the information within the table can be conveyed in a meaningful way.
Tips for tables
- Only use tables for tabular information, not for formatting.
- Use “real tables” rather than text formatted to look like tables using the TAB key or space bar. These will not be recognized by assistive technology.
- Keep tables simple by avoiding merged cells and dividing complex data sets into separate smaller tables, where possible.
- If tables split across pages, set the header to show at the top of each page. Also set the table to break between rows instead of in the middle of rows.
- Create a text summary of the essential table contents. Any abbreviations used should be explained in the summary.
- Table captions or descriptions should answer the question “what is the table’s purpose and how is it organized?” (e.g., “A sample order form with separate columns for the item name, price and quantity”).
- Table cells should be marked as table headers when they serve as labels to help interpret the other cells in the table.
- Table header cells labels should be concise and clear.
- Ensure the table is not “floating” on the page (see Technique 4).
To set default table attributes
-
- Go to menu item: View > Show Master Slides
- Select a master slide from the Master Slides Navigator in the left pane

- In the Toolbar, click Table
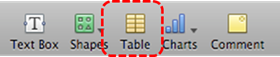
- Select the table
- Go to menu item: View > Show Inspector
- In the Inspector dialog, select Table inspector
- Click the Table tab
- In the Headers & Footers section, select Choose the number of header columns or Choose the number of header rows drop-down menus
- Select the number of headers
Note: Limiting your table to one row or column of header will ensure your table remains clear and easy to interpret by assistive technologies.
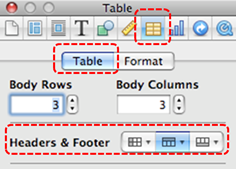
- Customize the other characteristics of your table through the other sections of the Table inspector dialog
- To make the table a default for your current master slide, go to menu item: Format > Advanced > Define Table for Current Master
Note: To make the table a default for all master slides, go to menu item: Format > Advanced > Define Table for All Masters Note: Defining the table as a default for all masters means that when you insert a Table element into any slide, it will display your preformatted characteristics (including appropriate headers)
7.2 Lists
When you create lists, it is important to format them as “real lists”. Otherwise, assistive technologies will interpret your list as a series of short separate paragraphs instead of a coherent list of related items.
To create an ordered or unordered list
- Select the text box or highlight the text
- Go to menu item: View > Show Inspector
- In the Inspector dialog, click Text inspector
- Click the Bullets tab
- In the Bullets & Numbering section, click the drop-down menu and choose a bullet or numbering option
- Customize the list style accordingly, ensuring your selections align with the guidelines in this document
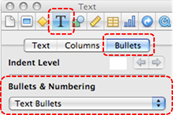
7.3 Columns
Use Columns feature for placing text in columns. Note: Because columns can be a challenge for users of some assistive technologies, consider whether a column layout is really necessary.
7.4 Document Title
In case the document is ever converted into HTML, it should be given a descriptive and meaningful title.
To change the title of the current document
- In the Toolbar, select Inspector
- In the Inspector dialog, select the Document inspector button
- Click the Spotlight tab
- In the Title box, type a descriptive name for the document Note: The Title defined in the properties is different than the file name. It is also unrelated to the template name, discussed above.

Technique 8. Create Accessible Charts
Charts can be used to make data more understandable for some audiences. However, it is important to ensure that your chart is as accessible as possible to all members of your audience. All basic accessibility considerations that are applied to the rest of your document must also be applied to your charts and the elements within your charts. For example, use shape and color, rather than color alone, to convey information. As well, some further steps should be taken to ensure that the contents are your chart are appropriate labeled to give users reference points that will help them to correctly interpret the information.
To create a chart
- Go to menu item: Insert > Chart
- Select the type of chart you want to use
- Update the Chart Data Editor with the data you would like to display
- Close the Chart Data Editor
To add titles and labels
- Select the chart
- Go to menu item: View > Show Inspector
- In the Chart Inspector, select Chart
- Ensure the Show Title and Show Legend check boxes are selected
- Select Axis
- Under Value Axis (Y) and Category Axis (X), select Show Title and Show Value Labels from their respective drop-down menus
To change to a different predefined Chart Type
- Select the chart
- Go to menu item: View > Show Inspector
- Select a chart type from the Choose a chart type drop-down menu
Other Chart Considerations
- When creating line charts, use the formatting options to create different types of dotted lines to facilitate legibility for users who are color blind
- When creating bar charts, it is helpful to apply texture instead of color to differentiate the bars
- Change the default colors to a color safe or gray-scale palette
- Use the formatting options to change predefined colors, ensuring that they align with sufficient contrast requirements (see Technique 9.2)
Technique 9. Make Content Easier to See
9.1 Format of Text
When formatting text, especially when the text is likely to be printed, try to:
- Use font sizes between 12 and 18 points for body text.
- Use fonts of normal weight, rather than bold or light weight fonts. If you do choose to use bold fonts for emphasis, use them sparingly.
- Use standard fonts with clear spacing and easily recognized upper and lower case characters. Sans serif fonts (e.g., Arial, Verdana) may sometimes be easier to read than serif fonts (e.g., Times New Roman, Garamond).
- Avoid large amounts of text set all in caps, italic or underlined.
- Use normal or expanded character spacing, rather than condensed spacing.
- Avoid animated or scrolling text.
But can’t users just zoom in? Office applications do typically include accessibility features such as the ability to magnify documents and support for high contrast modes. However, because printing is an important aspect of many workflows and changing font sizes directly will change documents details such the pagination, the layout of tables, etc., it is best practice to always format text for a reasonable degree of accessibility.
9.2 Use Sufficient Contrast
The visual presentation of text and images of text should have a contrast ration of at least 4.5:1. To help you determine the contrast, here are some examples on a white background:
- Very good contrast (Foreground=black, Background=white, Ratio=21:1)
- Acceptable contrast (Foreground=#767676, Background=white, Ratio=4.54:1)
- Unacceptable contrast (Foreground=#AAAAAA, Background=white, Ratio=2.32:1)
Also, always use a single solid color for a text background rather than a pattern. In order to determine whether the colors in your document have sufficient contrast, you can consult an online contrast checker, such as:
9.3 Avoid Using Color Alone
Color should not be used as the only visual means of conveying information, indicating an action, prompting a response, or distinguishing a visual element. In order to spot where color might be the only visual means of conveying information, you can create a screenshot of the document and then view it with online gray-scale converting tools, such as:
- GrayBit v2.0: Grayscale Conversion Contrast Accessibility Tool
Editor’s note: GrayBit v2.0 is no longer available. However, multiple tools can be found online: Google Search: gray-scale conversion tool.
9.4 Avoid Relying on Sensory Characteristics
The instructions provided for understanding and operating content should not rely solely on sensory characteristics such as the color or shape of content elements. Here are two examples:
- Do not track changes by simply changing the color of text you have edited and noting the color. Instead use PowerPoint 2010’s “Track Changes” feature to track changes.
- Do not distinguish between images by referring to their appearance (e.g., “the bigger one”). Instead, label each image with a figure number and use that for references.
9.5 Avoid Using Images of Text
Before you use an image to control the presentation of text (e.g., to ensure a certain font or color combination), consider whether you can achieve the same result by styling “real text”. If this is not possible, as with logos containing stylized text, make sure to provide alternative text for the image following the techniques noted above.
9.6 Avoid Transitions
Transitions between slides and elements in each slide (e.g., bullets in a list flying onto the screen) can be distracting to users with disabilities. It can also cause assistive technologies to read the slide incorrectly. For these reasons, it is best to avoid transitions altogether.
Technique 10. Make Content Easier to Understand
10.1 Write Clearly
By taking the time to design your content in a consistent way, it will be easier to access, navigate and interpret for all users:
- Whenever possible, write clearly with short sentences.
- Introduce acronyms and spell out abbreviations.
- Avoid making the document too “busy” by using lots of whitespace and by avoiding too many different colors, fonts and images.
- If content is repeated on multiple pages within a document or within a set of documents (e.g., headings, footings, etc.), it should occur consistently each time it is repeated.
10.2 Provide Context for Hyperlinks
Hyperlink text in your document should be meaningful when read out of context. To be an effective navigation aid, the link text should describe the destination of the link.
Consider the experience of screen reader users: Generally, screen readers generate a list of links, and screen reader users navigate this list alphabetically. Hyperlink text such as “click here” or “more” is meaningless in this context.
In order to be useful to someone using a screen reader, ensure that hyperlink text is self-describing and meaningful on its own. To make the address of hyperlink clear when printing, you may wish to include the address in brackets following the descriptive text of the hyperlink.
To edit hyperlink text
- Enter the hyperlink
- Go to menu item: View > Show Inspector
- In the Inspector dialog, click Hyperlink inspector
- In the Display box, enter the text you would like to display
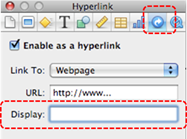
10.3 Accessible Presentations
It is important to consider accessibility before, during, and after presentations. Below is a helpful link with guidance on how to make presentations accessible to all:
Technique 11. Check Accessibility
At this time, Keynote ’09 does not offer a mechanism to check for potential accessibility errors in your document prior to publishing. [Tested: September 30th, 2010] In order to get some indication of the accessibility of your document or template (see Technique 1), then you may consider saving the file into HTML or PDF in order to perform an accessibility check in one of those formats, as described below.
To evaluate HTML accessibility
If you wish to check the accessibility of your document or template (see Technique 1), one option is to save it into HTML format and use one of the web accessibility checkers available online. Such as:
To evaluate PDF accessibility
If you saved your document in tagged PDF format, you can use the following tools and steps to evaluate the accessibility of the PDF document:
To evaluate PDF accessibility in Adobe Acrobat Professional
- Go to menu item: Advanced > Accessibility > Full Check…
- In the Full Check dialog, select all the checking option
- Select the Start Checking button
Editor’s note: For detailed instructions, see our section on how to check accessibility using Adobe Acrobat Professional.
Technique 12. Use Accessibility Features when Saving/Exporting to Other Formats
In some cases, additional steps must be taken in order to ensure accessibility information is preserved when saving/exporting to formats other than the default.
To export to a different format
- Go to menu item: Share > Export
- Select the file format you would like to export
- Customize the settings relevant to the selected file format
- Click Next
- In the Save As box, enter a descriptive file name
- In the Where drop-down menu, specify the location you would like the exported file to be saved
- Click Export
PDF
PDF documents are not always accessible. Accessible PDF documents are often called “Tagged PDF” because they include “tags” that encode structural information required for accessibility. To evaluate the accessibility of your PDF document, see Technique 11 (above).
To clean up your HTML file
- Remove unnecessary styles, line breaks, etc.
- Remove unnecessary id, class, and attributes
- Remove font tags
- Remove styles in the <head> tag
- Ensure the <th> tags have a scope attribute
- Remove <p> tags nested inside <th> and <td> tags
- Check for accessibility (see Technique 11) Note: you may wish to use HTML editors or utilities to help with this process.
Technique 13. Consider Using Accessibility Support Applications/Plugins
Disclaimer: This list is provided for information purposes only. It is not exhaustive and inclusion of an application or plug-in on the list does not constitute a recommendation or guarantee of results. The following accessibility related plug-ins and support are available for Keynote ‘09:
- PowerTalk – an accessibility tool that provides a good approximation of how presentations will sound with a screen reader. [Editor’s note: Tool no longer available.]
- Keynote Support
Accessibility Help
If you are interested in what features are provided to make using Keynote ‘09 more accessible to users, documentation is provided in the Help system:
- Go to menu item: Help
- Enter your search term in the Search box
References and Resources
- Keynote User Guide for Mac
- Apple: Create accessible presentations with Keynote
- GAWDS Writing Better Alt Text
Acknowledgments
This document was produced as part of the Accessible Digital Office Document (ADOD) Project.
This project has been developed by the Inclusive Design Research Centre, OCAD University as part of an EnAbling Change Partnership project with the Government of Ontario and UNESCO (United Nations Educational, Scientific and Cultural Organization).

Source: Authoring Techniques for Accessible Office Documents: iWork Keynote ’09 by the Inclusive Design Research Centre (IDRC) used under CC-BY-SA 3.0.
Usage Notes
At the time of testing (December 2019), OpenOffice Impress provides a set of accessibility features that is sufficient to enable the production of accessible digital office documents. However, OpenOffice Impress does not include an accessibility checking feature.
What’s an “Office Document”?
You should use these techniques when you are using Impress to create documents that are:
- Intended to be used by people (i.e., not computer code),
- Text-based (i.e., not simply images, although they may contain images),
- Fully printable (i.e., where dynamic features are limited to automatic page numbering, table of contents, etc. and do not include audio, video, or embedded interactivity),
- Self-contained (i.e., without hyperlinks to other documents, unlike web content), and
- Typical of office-style workflows (Reports, letters, memos, budgets, presentations, etc.).
If you are creating forms, web pages, applications, or other dynamic and/or interactive content, these techniques will still be useful to you, but you should also consult the W3C-WAI Web Content Accessibility Guidelines (WCAG 2.0) because these are specifically designed to provide guidance for highly dynamic and/or interactive content.
File Formats
The default file format for Impress is ODF Presentation (ODP).
In addition, Impress offers many other presentation processor and web format saving options. Most of these have not been checked for accessibility, but some information and/or instructions are available for the following formats in Technique 12:
- MS PowerPoint (PPT and PPTX)
- PDF
- HTML
Document Conventions
We have tried to formulate these techniques so that they are useful to all authors, regardless of whether they use a mouse. However, for clarity there are several instances where mouse-only language is used. Below are the mouse-only terms and their keyboard alternatives:
- *Right-click: To right-click with the keyboard, select the object using the Shift+Arrow keys and then press either (1) the “Right-Click” key (some keyboard have this to the right of the spacebar) or Shift+F10.
Disclaimer and Testing Details:
Following these techniques will increase the accessibility of your documents, but it does not guarantee accessibility to any specific disability groups. In cases where more certainty is required, it is recommended that you test the office documents with end users with disabilities, including screen reader users.
The application-specific steps and screenshots in this document were created using OpenOffice Impress (ver. 3.2.1, Windows XP, Aug. 2010 and Apache OpenOffice 4.1.7)) while creating an ODT document. Files can also be easily saved as other file formats (see Technique 12).
Technique 1. Use Accessible Templates
All office documents start with a template, which can be as simple as a blank standard-sized page or as complex as a nearly complete document with text, graphics and other content. For example, a “Meeting Minutes” template might include headings for information relevant to a business meeting, such as “Actions” above a table with rows to denote time and columns for actions of the meeting.
Because templates provide the starting-point for so many documents, accessibility is critical. If you are unsure whether a template is accessible, you should check a sample document produced when the template is used (see Technique 11).
OpenOffice Impress’s default template for new documents is a blank presentation. The basic installation also includes blank business card and blank label templates. These are all accessible by virtue of being blank. As well, you may create your own templates.
To create an accessible template
- Create a new document
- Ensure that you follow the techniques in this document
- When you are finished you should also check the accessibility of the document (see Technique 11)
- Go to menu item: File > Properties
- Use the Title and/or Comments to indicate the accessibility status of the template. Using Title (e.g., “Accessible Memo Template”) will increase the prominence of the accessibility status because this is used in place of the template’s file name. Comments can be used to add more information if necessary (e.g., “This memo template has been checked for accessibility.”).
- Close the dialog with OK

- Go to menu item: File > Templates > Save (Shift+F11)
- In the New Template box, type a name for the template
- Select the category you would like to save it in, under Categories
Note: the category is simply the folder into which you are saving the template
- Close the dialog with OK

To select an accessible template
Note: Only use these steps if you have an accessible template available (e.g., that you previously saved). Otherwise, simply open a new (blank) document.
- Go to menu item: File > New > Templates and Documents
- Select the Templates icon
- Select a template document from the list
Note: A properties pane appears on the right side of the window, where you can read the document properties (Title, By, Date, Modified by, Modified on, Description, and Size). If you placed information about the accessibility of the template in the Title and/or Comments when you created the template (see above), this will be displayed in the Title and/or Description, respectively.
- Select Open

- A new document based on the template will be displayed. If you have chosen an accessible template, the document will be accessible at this point. As you add your content (e.g., text, images, etc.), ensure that you consult the sections that follow to preserve accessibility.
Technique 2. Set Document Language
In order for assistive technologies (e.g., screen readers) to be able to present your document accurately, it is important to indicate the natural language of the document. If a different natural language is used for a paragraph or selected text, this also needs to be clearly indicated.
To select a language for the whole document
-
- Go to menu item: Tools > Options
- Select Language Settings > Languages
- Under Default languages for documents, select the document language for all newly created documents
Note: If you mark For the current document only, your choice will only apply to the current document.
- Close the dialog with OK
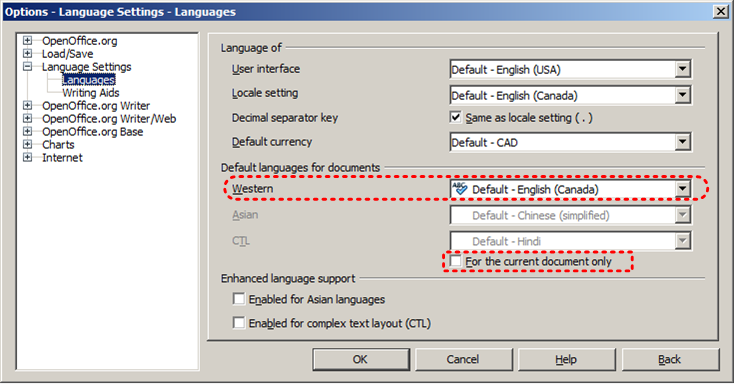
To apply a language directly to selected text
- Select the text to which you want to apply a language
- Go to menu item: Format > Character
- Select the Font tab
- Select the Language and click OK
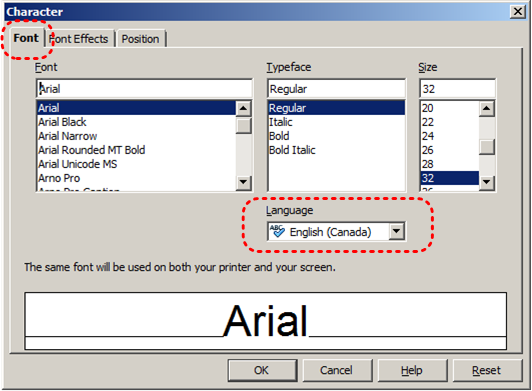
Technique 3. Use Built-In Layout and Styling Features
3.1 Use Built-In Slide Layouts
Instead of creating each slide in your presentation by starting from a blank slide, check whether there is a suitable built-in layout.
Note: The built-in layouts can be more accessible to users of assistive technologies because they technologies sometimes read the floating items on the slide in the order that they were placed on the slide. The built-in layouts have usually taken this into account (e.g., “Title” first followed by other items, left to right and from top to bottom). If you create slide layouts from scratch, it is sometimes difficult to keep track of the order elements were placed.
To apply “true layout” to a slide
- Select the slide in the Slides pane on the left
- Go to menu item: Format > Slide Layout…
- Go to Tasks pane on the right
- Select layout under the Layouts section
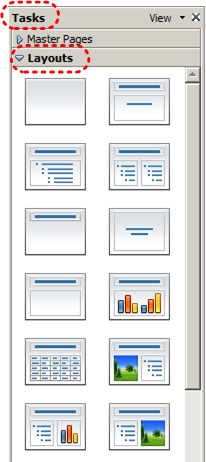
3.2 Use Quick Styles
You should make use of the quick styles that are included with the office application (e.g., pre-defined heading fonts and characters) before creating your own styles or using the character formatting tools directly. Quick styles help your readers understand why something was formatted in a given way, which is especially helpful when there are multiple reasons for the same formatting (e.g., it is common to use italics for emphasis, Latin terms and species names).
Note: While office application suites support headings in much the same way, the named styles often differ.
Impress provides quick styles for theme fonts, but applying these directly to text does not define the text as a heading or body font. To define the font for headings and body text, you need to apply these characteristics to the presentation theme.
Impress provides named styles for “Heading”, “Title”, etc., but not for strong and emphasis.
To use default named styles
- Go to menu item: Format > Styles and Formatting (F11)
- Select the Graphic Styles icon
- Select the named style
- Click the Bucket icon in the element to which you would like to apply the named style
- Close the Styles and Formatting dialog
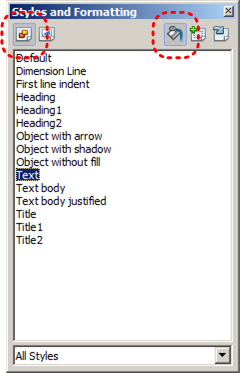
To change the text size for a default named style
- Go to menu item: Format > Styles and Formatting (F11)
- Select the style to modify from the list
- Right click and select: Modify…
- Select the Font tab
- Select a font size under Size
- Exit with OK
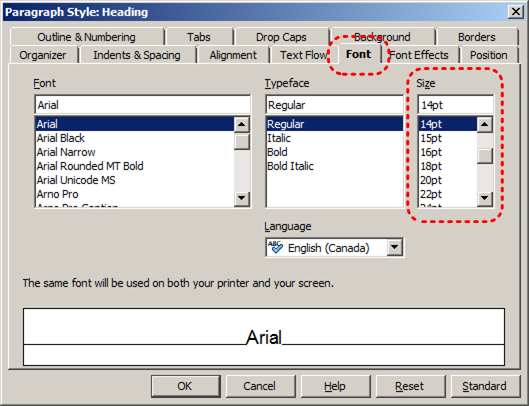
3.3 Customize Using Master Slides
If a layout must be customized, it is recommended that Master Slides be used.
Every slide layout in a presentation is defined by its master slide. A master slide determines the formatting style for various elements of the slide layout. This includes font styles, character formatting, and the positioning of elements. Essentially, each master slide acts as a design template for the slide layout.
If you edit any aspect of the slide layout in the master slide, the change will affect all slides that were created based on it. For this reason, it is good practice to edit the master slide and use the slide layouts before building individual slides. It is essential that you create and use master slides that meet the accessibility requirements outlined in this document.
To modify a Master Slide
- Go to menu item: View > Master > Slide Master
- Edit the master slide, ensuring it aligns with the guidelines in this document
Technique 4. Set a Logical Tab Order
Many presentation applications create content composed almost exclusively of “floating” objects. This means that they avoid the transitions between in-line content and secondary “floating” objects (text boxes, images, etc.) that can cause accessibility issues in word processors.
However, when you are working with “floating” objects, it is important to remember that the way objects are positioned in two dimensions on the screen may be completely different from how the objects will be read by a screen reader or navigated using a keyboard. The order that content is navigated sequentially is called the “Tab Order” because often the “Tab” key is used to navigate from one “floating” object to the next.
Tips for setting a logical “tab order” for “floating” objects
- The tab order of floating objects is usually from the “lowest” object on the slide to the “highest”.
- Because objects automatically appear “on top” when they are inserted, the default tab order is from the first object inserted to the last. However, this will change if you use features such as “bring to front” and “send to back”.
- The slide’s main heading should be first in the tab order.
- Headings should be placed in the tab order immediately before the items (text, diagrams, etc.) for which they are acting as a heading.
- Labels should be in the reading order placed immediately before the objects that they label.
- For simple slide layouts, it may be possible to simply insert objects in a logical tab order.
- For more complex layouts, it may be easier to simply to create the slide as usual and then set the tab order (see below).
To set the tab order
- Right-click* the object
- Select Arrange > Bring to Front, Bring Forward, Send Backward, or Send to Back
Technique 5. Use Slide Notes
A useful aspect of presentation applications is the facility to add notes to slides, which can then be read by assistive technologies. You can use these slide notes to explain and expand on the contents of your slides in text format. Slide notes can be created as you build your presentation.
To add notes to your slides
- Go to menu item: View > Notes Page
- In the text box positioned at the bottom of the page, select Click to add notes
- Enter notes to accompany the slide
Technique 6. Provide Text Alternatives for Images and Graphical Objects
When using images or other graphical objects, such as charts and graphs, it is important to ensure that the information you intend to convey by the image is also conveyed to people who cannot see the image. This can be accomplished by adding concise alternative text to of each image. If an image is too complicated to concisely describe in the alternative text alone (artwork, flowcharts, etc.), provide a short text alternative and a longer description as well.
Tips for writing alternative text
- Try to answer the question “what information is the image conveying?”
- If the image does not convey any useful information, leave the alternative text blank
- If the image contains meaningful text, ensure all of the text is replicated
- Alternative text should be fairly short, usually a sentence or less and rarely more than two sentences
- If more description is required (e.g., for a chart or graph), provide a short description in the alternative text (e.g., a summary of the trend) and more detail in the long description, see below
- Test by having others review the document with the images replaced by the alternative text
Tips for writing longer descriptions
- Long descriptions should be used when text alternatives (see above) are insufficient to answer the question “what information is the image conveying?”
- In some situations, the information being conveyed will be how an image looks (e.g., an artwork, architectural detail, etc.). In these cases, try to describe the image without making too many of your own assumptions.
- One approach is to imagine you are describing the image to a person over the phone
- Ensure that you still provide concise alternative text to help readers decide if they are interested in the longer description
Alternatively, you can include the same information conveyed by the image within the body of the document, providing the images as an alternate to the text. In that case, you do not have to provide alternate text within the image.
To add alternative text to images
- Right-click on object
- Select Description… option
- Enter alternative text in the Title box

To add long descriptions to images
- Right-click on object
- Select Description… option
- Enter description in Description box

Technique 7. Use Built-In Structuring Features
7.1 Tables
When using tables, it is important to ensure that they are clear and appropriately structured. This helps all users to better understand the information in the table and allows assistive technologies (e.g., screen readers) to provide context so that the information within the table can be conveyed in a meaningful way.
Tips for tables
- Only use tables for tabular information, not for formatting.
- Use “real tables” rather than text formatted to look like tables using the TAB key or space bar. These will not be recognized by assistive technology.
- Keep tables simple by avoiding merged cells and dividing complex data sets into separate smaller tables, where possible.
- If tables split across pages, set the header to show at the top of each page. Also set the table to break between rows instead of in the middle of rows.
- Create a text summary of the essential table contents. Any abbreviations used should be explained in the summary.
- Table captions or descriptions should answer the question “what is the table’s purpose and how is it organized?” (e.g., “A sample order form with separate columns for the item name, price and quantity”).
- Table cells should be marked as table headers when they serve as labels to help interpret the other cells in the table.
- Table header cells labels should be concise and clear.
- Ensure the table is not “floating” on the page (see Technique 4).
To add a table with headings
- Go to menu item: Insert > Table…
- Specify the number of columns and rows in the new table
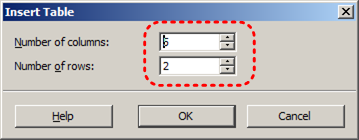
- Double-click anywhere within the table to open the Table menu
- Select the Table Design icon to open the Table Design menu in the Tasks window pane on the right
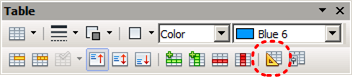
- Select the Header row check box
7.2 Lists
When you create lists, it is important to format them as “real lists”. Otherwise, assistive technologies will interpret your list as a series of short separate paragraphs instead of a coherent list of related items.
To create an ordered or unordered list
- Go to menu item: Format > Bullets and Numbering
- For unordered lists, select an option from the Bullets tab
- For ordered lists, select an option from the Numbering Type tab
To modify list styles
- Go to menu item: Format > Bullets and Numbering
- In the Bullets and Numbering dialog, select the Customize tab
- Modify the list style by making selections from the available formatting options
- Select OK
Note: This only modifies that instance of the list style.
7.3 Columns
Use Columns feature for placing text in columns.
Note: Because columns can be a challenge for users of some assistive technologies, consider whether a column layout is really necessary.
7.4 Document Title
In case the document is ever converted into HTML, it should be given a descriptive and meaningful title.
To change the title of the current document
-
- Go to menu item: File > Properties
- Select the Description tab
- Type the new title in the Title box and click OK
Note: The Title defined in the properties is different than the file name. It is also unrelated to the template name, discussed above.
Technique 8. Create Accessible Charts
Charts can be used to make data more understandable for some audiences. However, it is important to ensure that your chart is as accessible as possible to all members of your audience. All basic accessibility considerations that are applied to the rest of your document must also be applied to your charts and the elements within your charts. For example, use shape and color, rather than color alone, to convey information. As well, some further steps should be taken to ensure that the contents are your chart are appropriate labeled to give users reference points that will help them to correctly interpret the information.
To create a chart
- Select a slide layout with a placeholder for data charts (see Technique 3.1)
- Double-click* the center of the placeholder to insert the data chart
- Right-click* the chart and select Chart Data Table…
- Update the data table with the data you would like to display
- Close the data table
To add titles and labels
- Double-click* the chart to access the chart menus
- Go to menu item: Insert > Titles
- Update the relevant fields and select OK
- Go to menu item: Insert > Data Labels
- Configure your data label selections and select OK
To change to a different predefined Chart Type
- Double-click* the chart to access the chart menus
- Go to menu item: Format > Chart Type
- In the Chart Type dialog, select a predefined chart type and style
- Select OK
Other Chart Considerations
- When creating line charts, use the formatting options to create different types of dotted lines to facilitate legibility for users who are color blind
- When creating bar charts, it is helpful to apply textures instead of color to differentiate the bars
- Change the default colors to a color safe or gray-scale palette
- Use the formatting options to change predefined colors, ensuring that they align with sufficient contrast requirements (see Technique 9.2)
Technique 9. Make Content Easier to See
9.1 Format of Text
When formatting text, especially when the text is likely to be printed, try to:
- Use font sizes between 12 and 18 points for body text.
- Use fonts of normal weight, rather than bold or light weight fonts. If you do choose to use bold fonts for emphasis, use them sparingly.
- Use standard fonts with clear spacing and easily recognized upper and lower case characters. Sans serif fonts (e.g., Arial, Verdana) may sometimes be easier to read than serif fonts (e.g., Times New Roman, Garamond).
- Avoid large amounts of text set all in caps, italic or underlined.
- Use normal or expanded character spacing, rather than condensed spacing.
- Avoid animated or scrolling text.
But can’t users just zoom in? Office applications do typically include accessibility features such as the ability to magnify documents and support for high contrast modes. However, because printing is an important aspect of many workflows and changing font sizes directly will change documents details such the pagination, the layout of tables, etc., it is best practice to always format text for a reasonable degree of accessibility.
9.2 Use Sufficient Contrast
The visual presentation of text and images of text should have a contrast ration of at least 4.5:1. To help you determine the contrast, here are some examples on a white background:
- Very good contrast (Foreground=black, Background=white, Ratio=21:1)
- Acceptable contrast (Foreground=#767676, Background=white, Ratio=4.54:1)
- Unacceptable contrast (Foreground=#AAAAAA, Background=white, Ratio=2.32:1)
Also, always use a single solid color for a text background rather than a pattern.
In order to determine whether the colors in your document have sufficient contrast, you can consult an online contrast checker, such as:
9.3 Avoid Using Color Alone
Color should not be used as the only visual means of conveying information, indicating an action, prompting a response, or distinguishing a visual element. In order to spot where color might be the only visual means of conveying information, you can create a screenshot of the document and then view it with online gray-scale converting tools, such as:
9.4 Avoid Relying on Sensory Characteristics
The instructions provided for understanding and operating content should not rely solely on sensory characteristics such as the color or shape of content elements. Here are two examples:
- Do not track changes by simply changing the color of text you have edited and noting the color. Instead use PowerPoint’s “Track Changes” feature to track changes.
- Do not distinguish between images by referring to their appearance (e.g. “the bigger one”). Instead, label each image with a figure number and use that for references.
9.5 Avoid Using Images of Text
Before you use an image to control the presentation of text (e.g., to ensure a certain font or color combination), consider whether you can achieve the same result by styling “real text”. If this is not possible, as with logos containing stylized text, make sure to provide alternative text for the image following the techniques noted, above.
9.6 Avoid Transitions
Transitions between slides and elements in each slide (e.g., bullets in a list flying onto the screen) can be distracting to users with disabilities. It can also cause assistive technologies to read the slide incorrectly. For these reasons, it is best to avoid transitions altogether.
Technique 10. Make Content Easier to Understand
10.1 Write Clearly
By taking the time to design your content in a consistent way, it will be easier to access, navigate and interpret for all users:
- Whenever possible, write clearly with short sentences.
- Introduce acronyms and spell out abbreviations.
- Avoid making the document too “busy” by using lots of whitespace and by avoiding too many different colors, fonts and images.
- If content is repeated on multiple pages within a document or within a set of documents (e.g., headings, footings, etc.), it should occur consistently each time it is repeated.
10.2 Provide Context for Hyperlinks
Hyperlink text in your document should be meaningful when read out of context. To be an effective navigation aid, the link text should describe the destination of the link.
Consider the experience of screen reader users: Generally, screen readers generate a list of links, and screen reader users navigate this list alphabetically. Hyperlink text such as “click here” or “more” is meaningless in this context.
In order to be useful to someone using a screen reader, ensure that hyperlink text is self-describing and meaningful on its own. To make the address of hyperlink clear when printing, you may wish to include the address in brackets following the descriptive text of the hyperlink.
To change link text
- Type the link address and Enter
- Highlight the link
- Go to menu item: Edit > Hyperlink…
- In the Hyperlink dialog, type meaningful descriptive text of the hyperlink in the field labeled Text
- Select Apply
- Select Close
10.3 Accessible Presentations
It is important to consider accessibility before, during, and after presentations. Below is a helpful link with guidance on how to make presentations accessible to all:
Technique 11. Check Accessibility
At this time (December 2019), OpenOffice Impress does not offer a mechanism to identify potential accessibility errors in your document prior to publishing.
In order to get some indication of the accessibility of your document or template (see Technique 1), then you may consider saving the file into HTML or PDF in order to perform an accessibility check in one of those formats, as described below.
To evaluate HTML accessibility
If you wish to check the accessibility of your document or template (see Technique 1), one option is to save it into HTML format and use one of the web accessibility checkers available online. Such as:
To evaluate PDF accessibility
If you saved your document in tagged PDF format, you can use the following tools and steps to evaluate the accessibility of the PDF document:
To evaluate PDF accessibility in Adobe Acrobat Professional
- Go to menu item: Advanced > Accessibility > Full Check…
- In the Full Check dialog, select all the checking option
- Select the Start Checking button
Editor’s note: For detailed instructions, see our section on how to check accessibility using Adobe Acrobat Professional.
Technique 12. Use Accessibility Features when Saving/Exporting to Other Formats
In some cases, additional steps must be taken in order to ensure accessibility information is preserved when saving/exporting to formats other than the default.
PDF
PDF documents are not always accessible. Accessible PDF documents are often called “Tagged PDF” because they include “tags” that encode structural information required for accessibility. To evaluate the accessibility of your PDF document, see Technique 11.
-
- Go to menu item: File > Export as PDF
- Check box labeled Tagged PDF
- Click Export
- Enter name and save location
- Select Save
Note: You must ensure this option is selected in the PDF Options window dialog box before using PDF icon on menu bar.
HTML
- Open the presentation that you want to save in HTML format.
- Go to menu item: File > Export
- Set the File type to HTML Document (OpenOffice.org Impress) (.html;.htm).
- Enter a File name
- Click Export
- Follow the instructions in the HTML Export Wizard
- Check the HTML file for accessibility (see Technique 11 )
To clean up your HTML file
- Remove unnecessary styles, line breaks, etc.
- Remove unnecessary id, class, and attributes
- Remove font tags
- Remove styles in the <head> tag
- Ensure the <th> tags have a scope attribute
- Remove <p> tags nested inside <th> and <td> tags
- Check for accessibility (see Technique 11 )
Note: you may wish to use HTML editors or utilities to help with this process.
Technique 13. Consider Using Accessibility Support Applications/Plugins
Disclaimer: This list is provided for information purposes only. It is not exhaustive and inclusion of an application or plug-in on the list does not constitute a recommendation or guarantee of results.
The following accessibility related plug-ins and support are available for OpenOffice Impress:
- PowerTalk – an accessibility tool that provides a good approximation of how presentations will sound with a screen reader.
- OOo2GD – an extension that allows you to export, update and import documents, spreadsheets and presentations between OpenOffice.org applications and Google docs.
Accessibility Help
If you are interested in what features are provided to make using OpenOffice Impress more accessible to users, documentation is provided in the Help system:
- Go to menu item: Help > OpenOffice.org Help (F1)
- Enter “accessibility” as the Search Term
References and Resources
- OpenOffice Impress Help
- WebAim: OpenOffice.org and Accessibility
- GAWDS Writing Better Alt Text
- OpenOffice.org 3 Impress Guide (PDF)
Acknowledgments
This document was produced as part of the Accessible Digital Office Document (ADOD) Project.
This project has been developed by the Inclusive Design Research Centre, OCAD University as part of an EnAbling Change Partnership project with the Government of Ontario and UNESCO (United Nations Educational, Scientific and Cultural Organization).
Substantial contributions have also been made to the project by AnySurfer, the City of Toronto, and OCAD University.


Source: Authoring Techniques for Accessible Office Documents: OpenOffice Impress by the Inclusive Design Research Centre (IDRC) used under CC-BY-SA 3.0.
PDF Production Applications
V
Adobe InDesign CS6 and CC
23
Usage Notes
At the time of testing, Adobe InDesign CS6 (April 2013) and Adobe InDesign Creative Cloud 2019 (December 2019) provide a set of accessibility features that are sufficient to enable the production of accessible digital documents.
What is “InDesign”?
You should use the technique below when you are using InDesign to create documents that are:
- Intended to be used by people (i.e., not computer code),
- Text and Image based (intended for design)
- Fully printable and can be digitized
- Creative design (layout, e.g., books, packages, poster, interactive web)
Note: InDesign is best for print design, but there are also options of doing web and digital publishing. If you are creating forms, web pages, applications, or other dynamic and/or interactive content, the techniques below will be useful, but consult the W3C-WAI Web Content Accessibility Guidelines (WCAG 2.0) because these are specifically designed to provide guidance for highly dynamic and/or interactive content.
File Formats
The default file format for InDesign is (.indd).
In addition, InDesign offers many other web format saving options. Most of these have not been checked for accessibility.
- ePub
- PDF (print and interactive)
- Flash Player SWF (for interactive)
- HTML, XHTML
- XML
Document Conventions
We have tried to formulate these techniques so that they are useful to all authors, regardless if they use a mouse. However, there are several instances where mouse-only language is used for clarity purposes . Below are the mouse-only terms and their keyboard alternatives:
- *Right-click: To right-click with the keyboard, select the object using the Shift+Arrow keys and then press either (1) the “Right-Click” key (some keyboard have this to the right of the spacebar) or Shift+F10.
Disclaimer and Testing Details:
Following these techniques will increase the accessibility of your documents, but it does not guarantee accessibility to any specific disability groups. In cases where more certainty is required, it is recommended that you test the documents with end users with disabilities, including screen reader users.
Technique 1. Use Accessible Templates
InDesign starts with a simple blank page that can be adjusted to any size. There are no build-in templates for InDesign. However, you can create your own templates from scratch or download already made templates from Adobe.
Templates provide the starting point for documents, so accessibility is critical. If you are unsure whether a template is accessible, check the document using Acrobat Pro. Export the file and use the Accessibility Checker in Acrobat Pro.
To create an accessible template
- Select File > New > New Document
Keyboard shortcut: Ctrl + N (on Windows) and Cmd + N (on Mac)
- Select print, web, or mobile and Page Size
- Uncheck the Facing Pages box if your document is NOT intended to be in book format
- Select OK
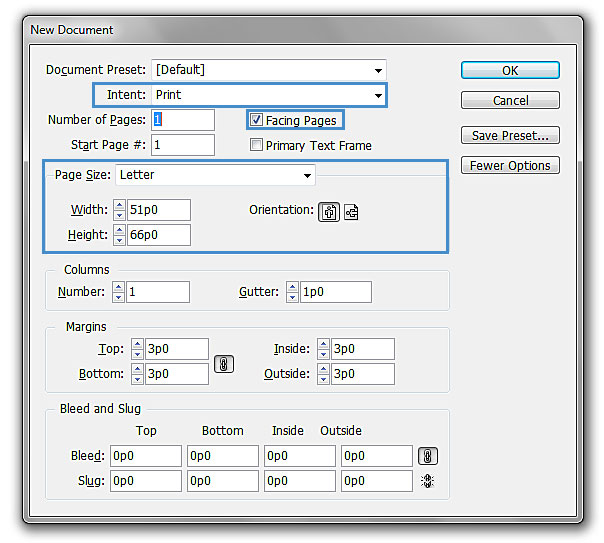
Editor’s note: Adobe InDesign CC users will see a different version of the dialog box with the same menu items.
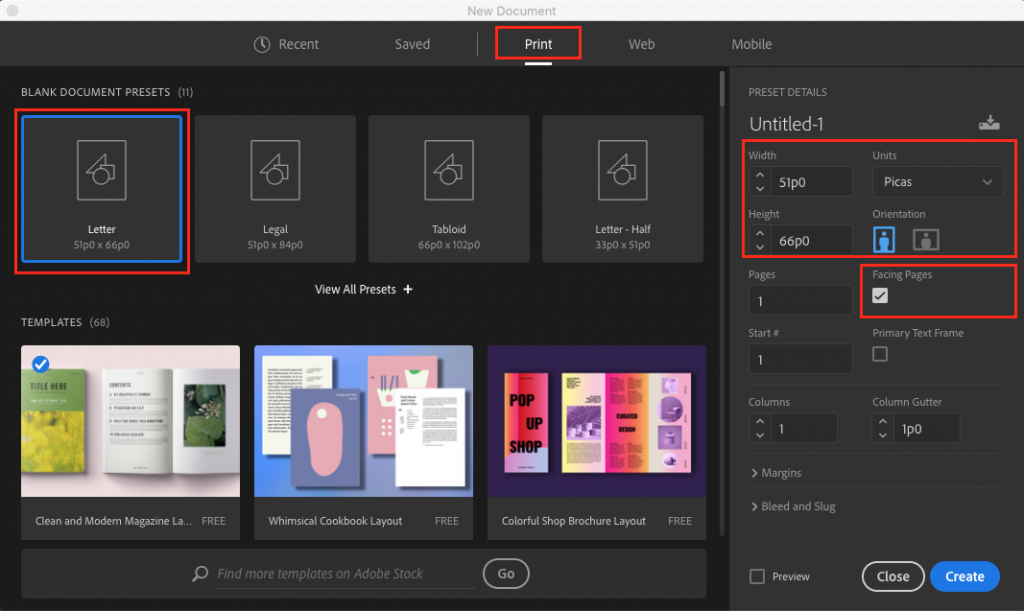
To Saving File as a Template
Keyboard shortcut: Ctrl + S (on Windows) and Cmd + S (on Mac)
- Insert file name and under Save as type select CS6 InDesign template
- Select Save
Editor’s note: InDesign CC, users will see the following dialog box.
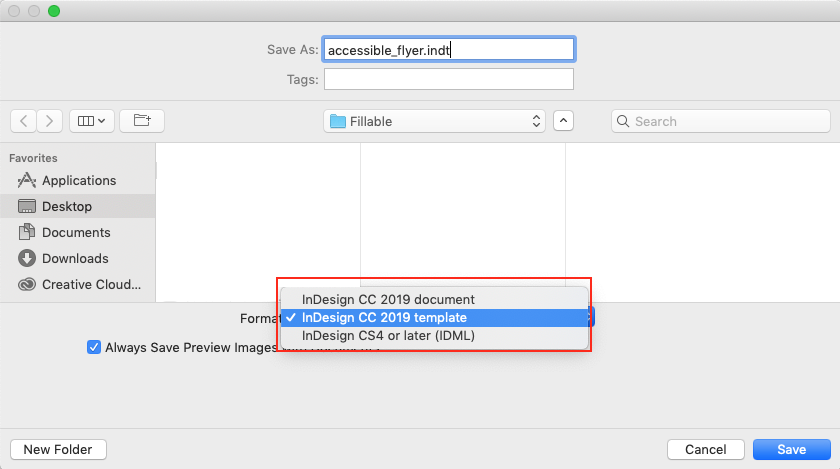
Technique 2. Specify Document Language
The language setting in InDesign will set language within the program only. This language setting in InDesign will not carry over to the exported PDF. Be sure to set the document language in Adobe Acrobat after exporting to PDF.
To specify the document language for an exported PDF
- Choose File > Export.
- Specify a name and location for the file. For Compatibility, choose the lowest PDF version necessary to open the files you create.
- For Save As Type (Windows) or Format (Mac OS), choose Adobe PDF (Print), and then click Save.
- Find the Advanced tab, and go to Accessibility Options.
- Under Language, choose the document language for the PDF. This determines the default language for the exported PDF.
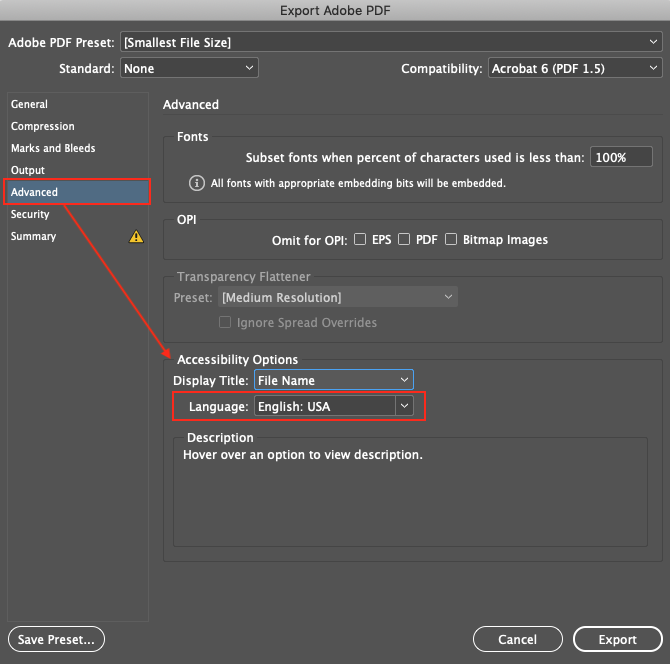
Technique 3. Creating Artifacts for Objects
The artifact tag allows users to hide items on the page, such as page numbers or unimportant objects, when viewing the exported PDF file in Reflow view, which displays only tagged items. This is also useful when viewing PDF files on a mobile device or in other PDF readers.
There are two options to creating artifacts:
- Option 1 uses Object Export Options Dialog box where the user select the images in the document individually and add artifact.
- Option 2 uses Tag pane where the users individually select the object and add the required tagging.
Artifact Option 1
- Select the image or object
- Select Object > Object Export Options
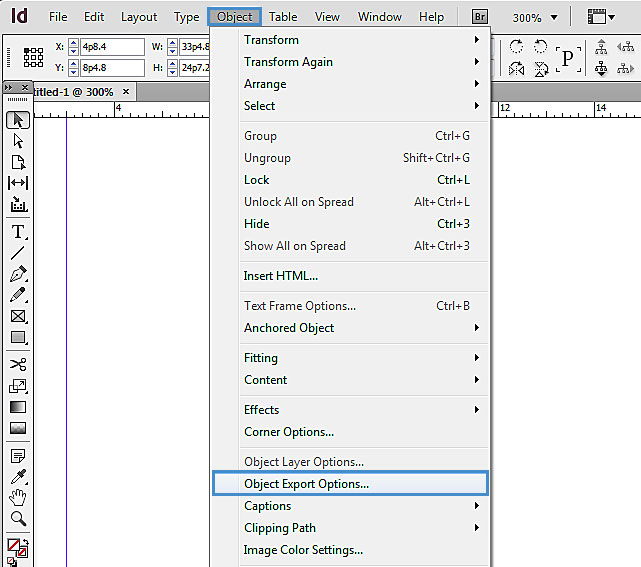
- Select Tagged PDF > Apply Tag
- Choose either Artifact or Based on Object
- Select Done
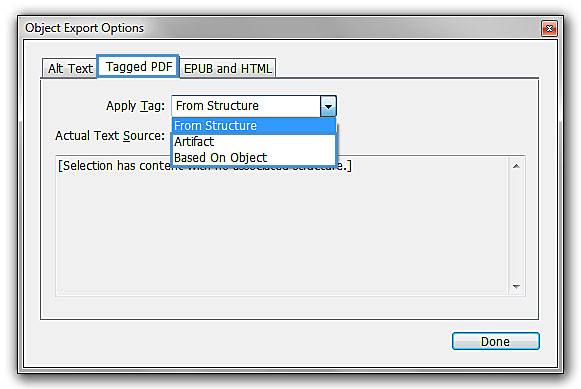
Artifact Option 2
-
- Select the object or artifact
- In Tag pane select Artifact
Note: to view Tags Panel: (Window > Utilities > Tags)
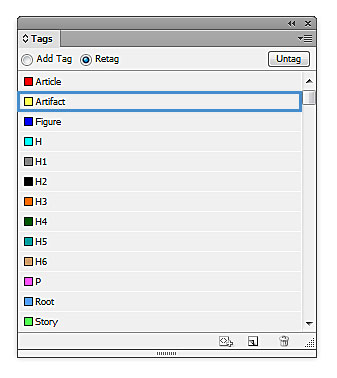
Note: for more detail information on tagging and structure pane see Technique 7.
Technique 4. Alternative Text for Images and Graphical Objects
When using images or other graphical objects, such as graphs, shapes, and background, it is important to ensure that the information you intend to convey using the image is also conveyed to people who cannot see the image. This can be accomplished by adding concise alternative text to each image.
Tips for Writing Alternative Text
- Try to answer the question “what information is the image conveying?”
- If the image does not convey any useful information, leave the alternative text blank and create an artifact (e.g., background images should generally have no alt text, other decorative images should only have alt text if they form a crucial part of the content, message, and purpose of the document).
- If the image contains meaningful text, ensure all of the text is replicated.
- For logos, the alternative text should be the organization’s name.
- For groups of logos, one logo can be chosen to represent the group.
- Sometimes text is included as part of a logo or footer image (e.g. the image might contain a phone number), this text should be set as the alternative text of the image.
- Alternative text should be fairly short, usually a sentence or less and rarely more than two sentences.
- Test by having others review the document with the images replaced by the alternative text.
Tips for writing longer descriptions
- Long descriptions should be used when text alternatives (see above) are insufficient to answer the question “what information is the image conveying?”
- In some situations, the information being conveyed will be how an image looks (e.g., an artwork, architectural detail, etc.). In these cases, try to describe the image without making too many of your own assumptions.
- One approach is to imagine you are describing the image to a person over the phone
- Ensure that you still provide concise alternative text to help readers decide if they are interested in the longer description.
There are two options to add Alternative Text to images Option one uses the Object Export Options dialog box where the user select the images in the document individually and add the alternative text. Option two uses Structure panel that create attribute to individual images.
When you export the document, the alt text you’ve assigned will travel with the image.
- Select the image or object
- Select Object > Object Export Options
To add alternative text to images (Option 1)
-
- Select Alt Text > Alt Text Source drop down menu
- Choose Custom
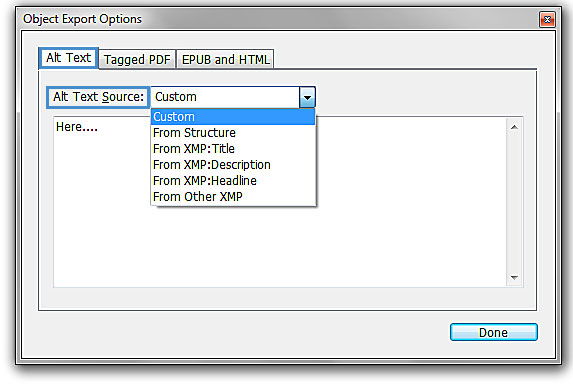
- Type the description in the box below
- Select Done
To add alternative text to images (Option 2 – Using Structure Panel)
-
- Structure Panel (View > Structure > Show Structure)
- Select the Figure in the panel.
- Select
 or
or 
- Select New Attribute
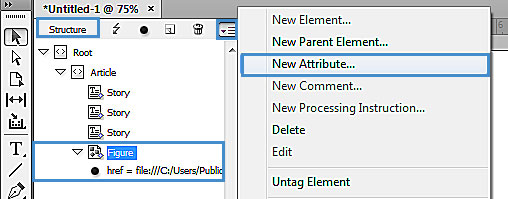
- Insert Alt (case sensitive) under Name (Note: You must use a capital “A” and lowercase “lt” to be valid)
- Place the descriptions under Value
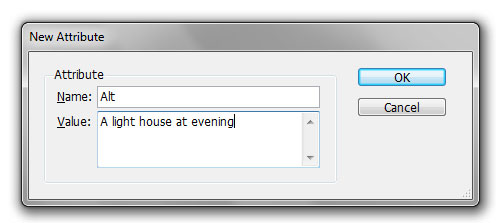
Technique 5. Creating Paragraph Styles
Any document that is longer than a few paragraphs require structure to make them more straightforward for readers to understand. Creating Paragraph styles will set the headings and style for the document. It will also help in creating a Table of Contents. The structural elements that indicate order and level provide a meaningful sequence to users of assistive technologies.
- Select Paragraph Styles (in typography workspace)
Keyboard shortcut: F11 (on Windows) Cmd + F11 (on Mac)
-
- Select or in the top right corner for more options.
- Select New Paragraph Style…
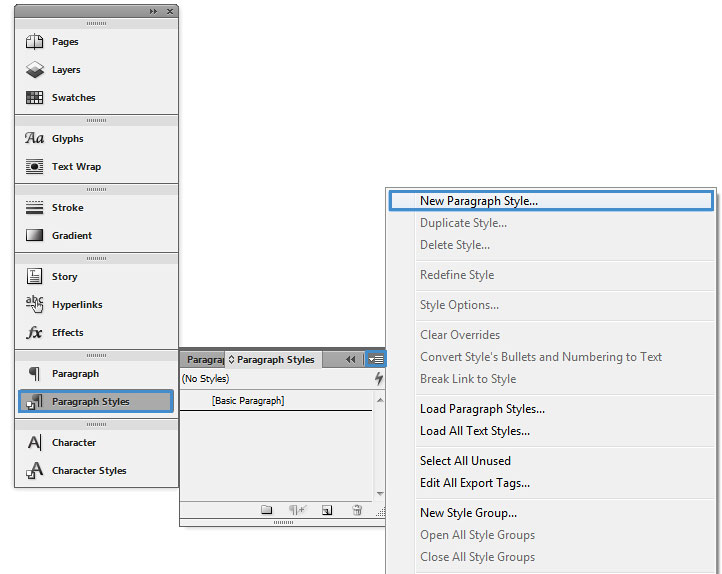
- Select General > Style Name and insert a title for the style (e.g., header, body text, caption .etc)
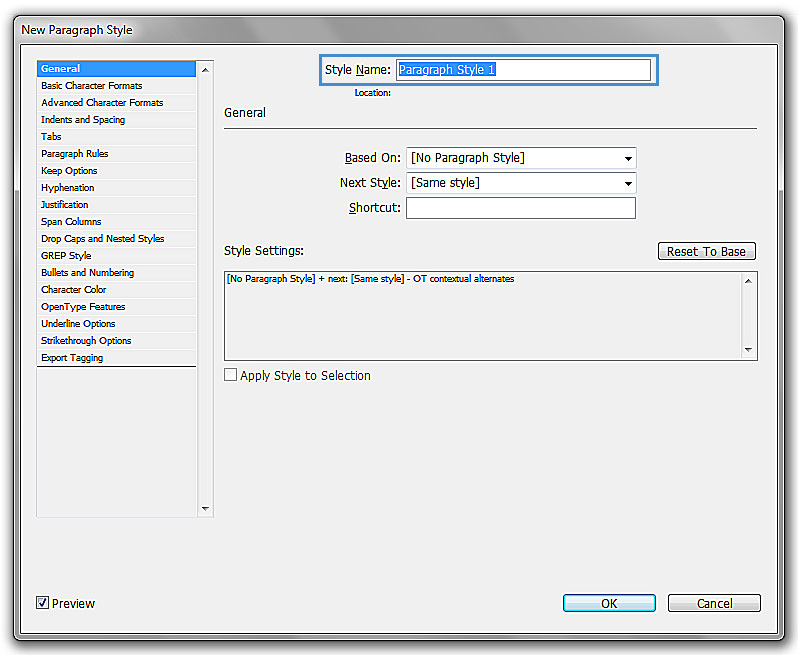
- Select Basic Character Formats located in the left side pane
- Choose the font, font style and the size
Technique 6. Creating Accessible Tables
When using tables, it is important to ensure that they are clear and appropriately structured. This helps all users to better understand the information in the table and allows assistive technologies (e.g., screen readers) to provide context so that the information within the table can be conveyed in a meaningful way.
When creating accessible tables in InDesign, there are some things to keep in mind:
- Be sure to add alternative text to facilitate understanding of the table (see Technique 3).
- After converting your InDesign document to PDF, be sure to review the document in Adobe Acrobat and ensure that the table is properly tagged.
Tips for tables
- Only use tables for tabular information, not for formatting, such as to position columns.
- Use “real tables” rather than text formatted to look like tables using the TAB key or space bar. These will not be recognized by assistive technology.
- Keep tables simple by avoiding merged cells and dividing complex data sets into separate smaller tables, where possible.
- If tables split across pages, set the header to show at the top of each page. Also set the table to break between rows instead of in the middle of rows.
- Create a text summary of the essential table contents. Any abbreviations used should be explained in the summary.
- Table captions or descriptions should answer the question “what is the table’s purpose and how is it organized?” (e.g., “A sample order form with separate columns for the item name, price and quantity”).
- Table header cell labels should be concise and clear.
To create tables
Keyboard short cut: Ctrl + Alt + Shift + T (on Windows), Cmd + Shift + Option + T (on Mac)
- Create a table, go to Table > Create Table
- Insert Body Rows and Columns

- Select OK
To convert Text (with tabs) to a Table
If you have created text with tabs. To convert the text to a table:
- Select all the text
- Table > Convert To Table
- Column Separator > Tab
- Select OK
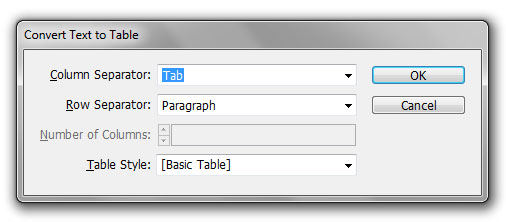
Removing Table Lines
- Place the Type cursor on top of the table until the cursor changes to an upside down black arrow.
- Click and drag the cursor to select all of the chart (or part of the chart)
- In the top navigation. It’ll show a line box where you can choose which side you would like to remove the line from.
- Once selected. Click on the “None” outline button
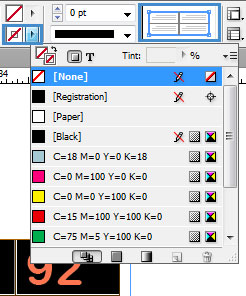
Repeat table header
If you have a table that spans more than one page or spread, it’s important to ensure that table headers are repeated to facilitate understanding of the content.
- Go to Table > Table Options > Table Setup…
- The Table Options dialog box appears.
- Under the Table Setup tab, indicate the number of Header Rows, under Table Dimensions.
- Next, go to the Headers and Footers tab. Here you can indicate if you would like your table header repeated on every page, column, or frame.

Technique 7. Tagging Items
Tagging items will help assistive technologies (e.g., screen readers) to locate the logical order of the assigned headings. Also, when exporting the document to a PDF, the tagging will automatically be embedded, therefore, the user does not need to apply tagging in Acrobat.
To quickly tag the items in the file
Note: This does not tag all content correctly. To correctly tag all content, you would have to assign the tags manually (see To Assign Tags Manually).
- Structure Panel (View > Structure > Show Structure)
keyboard shortcut Alt + Ctrl + 1 (on Window), Cmd + Option + 1 (on Mac)
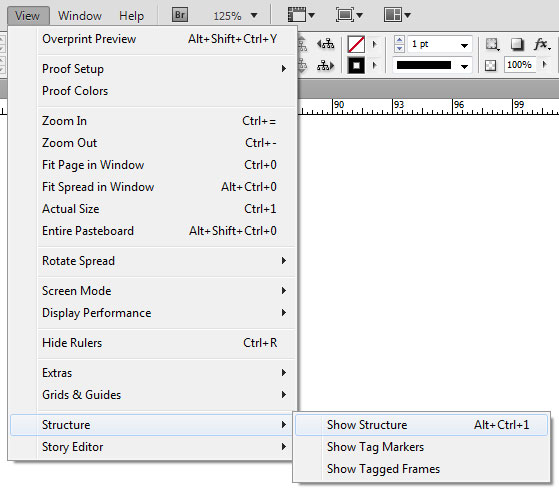
- In the structure pane click the three line button and choose Add Untagged Items
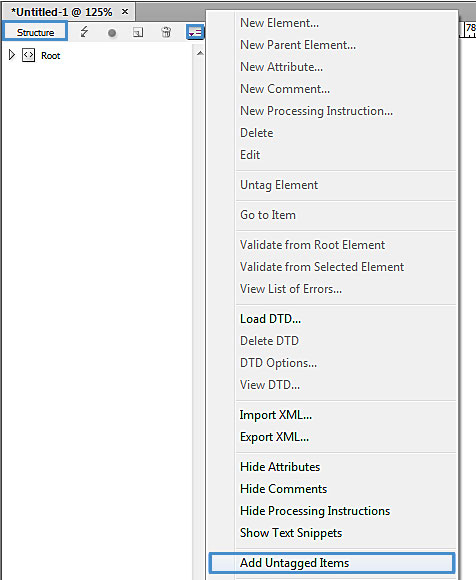
To view which items have been tagged
- View > Structure > Show Tagged Frames
- The boxes will be coloured according to the tagging in the Tags Panel. (Window > Utilities > Tags)
Note: You must be in preview mode (keyboard shortcut W) to view the tagged items.
To Assign Tags Manually (and correctly)
-
- Tag pane (Window > Utilities > Tags)
- Click > Map Style to Tags…
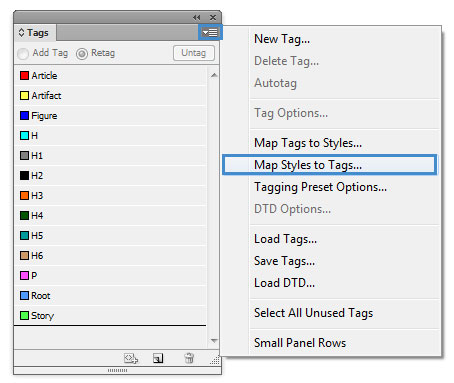
- Select the style and change [Not Mapped] to a heading title (e.g. H, H1, H2 etc.).
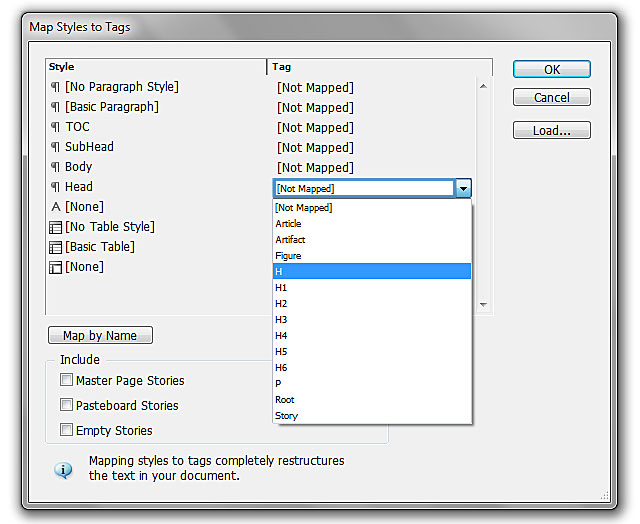
Option 2: Export Tagging (manually assign tagging)
- Double click on the paragraph style (e.g., “heading”).
- In the dialog box Paragraph Style Options choose Export tagging.
- Under PDF > Tag: select the appropriate heading title (e.g. style name: heading & Tag: H).
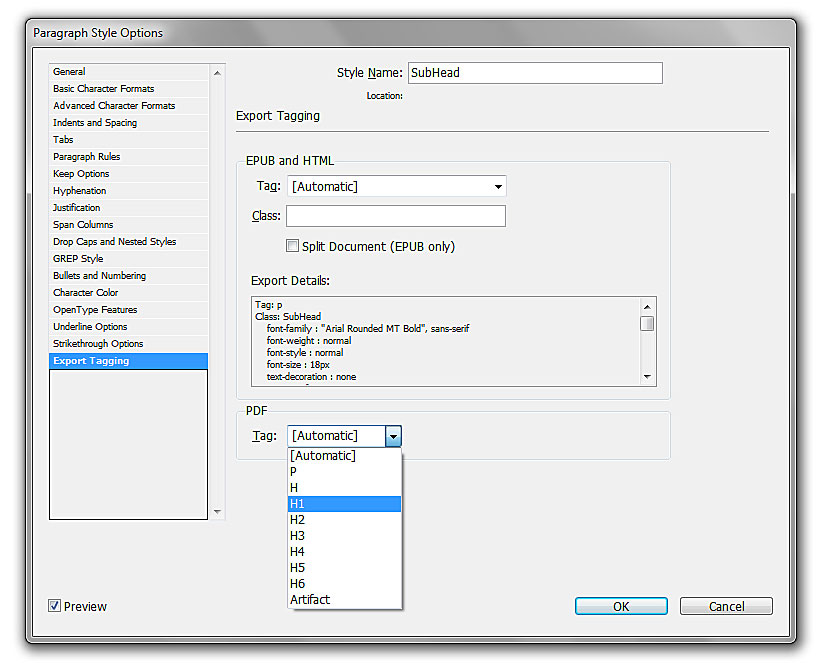
Note: To make the reading order and tags easier to manage make thread text boxes. If possible make one text box per page.
Technique 8. Creating Table of Contents
- Create a paragraph style (see Technique 5)
- For all the contents in the table of contents assign the title to the style “TOC”
Optional: creating another style for the body of the table of content once all the contents are in the style of “TOC”
-
- Select Layout > Table of Contents…
- Under Other Styles select the style
- Select the << Add button to transfer the style to Include Paragraph Styles:
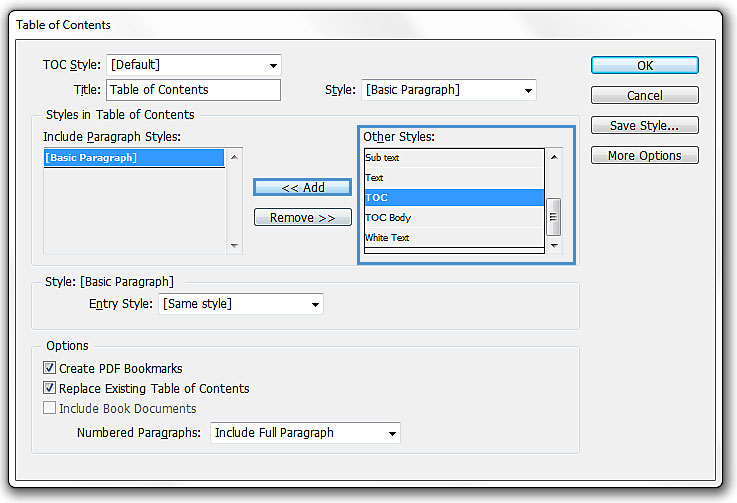
Optional: to change the body of the table of contents to a different style than the header of the table of contents. Select entry style and change same style to another style.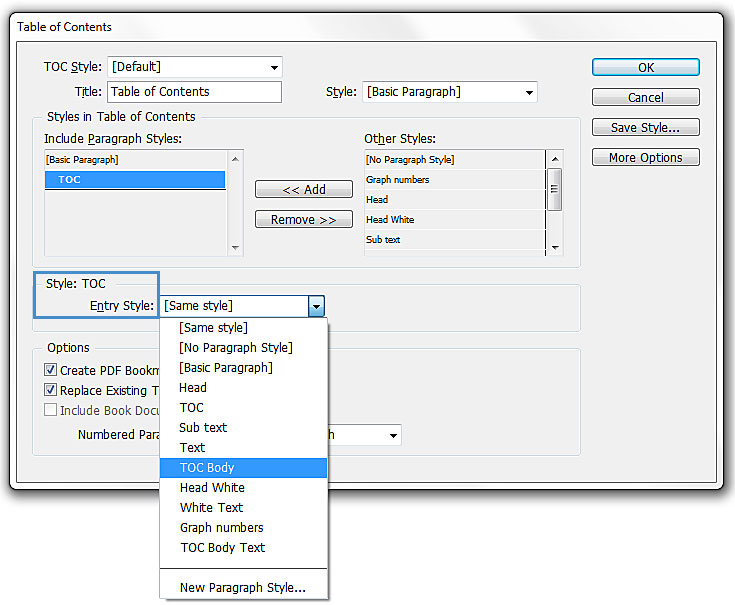
- Drag the cursor to create a large box for the table of content.
Note: The table of contents will automatically create the title, contents and page numbers.
8.1 Columns
Use Columns feature for placing text in columns instead of creating multiple text boxes.
8.2 Use Page Numbering
Numbering the pages of your document helps those reading and editing your document effectively navigate and reference its content. For users of assistive technologies, it provides a valuable point of reference within the document.
8.3 Naming PDF before exporting
- File > File Info
keyboard shortcut: Ctrl + Alt + Shift + I (on Window), Cmd + Shift + Option + I (on Mac)
- Descriptions > Document title: Insert the file title
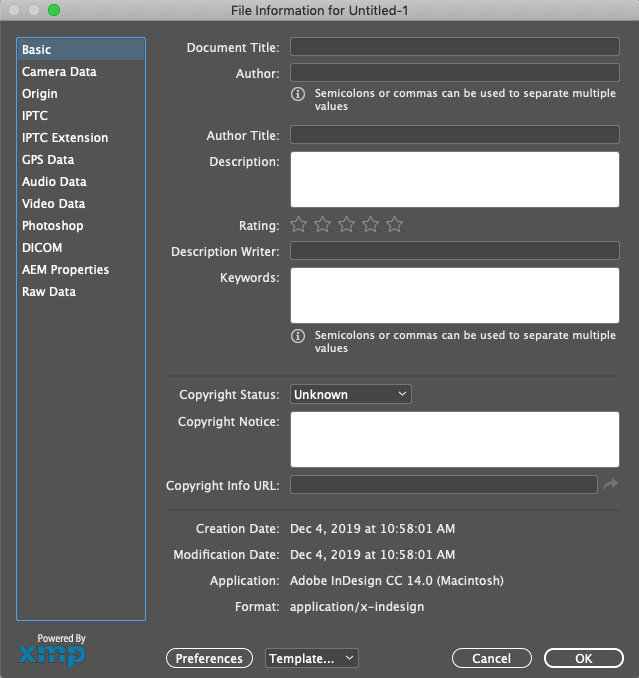
Note: You can also fill in the author’s name and description.
Technique 9. Make Content Easier to See
Here are some other things to keep in mind:
9.1 Format of Text
When formatting text, especially when the text is likely to printed, try to:
- Use font sizes between 12 and 15 points for body text.
- Use fonts of normal weight, rather than bold or light weight fonts. If you do choose to use bold fonts for emphasis, use them sparingly.
- Use standard fonts with clear spacing and easily recognized upper and lower case characters. Sans serif fonts (e.g., Arial, Verdana) may sometimes be easier to read than serif fonts (e.g., Times New Roman, Garamond).
- Avoid large amounts of text set all in caps, italic or underlined.
- Use normal or expanded character spacing, rather than condensed spacing.
- Avoid animated or scrolling text.
But can’t users just zoom in? Because printing is an important aspect of many workflows and changing font sizes directly will change documents details such the pagination, the layout of tables, etc., it is best practice to always format text for a reasonable degree of accessibility.
9.2 Use Sufficient Contrast
The visual presentation of text and images of text should have a contrast ration of at least 4.5:1. To help you determine the contrast, here are some examples on a white background:
- Very good contrast (Foreground=black, Background=white, Ratio=21:1)
- Acceptable contrast (Foreground=#767676, Background=white, Ratio=4.54:1)
- Unacceptable contrast (Foreground=#AAAAAA, Background=white, Ratio=2.32:1)
Also, always use a single solid color for a text background rather than a pattern.
In order to determine whether the colors in your document have sufficient contrast, you can consult an online contrast checker, such as:
9.3 Avoid Using Color Alone
Color should not be used as the only visual means of conveying information, indicating an action, prompting a response, or distinguishing a visual element. In order to spot where color might be the only visual means of conveying information, you can create a screenshot of the document and then view it with online gray-scale converting tools, such as:
- GrayBit v2.0: Grayscale Conversion Contrast Accessibility Tool
Editor’s note: GrayBit v2.0 is no longer available. However, multiple tools can be found online: Google Search: gray-scale conversion tool.
9.4 Avoid Relying on Sensory Characteristics
The instructions provided for understanding and operating content should not rely solely on sensory characteristics such as the color or shape of content elements. Here are two examples:
- Do not track changes by simply changing the color of text you have edited and noting the color. Instead use InDesign’s “Track Changes” feature to track changes.
- Do not distinguish between images by referring to their appearance (e.g., “the bigger one”). Instead, label each image with a figure number and use that for references.
9.5 Avoid Using Images of Text
Before you use an image to control the presentation of text (e.g., to ensure a certain font or color combination), consider whether you can achieve the same result by styling “real text”. If this is not possible, as with logos containing stylized text, make sure to provide alternative text for the image following the techniques noted above.
Technique 10. Make Content Easier to Understand
Write Clearly
By taking the time to design your content in a consistent way, it will be easier to access, navigate and interpret for all users:
- Whenever possible, write clearly with short sentences.
- Introduce acronyms and spell out abbreviations.
- Avoid making the document too “busy” by using lots of whitespace and by avoiding too many different colors, fonts and images.
- If content is repeated on multiple pages within a document or within a set of documents (e.g., headings, footings, etc.), it should occur consistently each time it is repeated.
Accessibility Checker
To check for accessibility, first, the InDesign file must be exported to a PDF and viewed in Acrobat Pro.
- File > Export (keyboard shortcut: Windows: Ctrl + E; Mac: Cmd + E)
- Save as: PDF (Interactive or Print)
- Select Save
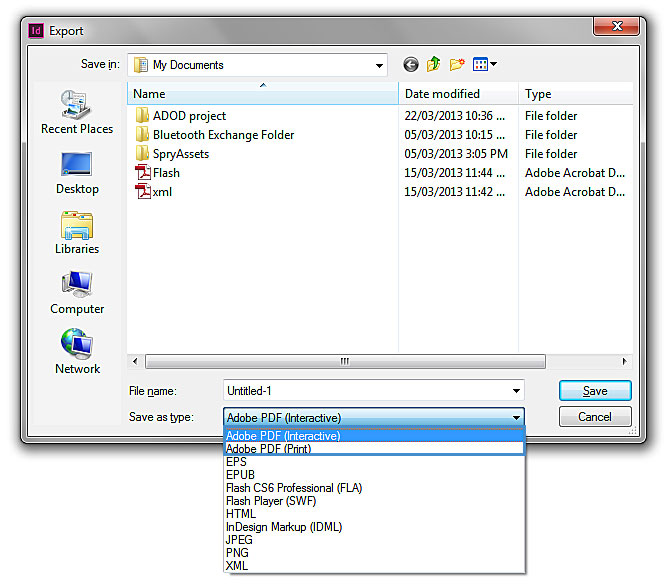
To evaluate PDF accessibility in Adobe Acrobat Professional
- Go to menu item: Advanced > Accessibility > Full Check…
- In the Full Check dialog, select all the checking option
- Select the Start Checking button
Editor’s note: For detailed instructions, see our section on how to check accessibility using Adobe Acrobat Professional.
Using the Acrobat 10 Action Wizard
In Acrobat 10 Pro, there is a special accessibility Action Wizard for InDesign CS6 where the user can follow to make the file accessible.
- To Follow the Action Wizard in Acrobat 10: select Tools > Action Wizard> InDesign (CS6) Accessibility Touch up.
Editor’s note: At the time of testing (December 2019), we were not able to download and use the Acrobat 10 Action Wizard. If you do already have the required application, see how to use the Action Wizard for InDesign for more details.
Accessibility Help
If you are interested in what features are provided to make using InDesign more accessible to users, documentation is provided in the Help button or the search bar.
References and Resources
Acknowledgments
Authors: Vellicia Christanto, Jan Richards
This document was produced as part of the Accessible Digital Office Document (ADOD) Project.
This project has been developed by the Inclusive Design Research Centre, OCAD University as part of an EnAbling Change Partnership project with the Government of Ontario and UNESCO (United Nations Educational, Scientific and Cultural Organization).
Source: Authoring Techniques for Accessible Office Documents: Adobe InDesign CS6 by the Inclusive Design Research Centre (IDRC) used under CC-BY-SA 3.0.
Adobe Acrobat 11 Pro and DC
24
Usage Notes
At the time of testing (December 2019), Acrobat 11 Pro and Acrobat Pro DC enables the production of accessible digital documents. Both Acrobat 11 Pro and DC include an accessibility checking feature.
Note: While PDF accessibility has improved over the years, accessibility support for PDF by authoring tools, viewers, and assistive technologies (e.g., screen readers) is not as widespread as for HTML documents.
We recommend considering HTML instead of or in addition to PDF where appropriate.
Should I use ADOD or WCAG 2.0?
These techniques can help you to use Acrobat 11 Pro to create documents that are:
- Intended to be used by people (i.e. not computer code),
- Text-based (i.e. not simply images, although they may contain images),
- Fully printable (i.e. where dynamic features are limited to automatic page numbering, table of contents, etc. and do not include audio, video, or embedded interactivity),
- Self-contained (i.e. without hyperlinks to other documents, unlike web content), and
- Typical of office-style workflows (Reports, letters, memos, budgets, presentations, etc.)
Note: If you are creating forms, web pages, applications, or other dynamic and/or interactive content, these you should also consult the W3C-WAI Web Content Accessibility Guidelines (WCAG 2.0). The WCAG working group has provided PDF Techniques for WCAG 2.0.
File Formats
The default file format for Acrobat 11 Pro and DC is Adobe Portable Document Format (PDF). In addition, Acrobat 11 Pro offers several other word processor and web format saving options. These have not been checked for accessibility.
Document Conventions
We have tried to write these techniques so that they are useful to all authors, regardless of whether they use a mouse. However, for clarity there are several instances where mouse-only language is used. Below are the mouse-only terms and their keyboard alternatives:
- *Right-click: To right-click with the keyboard, select the object using the Shift+Arrow keys and then press either (1) the “Right-Click” key (some keyboard have this to the right of the spacebar) or (2) Shift+F10.
- *Drag: Unfortunately, there is no keyboard alternative for several operations in Acrobat 11 Pro that require dragging.
Disclaimer and Testing Details:
- Following these techniques will increase the accessibility of your documents, but it does not guarantee accessibility to any specific disability groups. In cases where more certainty is required, it is recommended that you test the office documents with end users with disabilities, including screen reader users.
- The application-specific steps and screenshots in this document were created using Adobe Acrobat 11 Pro (ver.11.0, Windows 7, April. 2013) and Adobe Acrobat Pro DC (version 2019.021.20056, macOS Mojave version 10.14.6, December 2019).
- Unfortunately, tasks completed in Technique 3, Technique 4, and Technique 5 cannot be undone. It is recommended that you save your PDF document often under different names, especially before you make significant changes.
- This document is provided for information purposes only and is neither a recommendation nor a guarantee of results
Technique 1. Use Accessible Source Documents
In the Adobe Acrobat 11 Pro workflow, all PDF documents start with a source document created in an office document authoring application, such as Microsoft Word or OpenOffice.org Writer. Because source documents provide the starting-point for the PDF documents, accessibility is very important.
To create an accessible source document
- Create a new document in the authoring application (from the default blank template or from one of the pre-packaged templates).
- Ensure that you follow the ADOD Authoring Techniques provided for the authoring application (an updated version available at Understanding Document Accessibility).
- When you are finished, you should also check the accessibility of the document (see “Accessibility Checking” in the Authoring Techniques for the authoring application).
Once you have completed the above steps, you are ready to convert your document to PDF using Adobe Acrobat 11 or Acrobat DC.
To convert single source documents to PDF
- Go to the menu item: File > Create > PDF From file…
- Locate and select your source document and select the Open button, Acrobat will then proceed to convert the file.
A batch conversion process is also available from the menu item: File > Create PDF > Batch Create Multiple Files.
Scanned Content
If you created a PDF from a scanned document, then it will be inherently inaccessible to screen readers and other assistive technologies. The document will be less useful because graphic representations of text cannot be selected, edited or searched.
In this case, it is necessary that you convert the scanned images of text to searchable content using Acrobat’s optical character recognition (OCR) feature before addressing the accessibility features of the document.
Technique 2. Check Accessibility
“Make Accessible Action Wizard
The “Make Accessible” Action Wizard can help you create accessible PDFs by leading you through the techniques in this guide (e.g., setting alternative text, setting document properties, etc.).
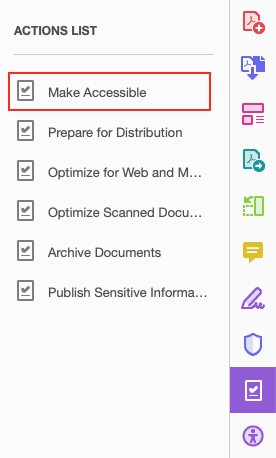
You can complete the wizard in its entirety by pressing Start or you can follow the the instructions below:
- Select Add Document Description
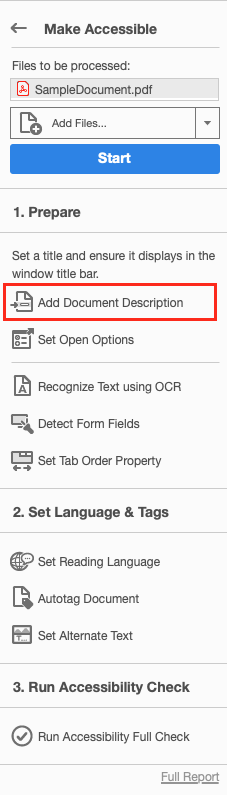
- Fill in the Title (author, subject and keywords can also be filled in). See also Technique 6.
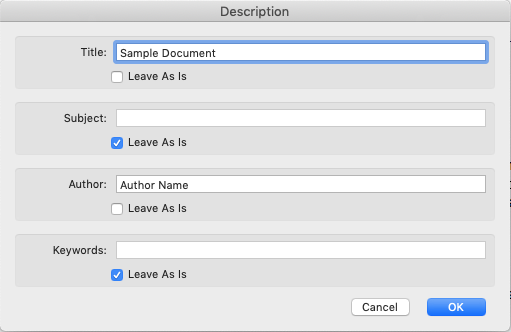
- Select Set Open Options
- Select Set Tabs Order Property
- Select Set Reading Language
- In the drop down menu, select the language for the file). See also Technique 6.
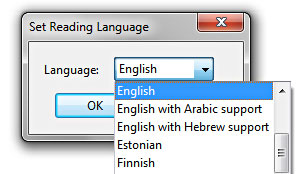
- Select Add Tags to Document
Note: This will automatically add tags to the file. Unfortunately, this process sometimes misinterprets the structure and reading order of complex page elements. Therefore, you should still manually check the tags (see Technique 3).
- Select Set Alternative Text. See also Technique 4.
The wizard automatically searches for” figures” in the file. You must then fill in the alternate text in the pop up box.
Note: The wizard might not tag all the images as figures, so check if tags are correct.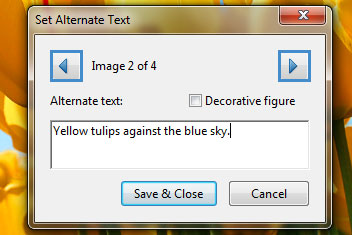
- Select Run Accessibility Full Check. See also Technique 2.
- Recognize Text using OCR.
- Detect Form Fields. This is only required if the file is intended to be a fillable form.
See also Creating Accessible PDF Documents in Adobe Acrobat by the National Center on Disability and Access to Education for a video walkthrough and handout on the “Make Accessible” Wizard.
The most basic requirement for a PDF document to be accessible is for it to be “tagged” with hidden labels (“tags”) that describe the structure of the document (e.g. that text should be interpreted as a header, paragraph, table cell, etc.). Screen readers can use these tags to convey the document’s information effectively to people with visual disabilities.
The other requirements for a PDF document to be accessible (e.g. alternate text, logical reading order, etc.) can only all apply once the document is tagged.
Caution!: The “Quick Check” feature is not recommended because it misses some important accessibility issues. Always perform a “Full Check” instead.
To perform a “Full Check”
Note: If “Accessibility” is not visible under tools, go to menu item: View > Tools > Accessibility
- Select Tools > Accessibility > Full Check Up
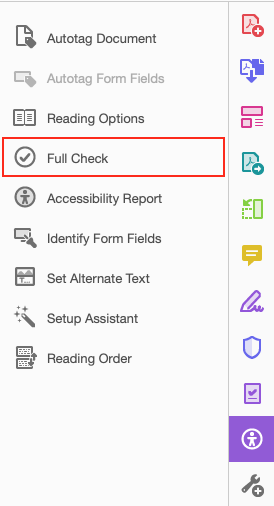
- Once the file is fully run through the checker, a panel will show which parts of the files are correct and which parts need to be fixed.
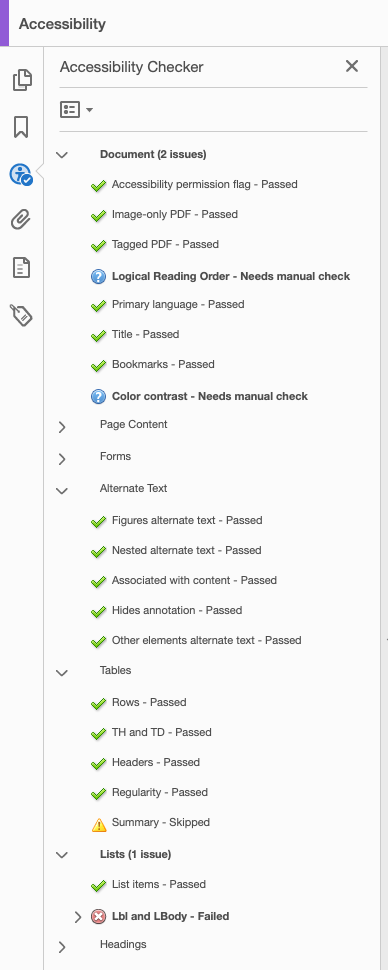
If you have a large document, it may be more efficient to run a full check one page or a page range at a time.
Technique 3. Add and Edit Tags
Caution!: Actions taken using the TouchUp Reading Order tool and Order Panel cannot be undone and in some cases Acrobat may misinterpret your intentions. Remember to save your work frequently! If you frequently create PDF files you might consider using one of these accessible PDF support tools.
If tags are missing, then they must be added. When tags are present, they should still be checked for correctness and edited as needed.
Touch Up Reading Order Tags
The TouchUp Reading Order dialog box offers some basic document tag options. Acrobat’s Help text describes the tags as follows:
- Text
- Tags the selection as text.
- Figure
- Tags the selection as a figure. Text contained within a figure tag is defined as part of the image and is not read by screen readers, though alternate text defined for the figure is read out.Note: An effective way of handling very complex text constructs (e.g. flow charts) is to group it all as a figure and then provide a unified alt text description for the entire group.
- Form Field
- Tags the selection as a form field.
- Figure/Caption
- Tags a selected figure and caption as a single tag. Any text contained in the tag is defined as a caption. Useful for tagging photos and captions and preventing caption text from being incorrectly added to adjacent text blocks. Note: Unless the caption actually describes the image, the figures will still require alternate text.
- Heading 1, Heading 2, Heading 3
- Tags the selection as a first, second, third, fourth, fifth, or sixth level heading tag. You can convert heading tags to bookmarks to help users navigate the document.
- Table
- Tags the selection as a table. When this selection is made, Acrobat analyzes the selection to determine the location of headings, columns, and rows.
Note: Table editing can be especially challenging. Try to keep them as simple as possible in the source document.
- Cell
- Tags the selection as a table or header cell. Use this option to merge cells that are incorrectly split.
Note: Table editing can be especially challenging. Try to keep them as simple as possible in the source document.
- Formula
- Tags the selection as a formula. Note: Because speech software may handle formula tags differently from normal text, you should still add alternate text.
- Background
- Tags the selection as a background element, or artifact, removing the item from the tag tree so that it does not appear in the reflowed document and is not read by screen readers.
Additional Tags
Not all tags are available using the TouchUp Reading order dialog window. Additional tags can be accessed from the Tags pane. See the Editing tags using the Tags pane section for more information.
Document Section Tags
There are additional tags that help define semantic and structural file elements in more detail. The Adobe Acrobat website categorizes and defines all standard tags as follows (some appear in the section above):
- Container elements
- Container elements are the highest level of element and provide hierarchical grouping for other block-level elements.
- Document
- Document element. The root element of a document’s tag tree.
- Part
- Part element. A large division of a document; may group smaller units of content together, such as division elements, article elements, or section elements.
- Div
- Division element. A generic block-level element or group of block-level elements.
- Art
- Article element. A self-contained body of text considered to be a single narrative.
- Sect
- Section element. A general container element type, comparable to Division (DIV Class=”Sect”) in HTML, which is usually a component of a part element or an article element.
Heading and Paragraph Elements
Heading and paragraph elements are paragraph-like, block-level elements that include specific level heading and generic paragraph (P) tags. A heading (H) element should appear as the first child of any higher-level division. Six levels of headings (H1 to H6) are available for applications that don’t hierarchically nest sections (See TouchUp Reading Order Tags section above for more).
Label and List Elements
Label and list elements are block-level elements used for structuring lists.
- L
- List element. Any sequence of items of similar meaning or other relevance; immediate child elements should be list item elements.
- LI
- List item element. Any one member of a list; may have a label element (optional) and a list body element (required) as a child.
- LBL
- Label element. A bullet, name, or number that identifies and distinguishes an element from others in the same list.
- LBody
- List item body element. The descriptive content of a list item.
Special Text Elements
Special text elements identify text that isn’t used as a generic paragraph (P).
- BlockQuote
- Block quote element. One or more paragraphs of text attributed to someone other than the author of the immediate surrounding text.
- Caption
- Caption element. A brief portion of text that describes a table or a figure.
- Index
- Index element. A sequence of entries that contain identifying text and reference elements that point out the occurrence of the text in the main body of the document.
- TOC
- Table of contents element. An element that contains a structured list of items and labels identifying those items; has its own discrete hierarchy.
- TOCI
- Table of contents item element. An item contained in a list associated with a table of contents element.
Table Elements
Table elements are special elements for structuring tables.
- Table
- Table element. A two-dimensional arrangement of data or text cells that contains table row elements as child elements and may have a caption element as its first or last child element.
- TR
- Table row element. One row of headings or data in a table; may contain table header cell elements and table data cell elements.
- TD
- Table data cell element. A table cell that contains non-header data.
- TH
- Table header cell element. A table cell that contains header text or data describing one or more rows or columns of a table.
Inline-Level Elements
Inline-level elements identify a span of text that has specific formatting or behavior. They are differentiated from block-level elements. Inline-level elements may be contained in or contain block-level elements.
- BibEntry
- Bibliography entry element. A description of where some cited information may be found.
- Quote
- Quote entry element. An inline portion of text that is attributed to someone other than the author of the text surrounding it; different from a block quote, which is a whole paragraph or multiple paragraphs, as opposed to inline text.
- Span
- Span entry element. Any inline segment of text; commonly used to delimit text that is associated with a set of styling properties.
Special Inline-Level Elements
Similar to inline-level elements, special inline-level elements describe an inline portion of text that has special formatting or behavior.
- Code
- Code entry element. Computer program text embedded within a document.
- Figure
- Figure entry element. A graphic or graphic representation associated with text.
- Form
- Form entry element. A PDF form annotation that can be or has been filled out.
- Formula
- Formula entry element. A mathematical formula.
- Link
- Link entry element. A hyperlink that is embedded within a document. The target can be in the same document, in another PDF document, or on a website.
- Note
- Note entry element. Explanatory text or documentation, such as a footnote or endnote, that is referred to in the main body of text.
- References
- Reference entry element. A citation to text or data that is found elsewhere in the document.
To add tags automatically
Note: The automatic tagging feature may be sufficient on simple layouts, but it sometimes misinterprets the structure and reading order of complex page elements (e.g. closely spaced columns, irregular text alignment, and tables without borders.). Therefore, use the automatic tagging feature as a starting point, and always manually check and edit the tags as explained below.
- Go to menu item: Tools > Accessibility > Add Tags To Document
*To Show the hidden “Accessibility” drop down menu Go to menu item: View > Tools > Accessibility
Note: This command removes any tags that were in the document before the command was run. If any potential problems were encountered, an Add Tags Report appears in the navigation pane.
To add/edit tags manually
There are two ways of adding and editing tags in Adobe Acrobat. You can either do it through the TouchUp Reading Order dialog box, or using the Tags navigation pane.
Note: Some tag types are not available through the TouchUp Reading Order dialog box. For documents with complex layouts and elements, use it together with the Tags pane method described below.
Adding/Editing tags using TouchUp Reading Order
- Go to menu item: Tools > Accessibility > TouchUp Reading Order…
In most cases, it will help to have the four checkboxes checked (Show page content groups, Show table cells, Display like elements in a single block, Show tables and figures)
- Using the TouchUp Reading Order tool, drag* within the document pane to select a region of the page that contains one type of content (e.g. a text block)
Note: If you drag* over part of an already tagged element, the element is sometimes split up. This is helpful when splitting larger elements to ensure correct reading over of sub-elements.
- To add more page content to the current selection, Shift + drag*
- To remove page content from the current selection, Ctrl + drag*
- Select the appropriate button in the TouchUp Reading Order dialog to specify the tag type, a box should now encapsulate the element (the tags are explained here).
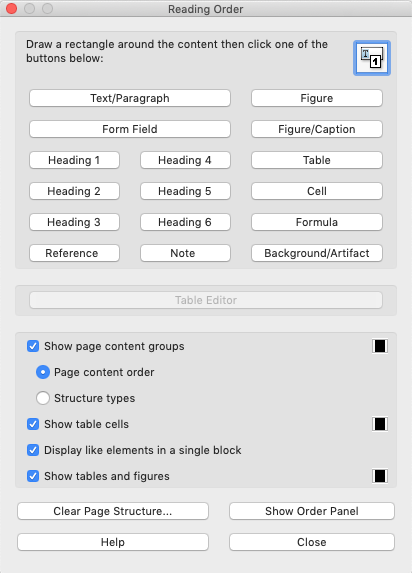
Tips for Tagging
- On the “Touch Up Reading Order” dialog, make sure to select the Show page content groups checkbox and the Structure types radio button. This will display the type of structure for each tag, which will help you to spot mis-tagged content.
- A good place to start is tagging “Background” content, since this will reduce the number of tags to deal with. Background content should include:
- empty boxes,
- visible or invisible text box borders (especially in busy areas where they overlap with text),
- visuals that are decorative or redundant (e.g., backgrounds, illustrations), whose content is described adequately in the text .
- If you are having difficulty tagging complex content (e.g., a complex table), consider either:
- Editing the source document to simplify it, or
- Selecting the complex content and tagging it as a figure for which you must then add alternative text that properly conveys all of the information in the new figure
Editing tags using the Tags pane
- Go to menu item: View > Show/Hide > Navigation Panes > Tags…
Note: For best results, use ‘Add Tags to Document’ first. You can also create a new tag using the TouchUp Reading Order dialog box and then edit it in the Tags Pane.
- To change a tag, locate it in the structure tree.
- Right-click* on the tag, and select Properties. From the drop-down menu next to tag type, select the tag you would like to use.
- Alternatively, you can edit tags by clicking on the tag name drop-down menu, and then typing the appropriate tag name (see list of tags above).
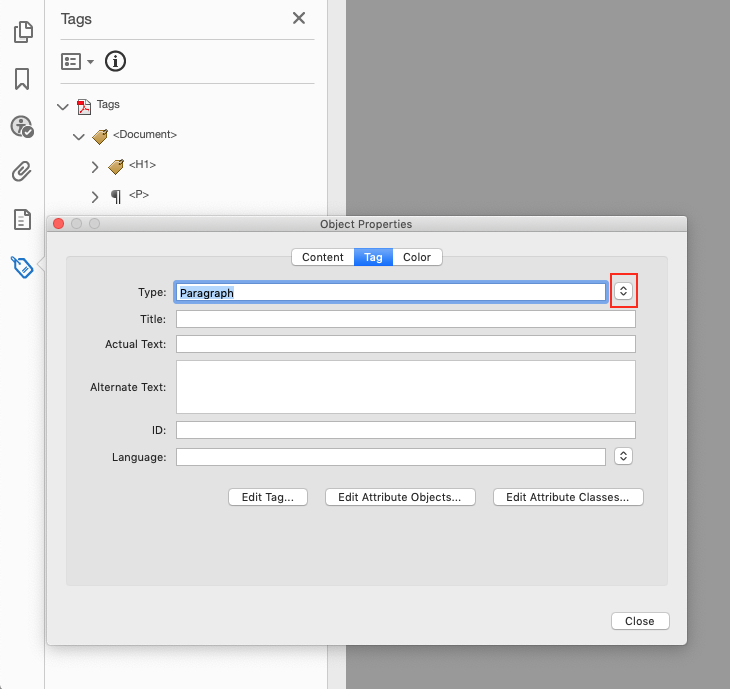
Technique 4. Provide Alternative Text
When using images, it is important to ensure that the information you intend to convey by the image is also conveyed to people who cannot see the image. This can be accomplished by adding concise alternative text to each image. If the image is purely decorative, mark it as background.
Tips for writing alternative text
- Try to answer the question “what information is the image conveying?”
- If the image does not convey any useful information, leave the alternative text blank (e.g. Background images should generally have no alt text, other decorative images should only have alt text if they form a crucial part of the content, message, and purpose of the document)
- If the image contains meaningful text, ensure all of the text is replicated
- For logos, the alternative text should be the organization’s name
- For groups of logos, one logo can be chosen to represent the group
- Sometimes text is included as part of a logo or footer image (e.g. the image might contain a phone number), this text should be set as the alternative text of the image
- Alternative text should be fairly short, usually a sentence or less and rarely more than two sentences
- If more description is required (e.g. for a chart or graph), provide a short description in the alternative text (e.g. a summary of the trend) and more detail in the long description, see below
- Test by having others review the document with the images replaced by the alternative text
Tips for writing longer descriptions
- Long descriptions should be used when text alternatives (see above) are insufficient to answer the question “what information is the image conveying?”
- In some situations, the information being conveyed will be how an image looks (e.g. an artwork, architectural detail, etc.). In these cases, try to describe the image without making too many of your own assumptions.
- One approach is to imagine you are describing the image to a person over the phone
- Ensure that you still provide concise alternative text to help readers decide if they are interested in the longer description
- Alternatively, you can include the same information conveyed by the image within the body of the document, providing the images as an alternate to the text. In that case, the images should be marked as “Background” and you do not have to provide alternate text within the image.
To add alternative text to images
- Tools > Accessibility > Set Alternate Text
(If “Accessibility” is not listed, it can be opened from menu item: View > Tools > Accessibility
- Select Ok the Adobe Acrobat pop up box
- Type in the description in the Set Alternative Text pop up box
- Select the right arrow to set alternative text on the next figure
- When complete select Save & Close
The dialog box will automatically select all the objects that are tags as figure.
To add alternative text to links
- Select the text or object for which you want to create a link.
- Right-click* the selection, and choose Create Link from the context menu.
- In the Create Link dialog box, select the appropriate options, and then follow the onscreen instructions to specify a URL, page view, or file as the link target.
Technique 5. Set a Logical Reading Order
Setting up reading order will set up the way the device will read the file out loud to view and change reading order:
- Select the Order Pane (View > Show/Hide > Navigation Panes > Order)
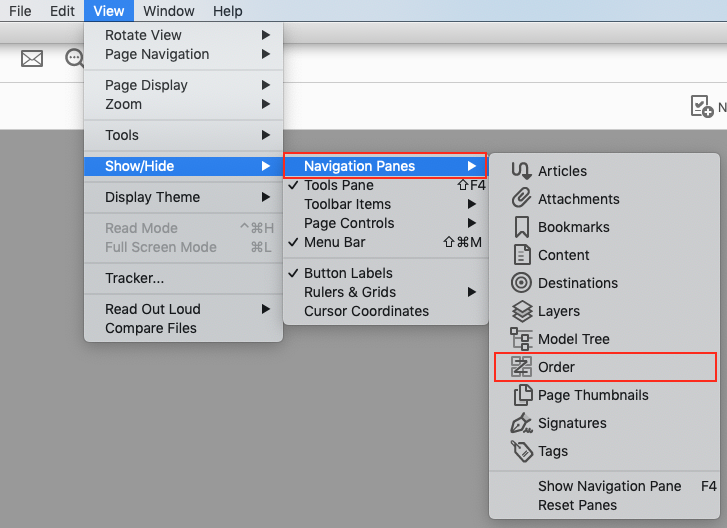
- Once the order pane is selected the file will show numbers per page showing the reading order.
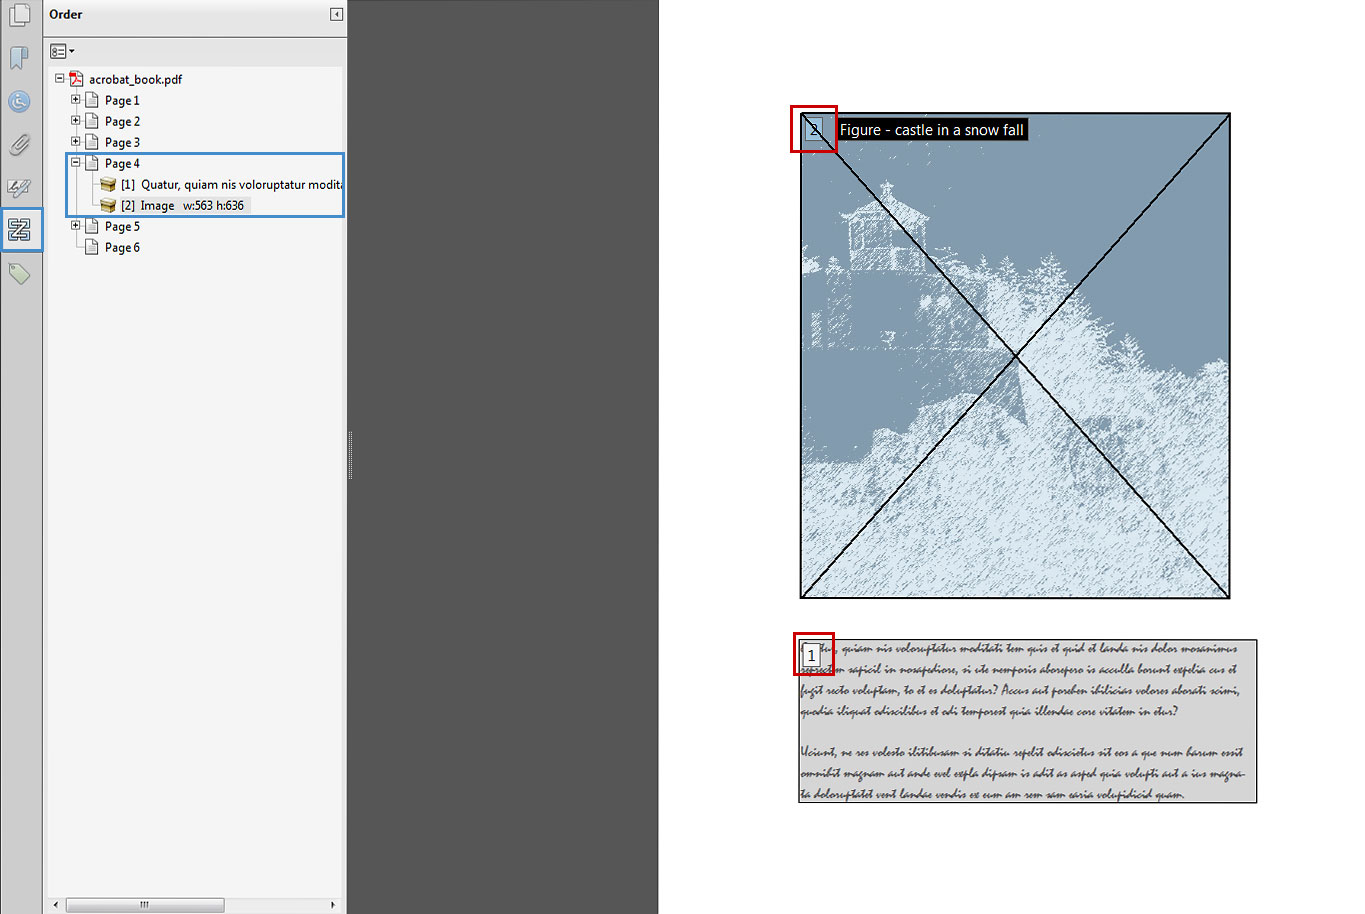
- If the reading order is incorrect, select the following information from the pane and move the information bellow or above to make the reading order correct.
To test the reading order
Sometimes it may not be clear by looking at content, what would be the most logical aural reading order. In these cases, it is recommended to preview the reading order.
Caution!: The “Read Out Loud” feature is not recommended for checking the aural order because it will provide inaccurate results.
One method for testing the reading order of your document is called “reflowing”, which temporarily presents it as a single column that is the width of the document pane. Only readable text appears in the reflow view.
If the tagged PDF does not reflow the way you want, it means that the content order or reading order of the PDF contains inconsistencies. If this is the case, in addition to correcting the reading order, it may also be helpful to edit the document tags.
- Go to menu item: View > Zoom > Reflow
- To return to regular view, go to menu item: View > Zoom > Reflow
Another way to test the aural accessibility of a document is to attempt to access the document with the screen readers that your readers will use (e.g., NVDA or JAWS on Windows, VoiceOver on Mac OS).
Technique 6. Set Document Properties
It is important to set up the PDF correctly in order for assistive technologies (e.g., screen readers) to be able to present your document accurately.
- File > Properties
keyboard shortcut: Ctrl + D (on windows), Cmd + D (on Mac)
- Under Descriptions tab fill in the title and author. (Subject and Keywords can also be filled in)
- Under Initial Views change the following
- Layout and Magnification
- Navigation Tab: Bookmarks Panel and pages
- Magnification: Fit Page
- Open to Page: 1
- Window Options
- Check Center window on Screen
- Show > Document Title
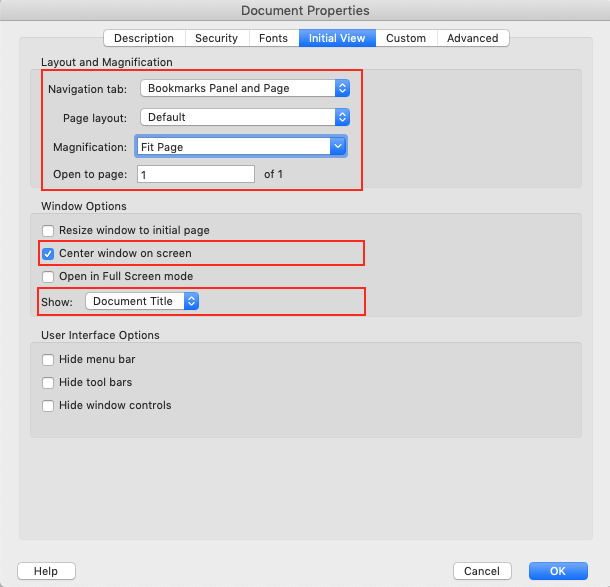
- Under the Advanced tab select Language and change to the preferred language. If a different natural language is used for a paragraph or selected text, this also needs to be clearly indicated.
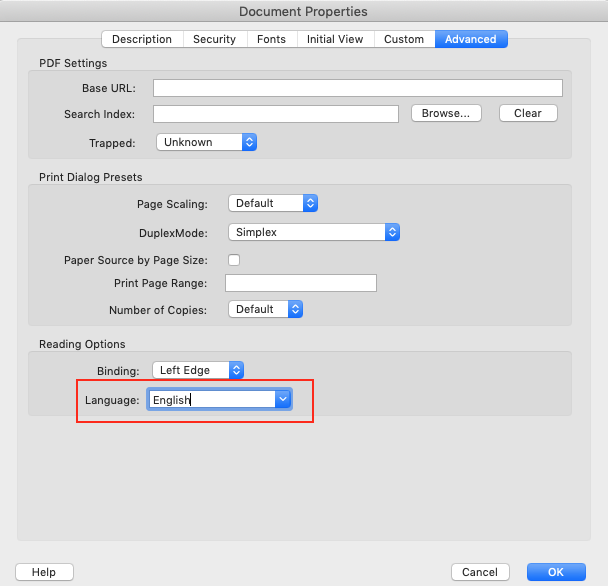
- Select OK
To apply a language directly to selected element
- Go to menu item: View > Navigation Panels > Tags
- In the Tags tab, select the element
- Right-click* the element and select Properties…
- In the Content tab, select the language from the Language drop-down list
- Select Close
To set the page structure to document structure
- Select all the pages (ctrl + A or cmd + A) in the page Thumbnails Panel
- Select Page Properties
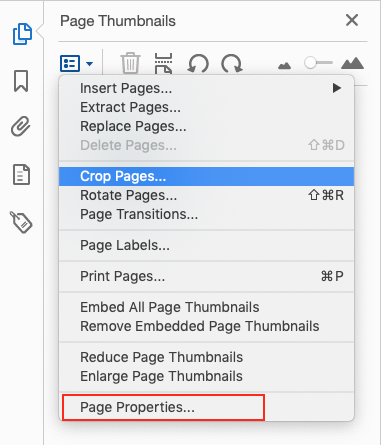
- Under Tab Order select Use Document Structure.
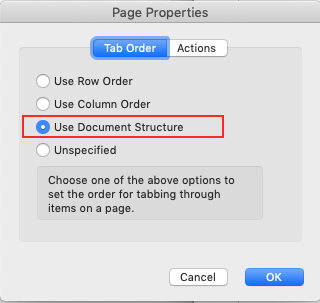
- Select OK.
Technique 7. Adjust Security Settings
It is possible to specify that no part of an accessible PDF is to be copied, printed, extracted, commented on, or edited. This can be accomplished by encrypting the document with password security. However, this could interfere with a screen reader’s ability to read the document, because screen readers must be able to copy or extract the document’s text in order to convert it to speech. In Acrobat 11 Pro, it is possible to maintain high-encryption-level security while at the same time providing the necessary access to assistive technologies.
To allow assistive technologies access to content
- Go to menu item: File >Properties > Security.
- In the Security Method drop down menu select Password Security.
- In the Password Security – Settings dialog, under Permissions, select Restrict editing and printing of the document.
- For low-encryption-level security, select Enable copying of text, images, and other content.
- For high-encryption-level security, select Enable text access for screen reader devices for the visually impaired (this overrides the document’s security settings only for the purpose of giving assistive software, such as screen readers, access to the content).
- Select OK.
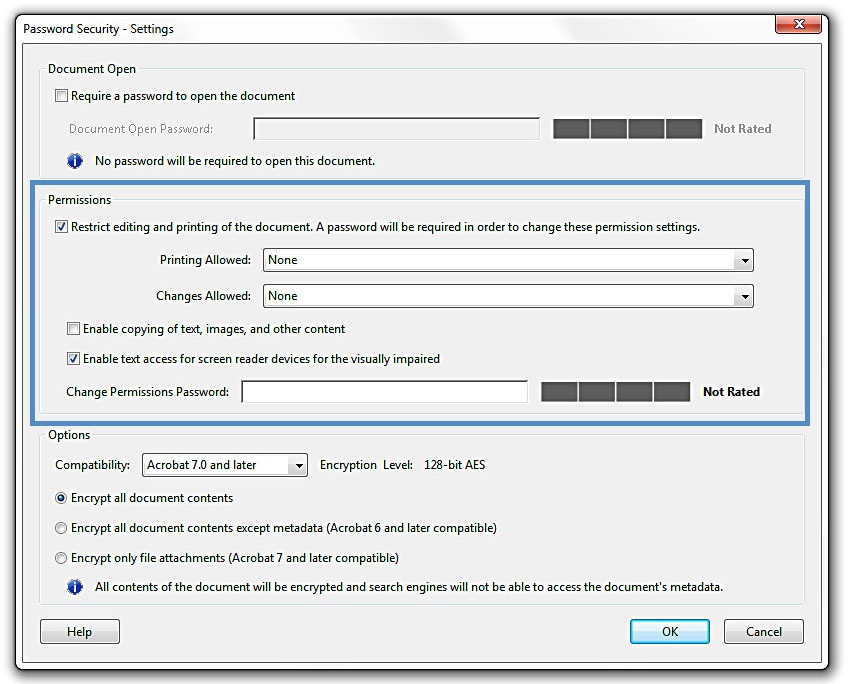
Technique 8. Set Bookmarks
A bookmark is a type of link with representative text in the Bookmarks panel in the navigation pane. Each bookmark goes to a different view or page in the document. In Acrobat 11 Pro, you can use bookmarks to mark a place in the PDF to which you want to return, or to jump to a destination in the PDF, another document, or a web page. There are several ways to create bookmarks.
Note: An Acrobat user can only add bookmarks to a document only if the security settings allow it.
To add a bookmark manually
- Bookmark > New Bookmark
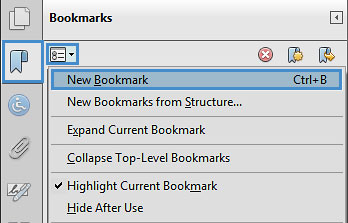
- Insert the title of the content

- Scroll to the page that the bookmark is intended to link.
- *Right click the bookmark title > Set Destination

To add bookmarks automatically
Bookmarks can also be generated automatically from various types of structures that will be in your document if you have tagged it properly:
- Bookmark > New Bookmark from Structure (in the drop down menu in the bookmark pane).
- Select the structure to generate bookmarks from.
Accessibility Support Tools
- axesPDF: A plug-in for Microsoft Word 2007/2010 that makes it easier to create accessible PDFs (free public beta program);
- CommonLook Office: A plug-in for Microsoft Word 2007/2010 and PowerPoint 2007/010 that makes it easier to create accessible PDFs.
- CommonLook PDF: A plug-in for Adobe Acrobat that helps identify, report and correct accessibility problems.
- MadeToTag: A plug-in for for Adobe InDesign that makes it easier to create accessible PDF from InDesign documents.
- PDFGoHTML: A free Adobe Acrobat plug-in that converts tagged PDF into HTML, which can be useful in debugging tagging structures.
References and Resources
Acknowledgments
Authors: Jan Richards, Sabrina Ruplall
This document was produced as part of the Accessible Digital Office Document (ADOD) Project.
This project has been developed by the Inclusive Design Research Centre, OCAD University as part of an EnAbling Change Partnership project with the Government of Ontario and UNESCO (United Nations Educational, Scientific and Cultural Organization).
Substantial contributions have also been made to the project by AnySurfer, the City of Toronto, and OCAD University.
Source: Authoring Techniques for Accessible Office Documents: Adobe Acrobat 11 Pro by the Inclusive Design Research Centre (IDRC) used under CC-BY-SA 3.0.
Usage Notes
At the time of testing (March 2013), Acrobat 10 Pro (Windows) enables the production of accessible digital documents. Acrobat 10 Pro includes an accessibility checking feature.
Note: While PDF accessibility has improved over the years, accessibility support for PDF by authoring tools, viewers, and assistive technologies (e.g., screen readers) is not as widespread as for HTML documents. We recommend considering HTML instead of or in addition to PDF where appropriate.
Should I use ADOD or WCAG 2.0?
These techniques can help you to use Acrobat 10 Pro to create documents that are:
- Intended to be used by people (i.e. not computer code),
- Text-based (i.e., not simply images, although they may contain images),
- Fully printable (i.e., where dynamic features are limited to automatic page numbering, table of contents, etc. and do not include audio, video, or embedded interactivity),
- Self-contained (i.e., without hyperlinks to other documents, unlike web content), and
- Typical of office-style workflows (Reports, letters, memos, budgets, presentations, etc.).
Note: If you are creating forms, web pages, applications, or other dynamic and/or interactive content, these you should also consult the W3C-WAI Web Content Accessibility Guidelines (WCAG 2.0). The WCAG working group has provided PDF Techniques for WCAG 2.0.
File Formats
The default file format for Acrobat 10 Pro is Adobe Portable Document Format (PDF). In addition, Acrobat 10 Pro offers several other word processor and web format saving options. These have not been checked for accessibility.
Document Conventions
We have tried to write these techniques so that they are useful to all authors, regardless of whether they use a mouse. However, for clarity there are several instances where mouse-only language is used. Below are the mouse-only terms and their keyboard alternatives:
- *Right-click: To right-click with the keyboard, select the object using the Shift+Arrow keys and then press either (1) the “Right-Click” key (some keyboard have this to the right of the spacebar) or (2) Shift+F10.
- *Drag: Unfortunately, there is no keyboard alternative for several operations that require dragging.
Disclaimer and Testing Details:
- Following these techniques will increase the accessibility of your documents, but it does not guarantee accessibility to any specific disability groups. In cases where more certainty is required, it is recommended that you test the office documents with end users with disabilities, including screen reader users.
- The application-specific steps and screenshots in this document were created using Adobe Acrobat 10 Pro (ver.10.0, Windows 7, Mar. 2011) while creating a PDF document.
- Tasks completed in Technique 3, Technique 4, and Technique 5 cannot be undone. It is recommended that you save your PDF document before and after you make significant changes.
- This document is provided for information purposes only and is neither a recommendation nor a guarantee of results.
- If errors are found, please report them to: adod-comments@idrc.ocad.ca
Technique 1. Use Accessible Source Documents
In the Adobe Acrobat 10 Pro workflow, all PDF documents start with a source document created in an office document authoring application, such as Microsoft Word or OpenOffice.org Writer. Because source documents provide the starting-point for the PDF documents, accessibility is very important.
To create an accessible source document
- Create a new document in the authoring application (from the default blank template or from one of the prepackaged templates).
- Ensure that you follow the ADOD Authoring Techniques provided for the authoring application (available at: How to Use This Resource).
- When you are finished, you should also check the accessibility of the document (see Accessibility Checking in the Authoring Techniques for the authoring application).
Once you have completed the above steps, you are ready to convert your document to PDF using Adobe Acrobat 10.
To convert single source documents to PDF
- Go to the menu item: File > Create PDF > From file…
- Locate and select your source document and select the Open button, Acrobat will then proceed to convert the file.
Note: A batch conversion process is also available from the menu item: File > Create PDF > Batch Create Multiple Files
Scanned Content
If you created a PDF from a scanned document, then it will be inherently inaccessible to screen readers and other assistive technologies. The document will be less useful because graphic representations of text cannot be selected, edited or searched. In this case, it is necessary that you convert the scanned images of text to searchable content using Acrobat’s optical character recognition (OCR) feature before addressing the accessibility features of the document.
Technique 2. Check Accessibility
The most basic requirement for a PDF document to be accessible is for it to be “tagged” with hidden labels (“tags”) that describes the structure of the document (e.g. that text should be interpreted as a header, paragraph, table cell, etc.). Screen readers can then use these tags to convey the document’s information effectively to people with visual disabilities. The other requirements for a PDF document to be accessible (e.g. alternate text, logical reading order, etc.) can only all apply once the document is tagged.
Caution!: The “Quick Check” feature is not recommended because it misses some important accessibility issues. Always perform a “Full Check” instead.
To perform a “Full Check”
Note: If “Accessibility” is not visible under tools, go to menu item: View > Tools > Accessibility
- Select Tools > Accessibility > Full Check Up
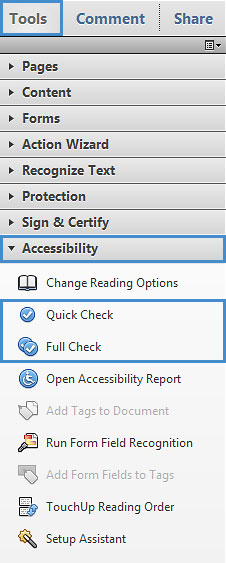
Running a Wizard Action Full Check when the file is first created would be ideal. This allows you to fix a few mistakes before the check up.
- Select Tools > Action Wizard > Create Accessible PDF’sNote: If the PDF file was created from InDesign, then select “InDesign CS6 Accessibility Touch up”
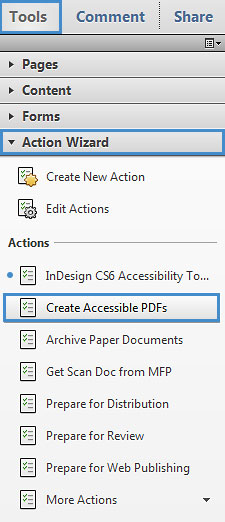
- Select “5 Accessibility Check (Full)” (in the Action: Create Accessible PDFs)
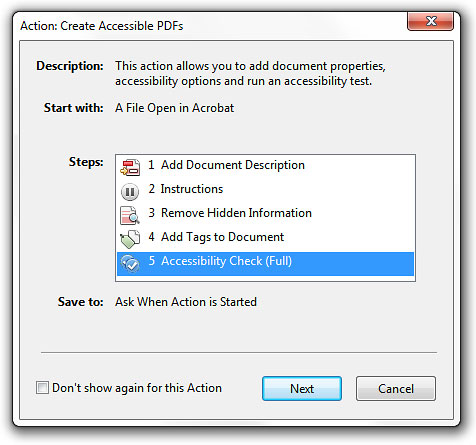
- Select Next
- Select the folder to save the file (in Browse For Folder)
- Insert Title and Author (you can also insert subject and keyword). In order to insert you must uncheck the “Leave As Is” button.
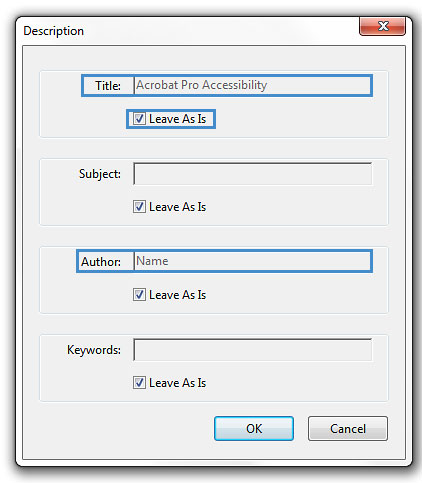
- Follow the Wizard (a yellow sticky note-like pop-up box)
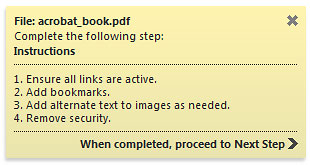
- In the Remove Hidden Information pop up box select OK. All of the checked items will be removed.
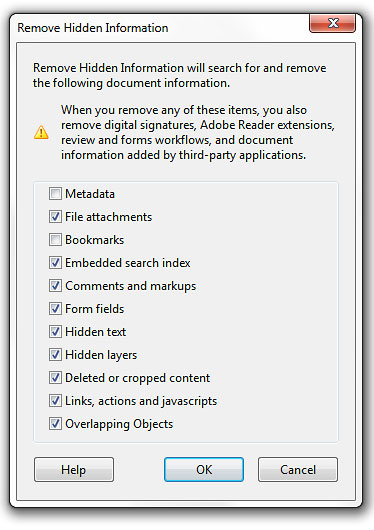
- Start Checking
- Save file. If the file is not fully accessible the errors (report) will be shown on the left panel).
Technique 3. Add and Edit Tags
Caution!: Actions taken using the TouchUp Reading Order tool and Order Panel cannot be undone. Remember to save your work frequently. If you frequently create PDF files you might consider using one of these
accessible PDF support tools.
If tags are missing, then they must be added. When tags are present, they should still be checked for correctness. Acrobat’s Help text describes the tags as follows:
- Text
- Tags the selection as text.
- Figure
- Tags the selection as a figure. Text contained within a figure tag is defined as part of the image and is not read by screen readers, though alternate text defined for the figure is read out. Note: An effective way of handling very complex tex constructs (e.g. flow charts) is to group it all as a figure and provide alt text.
- Form Field
- Tags the selection as a form field.
- Figure/Caption
- Tags a selected figure and caption as a single tag. Any text contained in the tag is defined as a caption. Useful for tagging photos and captions and preventing caption text from being incorrectly added to adjacent text blocks. Note: Unless the caption actually describes the image, the figures will still require alternate text.
- Heading 1, Heading 2, Heading 3
- Tags the selection as a first, second, third, fourth, fifth, or sixth level heading tag. You can convert heading tags to bookmarks to help users navigate the document.
- Table
- Tags the selection as a table. When this selection is made, Acrobat analyzes the selection to determine the location of headings, columns, and rows. Note: Table editing can be especially challenging. Try to keep them as simple as possible in the source document.
- Cell
- Tags the selection as a table or header cell. Use this option to merge cells that are incorrectly split. Note: Table editing can be especially challenging. Try to keep them as simple as possible in the source document.
- Formula
- Tags the selection as a formula. Note: Because speech software may handle formula tags differently from normal text, you should still add alternate text.
- Background
- Tags the selection as a background element, or artifact, removing the item from the tag tree so that it does not appear in the reflowed document and is not read by screen readers.
To add tags automatically
Note: The automatic tagging feature may be sufficient on simple layouts, but it sometimes misinterprets the structure and reading order of complex page elements (e.g. closely spaced columns, irregular text alignment, and tables without borders.). Therefore, you should still manually check the tags as explained below.
- Go to menu item: Advanced > Accessibility > Add Tags To Document
Note: This command removes any tags that were in the document before the command was run. If any potential problems were encountered, an Add Tags Report appears in the navigation pane.
To add/edit tags manually
- TouchUp Reading Order… In most cases, it will help to have the three checkboxes checked (Show page content order, Show table cells, Show tables and figures)
- Using the TouchUp Reading Order tool, drag* within the document pane to select a region of the page that contains one type of content (e.g. a text block)
- To add more page content to the current selection, Shift + drag*
- To remove page content from the current selection, Ctrl + drag*
- Select the appropriate button in the TouchUp Reading Order dialog to specify the tag type, a box should now encapsulate the element (the tags are explained here)
Tips for Tagging
- A good place to start is tagging “Background” content, since this will reduce the number of tags to deal with. Background content should include:
- empty boxes,
- visible or invisible textbox borders (especially in busy areas where they overlap with text),
- visuals that are decorative or redundant (e.g. backgrounds, illustrations), whose content is described adequately in the text .
- If you are having difficulty tagging complex content (e.g. a complex table), consider either:
- Editing the source document to simplify it, or
- Selecting the complex content and tagging it as a figure for which you must then add alternative text that properly conveys all of the information in the new figure.
To change the tag for a region
- With the TouchUp Reading Order tool…
- In the document pane, drag* to select a highlight region or select the number of the highlighted region (or select from the Order Panel)
Note: If you drag* over part of an already tagged element, the element is sometimes split up. This is helpful when splitting larger elements to ensure correct reading over of sub-elements.
- Select the appropriate button in the TouchUp Reading Order dialog to specify the tag (the tags are explained here)
To Modify Tagging
- Tools > Content > Edit Object
- Select items required to be tagged*right click > properties…
- Under Tag select type (paragraph, heading level, span etc.) Tip: Tagging items and adding alternative text before converting to PDF will save time.
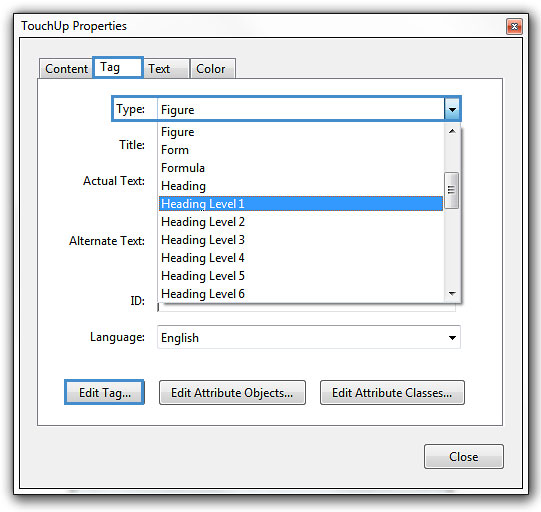
Correcting Visual Side-Effects of Tagging
Sometimes tagging can result in unexpected visual side effects, such as text disappearing behind background images. The following steps can be taken to correct such side-effects:
- Open Content panel (View > Show/Hide > Navigation Panes > Content)
- Move any <Artifact> elements to the top (this places them behind all other elements).
- See if this fixes the problem. If not, continue:
- Click Gears icon > Highlight Content
- Drag* mouse over unwanted element or the area where missing element should be
- Click Gears icon > “Find content from selection” to locate selection in Content tree
- In the Content panel tree, click on the “Container” node of the selected element and then adjacent nodes.
- As you click, note which element is highlighted on screen. When you have found the element you want to correct, continue:
- If you found text that is hidden behind another element, move the hidden element DOWN within the Content panel tree (this moves it above other elements).
- If you found an element that should not be there, move it UP within the Content panel tree (this moves in behind other elements) or delete it if necessary (remember to Save beforehand)
Note: The order of items in the Content panel tree indicates their layer order in the document. If item A is lower in the tree than item B, then if item A and B overlap in the document, A will be in front. Some people find this confusing, so a good way to remember how this works is to imagine putting documents in a pile and noting their names in a list. The last document placed will be on top of the pile, covering the others, and its name will be on the bottom of the list.
Technique 4. Provide Alternative Text
When using images, it is important to ensure that the information you intend to convey by the image is also conveyed to people who cannot see the image. This can be accomplished by adding concise alternative text to each image. If the image is purely decorative, mark it as background.
Tips for writing alternative text
- Try to answer the question “what information is the image conveying?”
- If the image does not convey any useful information, leave the alternative text blank (e.g. Background images should generally have no alternative text, other decorative images should only have alt text if they form a crucial part of the content, message, and purpose of the document)
- If the image contains meaningful text, ensure all of the text is replicated
- For logos, the alternative text should be the organization’s name
- For groups of logos, one logo can be chosen to represent the group
- Sometimes text is included as part of a logo or footer image (e.g. the image might contain a phone number), this text should be set as the alternative text of the image
- Alternative text should be fairly short, usually a sentence or less and rarely more than two sentences
- If more description is required (e.g. for a chart or graph), provide a short description in the alternative text (e.g. a summary of the trend) and more detail in the long description, see below
- Test by having others review the document with the images replaced by the alternative text
Tips for writing longer descriptions
- Long descriptions should be used when text alternatives (see above) are insufficient to answer the question “what information is the image conveying?”
- In some situations, the information being conveyed will be how an image looks (e.g. an artwork, architectural detail, etc.). In these cases, try to describe the image without making too many of your own assumptions.
- One approach is to imagine you are describing the image to a person over the phone
- Ensure that you still provide concise alternative text to help readers decide if they are interested in the longer description
- Alternatively, you can include the same information conveyed by the image within the body of the document, providing the images as an alternate to the text. In that case, the images should be marked as “Background” and you do not have to provide alternate text within the image.
To add alternative text to images
- Tools > Content > Edit Object
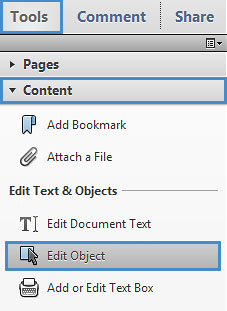
- Select image *right click > properties…
- Under Tag select type (figure, table etc.)
- Alternative text inserts text
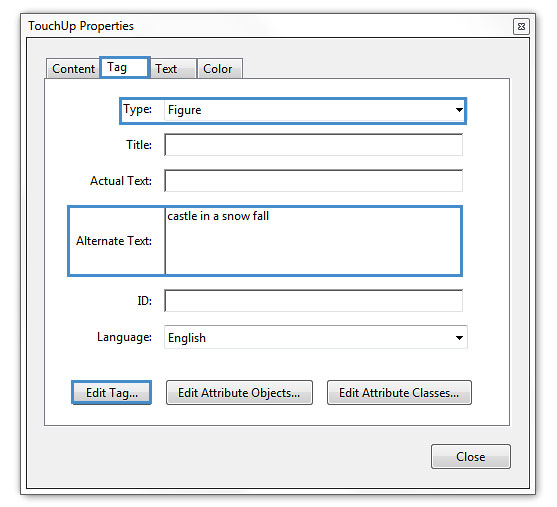
To add alternative text to links
- In the tag tree, select the Link tag for the link
- Select Options > Properties
- In the TouchUp Properties dialog, select the Tag tab
- Type alternative text for the link
- Select Close
To create an artifact
Artifacts are for objects that are not required to be read out loud (eg. background colours)
- Tools > Content > Edit Object
- Select image *right click > Create Artifact
Technique 5. Set a Logical Reading Order
Setting up reading order will set up the way the device will read the file out loud to view and change reading order:
- Select the Order Pane (View > Show/Hide > Navigation Panes > Order)
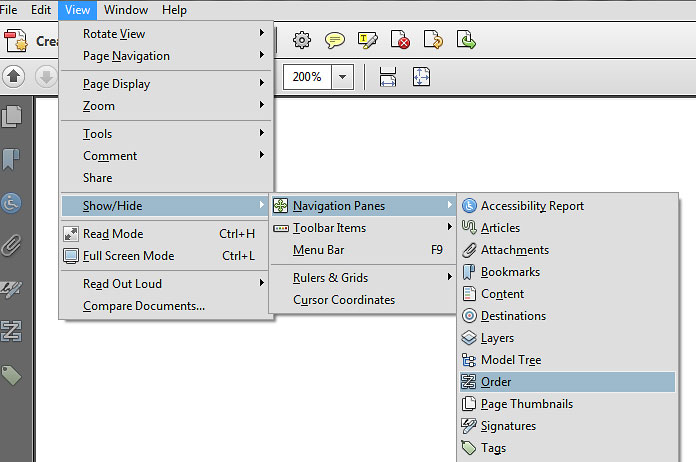
- Once the order pane is selected the file will show numbers per page showing the reading order.

- If the reading order is incorrect select the following information from the pane and move the information bellow or above to make the reading order correct.
To test the reading order
Sometimes it may not be clear by looking at content, what would be the most logical aural reading order. In these cases, it is recommended to preview the reading order.
Caution!: The “Read Out Loud” feature is not recommended for checking the aural order because it will provide an inaccurate .
One method for testing the reading order of your document is called “reflowing”, which temporarily presents it as a single column that is the width of the document pane. Only readable text appears in the reflow view. If the tagged PDF does not reflow the way you want, it means that the content order or reading order of the PDF contains inconsistencies. If this is the case, in addition to correcting the reading order, it may also be helpful to edit the document tags.
- Go to menu item: View > Zoom > Reflow
- To return to regular view, go to menu item: View > Zoom > Reflow
Another way to test the aural accessibility of a document is to attempt to access the document with the screen readers that your readers will use (e.g., NVDA or JAWS on Windows, VoiceOver on Mac OS).
Technique 6. Set Document Properties
It is important to set up the PDF correctly in order for assistive technologies (e.g. screen readers) to be able to present your document accurately.
- File > Properties keyboard shortcut: Ctrl + D (on windows), Cmd + D (on Mac)
- Under Descriptions tab fill in the title and author. (Subject and Keywords can also be filled in)
- Under Initial Views change the following
- Layout and Magnification
- Navigation Tab: Bookmarks Panel and pages
- Magnification: Fit Page
- Open to Page: 1 Window Options
- Check Center window on Screen
- Show > Document Title
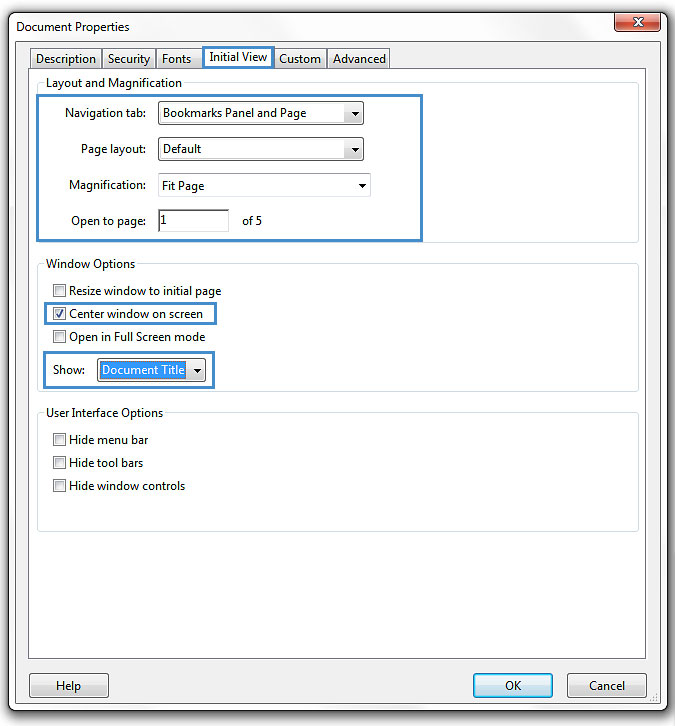
- Under the Advanced tab select Language and change to the preferred language If a different natural language is used for a paragraph or selected text, this also needs to be clearly indicated.
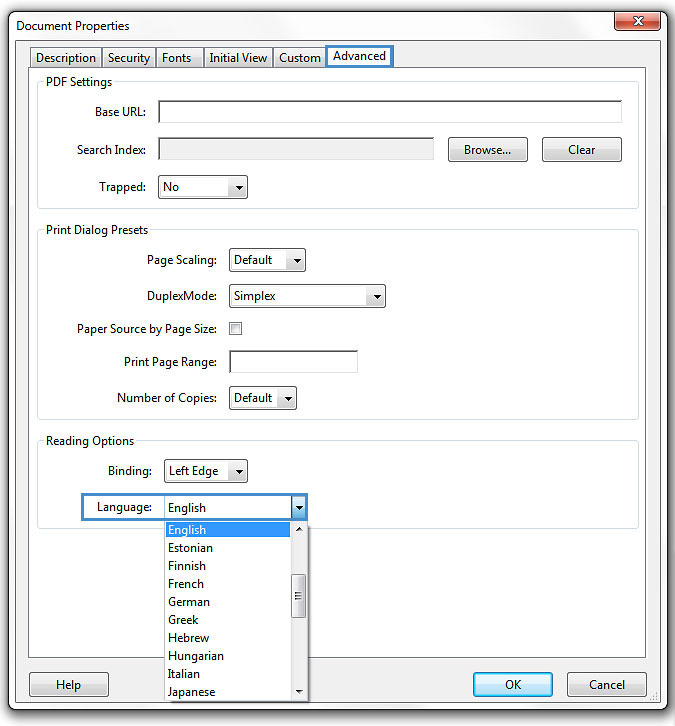
- Select OK
To apply a language directly to selected element
- Go to menu item: View > Navigation Panels > Tags
- In the Tags tab, select the element
- Right-click* the element and select Properties…
- In the Content tab, select the language from the Language drop-down list
- Select Close
To set the page structure to document structure
- Select all the pages (ctrl + A or cmd + A) in the page Thumbnails Panel
- Select Page Properties
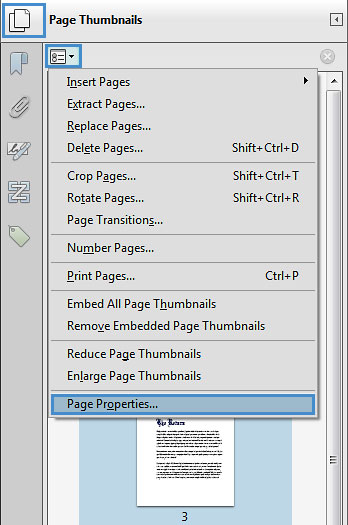
- Under Tab Order select Use Document Structure
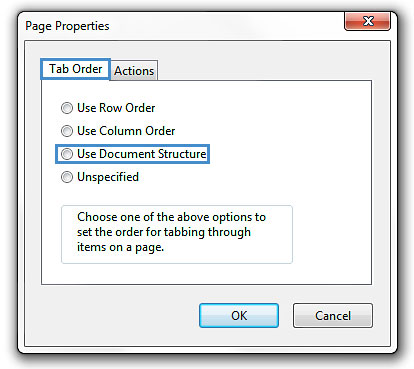
- Select OK
Technique 7. Adjust Security Settings
It is possible to specify that no part of an accessible PDF is to be copied, printed, extracted, commented on, or edited. This can be accomplished by encrypting the document with password security. However, this could interfere with a screen reader’s ability to read the document, because screen readers must be able to copy or extract the document’s text in order to convert it to speech. In Acrobat 10 Pro, it is possible to maintain high-encryption-level security while at the same time providing the necessary access to assistive technologies.
To allow assistive technologies access to content
- Go to menu item: File >Properties > Security Properties
- Security Method > Password Security
- In the Password Security – Settings dialog, under Permissions, select Restrict editing and printing of the document
- For low-encryption-level security, select Enable copying of text, images, and other content
- For high-encryption-level security, select Enable text access for screen reader devices for the visually impaired (this overrides the document’s security settings only for the purpose of giving assistive software, such as screen readers, access to the content)
- Select OK
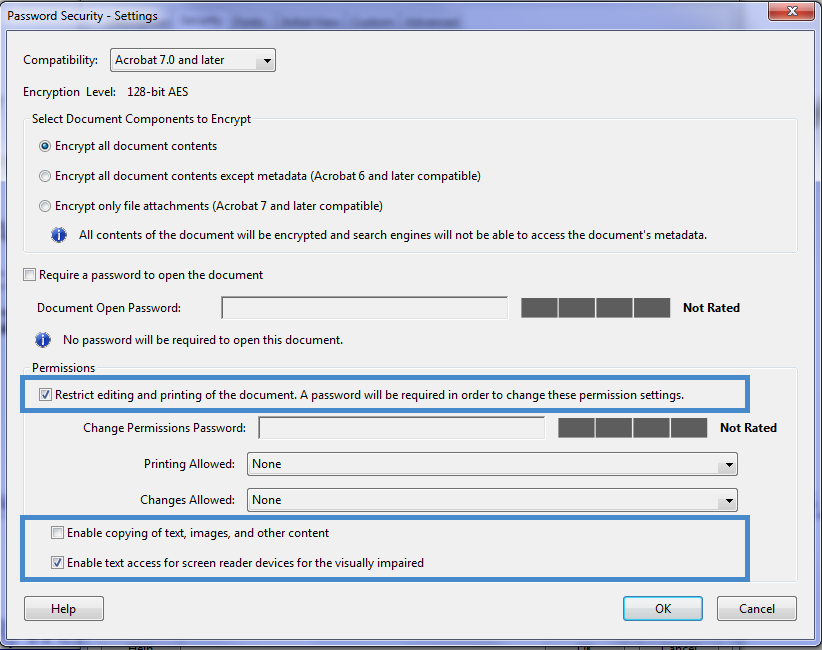
Technique 8. Set Bookmarks
A bookmark is a type of link with representative text in the Bookmarks panel in the navigation pane. Each bookmark goes to a different view or page in the document. In Acrobat 10 Pro, you can use bookmarks to mark a place in the PDF to which you want to return, or to jump to a destination in the PDF, another document, or a web page. There are several ways to create bookmarks.
Note: An Acrobat user can only add bookmarks to a document only if the security settings allow it.
To add a bookmark manually
- Bookmark > New Bookmark

- Insert the title of the content
- Scroll to the page that the bookmark is intended to link.
- *Right click the bookmark title > Set Destination
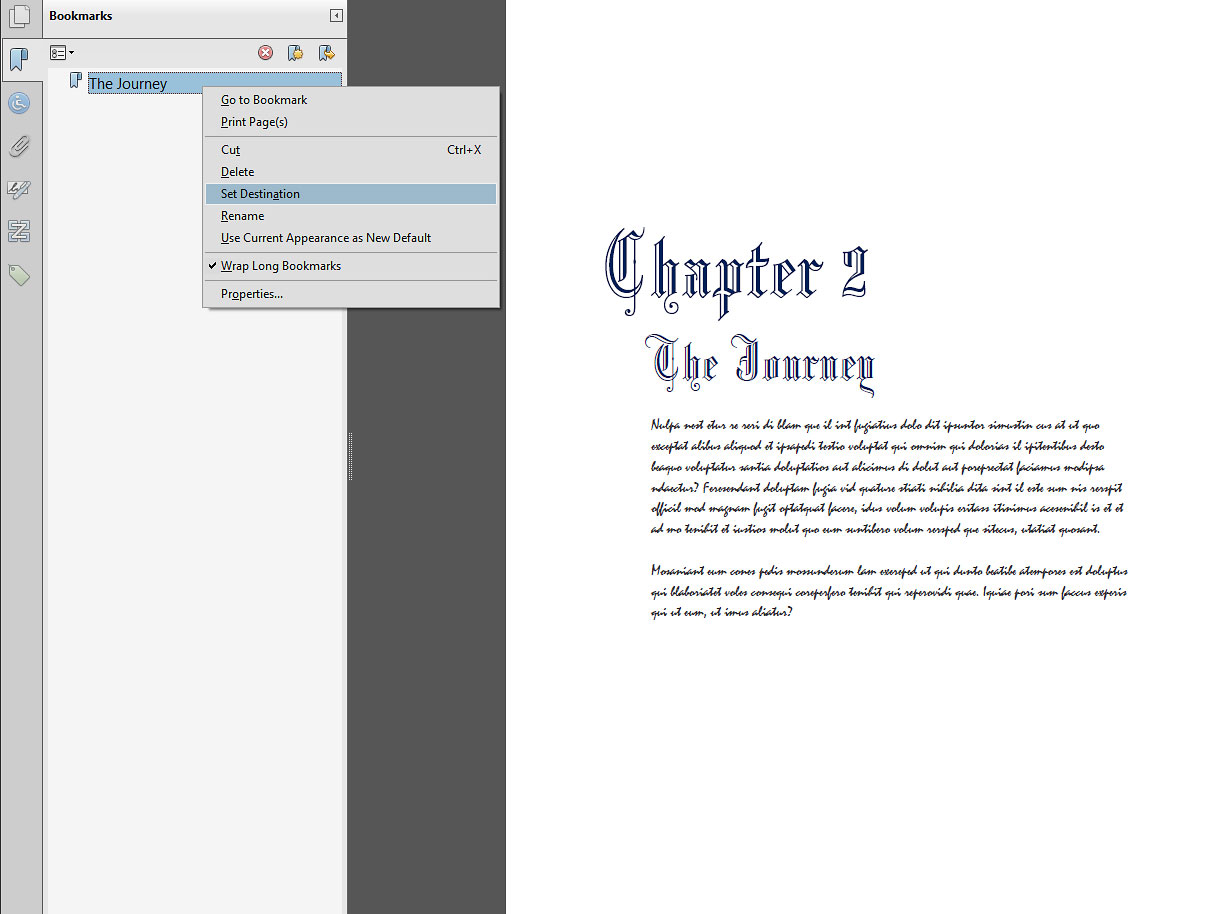
To add bookmarks automatically
Bookmarks can also be generated automatically from various types of structure that will be in your document if you have tagged it properly:
- Bookmark > New Bookmark from Structure (in the drop down menu in the bookmark pane)
- Select the structure to generate bookmarks from.
Accessibility Support Tools
- axesPDF: A plug-in for Microsoft Word 2007/2010 that makes it easier to create accessible PDFs (free public beta program);
- CommonLook Office: A plug-in for Microsoft Word 2007/2010 and PowerPoint 22007/010 that makes it easier to create accessible PDFs.
- CommonLook PDF: A plug-in for Adobe Acrobat that helps identify, report and correct accessibility problems.
- MadeToTag: A plug-in for for Adobe InDesign that makes it easier to create accessible PDF from InDesign documents.
- PDFGoHTML: A free Adobe Acrobat plug-in that converts tagged PDF into HTML, which can be useful in debugging tagging structures.
References and Resources
Acknowledgments
Authors: Vellicia Christanto, Jan Richards
This document was produced as part of the Accessible Digital Office Document (ADOD) Project. This project has been developed by the Inclusive Design Research Centre, OCAD University as part of an EnAbling Change Partnership project with the Government of Ontario and UNESCO (United Nations Educational, Scientific and Cultural Organization).
Substantial contributions have also been made to the project by AnySurfer, the City of Toronto, and OCAD University.
Authoring Techniques for Accessible Documents: Acrobat Pro 10 is licensed under a Creative Commons Attribution-ShareAlike 3.0 Unported License.
Source: Authoring Techniques for Accessible Office Documents: Adobe Acrobat 10 Pro by the Inclusive Design Research Centre (IDRC) used under CC-BY-SA 3.0.
Usage Notes
At the time of testing (January 19, 2011), Acrobat 9 Pro (Windows) enables the production of accessible digital office documents. Acrobat 9 Pro includes an accessibility checking feature.
Note: While PDF accessibility has improved over the years, accessibility support for PDF by authoring tools, viewers and assistive technologies (e.g. screen readers) is not as widespread as for HTML documents. We recommend considering HTML instead of or in addition to PDF where appropriate.
Should I use ADOD or WCAG 2.0?
These techniques can help you to use Acrobat 9 Pro to create documents that are:
- Intended to be used by people (i.e. not computer code),
- Text-based (i.e. not simply images, although they may contain images),
- Fully printable (i.e. where dynamic features are limited to automatic page numbering, table of contents, etc. and do not include audio, video, or embedded interactivity),
- Self-contained (i.e. without hyperlinks to other documents, unlike web content), and
- Typical of office-style workflows (Reports, letters, memos, budgets, presentations, etc.).
Note: If you are creating forms, web pages, applications, or other dynamic and/or interactive content, these you should also consult the W3C-WAI Web Content Accessibility Guidelines (WCAG 2.0). The WCAG working group has provided PDF Techniques for WCAG 2.0.
File Formats
The default file format for Acrobat 9 Pro is Adobe Portable Document Format (PDF). Several other word processor and web format saving options are also offered, but these have not been checked for accessibility.
Document Conventions
We have tried to write these techniques so that they are useful to all authors, regardless of whether they use a mouse. However, for clarity there are several instances where mouse-only language is used. Below are the mouse-only terms and their keyboard alternatives:
- *Right-click: To right-click with the keyboard, select the object using the Shift+Arrow keys and then press either (1) the “Right-Click” key (some keyboard have this to the right of the spacebar) or (2) Shift+F10.
- *Drag: Unfortunately, there is no keyboard alternative for several operations that require dragging.
Disclaimer and Testing Details:
- Following these techniques will increase the accessibility of your documents, but it does not guarantee accessibility to any specific disability groups. In cases where more certainty is required, it is recommended that you test the office documents with end users with disabilities, including screen reader users.
- The application-specific steps and screenshots in this document were created using Adobe Acrobat 9 Pro (ver.9.0.0, Windows 7, Jan. 2011) while creating a PDF document.
- Tasks completed in Technique 3, Technique 4, and Technique 5 cannot be undone. It is recommended that you save your PDF document before and after you make significant changes.
- This document is provided for information purposes only and is neither a recommendation nor a guarantee of results.
- If errors are found, please report them to: adod-comments@idrc.ocad.ca
Technique 1. Use Accessible Source Documents
In the Adobe Acrobat 9 Pro workflow, all PDF documents start with a source document created in an office document authoring application, such as Microsoft Word or OpenOffice.org Writer. Because source documents provide the starting-point for the PDF documents, accessibility is very important.
To create an accessible source document
- Create a new document in the authoring application (from the default blank template or from one of the prepackaged templates).
- Ensure that you follow the ADOD Authoring Techniques provided for the authoring application (available at: How to Use This Resource).
- When you are finished, you should also check the accessibility of the document (see “Accessibility Checking” in the Authoring Techniques for the authoring application).
Once you have completed the above steps, you are ready to convert your document to PDF using Adobe Acrobat 9.
To convert single source documents to PDF
- Go to the menu item: File > Create PDF > From file…
- Locate and select your source document and select the Open button, Acrobat will then proceed to convert the file.
Note: A batch conversion process is also available from the menu item: File > Create PDF > Batch Create Multiple Files
Scanned Content
If you created a PDF from a scanned document, then it will be inherently inaccessible to screen readers and other assistive technologies.The document will be less useful because graphic representations of text cannot be selected, edited or searched.
In this case, it is necessary that you convert the scanned images of text to searchable content using Acrobat’s optical character recognition (OCR) feature before addressing the accessibility features of the document.
Technique 2. Check Accessibility
The most basic requirement for a PDF document to be accessible is for it to be “tagged” with hidden labels (“tags”) that describes the structure of the document (e.g. that text should be interpreted as a header, paragraph, table cell, etc.). Screen readers can then use these tags to convey the document’s information effectively to people with visual disabilities.
The other requirements for a PDF document to be accessible (e.g. alternate text, logical reading order, etc.) can only all apply once the document is tagged.
Caution!: The “Quick Check” feature is not recommended because it misses some important accessibility issues. Always perform a “Full Check” instead.
To perform a “Full Check”
- Go to menu item: Advanced > Accessibility > Full check
- Under Report and Comment Options, select how you would like to view the results
- If you would like to do a full check on individual sections of a document, under Page Range, select a page range (when you have a large document, running a full check on one section at a time can be more efficient.)
- Under Checking Options, select an accessibility standard from the Name drop-down list
- Under Checking Options, select Select All to run a complete accessibility check
- Select Start Checking
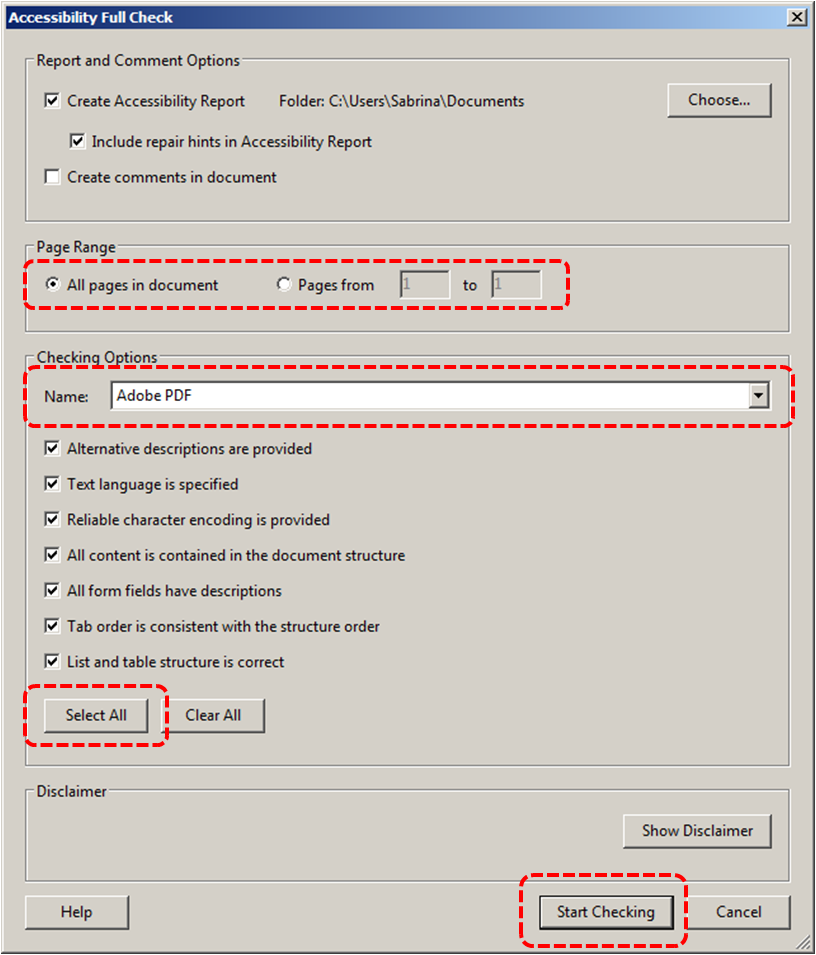
Technique 3. Add and Edit Tags
Caution!: Actions taken using the TouchUp Reading Order tool and Order Panel cannot be undone. Remember to save your work frequently. If you frequently create PDF files you might consider using one of these
accessible PDF support tools.
If tags are missing, then they must be added. When tags are present, they should still be checked for correctness. Acrobat’s Help text describes the tags as follows:
- Text
- Tags the selection as text.
- Figure
- Tags the selection as a figure. Text contained within a figure tag is defined as part of the image and is not read by screen readers, though alternate text defined for the figure is read out.Note: An effective way of handling very complex tex constructs (e.g. flow charts) is to group it all as a figure and provide alt text.
- Form Field
- Tags the selection as a form field.
- Figure/Caption
- Tags a selected figure and caption as a single tag. Any text contained in the tag is defined as a caption. Useful for tagging photos and captions and preventing caption text from being incorrectly added to adjacent text blocks. Note: Unless the caption actually describes the image, the figures will still require alternate text.
- Heading 1, Heading 2, Heading 3
- Tags the selection as a first, second, third, fourth, fifth, or sixth level heading tag. You can convert heading tags to bookmarks to help users navigate the document.
- Table
- Tags the selection as a table. When this selection is made, Acrobat analyzes the selection to determine the location of headings, columns, and rows. Note: Table editing can be especially challenging. Try to keep them as simple as possible in the source document.
- Cell
- Tags the selection as a table or header cell. Use this option to merge cells that are incorrectly split. Note: Table editing can be especially challenging. Try to keep them as simple as possible in the source document.
- Formula
- Tags the selection as a formula. Note: Because speech software may handle formula tags differently from normal text, you should still add alternate text.
- Background
- Tags the selection as a background element, or artifact, removing the item from the tag tree so that it does not appear in the reflowed document and is not read by screen readers.
To add tags automatically
Note: The automatic tagging feature may work for simple layouts, but it sometimes misinterprets the structure and reading order of complex page elements (e.g., closely spaced columns, irregular text alignment, and tables without borders). Therefore, you should still manually check the tags as explained below.
- Go to menu item: Advanced > Accessibility > Add Tags To Document
Note: This command removes any tags that are present in the document before the command was run. If any potential problems are encountered, an Add Tags Report appears in the navigation pane.
To add/edit tags manually
- Go to menu item: Advanced > Accessibility > TouchUp Reading Order…
In most cases, it will help to have the three checkboxes checked (Show page content order, Show table cells, Show tables, and figures).
- Using the TouchUp Reading Order tool, drag* within the document pane to select a region of the page that contains one type of content (e.g., a text block).
- To add more page content to the current selection, Shift + drag*
- To remove page content from the current selection, Ctrl + drag*
- Select the appropriate button in the TouchUp Reading Order dialog to specify the tag type, a box should now encapsulate the element (the tags are explained above)
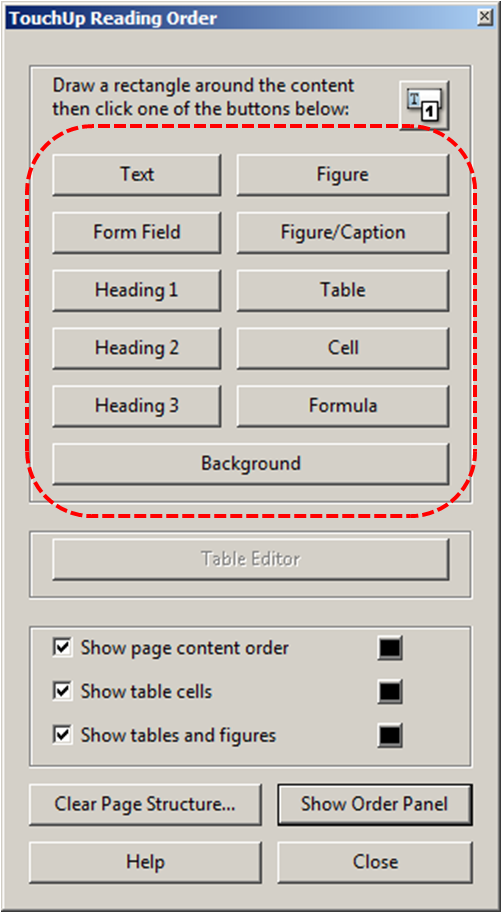
Tips for Tagging
- A good place to start is tagging “Background” content, since this will reduce the number of tags to deal with. Background content should include:
- empty boxes,
- visible or invisible textbox borders (especially in busy areas where they overlap with text),
- visuals that are decorative or redundant (e.g., backgrounds, illustrations), whose content is described adequately in the text .
- If you are having difficulty tagging complex content (e.g., a complex table), consider either:
- Editing the source document to simplify it, or
- Selecting the complex content and tagging it as a figure for which you must then add alternative text that properly conveys all of the information in the new figure
To change the tag for a region
- With the TouchUp Reading Order tool…
- In the document pane, drag* to select a highlight region or select the number of the highlighted region (or select from the Order Panel)
Note: If you drag* over part of an already tagged element, the element is sometimes split up. This is helpful when splitting larger elements to ensure correct reading over of sub-elements.
- Select the appropriate button in the TouchUp Reading Order dialog to specify the tag (the tags are explained here)
Technique 4. Provide Alternative Text
When using images, it is important to ensure that the information you intend to convey by the image is also conveyed to people who cannot see the image. This can be accomplished by adding concise alternative text to each image. If the image is purely decorative, mark it as background.
Tips for writing alternative text
- Try to answer the question “what information is the image conveying?”
- If the image does not convey any useful information, leave the alternative text blank (e.g., Background images should generally have no alt text, other decorative images should only have alt text if they form a crucial part of the content, message, and purpose of the document)
- If the image contains meaningful text, ensure all of the text is replicated
- For logos, the alternative text should be the organization name
- For groups of logos, one logo can be chosen to represent the group
- Sometimes text is included as part of a logo or footer image (e.g., the image might contain a phone number), this text should be set as the alternative text of the image
- Alternative text should be fairly short, usually a sentence or less and rarely more than two sentences
- If more description is required (e.g., for a chart or graph), provide a short description in the alternative text (e.g., a summary of the trend) and more detail in the long description, see below
- Test by having others review the document with the images replaced by the alternative text
Tips for writing longer descriptions
- Long descriptions should be used when text alternatives (see above) are insufficient to answer the question “what information is the image conveying?”
- In some situations, the information being conveyed will be how an image looks (e.g., an artwork, architectural detail, etc.). In these cases, try to describe the image without making too many of your own assumptions.
- One approach is to imagine you are describing the image to a person over the phone
- Ensure that you still provide concise alternative text to help readers decide if they are interested in the longer description.
- Alternatively, you can include the same information conveyed by the image within the body of the document, providing the images as an alternate to the text. In that case, the images should be marked as background and you do not have to provide alternate text within the image.
To add alternative text using the Navigation Panel
- Go to menu item: View > Navigation Panels > Tags
- In the Tags tab, select the element
- Right-click* the element and select Properties…
- In the Tag tab, fill in the alternative text in the Alternative Text box
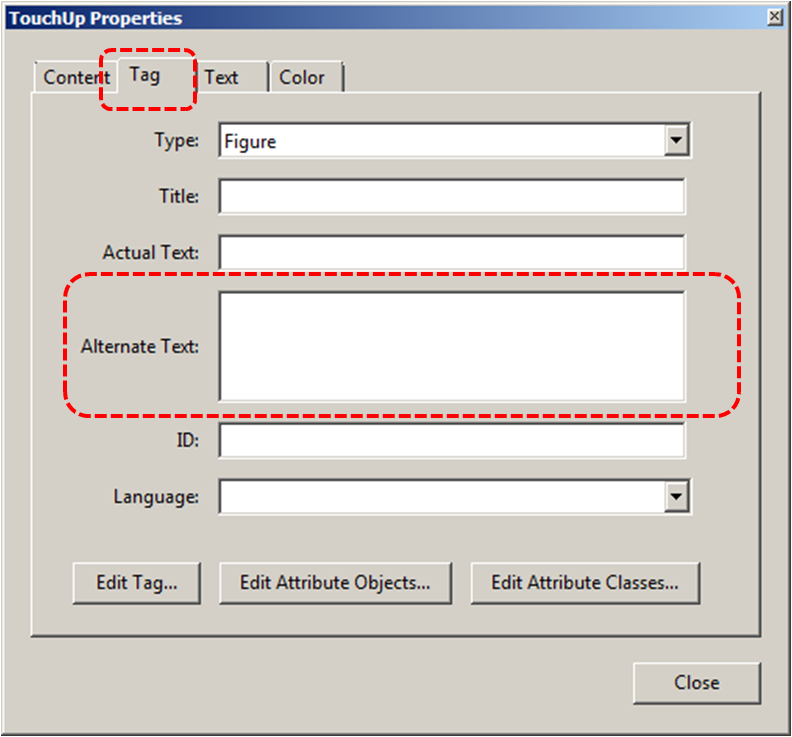
- Select Close
Tip: If you have a number of images arranged together, pick the main image and assign alternative text to it that describes the whole. Then, mark the secondary images as Background to be ignored (i.e. untag them)
To add alternative text directly to the element
- Right-click* the element and select Edit Alternate Text…
- Enter the alternative text in the Alternate Text box
- Select OK
To add alternative text to links
- In the tag tree, select the Link tag for the link
- Select Options > Properties
- In the TouchUp Properties dialog, select the Tag tab
- Type alternative text for the link
- Select Close
Correcting visual side-effects of tagging
Sometimes tagging can result in unexpected visual side effects, such as text disappearing behind background images. The following steps can be taken to correct such side-effects:
- Open Content panel (this is another option in the same location as the Order panel)
- Move any <Artifact> elements to the top (this places them behind all other elements).
- See if this fixes the problem. If not, continue:
- Click Gears icon > Highlight Content
- Drag* mouse over unwanted element or the area where missing element should be
- Click Gears icon > “Find content from selection” to locate selection in Content tree
- In the Content panel tree, click on the “Container” node of the selected element and then adjacent nodes.
- As you click, note which element is highlighted on screen. When you have found the element you want to correct, continue:
- If you found text that is hidden behind another element, move the hidden element DOWN within the Content panel tree (this moves it above other elements).
- If you found an element that should not be there, move it UP within the Content panel tree (this moves in behind other elements) or delete it if necessary (remember to Save beforehand)
Note: The order of items in the Content panel tree indicates their layer order in the document. If item A is lower in the tree than item B, then if item A and B overlap in the document, A will be in front. Some people find this confusing, so a good way to remember how this works is to imagine putting documents in a pile and noting their names in a list. The last document placed will be on top of the pile, covering the others, and its name will be on the bottom of the list.
Technique 5. Set a Logical Reading Order
The order in which elements in a document are read by assistive software is determined by the reading order. Each section of page content appears as a separate highlighted region and is numbered according to its placement in the reading order. You can change the reading order of the highlighted regions without changing the actual appearance of the PDF. For example, by reordering highlighted regions on the page, you can make a figure and caption read at the specific point that they are referenced in the text without actually moving the elements on the page.
To correct the reading order
- Go to menu item: Advanced > Accessibility > TouchUp Reading Order…
- Select Show Order Panel
- In the Order tab, navigate through the list of highlighted regions that appear in the document pane
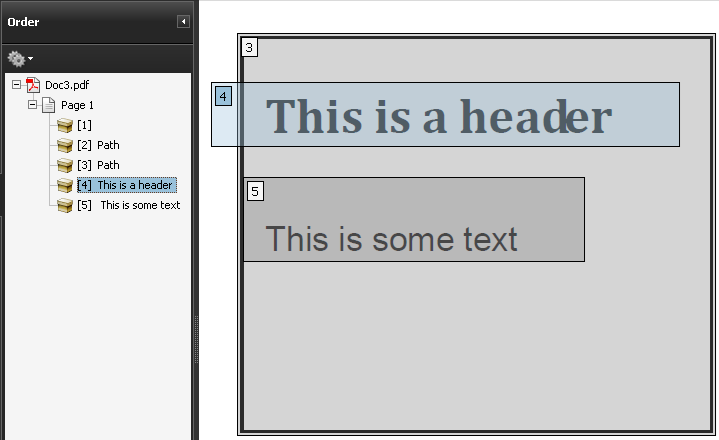
- If a highlighted region is misplaced, right-click* and select Cut
- Navigate to the location where the region should be placed, right-click* the item above the location in the list and select Paste. After you drag* an item to a new location, the highlighted regions are renumbered accordingly.
Note: You can also complete steps 4 and 5 by dragging* the tag for the region to the location you want. As well, you can select and move multiple adjacent regions at once.
To test the reading order
Sometimes it may not be clear by looking at content, what would be the most logical aural reading order. In these cases, it is recommended to preview the reading order.
Caution!: The “Read Out Loud” feature is not recommended for checking the aural order because it will provide an inaccurate .
One method for testing the reading order of your document is called “reflowing”, which temporarily presents it as a single column that is the width of the document pane. Only readable text appears in the reflow view.
If the tagged PDF does not reflow the way you want, it means that the content order or reading order of the PDF contains inconsistencies. If this is the case, in addition to correcting the reading order, it may also be helpful to edit the document tags.
- Go to menu item: View > Zoom > Reflow
- To return to regular view, go to menu item: View > Zoom > Reflow
Another way to test the aural accessibility of a document is to attempt to access the document with the screen readers that your readers will use (e.g. NVDA or JAWS on Windows, VoiceOver on Mac OS).
Technique 6. Set Document Properties
6.1 Document Language
It is important to set up the PDF correctly in order for assistive technologies (e.g. screen readers) to be able to present your document accurately.
To change the default language
- Go to menu item: File > Properties
- Select the Advanced tab
- In the Reading Options section, select the language from the Language drop-down list
- Select OK
To apply a language directly to selected element
- Go to menu item: View > Navigation Panels > Tags
- In the Tags tab, select the element
- Right-click* the element and select Properties…
- In the Tag tab, select the language from the Language drop-down list
- Select Close
6.2 Document Title
In case the document is ever converted into HTML, it should be given a descriptive and meaningful title.
To change the title of the current document
- Go to menu item: File > Properties
- Select the Description tab
- Enter a descriptive title in the Title box. It is also helpful to enter descriptive information in the text boxes that follow (Author, Subject, Keywords or select Additional Metadata)
- Select OK
Technique 7. Adjust Security Settings
It is possible to specify that no part of an accessible PDF is to be copied, printed, extracted, commented on, or edited. This can be accomplished by encrypting the document with password security. However, this could interfere with a screen reader’s ability to read the document, because screen readers must be able to copy or extract the document’s text in order to convert it to speech. In Acrobat 9 Pro, it is possible to maintain high-encryption-level security while at the same time providing the necessary access to assistive technologies.
To allow assistive technologies access to content
- Go to menu item: Advanced > Security > Show Security Properties
- Set the Security Method field to “No Security” or enable “Content Copying for Accessibility” in the Document Restrictions
- Go to menu item: Advanced > Security > Encrypt with Password
- In the Password Security – Settings dialog, under Permissions, select Restrict editing and printing of the document
- For low-encryption-level security, select Enable copying of text, images, and other content
- For high-encryption-level security, select Enable text access for screen reader devices for the visually impaired (this overrides the document’s security settings only for the purpose of giving assistive software, such as screen readers, access to the content)
- Select OK
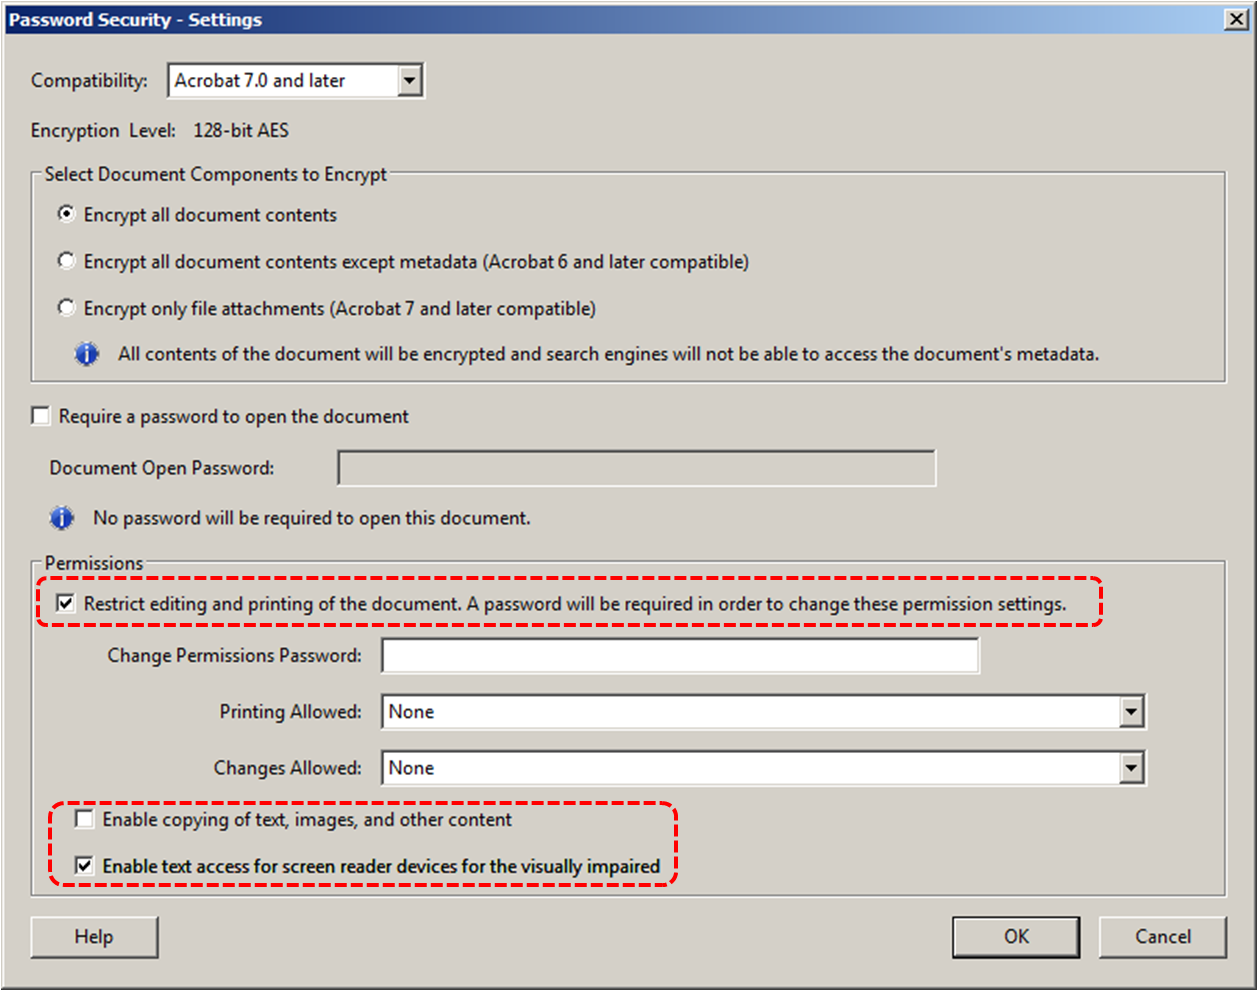
Technique 8. Set Bookmarks
A bookmark is a type of link with representative text in the Bookmarks panel in the navigation pane. Each bookmark goes to a different view or page in the document. In Acrobat 9 Pro, you can use bookmarks to mark a place in the PDF to which you want to return, or to jump to a destination in the PDF, another document, or a web page.
Note: An Acrobat user can only add bookmarks to a document only if the security settings allow it.
To create a bookmark
- Select text to bookmark
- Type Ctrl+B
- Type a name the bookmark (or leave the default text)
- To create a bookmark without keyboard shortcuts
To delete a bookmark
- In the Bookmarks pane, *right-click on the bookmark
- Select Delete
To create a bookmark hierarchy
- In the Bookmarks pane, *right-click on the bookmark to move
- Select Cut
- *right-click on the new bookmark you would like the moved bookmark to appear under
- Select Paste Under Selected Bookmark
Accessibility Support Tools
- axesPDF: A plug-in for Microsoft Word 2007/2010 that makes it easier to create accessible PDFs (free public beta program);
- CommonLook Office: A plug-in for Microsoft Word 2007/2010 and PowerPoint 2007/010 that makes it easier to create accessible PDFs.
- CommonLook PDF: A plug-in for Adobe Acrobat that helps identify, report and correct accessibility problems.
- MadeToTag: A plug-in for for Adobe InDesign that makes it easier to create accessible PDF from InDesign documents.
- PDFGoHTML: A free Adobe Acrobat plug-in that converts tagged PDF into HTML, which can be useful in debugging tagging structures.
References and Resources
- Adobe Acrobat 9 Pro Pro Accessbility Guide
- PDF Techniques for WCAG 2.0
- WebAIM PDF Accessibility: Acrobat 7-9 and Accessibility
- GAWDS Writing Better Alt Text
- Ryerson University: Adobe Acrobat Accessibility Tipsheet (PDF)
Acknowledgements
Authors: Jan Richards, Sabrina Ruplall
This document was produced as part of the Accessible Digital Office Document (ADOD) Project (http://inclusivedesign.ca/accessible-office-documents). This project has been developed by the Inclusive Design Research Centre, OCAD University as part of an EnAbling Change Partnership project with the Government of Ontario and UNESCO (United Nations Educational, Scientific and Cultural Organization).
Substantial contributions have also been made to the project by AnySurfer, the City of Toronto, and OCAD University.Authoring Techniques for Accessible Documents: Acrobat Pro 9 is licensed under a Creative Commons Attribution-ShareAlike 3.0 Unported License.
Source: Authoring Techniques for Accessible Office Documents: Adobe Acrobat 9 Pro by the Inclusive Design Research Centre (IDRC) used under CC-BY-SA 3.0.